Here’s my go-to recipe for cottage cheese chaffles, with a super simple mix of eggs, cheese, and a few basic ingredients that create a satisfying low-carb breakfast option.
These chaffles have become my morning staple, and I often make a double batch to have them ready for busy weekdays. Nothing better than a quick, filling breakfast that feels like comfort food, right?
Why You’ll Love These Chaffles
- Keto-friendly breakfast – Made with almond flour and coconut flour instead of regular wheat flour, these chaffles fit perfectly into a low-carb or keto diet plan.
- High in protein – Thanks to the eggs and cottage cheese, these chaffles will keep you feeling full and satisfied throughout the morning.
- Quick preparation – You can whip up these chaffles in just 20-35 minutes, making them perfect for busy mornings when you want something warm and filling.
- Simple ingredients – Most of these ingredients are common keto pantry staples, and you won’t need any special equipment beyond a waffle maker.
- Customizable recipe – You can easily adjust the sweetness level or add different flavors to make these chaffles match your taste preferences.
What Kind of Cottage Cheese Should I Use?
For chaffles, you’ll want to stick with either 2% or 4% milk fat cottage cheese since these varieties give you the perfect balance of creaminess without being too heavy. Small or medium curd works better than large curd because it distributes more evenly throughout the batter and melts more smoothly. If your cottage cheese seems particularly watery, you can drain it in a fine-mesh strainer for about 10 minutes before using – this helps prevent your chaffles from becoming too wet. Just make sure your cottage cheese is fresh and at room temperature when you’re ready to mix it in, as this will help it blend more easily with the other ingredients.
Options for Substitutions
Need to make some swaps? Here are some helpful substitutions for this chaffle recipe:
- Cottage cheese: You can replace cottage cheese with ricotta cheese for a similar texture. If using ricotta, drain it first to remove excess moisture.
- Almond flour: Swap almond flour with ground sunflower seeds (if nut-free) or more coconut flour. If using more coconut flour, only use 1/3 cup as it’s more absorbent.
- Coconut flour: While coconut flour is pretty unique in recipes, you can try using 1.5 cups of almond flour instead – just know the texture might be slightly different.
- Sweetener mix: Any keto-friendly sweetener works here – monk fruit, erythritol, or allulose are all good options. If using regular sugar, the same amount works fine.
- Cream cheese: Mascarpone cheese makes a good substitute, or you could use Greek yogurt cream cheese. Both options will keep the texture nice and rich.
- Vanilla essence: Vanilla extract works the same way, or try almond extract for a different flavor (use half the amount as it’s stronger).
Watch Out for These Mistakes While Cooking
The biggest challenge when making chaffles is getting that perfect crispy exterior while maintaining a tender inside – this balance comes from preheating your waffle maker properly until it’s nice and hot before adding any batter. Another common mistake is overmixing the batter, which can lead to dense, tough chaffles – instead, gently fold the ingredients just until combined, and don’t worry if there are a few small lumps of cream cheese remaining. To prevent sticking (a frequent chaffle catastrophe), make sure to grease your waffle iron well between each batch, even if it’s non-stick, and resist the urge to peek too early – wait until the steam starts to decrease before checking doneness. For the fluffiest results, let your eggs and cream cheese come to room temperature before mixing, and don’t skip the resting time – giving your batter 5 minutes to sit allows the coconut flour to fully absorb the moisture.
What to Serve With Chaffles?
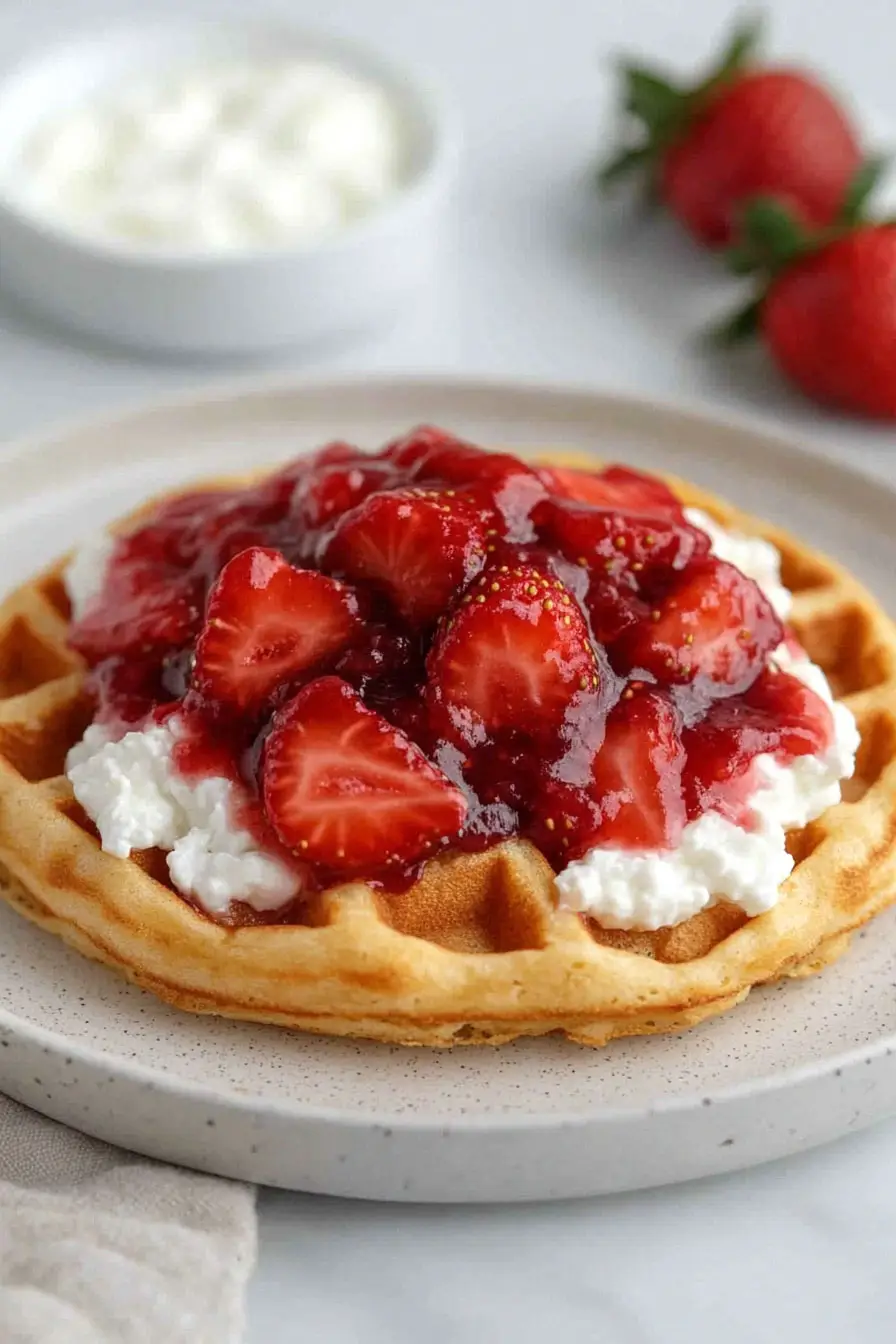
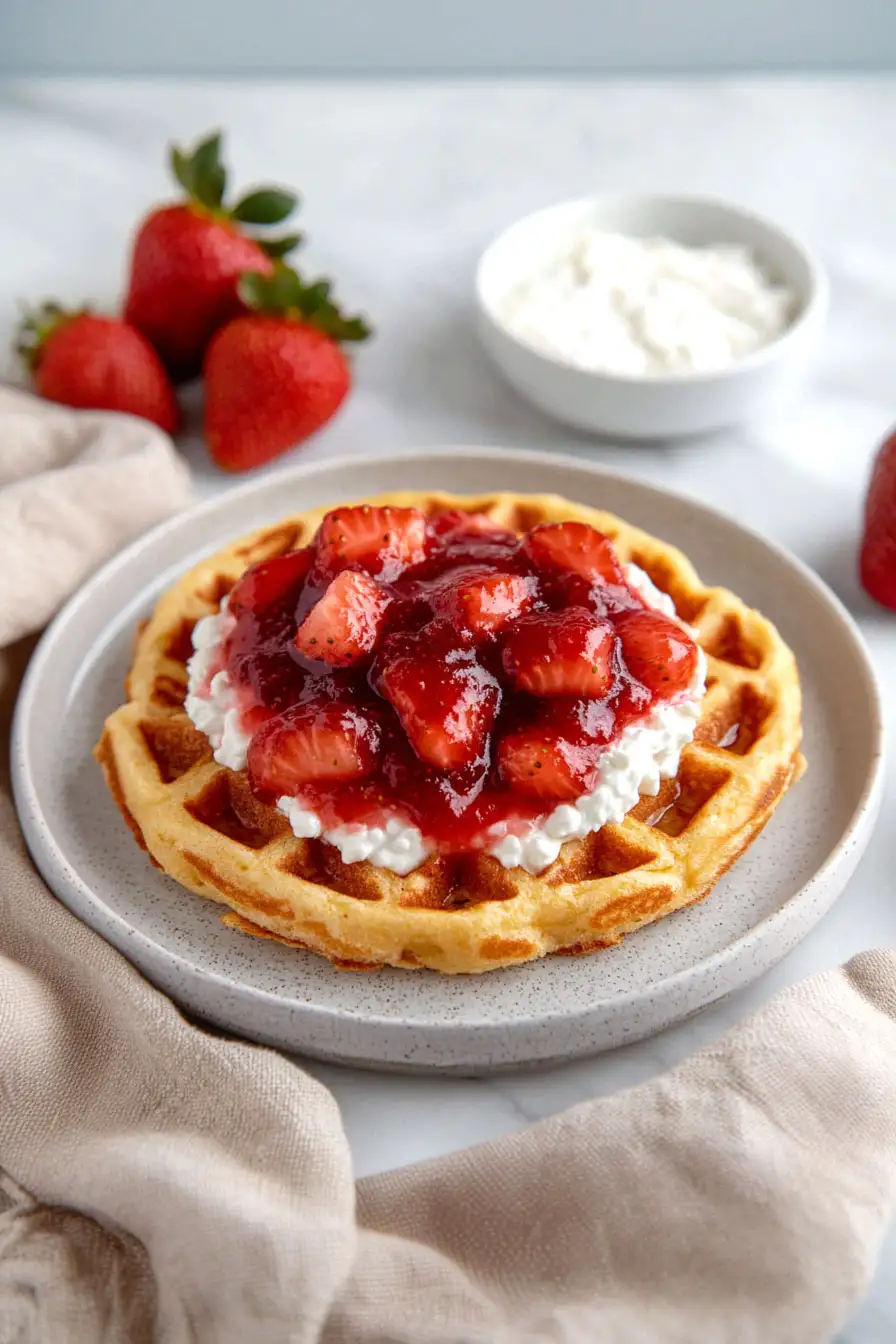
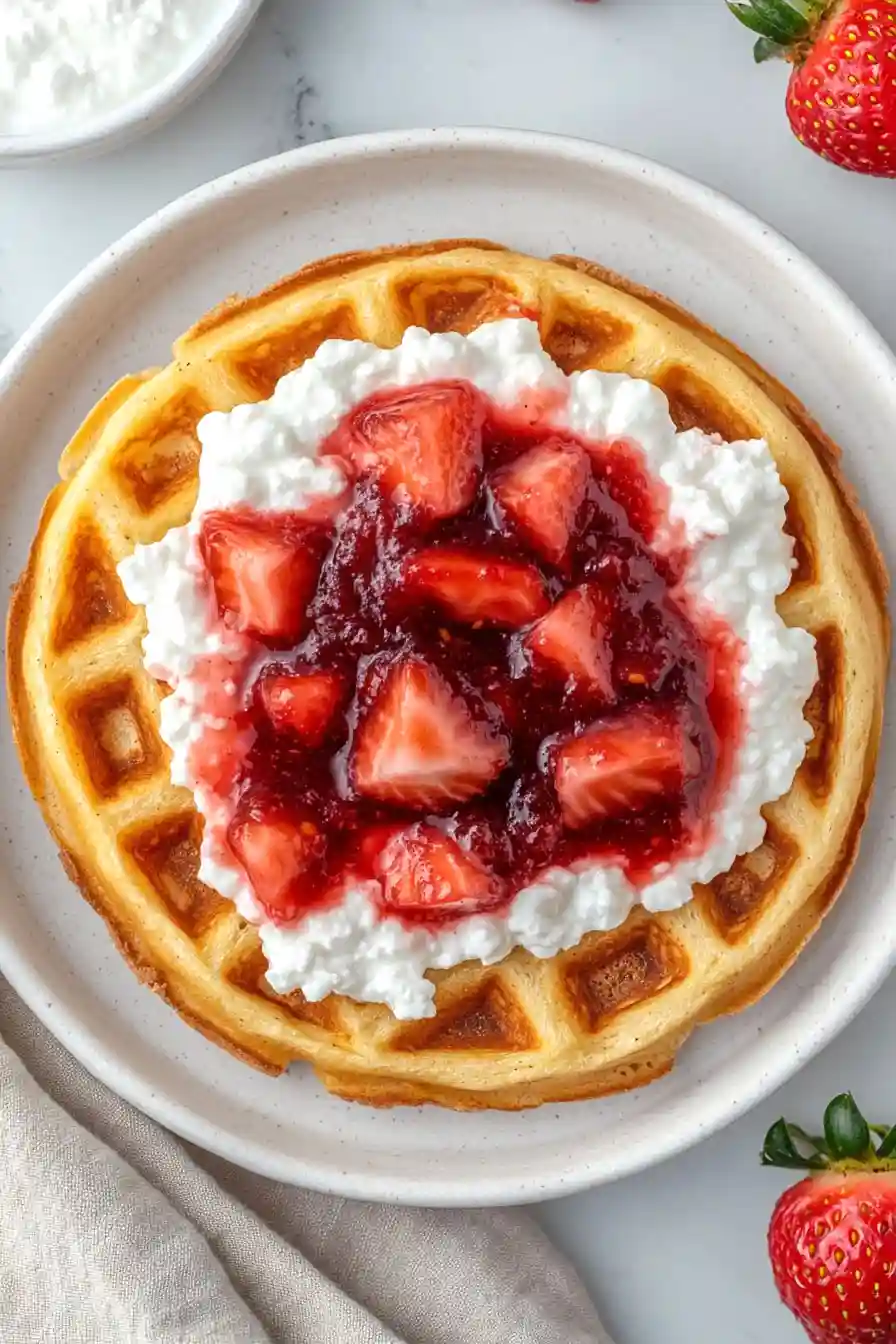
These keto-friendly cottage cheese chaffles are super versatile and can be dressed up in so many ways! For a breakfast or brunch setup, try topping them with sugar-free maple syrup, a pat of butter, and some fresh berries – blueberries and strawberries work especially well. If you’re going for a savory angle, they make great sandwich bread alternatives – try adding eggs, bacon, and avocado for a filling breakfast sandwich. You can also keep things simple with a spread of cream cheese and a sprinkle of cinnamon, or use them as a base for your favorite sugar-free jam or nut butter.
Storage Instructions
Keep Fresh: These chaffles stay good in the fridge for up to 5 days when stored in an airtight container. I like to place a piece of parchment paper between each chaffle to prevent them from sticking together. They make great grab-and-go breakfast options throughout the week!
Freeze: Want to make a big batch? These chaffles freeze really well! Just let them cool completely, then stack them with parchment paper in between and pop them in a freezer bag. They’ll keep for up to 3 months in the freezer – perfect for busy mornings.
Warm Up: When you’re ready to enjoy your chaffles, you can eat them straight from the fridge, or pop them in the toaster or air fryer for a minute to get them crispy again. If frozen, let them thaw in the fridge overnight, then toast them up for the best texture. They taste almost as good as fresh!
| Preparation Time | 10-15 minutes |
| Cooking Time | 10-20 minutes |
| Total Time | 20-35 minutes |
| Level of Difficulty | Easy |
Estimated Nutrition
Estimated nutrition for the whole recipe (without optional ingredients):
- Calories: 1200-1400
- Protein: 60-70 g
- Fat: 80-90 g
- Carbohydrates: 40-50 g
Ingredients
- 4 oz cream cheese (softened to room temperature)
- 1 cup almond flour (blanched fine almond flour is best)
- 1/2 cup coconut flour
- 1/3 cup sweetener
- 2 tsp vanilla essence
- 1 tsp baking powder
- 1 cup cottage cheese (I use Daisy brand, full-fat for best texture)
- 6 large eggs
Step 1: Preheat and Prepare
Begin by preheating your waffle iron according to the manufacturer’s instructions.
This ensures it will be hot and ready to cook your waffles evenly.
Step 2: Blend the Ingredients
Add all your ingredients to a blender.
Blend until the mixture is smooth, stopping to scrape down the sides as necessary to ensure everything is well-incorporated and there are no lumps in your batter.
Step 3: Prepare the Waffle Iron and Cook
Once the waffle iron is hot, grease it lightly to prevent the waffles from sticking.
Pour about 3/4 cup of the batter onto the waffle iron, using slightly less if you are not using a Belgian waffle iron.
Close the waffle iron and cook until the waffles are a deep golden brown.
Note that the ready light on your waffle iron may turn on before the waffles are fully cooked; keep an eye on the color instead.
Step 4: Remove and Repeat
Gently loosen and remove the cooked waffle from the iron.
Repeat the process with the remaining batter, ensuring to grease the iron between each batch if necessary.
Enjoy your delicious homemade waffles!
