If you ask me, gluten free bread that you can actually pull apart is basically kitchen magic.
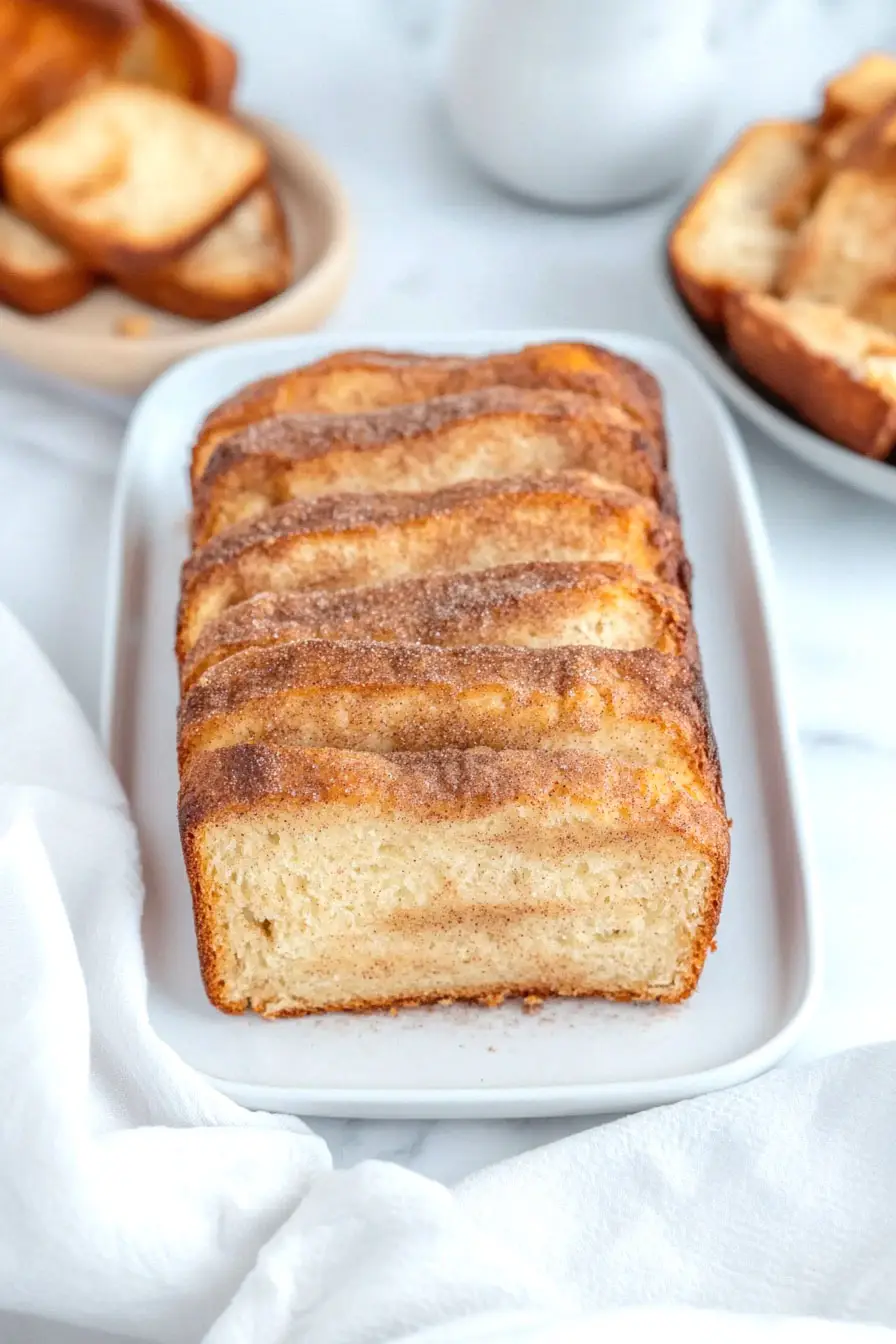
This soft and tender pull apart bread tastes just like the classic version, but it’s completely gluten free. The rolls come out with those perfect little seams that let you break off one piece at a time.
It’s made with a carefully tested blend of gluten free flours and a touch of honey that gives it that traditional bread flavor we all miss. The dough rises beautifully and bakes up into golden brown rolls that are perfect for sharing.
It’s a family-friendly recipe that brings that warm, fresh-baked bread experience back to gluten free tables.

Why You’ll Love This Pull Apart Bread
- Gluten-free friendly – Finally, a pull-apart bread that’s completely gluten-free but still has that perfect, soft texture you’ve been missing. No compromises on taste or texture!
- Cinnamon-sugar goodness – Each piece is coated in a perfect blend of cinnamon and sugar, making every bite sweet and satisfying – just like traditional monkey bread.
- Reliable results – The precise measurements and combination of gluten-free flours ensure this bread turns out perfectly every time, even if you’re new to gluten-free baking.
- Shareable treat – The pull-apart design makes this bread perfect for sharing at breakfast, brunch, or as a sweet afternoon snack with family and friends.
What Kind of Flour Should I Use?
For this gluten-free pull-apart bread, we’re working with a blend of three different flours – millet, sorghum, and tapioca starch – each playing its own important role. Millet flour brings a mild, slightly sweet flavor and helps create a tender crumb, while sorghum flour adds structure and a subtle nutty taste. Tapioca starch is crucial for binding and creating that stretchy texture we love in bread. If you can’t find millet flour, you could substitute with buckwheat flour or quinoa flour, though the taste will be slightly different. Just make sure to measure your flours by weight rather than volume for the best results – gluten-free baking is all about precision!

Options for Substitutions
When making this gluten-free bread, some ingredients are crucial while others can be swapped. Here’s what you need to know:
- Psyllium husk: This is a must-have ingredient that can’t be substituted as it provides the necessary structure for gluten-free bread. Just make sure to adjust the amount if using powder instead of whole husks.
- Flours: While the blend of millet and sorghum works best, you can swap millet flour with quinoa flour or brown rice flour. Sorghum can be replaced with oat flour. Keep in mind that tapioca starch is essential and shouldn’t be substituted.
- Xanthan gum: This is another crucial ingredient, but you can use guar gum in the same amount if needed.
- Milk: Any plant-based milk works well here – try almond, soy, or oat milk. Just make sure it’s at room temperature.
- Oil: Any neutral-flavored oil works fine – canola, grapeseed, or light olive oil are good options.
- Sugar: Both regular and fine sugar work equally well. For a less refined option, coconut sugar can be used, though it will make the bread slightly darker.
Watch Out for These Mistakes While Baking
The trickiest part of gluten-free bread making is getting the right texture, and using old or improperly stored gluten-free flours can lead to a dense, gummy result – always check that your flours haven’t expired and store them in an airtight container in a cool place. The temperature of your liquids matters more than you might think – if your water or milk is too hot, it can kill the yeast, while too cold will prevent proper activation, so aim for lukewarm (around 110°F/43°C). Another common mistake is rushing the rise time – gluten-free dough needs proper time to develop structure, so resist the urge to speed up this process even if it seems like nothing is happening. For the best outcome, measure your ingredients by weight rather than volume, as gluten-free flours can vary significantly in density, and don’t skip the xanthan gum – it’s crucial for creating the structure that gluten would typically provide.
What to Serve With Pull Apart Bread?
This sweet and cinnamony gluten-free pull apart bread is perfect for breakfast or brunch alongside your favorite hot drinks. A steaming cup of coffee, hot chocolate, or chai tea makes an excellent companion to balance out the sweetness. For a more substantial morning meal, serve it with some fresh fruit like berries or sliced apples, or pair it with a protein-rich side like scrambled eggs or yogurt. Since this bread is already pretty rich and sweet, keeping the accompaniments simple and light helps create a nice balance.
Storage Instructions
Keep Fresh: This gluten-free pull-apart bread stays best at room temperature for the first day, wrapped in plastic wrap or stored in an airtight container. After that, pop it in the fridge where it’ll keep well for up to 3 days. Just remember that gluten-free breads tend to firm up a bit in the fridge, but don’t worry – we can fix that!
Freeze: Good news – this bread freezes really well! Once it’s completely cool, wrap it tightly in plastic wrap, then aluminum foil, and freeze for up to 2 months. You can even slice it before freezing to grab individual portions whenever you want.
Warm Up: To bring back that fresh-baked taste, wrap the bread in foil and warm it in a 300°F oven for about 10 minutes. For individual slices, a quick 15-20 seconds in the microwave works great. A light toasting can also help restore that lovely texture we all love.
| Preparation Time | 30-45 minutes |
| Cooking Time | 40-45 minutes |
| Total Time | 1-1.5 hours |
| Level of Difficulty | Medium |
Estimated Nutrition
Estimated nutrition for the whole recipe (without optional ingredients):
- Calories: 1900-2100
- Protein: 35-40 g
- Fat: 85-95 g
- Carbohydrates: 280-300 g
Ingredients
For the dough:
- 15 g psyllium husk (whole, not powder, for best texture)
- 25 g sorghum flour
- 135 g millet flour (I like Bob’s Red Mill brand)
- 5 g xanthan gum
- 25 g sunflower oil
- 5 g salt
- 160 g tapioca starch
- 1 large egg
- 50 g sugar
- 180 g warm water (about 105-115°F)
- 6 g quick-rise yeast
- 6 g baking powder
- 100 g whole milk (at room temperature)
For the coating:
- 55 g butter (melted and cooled slightly)
- 150 g sugar
- 1 tbsp ground cinnamon
Step 1: Prepare the Psyllium Gel
In a small bowl, mix together the psyllium husk and lukewarm water.
Allow it to sit for about 30-45 seconds until a gel forms.
This will serve as a binder for your dough.
Step 2: Combine Dry Ingredients
In a large bowl, or the bowl of a stand mixer with the dough hook attached if you’re using it, whisk together the tapioca starch, millet flour, sorghum flour, sugar, instant yeast, baking powder, xanthan gum, and salt.
Tip: If using active dry yeast instead of instant yeast, activate it by mixing with lukewarm milk and a tablespoon of sugar.
Wait for 5-10 minutes until it froths before adding it to the dry ingredients.
Step 3: Incorporate Wet Ingredients
Add the milk, egg, and oil to the psyllium gel, mixing well to combine.
Create a well in the middle of the dry ingredients and pour in the psyllium gel-egg mixture.
Step 4: Knead the Dough
Knead the dough using a stand mixer for 4-5 minutes, or by hand for 6-8 minutes, until it becomes smooth and all the ingredients are evenly incorporated.
Use a rubber spatula occasionally to scrape the sides and bottom of the bowl to prevent any dry patches.
The dough should be slightly sticky.
Tip: Resist adding more flour, but if too sticky to handle, chill in the fridge for an hour to make it easier to manage.
Step 5: Roll and Coat the Dough
Line a 9×5-inch (23×13 cm) loaf pan with parchment paper and set aside.
Mix granulated sugar and cinnamon in a bowl and set aside.
Turn the dough onto a lightly floured surface, shape it into a ball, and roll it out to a 12-inch (30 cm) square.
Cut into 16 equal 3-inch (7.5 cm) squares.
Dip each square in melted butter, then into the cinnamon sugar, ensuring even coating.
Stack into two stacks of eight and place them into the loaf pan.
Step 6: Proof and Bake the Bread
Cover the loaf with plastic wrap and proof in a warm place for 1 hour 15 minutes to 1 hour 30 minutes, until doubled in size.
Preheat the oven to 350ºF (180ºC).
Place the loaf on a baking sheet and bake for about 40 minutes, until golden brown on top, using aluminum foil to cover if it browns too quickly.
Use a toothpick to check for doneness.
Step 7: Cool and Serve
Allow the bread to cool in the pan for 15 minutes, then transfer to a wire rack.
Serve warm or at room temperature.
It’s best enjoyed fresh but keeps well in a container for 2-3 days.
Reheat in a microwave or 350ºF (180ºC) oven before serving for best texture.
