Looking for ways to use up all those garden zucchini that seem to multiply overnight? We’ve all been there – staring at a counter full of summer squash and wondering how to turn them into something the whole family will actually eat. Between busy schedules and picky eaters, finding recipes that work can feel like solving a puzzle.
That’s where this bread machine zucchini bread comes to the rescue. It’s a hands-off way to transform those extra veggies into a warm, homemade treat, and the best part? Your bread machine does most of the work while you tackle other things on your to-do list.

Why You’ll Love This Zucchini Bread
- Effortless preparation – Your bread machine does all the work – just add ingredients and press start. No kneading, no mixing, no fuss!
- Healthier version – Made with applesauce instead of oil and sweetened with honey rather than refined sugar, this zucchini bread is a better-for-you option that doesn’t sacrifice taste.
- Sneaky vegetables – It’s a great way to use up garden zucchini and get picky eaters to eat their vegetables without even knowing it.
- Simple ingredients – You probably have most of these basic pantry staples on hand already, making this an easy recipe to whip up whenever you want.
What Kind of Zucchini Should I Use?
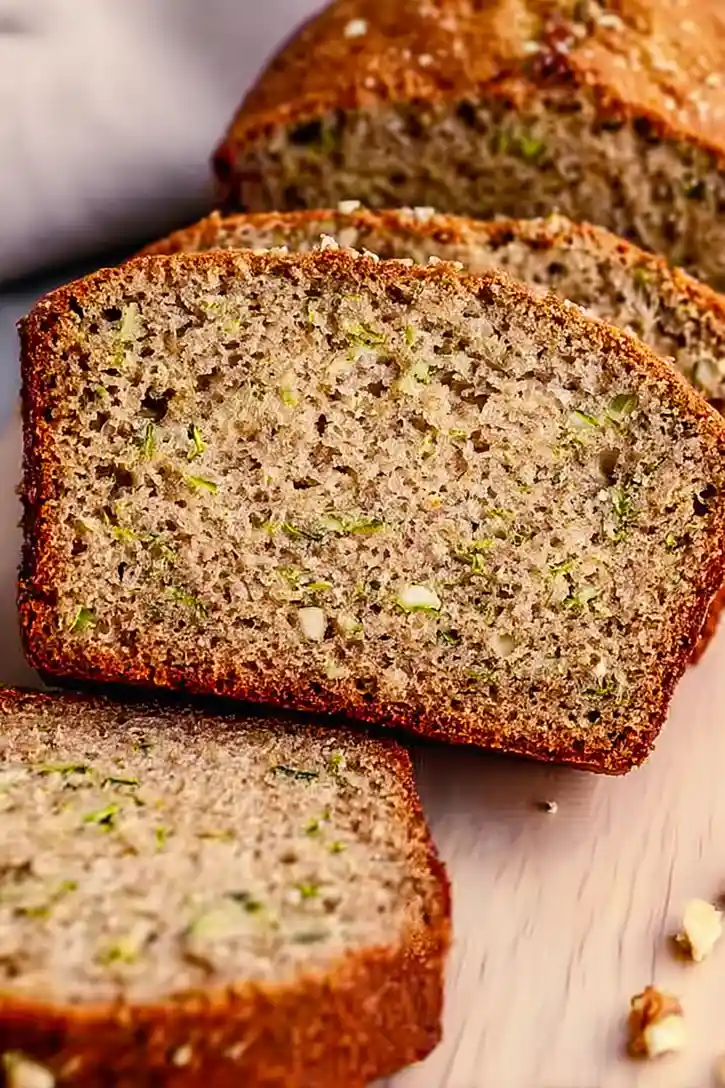
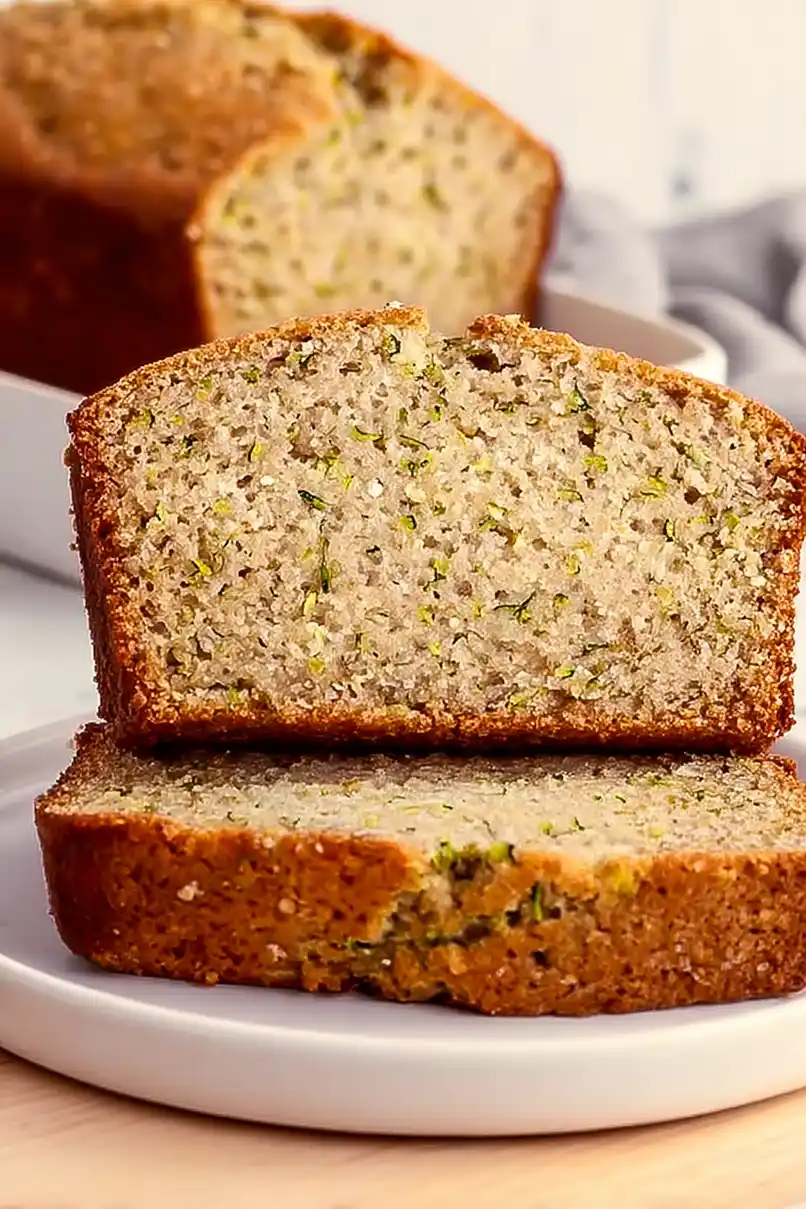
Medium-sized zucchini are your best bet for this bread recipe, as they tend to have the perfect moisture content and fewer seeds than larger ones. If you’re using garden zucchini, avoid the giant ones that got away from you – these jumbo zukes can be watery and have tough seeds that might affect your bread’s texture. When prepping your zucchini, there’s no need to peel it (the skin adds nice flecks of green to your bread), but do give it a good wash first. After shredding, you can pat the zucchini lightly with a paper towel if it seems especially wet, but don’t squeeze out too much moisture since that’s what helps keep your bread nice and moist.
Options for Substitutions
This bread machine recipe is pretty adaptable – here are some swaps you can try:
- Applesauce: Out of applesauce? You can use mashed banana, plain yogurt, or vegetable oil instead. Each will work fine as a moisture-adding ingredient.
- Zucchini: Yellow summer squash works perfectly in place of zucchini. Just make sure to squeeze out excess moisture the same way. You could also try grated carrots, though the bread will be slightly sweeter.
- Honey: Feel free to swap honey with maple syrup or agave nectar in equal amounts. Regular sugar works too, but you might need to add an extra 2-3 tablespoons of applesauce for moisture.
- Flour: All-purpose flour can be replaced with whole wheat flour (use 1¼ cups instead of 1½ to prevent density) or a 1:1 gluten-free flour blend.
- Walnuts: Any nuts work great here – try pecans, almonds, or even sunflower seeds if you need a nut-free option. You can also skip them completely.
Watch Out for These Mistakes While Baking
The biggest challenge when making zucchini bread in a bread machine is dealing with excess moisture – be sure to squeeze out as much liquid as possible from your shredded zucchini using a clean kitchen towel or cheesecloth, otherwise your bread might end up dense and gummy. A common mistake is adding the walnuts too early in the cycle – most bread machines have a “add-ins” beep signal, so wait for this prompt or add them during the last 5 minutes of the kneading cycle to prevent them from breaking down too much. To ensure proper measuring of your flour, avoid scooping directly with the measuring cup – instead, spoon the flour into the cup and level it off with a straight edge, as packed flour can lead to dry, heavy bread. For the best texture, check that your ingredients are at room temperature before adding them to the bread machine, and always add them in the order specified by your machine’s manual – typically liquids first, then dry ingredients, with yeast last.
What to Serve With Zucchini Bread?
This homemade zucchini bread is perfect for breakfast or as an afternoon snack, and there are lots of tasty ways to serve it! A simple spread of cream cheese or butter while the bread is still slightly warm makes for a cozy treat. For breakfast, pair a slice with your morning coffee or tea and some fresh fruit like berries or sliced peaches on the side. If you’re serving it as a dessert, try adding a dollop of whipped cream or a scoop of vanilla ice cream – the warmth of the cinnamon in the bread goes really well with something cool and creamy.
Storage Instructions
Counter Storage: Your zucchini bread will stay fresh at room temperature for about 2-3 days. Just wrap it well in plastic wrap or keep it in an airtight container. I like to place a paper towel in the container to absorb any extra moisture from the zucchini.
Refrigerate: Want it to last longer? Pop your bread in the fridge in an airtight container, and it’ll stay good for up to a week. The texture might get a bit firmer in the fridge, but it’s still just as yummy!
Freeze: This bread freezes really well! Cut it into slices, wrap them individually in plastic wrap, and store in a freezer bag for up to 3 months. It’s super handy to grab just one or two slices whenever you want a quick breakfast or snack.
Thaw & Enjoy: When you’re ready to eat your frozen zucchini bread, just let it thaw on the counter for about an hour. If you like it warm, give it a quick 10-15 seconds in the microwave or toast it lightly – it’ll taste almost like fresh-baked!
| Preparation Time | 10-15 minutes |
| Cooking Time | 60-70 minutes |
| Total Time | 70-85 minutes |
| Level of Difficulty | Easy |
Estimated Nutrition
Estimated nutrition for the whole recipe (without optional ingredients):
- Calories: 400-450
- Protein: 8-10 g
- Fat: 6-8 g
- Carbohydrates: 80-85 g
Ingredients
- 1 tsp ground cinnamon (for warmth and aroma)
- 1/2 tsp baking soda
- 1/2 cup honey (I use Sue Bee honey)
- 1 cup shredded zucchini (finely shredded and squeezed dry)
- 1/4 cup plain applesauce (store-bought or homemade)
- chopped walnuts (optional, for garnish or mix-in)
- 2 large eggs (at room temperature for better incorporation)
- 1 1/2 cups all-purpose flour
- 3/4 tsp salt
- 1/2 tsp baking powder
Step 1: Prepare the Bread Pan and Add Ingredients
- 1/4 cup plain applesauce
- 1 cup finely grated zucchini
- 2 large eggs
- 1/2 cup liquid honey
- 1 1/2 cup all-purpose flour
- 1 tsp ground cinnamon
- 3/4 tsp table salt
- 1/2 tsp baking powder
- 1/2 tsp baking soda
Spray the bread pan with oil to prevent sticking.
Add all the measured ingredients into the bread pan in the order listed in the ingredient list, except for the chopped walnuts.
Do not add the walnuts at this stage; they will be used later for garnish.
Make sure to add each ingredient one by one to ensure a well-mixed batter.
Step 2: Start the Bread Machine and Mix the Batter
- all ingredients from Step 1, combined in the bread pan
Secure the bread pan in the bread machine.
Plug in the machine and select the ‘quick bread/cake’ cycle, using the 1 pound loaf option and desired crust color.
Press start.
While the machine starts mixing (about 5 minutes), use a spatula to scrape any flour on the sides into the batter for an even consistency.
Once the mixing is complete, remove the paddle from the pan if your machine allows, as this will make it easier to remove the bread later.
If you forget, you can remove the paddle after baking.
Step 3: Add Walnuts and Finish Baking
- chopped walnuts for garnish (optional)
- mixed batter from Step 2
After the batter has finished mixing and the paddle has been removed, sprinkle the chopped walnuts evenly over the top of the batter (if using).
Close the bread machine lid and allow it to complete the bake cycle automatically.
I like to press the walnuts gently into the surface so they stick better.
Step 4: Cool and Slice the Bread
When the baking cycle is done, unplug the bread maker and let the bread cool in the pan for 10 minutes.
Then, transfer the baked bread to a wire rack and let it cool completely for at least one hour.
If you haven’t already, carefully remove the kneading paddle.
Once cooled, slice the bread into approximately 12 slices.
For even cleaner slices, I find waiting until the bread is fully cool makes a big difference.
