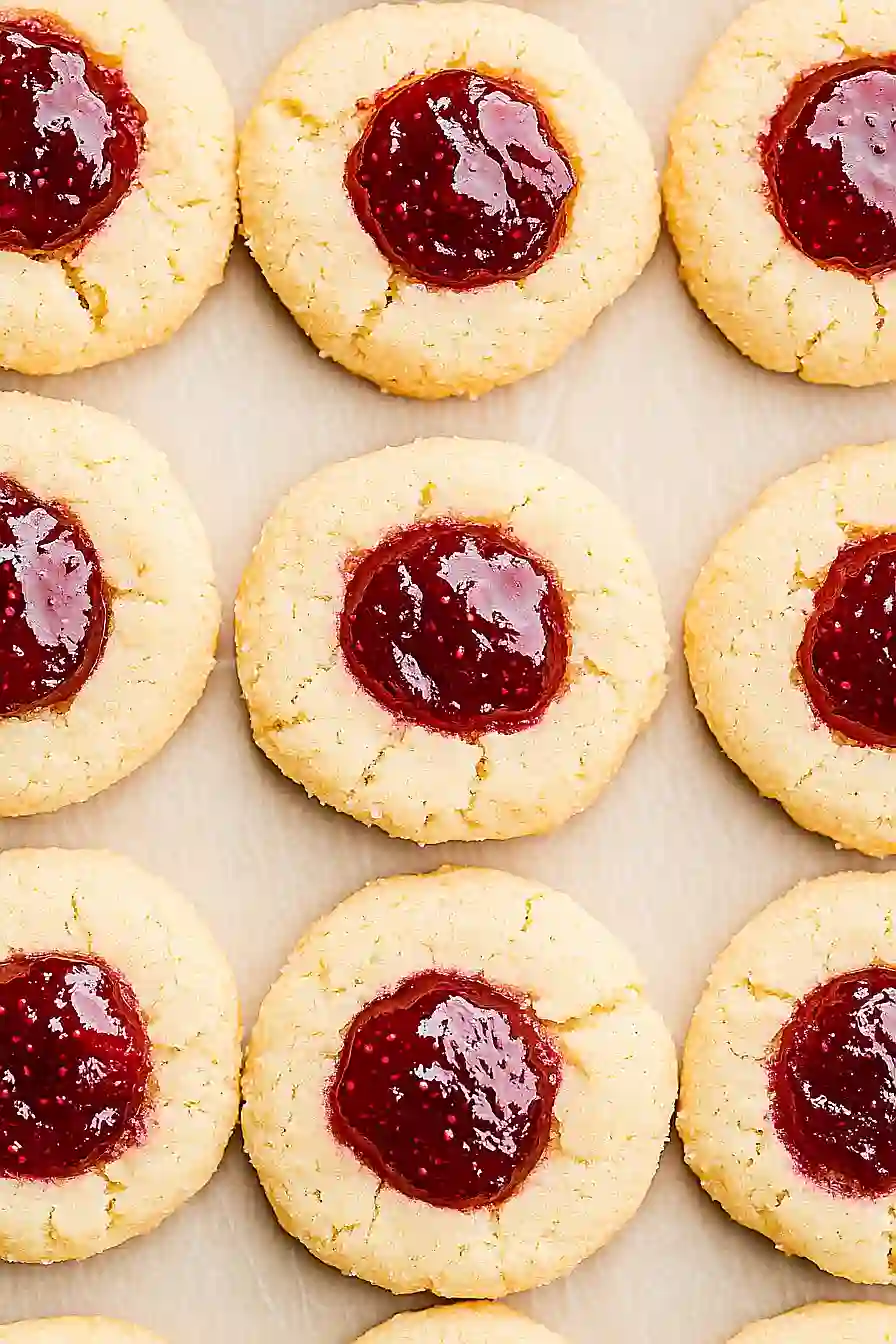
Here is my favorite Christmas jam thumbprint cookie recipe, with a tender, buttery cookie base that melts in your mouth, and sweet jam centers that make each bite feel like the holidays.
These thumbprint cookies are always the first to disappear from my holiday cookie platters. I usually make a double batch because my kids love helping press their little thumbs into the dough, and we always end up eating half of them before they even make it to the cookie tin.
Why You’ll Love These Christmas Jam Thumbprint Cookies
- Perfect for holiday baking – These festive cookies add a beautiful pop of color to your Christmas cookie platter and make wonderful gifts for neighbors and friends.
- Simple ingredients you likely have – Made with basic baking staples like flour, butter, and sugar, plus your favorite jam – no special trips to the store needed.
- Quick and easy to make – Ready in under an hour, these cookies come together fast enough for last-minute holiday parties or when you need a sweet treat in a hurry.
- Customizable with any jam flavor – Whether you prefer classic raspberry, strawberry, or apricot, you can use whatever jam you have on hand to create your own signature version.
- Kid-friendly baking project – Little hands love making the thumbprints and filling them with jam, making this a fun family activity during the holiday season.
What Kind of Jam Should I Use?
The beauty of thumbprint cookies is that you can use just about any jam or preserve you have on hand. Raspberry jam is a classic choice that gives you that traditional red color perfect for Christmas, but strawberry, apricot, or even blackberry jam work wonderfully too. The key is to use a thick jam rather than a runny one – this prevents it from spreading too much during baking and keeps those perfect little thumbprint wells intact. If your jam seems a bit thin, you can cook it down in a small saucepan for a few minutes to thicken it up, or look for preserves labeled as “thick cut” at the store.
Options for Substitutions
These thumbprint cookies are pretty forgiving when it comes to swaps, so here’s what you can change up:
- All-purpose flour: You can substitute with a 1:1 gluten-free flour blend if needed, though the texture might be slightly different. Avoid substituting with other flours like almond or coconut as they’ll change the cookie structure too much.
- Unsalted butter: Salted butter works fine – just reduce the salt in the recipe to 1/4 teaspoon. Make sure your butter is at the right temperature (soft but not melted) for proper mixing.
- Granulated sugar: You can replace up to half the granulated sugar with brown sugar for a slightly chewier texture and deeper flavor.
- Egg yolk: If you only have whole eggs, use one whole egg but expect slightly more tender cookies. For egg-free baking, try 2 tablespoons of milk or cream instead.
- Raspberry jam: Any thick jam or preserves work great here – strawberry, apricot, cherry, or even Nutella for chocolate lovers. Just make sure it’s thick enough so it won’t run during baking.
- Vanilla extract: Almond extract makes a nice change (use only 3/4 teaspoon as it’s stronger), or try lemon extract for a citrusy twist.
Watch Out for These Mistakes While Baking
The biggest mistake when making thumbprint cookies is using butter that’s too warm, which causes the cookies to spread too much and lose their shape – your butter should be cool room temperature, firm enough that you can press into it but not so soft that it’s greasy.
Another common error is making the thumbprint indentations too shallow or waiting until after baking to add them, so press firmly with your thumb or the back of a small spoon while the dough is still raw to create deep wells that won’t disappear during baking.
Don’t overfill the centers with jam since it will bubble over and burn on the pan – about 1/2 teaspoon per cookie is plenty, and choose a thick jam rather than a runny one to prevent messy spillovers.
Finally, let these cookies cool completely on the baking sheet before moving them, as the jam stays molten hot for quite a while and can easily slide off if you transfer them too soon.
What to Serve With Christmas Jam Thumbprint Cookies?
These buttery thumbprint cookies are perfect on their own, but they really shine when served alongside a warm cup of coffee or hot chocolate during the holidays. I love setting them out on a festive cookie platter with other Christmas treats like sugar cookies or gingerbread for a nice variety of flavors and textures. They also pair beautifully with a glass of cold milk, especially for the kids who are helping with holiday baking. For a cozy evening treat, try serving them with some spiced apple cider or even a cup of chai tea to complement the sweet raspberry jam filling.
Storage Instructions
Store: These thumbprint cookies stay fresh in an airtight container at room temperature for up to a week. I like to place a piece of parchment paper between layers to keep the jam from sticking to other cookies. They’re perfect for holiday cookie tins and gift giving!
Freeze: You can freeze these cookies for up to 3 months in a freezer-safe container with layers separated by parchment paper. I love making big batches during the holidays and pulling them out when unexpected guests drop by. They thaw quickly at room temperature in about 30 minutes.
Make Ahead: Want to get ahead on your holiday baking? You can make the cookie dough up to 2 days in advance and keep it wrapped tightly in the fridge. Just let it come to room temperature for easier rolling before baking. The baked cookies also taste even better the next day once the flavors have had time to meld together.
| Preparation Time | 30-45 minutes |
| Cooking Time | 10-12 minutes |
| Total Time | 40-57 minutes |
| Level of Difficulty | Medium |
Estimated Nutrition
Estimated nutrition for the whole recipe (without optional ingredients):
- Calories: 3400-3700
- Protein: 28-34 g
- Fat: 165-185 g
- Carbohydrates: 450-490 g
Ingredients
For the cookie dough:
- 2 1/4 cups all-purpose flour
- 1/2 tsp salt
- 1 cup unsalted butter, cool room temp
- 1/2 cup granulated sugar
- 3 tbsp light brown sugar
- 1 large egg yolk
- 1 1/2 tsp vanilla extract
For assembly and filling:
- 1/2 cup granulated sugar (for rolling dough)
- 2/3 cup thick raspberry jam (or other desired flavor)
Step 1: Prepare the Dry Ingredients
- 2 1/4 cups all-purpose flour
- 1/2 tsp salt
In a medium bowl, whisk together the all-purpose flour and salt until well combined.
Set aside for later use.
Step 2: Cream the Butter and Sugars
- 1 cup unsalted butter, cool room temp
- 1/2 cup granulated sugar
- 3 tbsp light brown sugar
- 1 large egg yolk
- 1 1/2 tsp vanilla extract
In the bowl of a stand mixer fitted with the paddle attachment, beat the cool room temperature unsalted butter for 1 minute on medium speed.
Add 1/2 cup of the granulated sugar and the light brown sugar.
Continue mixing until the mixture becomes light and fluffy, about 2 minutes.
Scrape down the sides of the bowl as needed.
Add the egg yolk and vanilla extract, then mix again until everything is well incorporated.
I always find that beating the butter and sugars just a little extra really improves the cookie texture.
Step 3: Combine Wet and Dry Ingredients
- dry ingredients from Step 1
- wet mixture from Step 2
Add the prepared dry ingredients from Step 1 to the wet mixture in the stand mixer bowl.
Mix on low speed until the dough just comes together and there are no visible streaks of flour.
Avoid overmixing to keep the cookies tender.
Step 4: Shape and Sugar the Dough Balls
- dough from Step 3
- 1/2 cup granulated sugar (for rolling dough)
Scoop out roughly 1 1/2 teaspoons of dough per cookie and roll into balls using your hands.
Place the remaining 1/2 cup granulated sugar in a small bowl.
Roll each dough ball in the sugar until fully coated.
Arrange the sugar-coated dough balls on a parchment- or Silpat-lined baking sheet (you may need two sheets).
Use the rounded back of a teaspoon or your thumb to gently press an indentation into the center of each dough ball.
Once all cookies have indents, transfer the baking sheets to the freezer and chill for 30 minutes before baking.
Chilling helps the cookies retain their shape and prevents spreading.
Step 5: Fill Cookies with Jam and Bake
- chilled dough balls from Step 4
- 2/3 cup thick raspberry jam (or other desired flavor)
Preheat the oven to 350°F (175°C).
Spoon the raspberry jam into a small zipper-lock bag, then snip a tiny corner from the bag to create a makeshift piping bag.
Carefully pipe or spoon about 1/2 teaspoon of jam into each cookie’s indentation, making sure not to overfill to prevent spillage during baking.
Space the cookies at least 2 inches apart.
Bake one sheet at a time for 10 to 12 minutes, or until the edges are just turning light golden brown.
Step 6: Cool and Serve
Remove the baking sheet from the oven and let the cookies cool on the sheet.
Enjoy your raspberry thumbprint cookies!
I like to let the cookies cool completely before transferring them to an airtight container to keep them fresh and prevent the jam centers from smudging.
Simple Christmas Jam Thumbprint Cookies
Ingredients
For the cookie dough:
- 2 1/4 cups all-purpose flour
- 1/2 tsp salt
- 1 cup unsalted butter, cool room temp
- 1/2 cup granulated sugar
- 3 tbsp light brown sugar
- 1 large egg yolk
- 1 1/2 tsp vanilla extract
For assembly and filling:
- 1/2 cup granulated sugar (for rolling dough)
- 2/3 cup thick raspberry jam (or other desired flavor)
Instructions
- In a medium bowl, whisk together the all-purpose flour and salt until well combined. Set aside for later use.
- In the bowl of a stand mixer fitted with the paddle attachment, beat the cool room temperature unsalted butter for 1 minute on medium speed. Add 1/2 cup of the granulated sugar and the light brown sugar. Continue mixing until the mixture becomes light and fluffy, about 2 minutes. Scrape down the sides of the bowl as needed. Add the egg yolk and vanilla extract, then mix again until everything is well incorporated. I always find that beating the butter and sugars just a little extra really improves the cookie texture.
- Add the prepared dry ingredients from Step 1 to the wet mixture in the stand mixer bowl. Mix on low speed until the dough just comes together and there are no visible streaks of flour. Avoid overmixing to keep the cookies tender.
- Scoop out roughly 1 1/2 teaspoons of dough per cookie and roll into balls using your hands. Place the remaining 1/2 cup granulated sugar in a small bowl. Roll each dough ball in the sugar until fully coated. Arrange the sugar-coated dough balls on a parchment- or Silpat-lined baking sheet (you may need two sheets). Use the rounded back of a teaspoon or your thumb to gently press an indentation into the center of each dough ball. Once all cookies have indents, transfer the baking sheets to the freezer and chill for 30 minutes before baking. Chilling helps the cookies retain their shape and prevents spreading.
- Preheat the oven to 350°F (175°C). Spoon the raspberry jam into a small zipper-lock bag, then snip a tiny corner from the bag to create a makeshift piping bag. Carefully pipe or spoon about 1/2 teaspoon of jam into each cookie's indentation, making sure not to overfill to prevent spillage during baking. Space the cookies at least 2 inches apart. Bake one sheet at a time for 10 to 12 minutes, or until the edges are just turning light golden brown.
- Remove the baking sheet from the oven and let the cookies cool on the sheet. Enjoy your raspberry thumbprint cookies! I like to let the cookies cool completely before transferring them to an airtight container to keep them fresh and prevent the jam centers from smudging.
