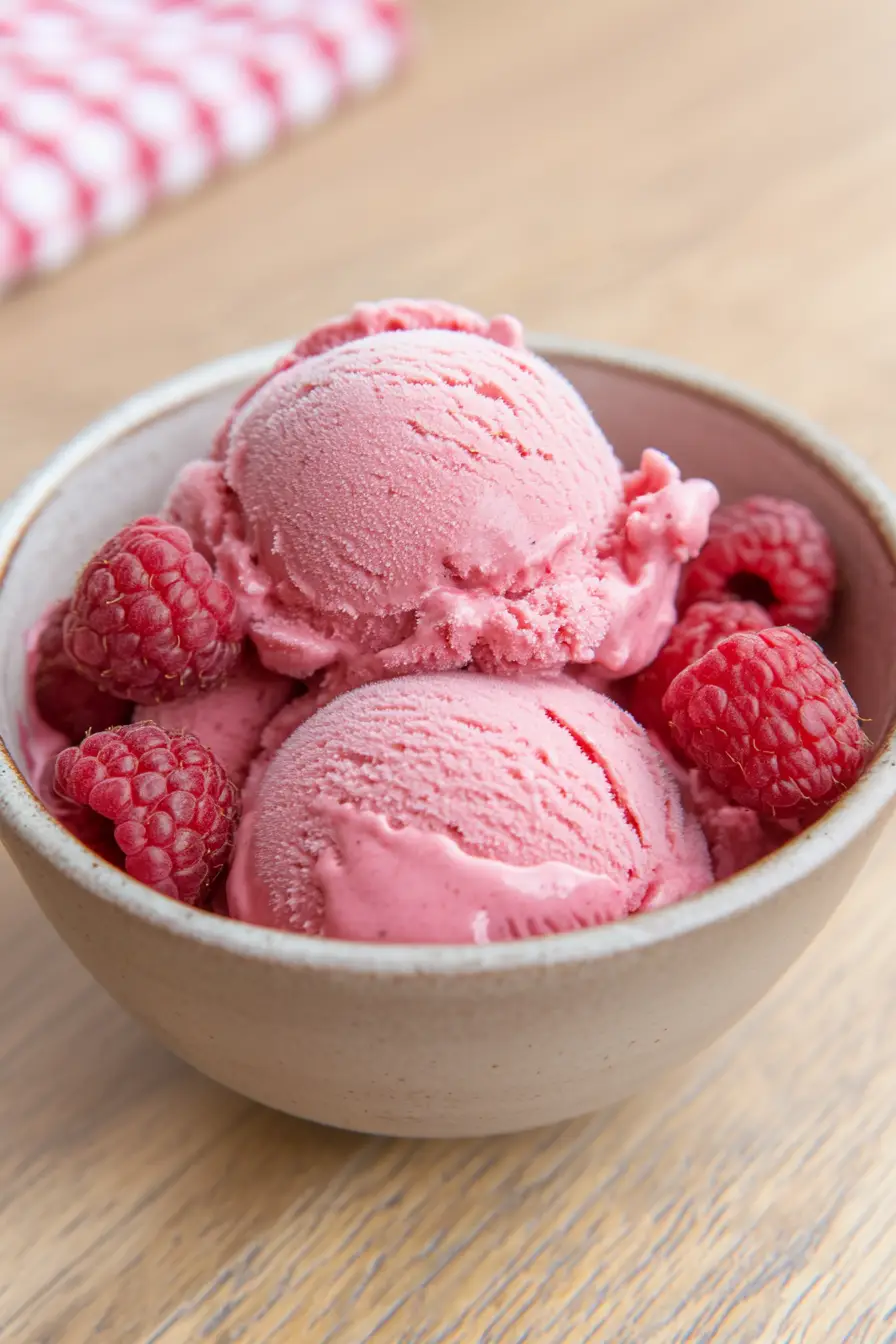
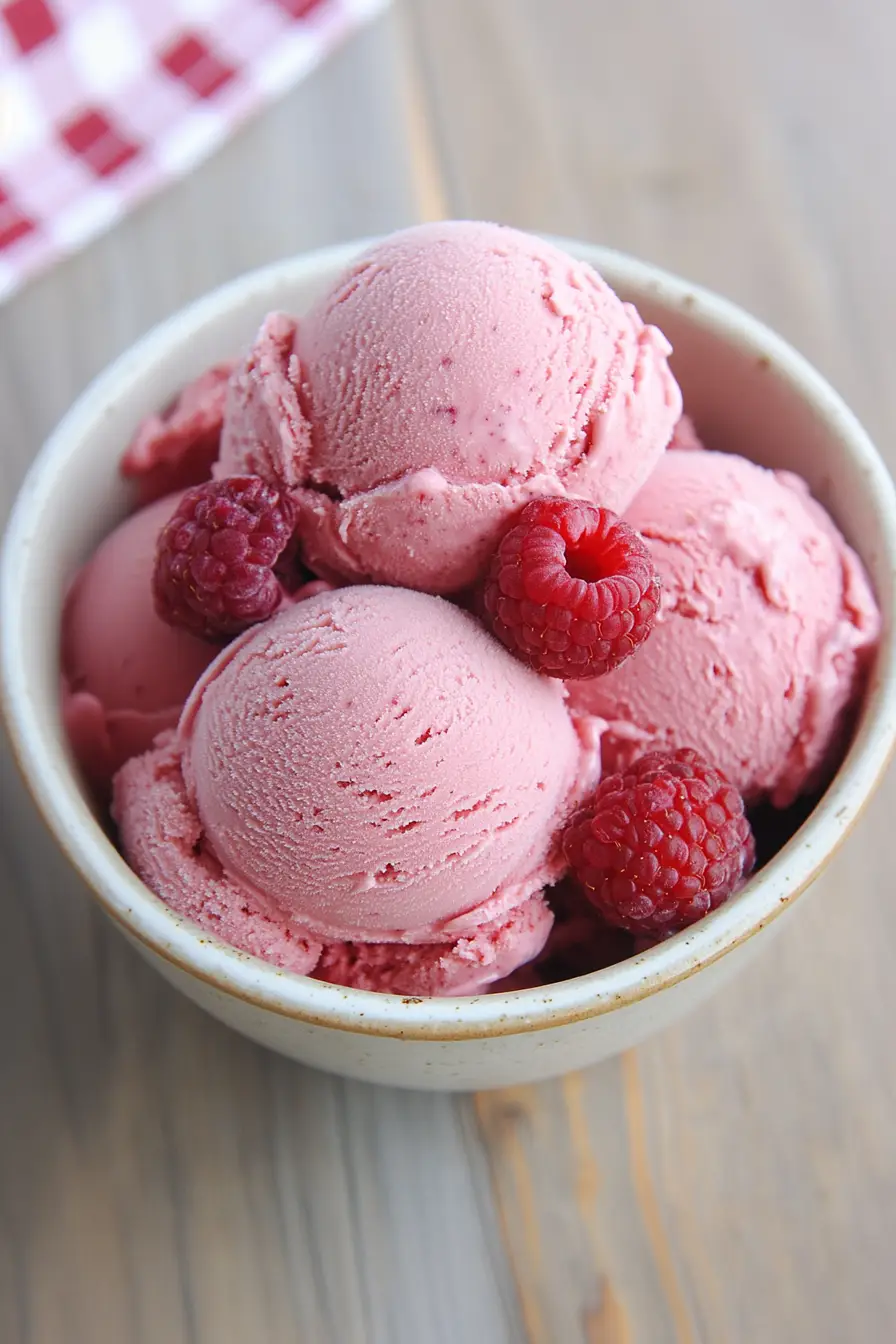
Making homemade ice cream in the summer can feel like a daunting task, especially when store-bought options are just a quick trip away. Between finding the right ingredients and getting the texture just right, it’s tempting to skip the whole process altogether – and I totally get that feeling, especially on those busy days when the kids are begging for a cold treat.
But this raspberry ice cream recipe is a game-changer: it’s surprisingly easy to make, uses simple ingredients you might already have, and has that perfect balance of creamy sweetness and fresh fruit flavor that store-bought versions just can’t match.
Why You’ll Love This Raspberry Ice Cream
- Real fruit flavor – Made with fresh or frozen raspberries, this ice cream delivers authentic berry taste in every spoonful – no artificial flavors here!
- Creamy texture – Thanks to the egg yolks and heavy cream, this ice cream turns out perfectly smooth and rich, just like premium store-bought versions.
- Simple ingredients – You only need 6 basic ingredients to make this ice cream, and they’re all real, wholesome items you can pronounce.
- Make-ahead dessert – While it needs time to chill, most of it is hands-off waiting – perfect for preparing a day before your special occasion.
- Customizable sweetness – You can easily adjust the sugar to match your taste preferences and the natural sweetness of your berries.
What Kind of Raspberries Should I Use?
Both fresh and frozen raspberries work great in homemade ice cream, so you can use whichever is more convenient or in season. If you’re going with fresh raspberries, look for plump, bright red berries that aren’t mushy or moldy – they should be sweet-tart and fragrant when you give them a sniff. Since frozen raspberries are typically picked at peak ripeness, they’re actually a really solid choice for ice cream making and might even give you better flavor than out-of-season fresh ones. Just make sure to thaw them completely and drain off any excess liquid before using them in your recipe. If you’re using fresh berries, give them a gentle rinse and let them dry completely before adding them to your ice cream base.
Options for Substitutions
While ice cream making needs some specific ingredients to work well, there are still some substitutions you can try:
- Heavy cream: You can use half-and-half, but your ice cream won’t be as rich. For a dairy-free version, try full-fat coconut cream – just know it will add a slight coconut flavor to your ice cream.
- Egg yolks: This is pretty important for making a proper custard base, but if you need an egg-free version, you can try using 2 tablespoons of cornstarch instead. Mix it with a bit of your cold cream first to avoid lumps.
- Raspberries: Other berries work great too! Try strawberries, blackberries, or a mix of berries. Just keep the same weight measurement. If using strawberries, you might need a bit more lemon juice since they’re naturally less tart.
- Granulated sugar: You can swap in caster sugar or even honey (use about 1/3 cup since it’s sweeter). Keep in mind that honey will change the texture slightly and add its own flavor.
- Lemon juice: Lime juice works just as well, or you could use a splash of good quality balsamic vinegar for a fancy twist – just use half the amount.
Watch Out for These Mistakes While Making
The biggest challenge when making raspberry ice cream is preventing ice crystals from forming, which can make your dessert grainy instead of creamy – you can avoid this by ensuring your custard base is properly chilled before churning and storing your ice cream maker bowl in the freezer for at least 24 hours beforehand.
Temperature control is crucial during the custard-making process – if you heat the mixture too quickly or don’t temper the eggs properly, you’ll end up with scrambled eggs instead of a smooth base, so keep your heat low and whisk constantly.
When adding the raspberry puree, strain out the seeds first and make sure it’s completely cool before mixing it into your custard base, as warm ingredients can create unwanted ice crystals.
For the smoothest texture, don’t skip the step of covering the surface of your custard with plastic wrap while it chills – this prevents a skin from forming and ensures your ice cream stays silky smooth.

What to Serve With Raspberry Ice Cream?
This homemade raspberry ice cream is amazing on its own, but there are so many fun ways to dress it up! A warm chocolate brownie or fudgy chocolate cake makes the perfect base – the contrast between warm and cold is just perfect. For something lighter, fresh berries (especially more raspberries!) or a simple butter cookie on the side lets the ice cream’s flavor shine. I love adding a drizzle of dark chocolate sauce or a sprinkle of toasted almonds on top for some crunch, and if you’re feeling fancy, a dollop of whipped cream makes this dessert extra special.
Storage Instructions
Keep Cold: Your homemade raspberry ice cream needs to stay in the freezer at 0°F (-18°C) or below. Place it in an airtight container – I like using a shallow, wide container rather than a tall one to make scooping easier. It’ll keep its best texture and flavor for about 2 weeks.
Prevent Ice Crystals: To keep your ice cream smooth and creamy, press a piece of plastic wrap or wax paper directly on the surface before putting the lid on. This helps prevent those pesky ice crystals from forming. Also, store it towards the back of your freezer where the temperature stays more consistent.
Serving Tips: Take your ice cream out of the freezer about 5-10 minutes before serving to soften it up a bit. This makes it easier to scoop and brings out the raspberry flavor. If it gets too soft, just pop it back in the freezer until it firms up again.
| Preparation Time | 15-20 minutes |
| Cooking Time | 10-15 minutes |
| Total Time | 6-8 hours (including chilling time) |
| Level of Difficulty | Medium |
Estimated Nutrition
Estimated nutrition for the whole recipe (without optional ingredients):
- Calories: 1200-1300
- Protein: 10-15 g
- Fat: 90-100 g
- Carbohydrates: 90-100 g
Ingredients
For the custard:
- 4 large egg yolks
- 2 cups heavy cream (for a richer, creamier ice cream)
- 1 pinch fine sea salt
- 1/2 cup granulated sugar (I use Domino sugar for consistency)
For the raspberry puree:
- 12 oz raspberries (fresh or frozen, thawed)
- 1 tbsp fresh lemon juice
Step 1: Cook the Custard Base
In a pot, combine the sugar, salt, egg yolks, and heavy cream.
Set the pot over medium-low heat.
Cook the mixture while stirring constantly until the temperature reaches 165°F, and you notice the bottom of the custard begin to thicken.
Step 2: Strain and Set Aside
Once the custard has thickened, transfer it to a bowl.
If there are any bits in the cream, pour the mixture through a fine mesh sieve into the bowl to achieve a smooth texture.
Set the custard aside.
Step 3: Prepare the Raspberry Puree
In a food processor, puree the raspberries on high until smooth.
Set a fine mesh sieve over the bowl of cooked custard and pour the raspberry puree into the sieve.
Stir the puree, pressing on the berries to release as much liquid as possible.
Scrape the bottom of the sieve to capture every last bit of the puree.
Step 4: Combine Mixtures and Chill
Add the lemon juice to the sieved raspberry and custard mixture and stir until everything is well combined.
You can add a splash of vanilla extract if desired.
Allow the mixture to come to room temperature, then cover it with plastic wrap and set it in the fridge overnight or for at least 6-8 hours.
Step 5: Prepare the Ice Cream
After chilling, if the custard has set at the top, stir it to combine.
Follow your ice cream machine’s instructions to churn the mix.
Once churned, transfer the ice cream to an airtight, freezer-safe container and freeze.
Step 6: Store and Serve
The ice cream can be stored in the freezer for about a month.
Enjoy your homemade raspberry custard ice cream whenever you wish!
