Finding a dessert that’s both cozy and wholesome can feel like searching for a needle in a haystack. Between navigating food sensitivities and trying to cut back on refined sugar, it’s easy to get discouraged when you’re craving something sweet but don’t want to compromise on health.
That’s where this apple crisp with almond flour comes in: it’s warm and comforting, naturally sweetened with seasonal apples, and made with simple ingredients you can feel good about. Plus, it’s easy enough to throw together on a busy weeknight when you need a little something special after dinner.

Why You’ll Love This Apple Crisp
- Allergy-friendly dessert – Made with almond flour and cassava flour, this gluten-free and dairy-free (if using coconut oil) apple crisp lets everyone enjoy a classic fall dessert, regardless of dietary restrictions.
- Natural sweetness – Using maple syrup and coconut sugar instead of refined sugar means you get a naturally sweetened dessert that doesn’t compromise on taste.
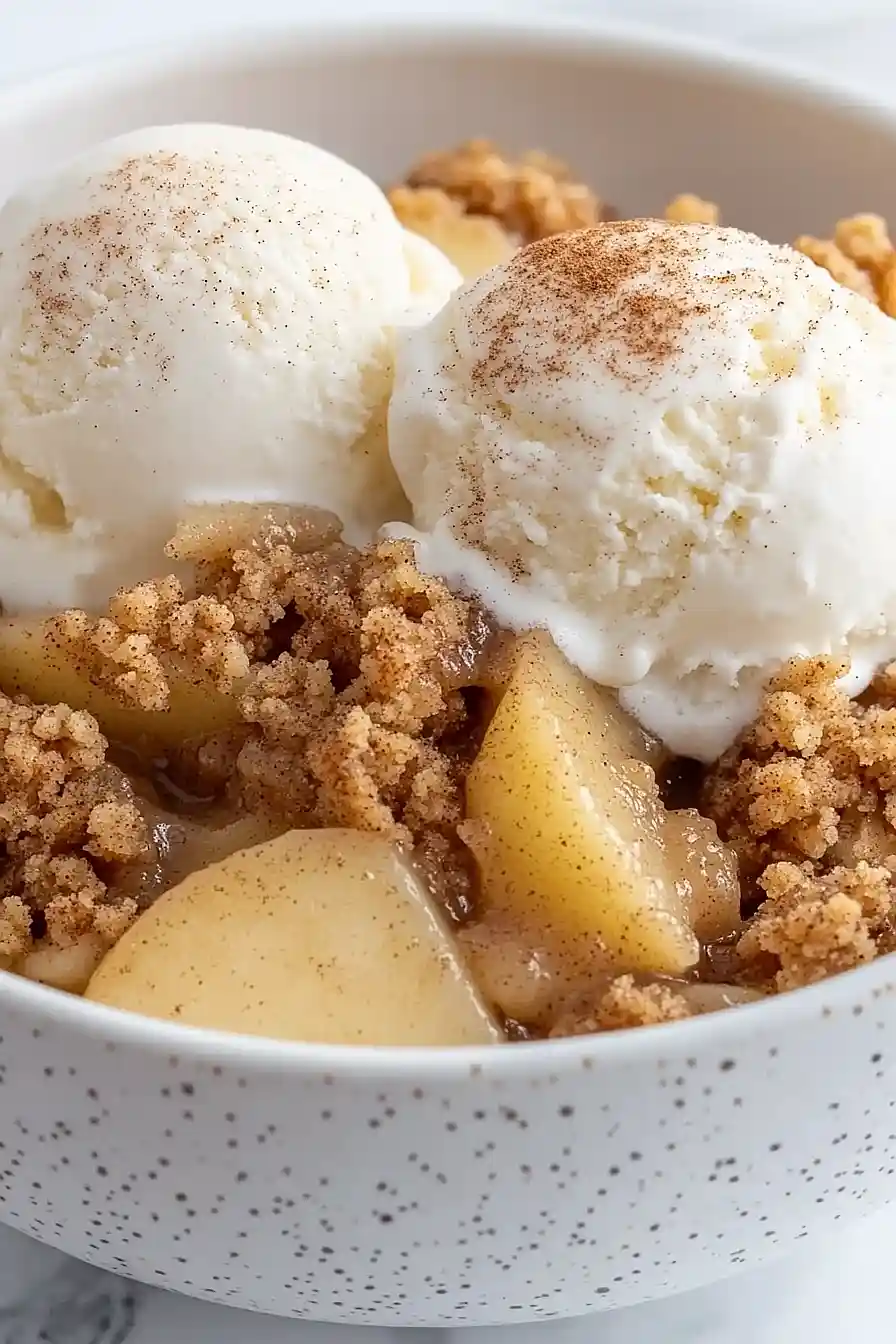
- Perfectly balanced texture – The combination of tender, juicy apples and the crispy, nutty topping creates that classic apple crisp experience you’re craving.
- Simple ingredients – While this recipe uses alternative flours, all ingredients can be found at most grocery stores, making it accessible for home bakers.
What Kind of Apples Should I Use?
For this apple crisp, you’ll want to stick with sweet-tart apples that hold their shape when baked. Honeycrisp, Fuji, and Pink Lady apples are all great choices since they won’t turn to mush in the oven and offer that perfect balance of sweet and tart flavors. If you can’t find these varieties, Granny Smith apples work well too, though you might want to add a bit more maple syrup since they’re more tart. When picking your apples, look for firm fruits without any soft spots or bruising, and try to choose ones that are roughly the same size so they’ll cook evenly. Remember to peel them if you prefer a softer texture, or leave the skins on for added fiber and a bit more structure in your crisp.
Options for Substitutions
This apple crisp recipe is super adaptable and friendly to different dietary needs. Here are some helpful swaps you can try:
- Apples: While sweet-tart apples work best, you can use any apples you have on hand. Granny Smith will give a tangier result (you might want to add more maple syrup), while Golden Delicious will make it sweeter.
- Apple juice/cider: Out of apple juice? Use water or orange juice instead. If using water, you might want to add an extra tablespoon of maple syrup for more flavor.
- Almond meal: You can swap this with other nut flours like hazelnut or cashew flour. If nuts are a concern, sunflower seed flour works too, though it might give a slightly different taste.
- Cassava flour: You can replace this with oat flour or a gluten-free all-purpose flour blend. Just note that the texture might be slightly different.
- Tapioca starch: Arrowroot powder or cornstarch work just as well in equal amounts.
- Coconut sugar: Brown sugar or regular granulated sugar can be used in the same amount. Even monk fruit sweetener works if you’re watching your sugar intake.
- Nuts: Feel free to swap between pecans and walnuts, or try almonds or macadamia nuts. For nut-free, use pumpkin seeds or sunflower seeds.
Watch Out for These Mistakes While Baking
The success of your apple crisp largely depends on how you cut your apples – slicing them too thin will turn them into mush, while cutting them too thick (more than 1/4 inch) means they won’t cook through by the time your topping is golden brown. Another common mistake is skipping the lemon juice, which not only prevents the apples from browning but also adds a necessary tang that balances the sweetness of the dish. When working with almond flour, avoid packing it too tightly when measuring as this can lead to a dense, heavy topping – instead, spoon it into the measuring cup and level it off gently. For the crispiest topping, make sure to evenly distribute the melted butter throughout the dry ingredients until you achieve a sandy texture, and don’t press the topping down onto the apples when assembling – a loose sprinkle will give you those desirable crunchy bits.
What to Serve With Apple Crisp?
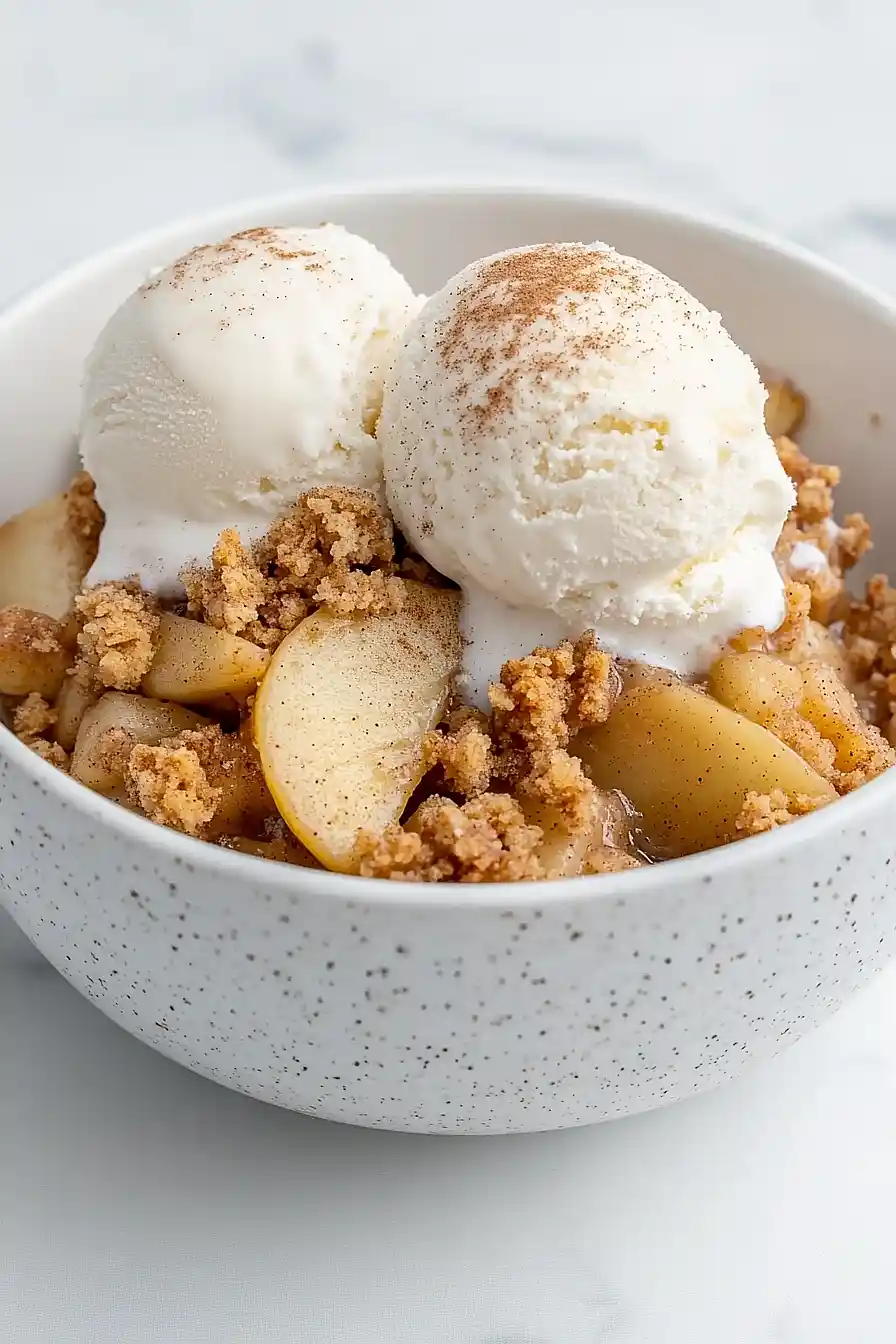
This warm, cozy apple crisp practically begs for a scoop of ice cream on top – whether you go for classic vanilla, dairy-free alternatives, or even a caramel-swirled variety. For a morning treat, try serving it with a dollop of Greek yogurt and a drizzle of honey, which adds a nice tangy contrast to the sweet apples. If you’re feeling extra indulgent, a splash of warm caramel sauce or a sprinkle of candied pecans takes this dessert to the next level. And don’t forget about drinks – a cup of hot coffee or spiced chai tea makes the perfect companion to this fall favorite.
Storage Instructions
Keep Fresh: Once your apple crisp has cooled down, cover it tightly with plastic wrap or transfer it to an airtight container. It’ll stay good in the fridge for up to 5 days. The topping might soften a bit over time, but it’ll still taste great!
Freeze: This apple crisp freezes really well! Place it in a freezer-safe container and it’ll keep for up to 3 months. I like to portion it into individual servings before freezing – it makes it super easy to grab just what you need when the craving hits.
Warm Up: To enjoy your apple crisp again, warm it in the oven at 350°F for about 15-20 minutes until heated through. If it’s frozen, let it thaw in the fridge overnight first. For a quick fix, you can use the microwave, but the topping won’t be as crispy. A quick tip: sprinkle a little extra cinnamon on top before reheating to bring back that fresh-baked aroma!
| Preparation Time | 15-30 minutes |
| Cooking Time | 70-90 minutes |
| Total Time | 85-120 minutes |
| Level of Difficulty | Medium |
Estimated Nutrition
Estimated nutrition for the whole recipe (without optional ingredients):
- Calories: 1800-2000
- Protein: 25-30 g
- Fat: 100-110 g
- Carbohydrates: 220-240 g
Ingredients
For the apple filling:
- 2 lb sweet-tart apples (such as Honeycrisp or Granny Smith, peeled, cored, and sliced 1/4-inch thick)
- 3 tbsp diced unsalted butter (I like Kerrygold for this, or use coconut oil)
- 1/4 cup apple juice (or cider)
- 1 1/2 tbsp lemon juice
- 1/8 tsp salt
- 1 tbsp maple syrup
For the crisp topping:
- 1/2 cup chopped pecans (or walnuts)
- 1/4 tsp nutmeg (freshly grated for best flavor)
- 1/4 cup cassava flour
- 1/4 tsp salt
- 1/2 tsp cinnamon
- 3/4 cup almond meal (finely ground for best texture)
- 5 tbsp melted unsalted butter (or a vegan alternative like Miyoko’s Kitchen)
- 1/3 cup coconut sugar
- 1 1/2 tbsp tapioca starch
For serving:
- vanilla non-dairy ice cream
Step 1: Prepare the Oven and Apples
Begin by positioning a rack in the lower third of the oven and preheating it to 350ºF.
While the oven heats, peel the apples using a T-shaped vegetable peeler.
Stand each peeled apple upright and cut downward next to the core to remove large chunks.
Place these chunks cut side-down and slice them to about three-eighths of an inch thick.
Step 2: Toss and Arrange Apples
In a large bowl, toss the sliced apples with apple cider, maple syrup, lemon juice, and salt to coat them evenly.
Transfer the apple mixture into a 9-inch round baking dish with 2-inch high sides, or an 8×8-inch square pan.
Dot the apples with cubed butter to add richness throughout the dish.
Step 3: Initial Baking
Place the baking dish in the oven and bake the apples until they are bubbling, which should take about 30-35 minutes.
After this time, stir the apples gently to ensure they cook evenly and do not stick to the dish.
Step 4: Prepare the Topping
While the apples are baking, prepare the crumble topping.
Combine almond, cassava, and tapioca flours in a large bowl along with nuts, coconut sugar, cinnamon, nutmeg, and salt.
Stir these dry ingredients together thoroughly.
Gradually stir in the melted butter until the mixture resembles gravel, ready for topping the baked apples.
Step 5: Bake with Topping
Once the initial apple baking is complete, crumble the prepared topping over the apples.
Return the dish to the oven and bake until the topping is deep golden and the apples continue bubbling.
This usually takes 40-50 minutes, but since oven times may vary, keep a close eye on it after 15-30 minutes.
Step 6: Cool and Serve
Allow the dessert to cool slightly for at least 10 minutes.
As it cools, the topping will become crispier and the juices will soak back into the apples, enriching the flavor.
Serve warm or at room temperature, ideally with a scoop of ice cream for an extra treat.
