There’s something deeply comforting about a good homemade custard. I’ve always found the process of making it almost therapeutic – just me in the kitchen, slowly stirring until that magic moment when it starts to thicken. Sure, you can buy custard at the store, but it never quite matches the silky smoothness of one made from scratch.
I learned this egg yolk vanilla custard recipe years ago, and it’s become my go-to whenever I need something reliable that’ll make everyone happy. Whether I’m pouring it over apple pie or serving it alongside bread pudding, it’s one of those basics that just works. The best part? You probably have all the ingredients in your kitchen right now.
What I really like about making custard is that you can’t rush it. It forces you to slow down, be patient, and pay attention to what’s happening in your pot. Trust me, once you’ve made this a couple of times, you’ll never want to go back to the boxed stuff again.
Why You’ll Love This Vanilla Custard
- Quick preparation – This custard comes together in just 20-30 minutes, making it perfect for when you need a homemade dessert without spending hours in the kitchen.
- Basic ingredients – You probably already have these simple ingredients in your pantry and fridge – no special shopping trip needed.
- Silky smooth texture – The combination of egg yolks and cornstarch creates a perfectly smooth, rich custard that’s better than any store-bought version.
- Versatile dessert base – Use this custard as a filling for pastries, serve it with fresh fruit, or enjoy it on its own – it’s a perfect foundation for countless desserts.
What Kind of Egg Yolks Should I Use?
For custard, fresh eggs at room temperature will give you the best results. While standard large eggs from the grocery store work perfectly fine, you might notice an even richer color and taste if you can get your hands on farm-fresh eggs, especially from chickens that are pasture-raised. The yolks from these eggs tend to have a deeper orange color, which will give your custard that beautiful golden hue. When separating your eggs, make sure not to get any whites mixed in with the yolks, as this can affect the texture of your custard. A good trick is to separate each egg into a small bowl first before adding it to your main mixture – this way if you break a yolk, you won’t ruin the whole batch.
Options for Substitutions
While custard needs some specific ingredients to work properly, there are still a few substitutions you can try:
- Egg yolks: These are essential for a true custard – there’s really no good substitute that will give you the same rich, creamy texture. Don’t try to skip or replace these!
- Milk: You can use different types of milk here. Whole milk gives the best results, but 2% works too. For a richer custard, try using half-and-half or a mix of heavy cream and milk. Non-dairy alternatives like full-fat coconut milk can work, but the texture might be slightly different.
- Vanilla essence: Feel free to use vanilla bean paste (same amount) or one whole vanilla bean (scraped). Pure vanilla extract works great too – just use the same amount as essence.
- Cornstarch: You can swap this with all-purpose flour, but you’ll need to use twice the amount (6 tablespoons). Arrowroot powder works too – use the same amount as cornstarch.
- Butter: You can leave this out if needed, though it adds a nice richness. Margarine works too, but won’t give quite the same flavor.
Watch Out for These Mistakes While Cooking
The biggest challenge when making custard is preventing those dreaded lumps – always strain your mixture through a fine-mesh sieve before cooking and whisk constantly during the heating process to ensure silky smoothness. Temperature control is crucial here – cooking your custard over too high heat can scramble the eggs, so keep it at medium-low and watch for tiny bubbles around the edges of your pan as a sign it’s ready. A common mistake is removing the custard from heat too early – it should coat the back of a spoon and hold a clear line when you run your finger through it (this is called the “nappe” stage). For the smoothest results, press plastic wrap directly onto the surface of your finished custard while it cools to prevent a skin from forming, and remember to stir in the butter while the mixture is still hot for the richest texture.
What to Serve With Vanilla Custard?
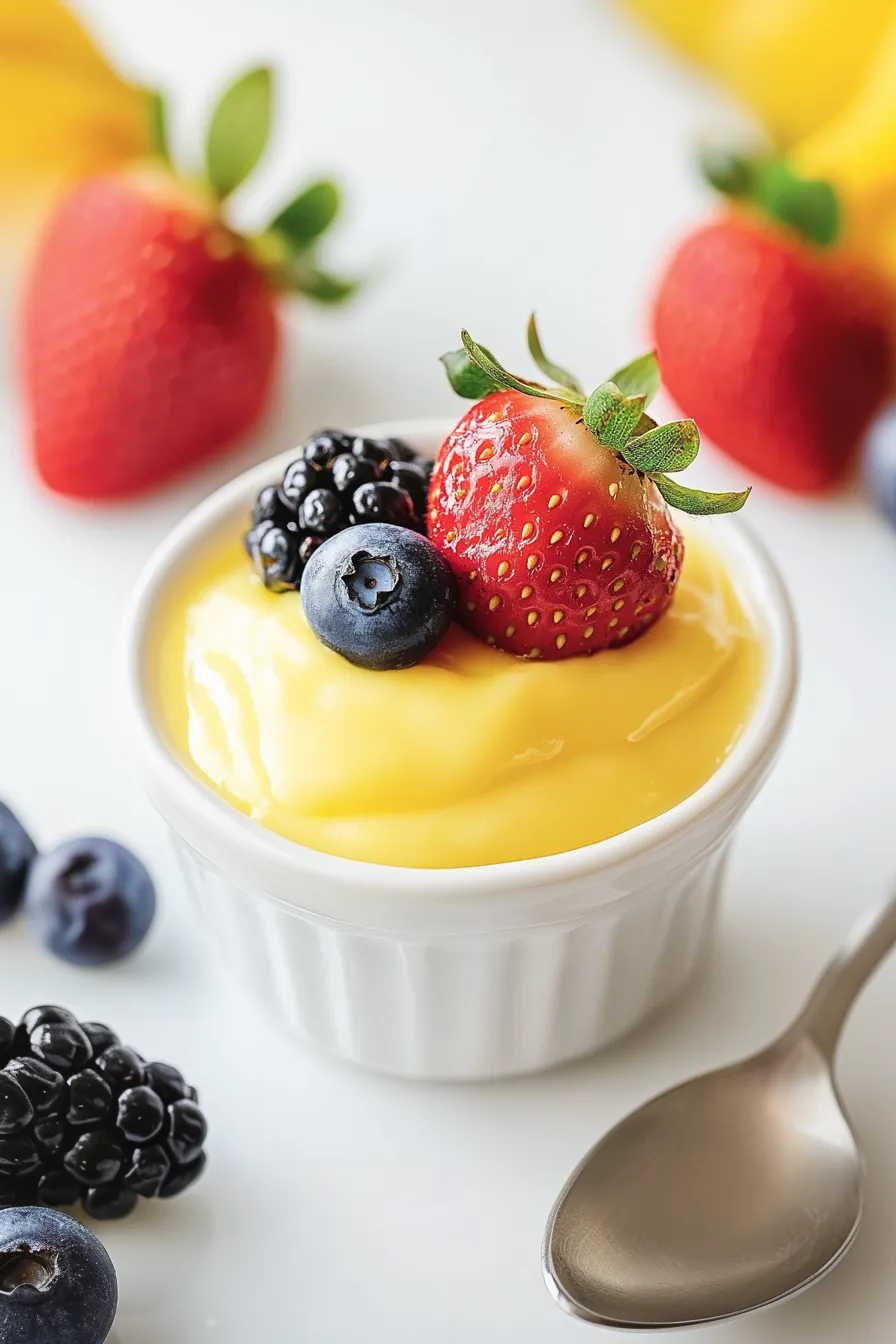
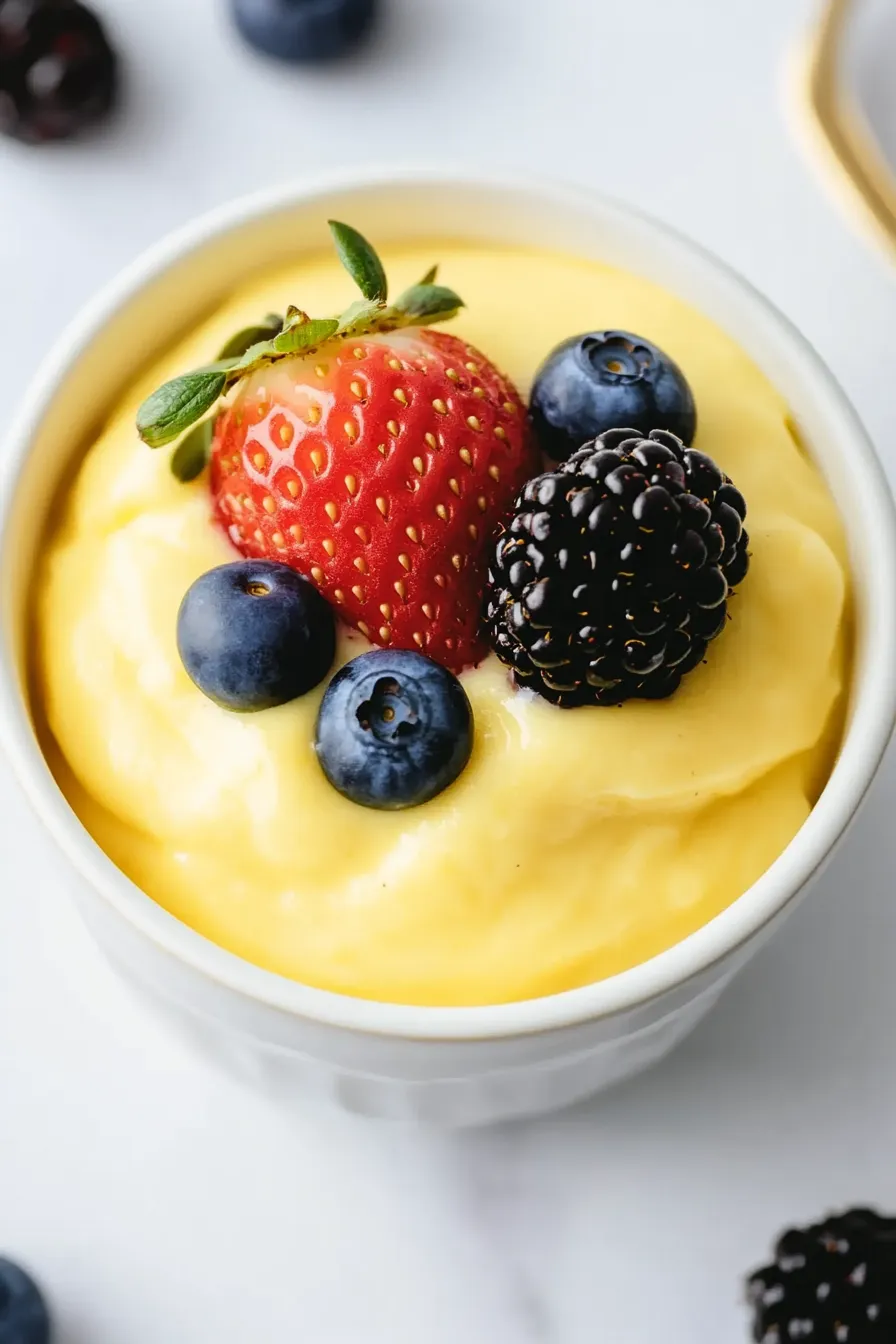
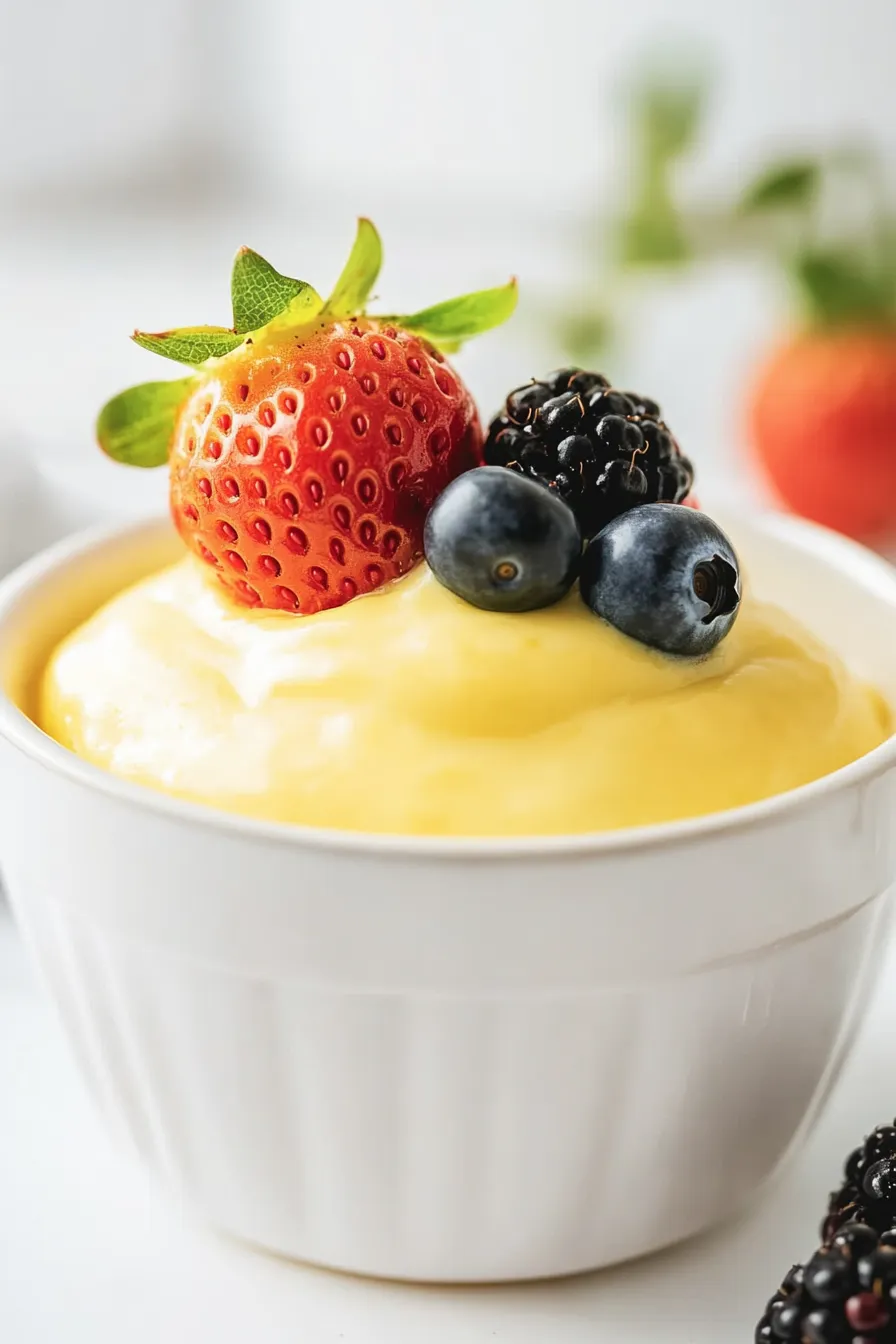
This smooth and creamy vanilla custard is super flexible when it comes to serving options! You can pour it warm over fresh berries or sliced peaches for a simple but tasty dessert. If you’re in the mood for something more traditional, serve it alongside a warm slice of apple pie or fruit crumble – the contrast between warm and cool is so good. For a quick weeknight dessert, I like to layer it in glasses with store-bought pound cake and whatever fruit is in season, kind of like a quick trifle. The custard also makes a great partner for bread pudding or as a dipping sauce for crispy churros.
Storage Instructions
Cool & Cover: Once your custard has cooled to room temperature, press a piece of plastic wrap directly onto its surface to prevent that pesky skin from forming. This simple trick keeps your custard smooth and creamy just the way you want it!
Refrigerate: Pop your covered custard in the fridge where it’ll stay fresh for up to 3 days. The texture might change slightly over time, but a quick whisk will bring it back to its silky smooth state. It’s perfect for making ahead when you’re planning a special dessert!
Important Note: I don’t recommend freezing this custard as it can separate and become grainy when thawed. For the best taste and texture, try to enjoy it within the first couple of days – though in my experience, it rarely lasts that long!
| Preparation Time | 10-15 minutes |
| Cooking Time | 10-15 minutes |
| Total Time | 20-30 minutes |
| Level of Difficulty | Medium |
Estimated Nutrition
Estimated nutrition for the whole recipe (without optional ingredients):
- Calories: 600-700
- Protein: 15-20 g
- Fat: 25-30 g
- Carbohydrates: 80-90 g
Ingredients
- 1/2 cup sugar (granulated white sugar)
- 4 large egg yolks
- 1 2/3 cups milk (whole milk for richness)
- 2 tsp vanilla extract
- 3 tbsp cornstarch
- 2 tbsp unsalted butter (I like Kerrygold unsalted butter, softened)
Step 1: Heat the Milk and Sugar
In a large pot, pour in the milk and add half of the sugar.
Bring the mixture to a boil, then reduce the heat to medium and keep the milk at a low simmer.
Step 2: Prepare Egg Mixture
While the milk is heating, whisk the egg yolks in a bowl.
In a separate bowl, combine the remaining sugar with the cornstarch.
Once the milk is starting to boil and you’re ready to proceed, add the egg yolks to the sugar and cornstarch mixture and whisk them together.
Step 3: Temper the Eggs and Combine
Carefully take 1 cup of the warm milk from the pot and gradually mix it into the egg yolk mixture, stirring continuously to temper the eggs.
Afterwards, add this tempered egg mixture back into the pot with the rest of the warm milk.
Heat gently over medium-high heat while stirring consistently with a wooden spoon or whisk.
Step 4: Thicken the Custard
Continue stirring the mixture until the custard thickens, or for about 3-5 minutes.
Aim to reach a temperature of 185°F to ensure the custard thickens properly and stays smooth when chilled.
Step 5: Finalize and Cool the Custard
Turn off the heat and stir in the butter to further thicken the custard as it cools.
Add vanilla for flavor and stir again.
For an extra smooth consistency, you may strain the custard to eliminate any lumps.
Transfer the custard into a bowl, cover it tightly with plastic wrap, pressing the wrap directly against the surface to prevent a skin from forming.
Allow the custard to cool to room temperature.
Step 6: Serve and Enjoy
Once the custard has cooled to room temperature, it can be served immediately or chilled in the refrigerator for a cold dessert.
Enjoy your silky, smooth custard!
