I avoided eating okra for years because the only way I’d ever had it was boiled into a slimy mess at my grandmother’s house. It wasn’t until I moved down South that I discovered fried okra, and even then, I thought that was as good as it could get.
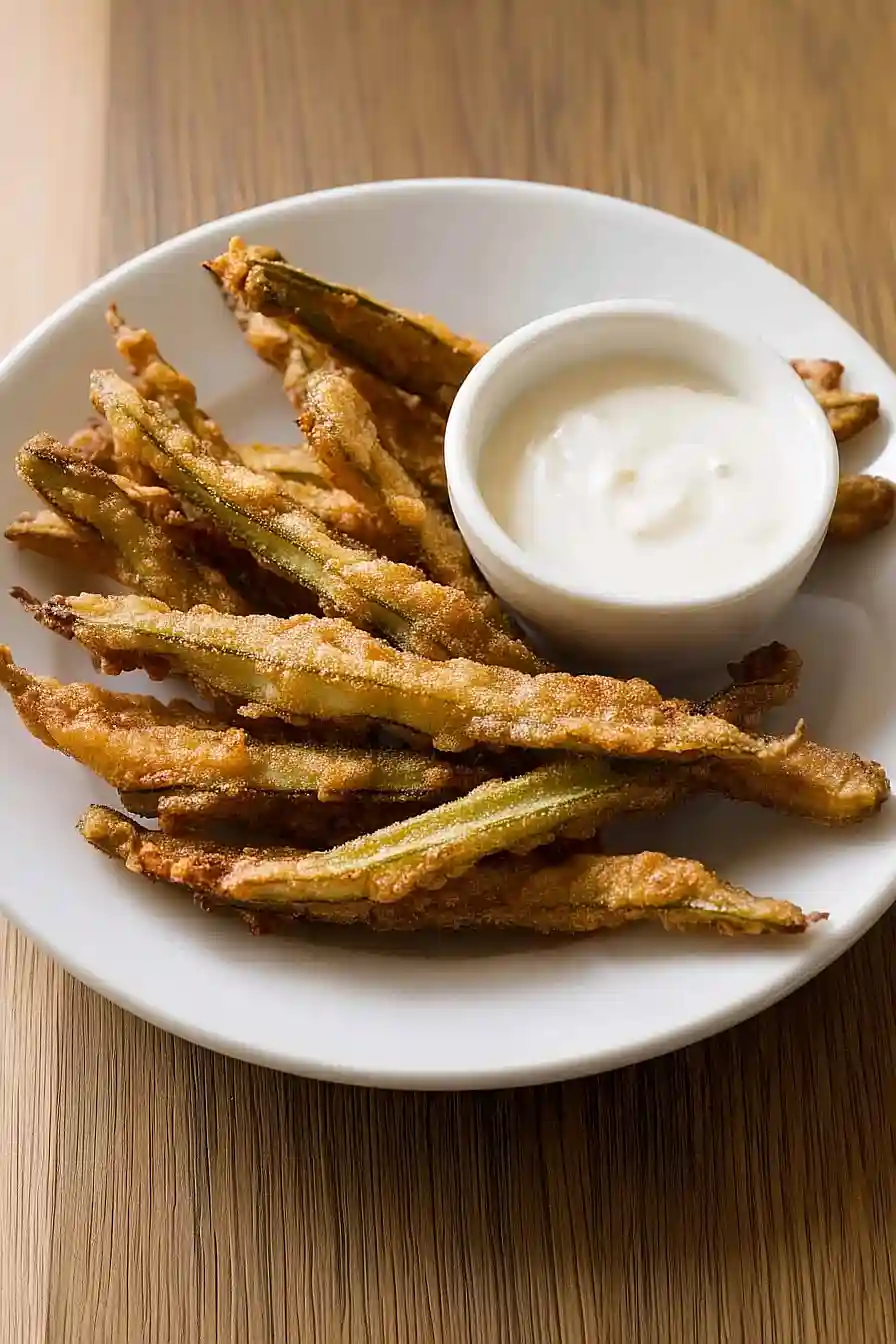
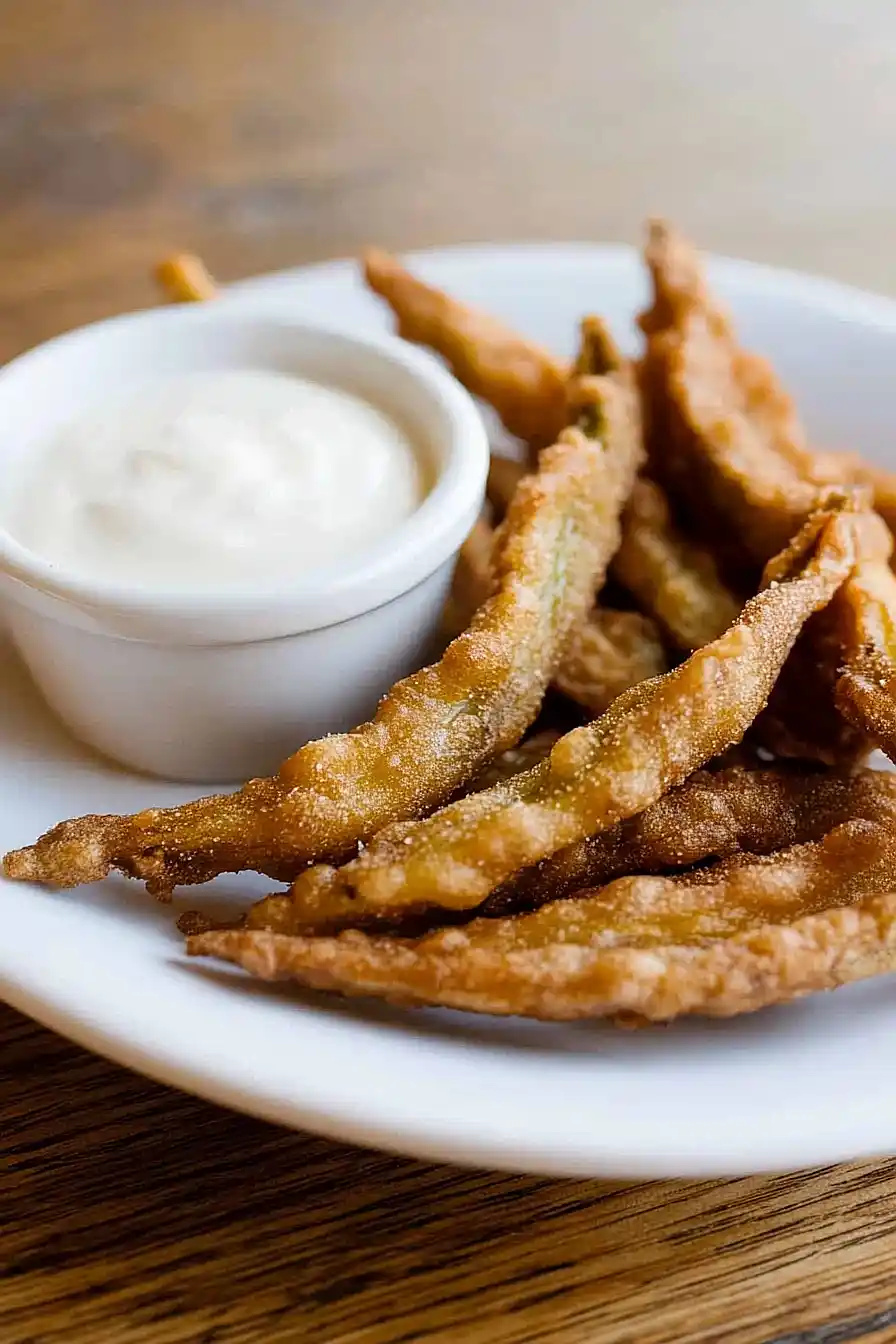
But then a friend introduced me to fried pickled okra, and it completely changed the game. The tangy, briny flavor of pickled okra combined with that crispy, golden coating is something special. It’s the kind of snack that makes people ask “What IS this?” at parties – in a good way.
Why You’ll Love This Fried Pickled Okra
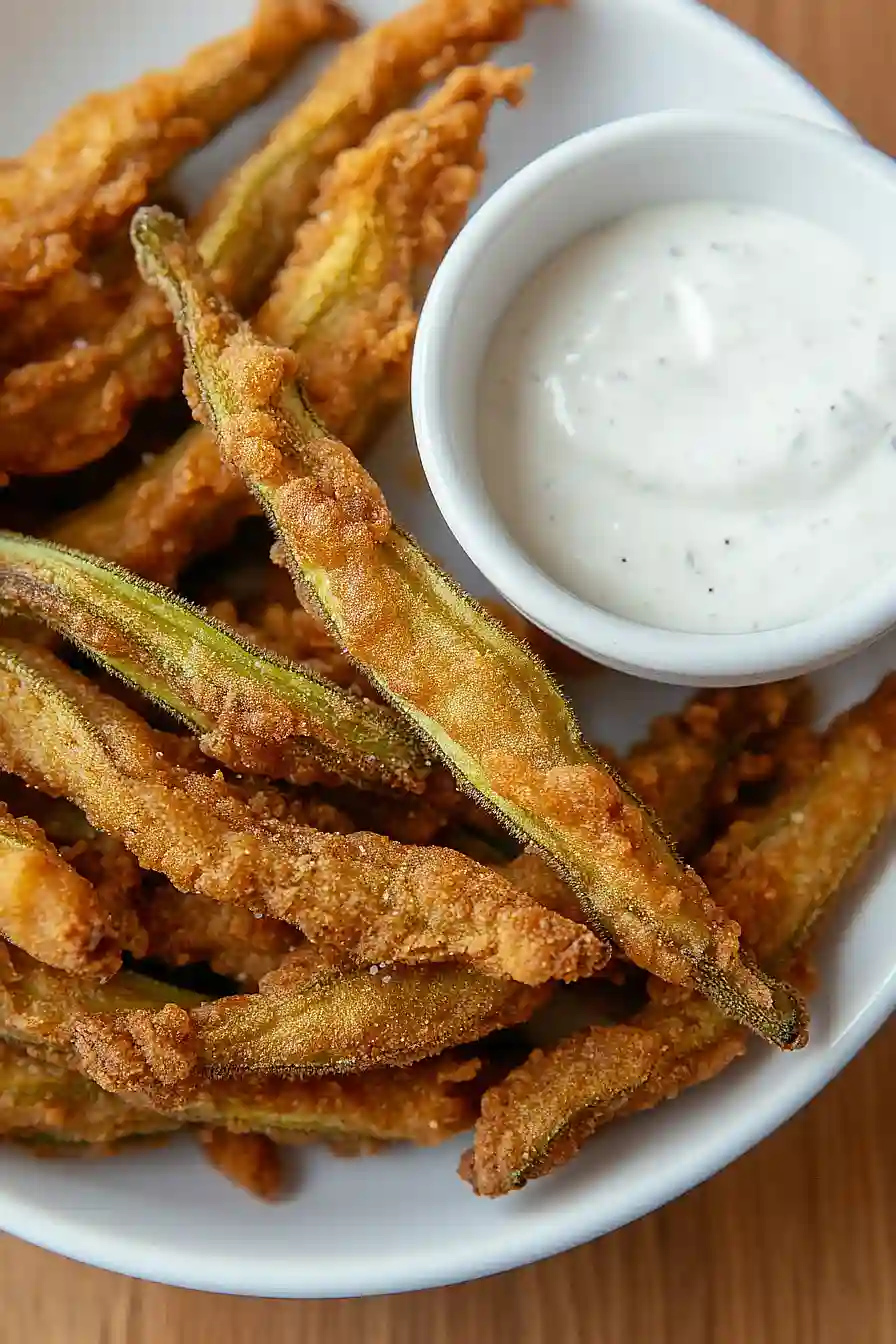
- Double-layered flavor – First pickling, then frying gives this okra a tangy-crispy combination that’s impossible to resist – it’s like two delicious preparations in one bite.
- Perfect party appetizer – These crispy bites come with their own creamy dipping sauce and are guaranteed to be the talk of any gathering – they’re different from the usual appetizer options.
- Make-ahead friendly – You can pickle the okra ahead of time and fry them just before serving, making party prep much more manageable.
- Southern charm with a twist – This recipe takes traditional Southern fried okra and adds pickling for an extra layer of flavor that cuts through any sliminess – even okra skeptics will love these.
What Kind of Okra Should I Use?
When shopping for okra, size really matters – you’ll want to look for smaller pods that are around 3 to 4 inches long, as these tend to be more tender and less fibrous than larger ones. Fresh okra should feel firm and have a bright green color without any brown spots or blemishes. If you’re buying from the grocery store or farmers market, try to pick pods that are all roughly the same size so they’ll pickle and fry evenly. While fresh okra is traditional for this recipe, frozen okra can work in a pinch – just make sure to thaw and pat it completely dry before pickling to avoid excess moisture.
Options for Substitutions
This Southern favorite can be adapted with several substitutions, though some ingredients are key to getting that classic taste:
- Okra: For this recipe, fresh okra is essential and can’t really be substituted since it’s the star of the show. However, you can use larger pods if needed – just slice them lengthwise.
- Buttermilk: No buttermilk? Mix 1/2 cup regular milk with 1/2 tablespoon lemon juice or white vinegar and let it sit for 5 minutes.
- Sour Cream: Plain Greek yogurt works great as a 1:1 replacement for sour cream in the dipping sauce.
- Cornmeal: You can use all flour instead of the cornmeal-flour mix, but you’ll miss out on that nice crunch. Another option is crushed crackers or panko breadcrumbs.
- Fresh Cilantro: Not a cilantro fan? Use fresh parsley instead, or simply leave it out of the sauce.
- Pickle Juice: If you don’t have okra pickle juice, use regular dill pickle juice or add an extra splash of vinegar to the sauce.
- Dried Dill: Fresh dill works too – just use about 1.5 times the amount called for dried. You could also use dried thyme or oregano for a different flavor profile.
Watch Out for These Mistakes While Frying
The biggest challenge when frying pickled okra is managing moisture – make sure to pat the pickled okra completely dry with paper towels before coating, or you’ll end up with a soggy crust that falls right off. Another common mistake is not getting your oil to the right temperature (350°F is ideal) – too cool and the okra becomes greasy, too hot and the coating burns before the inside heats through. When making the dipping sauce, avoid the temptation to skip the resting time – letting it sit in the fridge for at least an hour allows the flavors to properly blend and develop. For the crispiest results, don’t overcrowd the frying pan – work in small batches and keep the fried pieces warm in a 200°F oven while you finish the rest.
What to Serve With Fried Pickled Okra?
These crunchy, tangy fried okra pieces make an excellent appetizer or side dish that pairs really well with classic Southern main courses. Try serving them alongside pulled pork sandwiches, fried chicken, or barbecue ribs for a true down-home meal. The included dipping sauce is perfect on its own, but you could also put out some hot sauce or ranch dressing for extra dipping options. For a casual party spread, arrange these crispy bites on a platter with other Southern favorites like deviled eggs, pimento cheese and crackers, or cornbread.
Storage Instructions
Keep Fresh: Once you’ve fried up your pickled okra, it’s best enjoyed right away while it’s hot and crispy. If you have leftovers, let them cool completely and store them in an airtight container in the fridge for up to 2 days. Just know that they won’t stay as crispy as when they’re fresh out of the fryer.
Save the Sauce: The dipping sauce can be made ahead and stored in an airtight container in the refrigerator for up to 5 days. This is great for meal prep – you can make the sauce while your pickled okra is doing its thing!
Crisp Up: To get some of the crispiness back on leftover fried okra, spread them on a baking sheet and pop them in a 350°F oven for about 5-7 minutes. Keep an eye on them to make sure they don’t burn. The texture won’t be exactly like fresh-fried, but they’ll still be tasty!
| Preparation Time | 20-30 minutes |
| Cooking Time | 15-20 minutes |
| Total Time | 35-50 minutes |
| Level of Difficulty | Medium |
Estimated Nutrition
Estimated nutrition for the whole recipe (without optional ingredients):
- Calories: 2200-2400
- Protein: 25-30 g
- Fat: 120-140 g
- Carbohydrates: 230-250 g
Ingredients
For the pickled okra:
- 1 cup white vinegar
- 1 tsp whole black peppercorns
- 1/2 tsp dried dill weed
- 1 tsp mustard seeds
- 1/4 tsp ground cumin
- 2 tbsp kosher salt
- 2 cloves garlic (smashed lightly to release flavor)
- 1 1/4 cups water
- 1/4 tsp cayenne pepper
- 1 lb fresh okra (pods no more than 3-4 inches long, trimmed)
For the dipping sauce:
- 1/4 tsp lemon pepper seasoning
- 1/2 tsp dried dill weed
- 1 tbsp fresh cilantro, chopped
- 1/4 cup sour cream
- 1 tbsp reserved okra pickling liquid
- 1 garlic clove (finely chopped for smoother sauce)
- Salt, to taste
- 1/4 cup mayonnaise (I prefer Hellmann’s for its creamy texture)
- 1/4 tsp ground cumin
- 1/2 cup buttermilk
- Pinch of cayenne pepper
For frying:
- 1 cup all-purpose flour
- 1 cup yellow cornmeal
- 1/2 tsp kosher salt
- Oil for frying (peanut or canola oil work well)
- 1/4 tsp black pepper (freshly ground preferred for more aroma)
Step 1: Prepare the Okra
- 1 lb fresh okra, pods no more than 3–4 inches
Slice off the stem end of each okra pod.
Cut each pod in half lengthwise, then slice each half lengthwise into 2 or 3 strips, so that each slice is about 1/4-inch wide.
This will ensure even pickling and frying.
Step 2: Make the Pickling Brine and Soak Okra
- 1 1/4 cups water
- 1 cup distilled white vinegar
- 2 cloves garlic, smashed
- 2 tbsp kosher salt
- 1 tsp whole black peppercorns
- 1 tsp mustard seeds
- 1/2 tsp dried dill weed
- 1/4 tsp ground cumin
- 1/4 tsp cayenne powder
- sliced okra from Step 1
In a medium pot, combine the water, distilled white vinegar, smashed garlic cloves, kosher salt, black peppercorns, mustard seeds, dried dill weed, ground cumin, and cayenne powder.
Bring the mixture to a boil.
Turn off the heat and add the sliced okra to the hot brine, ensuring all pieces are submerged.
If needed, add a little more water to cover.
Let the okra sit, uncovered and unrefrigerated, in the hot brine for 30 minutes.
For make-ahead pickles, transfer the okra and brine to containers and refrigerate until ready to use.
I like to give the okra a gentle stir halfway through to make sure every piece gets evenly flavored.
Step 3: Fry the Okra
- pickled okra from Step 2
When ready to serve, heat 1 inch of oil in a large skillet over medium-high heat to 350°F (about 5 minutes).
Meanwhile, in a large food-storage bag, mix together flour, cornmeal, salt, and black pepper (ingredients not provided in your list but mentioned in the original instructions, so adjust as needed).
Remove the okra from the brine, letting excess liquid drip off, and add it to the flour mixture in the bag.
Shake vigorously to coat the okra evenly—separate any pieces that stick together.
Once the oil is hot, use a slotted spoon to add the coated okra and fry until golden brown, about 1 minute, stirring a few times.
Transfer the fried okra to a paper towel-lined plate to drain.
Repeat as needed until all okra is fried.
For an extra crispy crust, I sometimes double-coat the okra by dipping it in the flour mixture twice.
