I never thought I’d be making jam from radishes, but here we are! The first time someone mentioned radish jam to me, I thought they were joking. After all, radishes are those crunchy, peppery bits we toss in salads or slice up for veggie platters. But once I tried making it, I was genuinely surprised by how good it turned out.
Making jam has always been one of those kitchen projects that brings me joy, and this unusual recipe has become a favorite conversation starter at my farmers market visits. People’s eyebrows always go up when I tell them about it, but then they taste it, and their whole perspective changes. It’s different from your typical berry jam, and that’s exactly what makes it special.
If you’re looking to try something new in your jam-making adventures, or just want to use up those extra radishes from your garden, this recipe might be just what you need. Trust me, even the skeptics in my family had to admit it was worth trying.
Why You’ll Love This Radish Jam
- Unique spread – This isn’t your typical strawberry or grape jam – it’s a conversation starter that will surprise your guests with its creative use of radishes.
- Quick preparation – You can have this jam ready in under an hour, making it a perfect project for a free morning or afternoon.
- Simple ingredients – With just 5 basic ingredients, this recipe turns common radishes into something special without any fancy or hard-to-find items.
- Versatile condiment – It works great as a spread for sandwiches, a topping for cheese boards, or even as a glaze for roasted meats – giving you multiple ways to enjoy it.
What Kind of Radishes Should I Use?
Regular red globe radishes from your grocery store work perfectly for this unique jam recipe, but you could also experiment with other varieties. French Breakfast radishes or White Icicle radishes can add interesting flavor notes, though they might change the final color of your jam. When selecting your radishes, look for firm, crisp ones without any soft spots or blemishes – the fresher they are, the better your jam will taste. If your radishes come with the greens still attached, that’s usually a good sign of freshness, but be sure to remove and save those tops for other recipes. For the best texture in your jam, try to chop the radishes into consistently sized small pieces.
Options for Substitutions
While this unique jam recipe has some specific requirements, here are the possible swaps you can make:
- Pectin: Regular powdered pectin is best, but you can use liquid pectin – just follow the conversion on the package. You can’t skip pectin in this recipe as it’s needed for proper setting.
- White sugar: The amount of sugar is important for proper setting, but you can try using a mix of white and light brown sugar for a slightly different flavor. Don’t reduce the total amount though, as it affects how the jam sets.
- Ready-to-use horseradish: Fresh grated horseradish works too – use about 1 teaspoon since it’s stronger. If you want to skip the heat entirely, try adding 1 teaspoon of grated ginger or lemon zest instead.
- Radishes: Different radish varieties will work here – from regular red radishes to watermelon radishes. Just make sure they’re fresh and crisp. This is the main ingredient and can’t be substituted with other vegetables.
Watch Out for These Mistakes While Cooking
The biggest challenge when making radish jam is getting the right texture – chopping your radishes too coarsely will result in a chunky, uneven spread, so take time to dice them finely and uniformly. A common mistake is skipping the crucial step of properly dissolving the pectin, which can lead to a runny jam that won’t set – always whisk the pectin into room temperature water before adding it to your hot radish mixture. To ensure your jam sets properly, avoid the temptation to reduce the sugar amount, as it works together with the pectin for the perfect consistency, and make sure to bring the mixture to a full rolling boil that can’t be stirred down. For testing doneness, place a small plate in the freezer beforehand – when you think the jam is ready, drop a small amount on the cold plate and run your finger through it; if it wrinkles and doesn’t run back together, your jam is good to go.

What to Serve With Radish Jam?
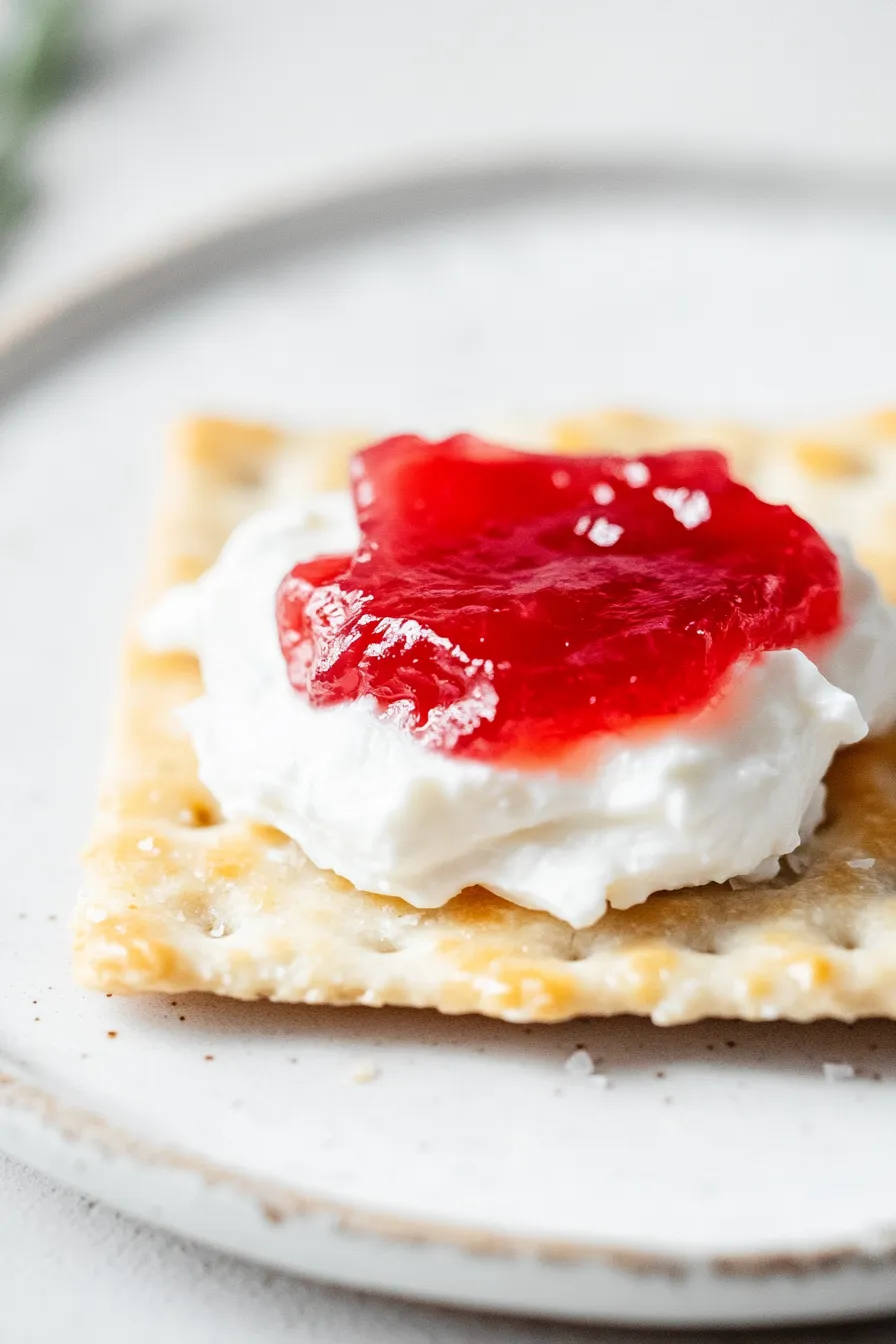
This unique savory-sweet jam is perfect for jazzing up your cheese board or charcuterie plate! The spicy kick from the horseradish and radishes pairs wonderfully with creamy cheeses like brie, goat cheese, or cream cheese spread on crackers or crusty bread. You can also use it as a condiment for sandwiches – it’s especially good with roast beef or turkey, adding a zingy brightness that regular mayo or mustard just can’t match. For a simple appetizer that’ll get people talking, try topping crostini with a schmear of cream cheese and a dollop of this pretty pink jam.
Storage Instructions
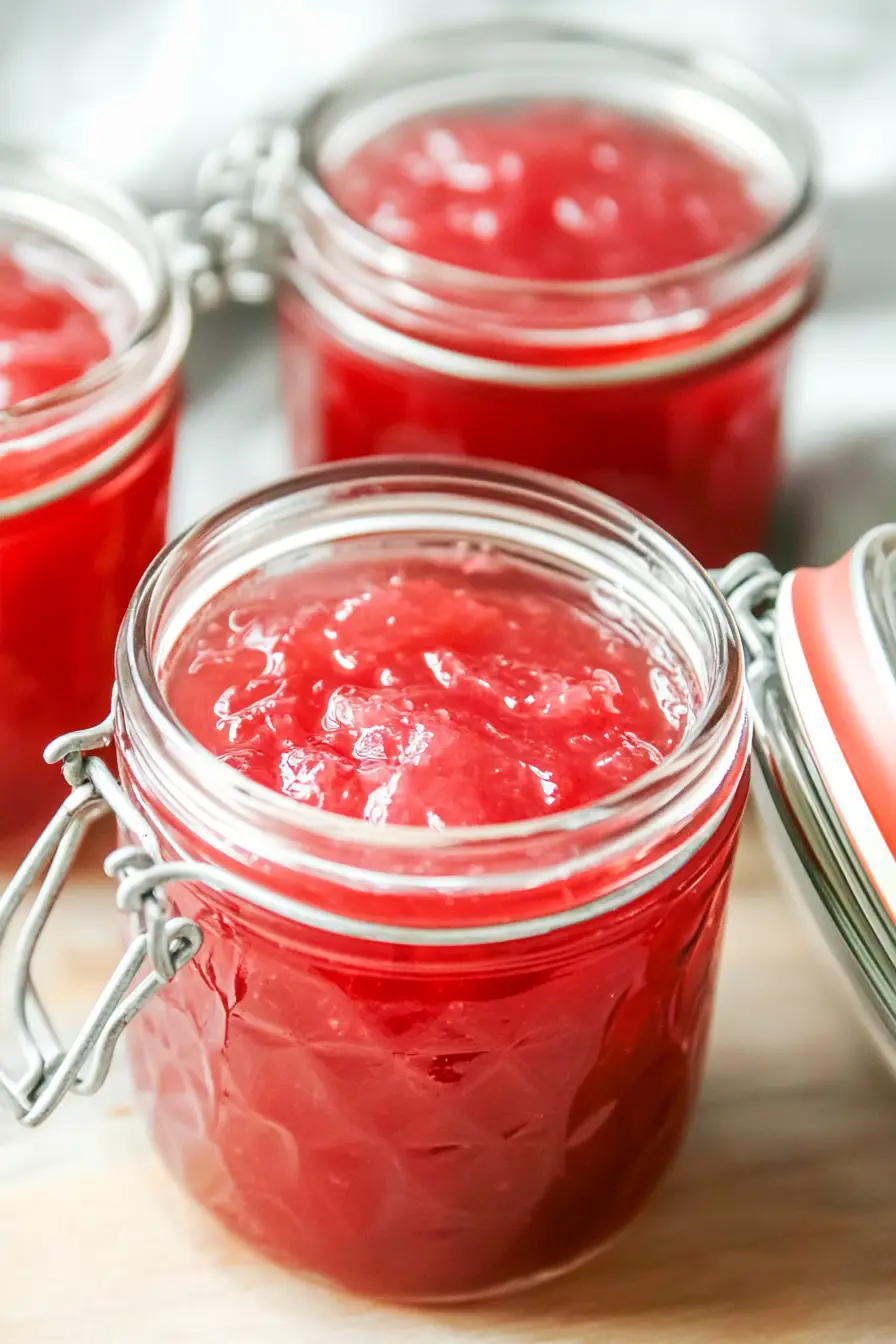
Keep Fresh: Once you’ve made your radish jam, let it cool completely before storing. For unopened jars that have been properly processed in a water bath, you can keep them in a cool, dark pantry for up to 12 months. After opening, pop the jar in the fridge and use within 3-4 weeks.
Preserve: The best way to preserve this jam is through the water bath canning method. Make sure your jars seal properly – you’ll hear that satisfying ‘pop’ sound as they cool. Always check the seals before storing, and any jars that didn’t seal should go straight into the fridge.
Gift: This unique jam makes wonderful homemade gifts! Just add a cute label with the date it was made and storage instructions. If giving as a gift, let the recipient know to refrigerate after opening and use within 3-4 weeks for the best taste and texture.
| Preparation Time | 15-20 minutes |
| Cooking Time | 20-30 minutes |
| Total Time | 35-50 minutes |
| Level of Difficulty | Medium |
Estimated Nutrition
Estimated nutrition for the whole recipe (without optional ingredients):
- Calories: 1600-1800
- Protein: 0-5 g
- Fat: 0-1 g
- Carbohydrates: 400-450 g
Ingredients
- 1 box pectin (1.75 oz, I use Sure-Jell)
- 2 tsp prepared horseradish (not fresh grated, look for a creamy variety)
- 3/4 cup water
- 2 1/2 cups white sugar (granulated sugar, not confectioners’)
- 2 cups radishes (finely chopped, about 1/8-inch pieces)
Step 1: Sterilize Jars, Lids, and Rings
Begin by sterilizing your jars, lids, and rings.
You can either place them on a tray in a warm oven set to 200 degrees F for 5-10 minutes, or place them in a water bath canner, bring the water to a boil, and let the water sterilize the jars as you prepare the jelly.
Step 2: Make the Jelly Base
In a tall stockpot set over medium heat, combine the chopped radishes, granulated sugar, and water.
Stir the mixture constantly until the sugar is fully dissolved.
This will form the base for your jelly.
Step 3: Boil and Add Pectin
Bring the mixture to a rolling boil.
Once boiling, add the pectin and stir until it is completely dissolved.
Continue to boil the mixture for 1 minute more, ensuring that the temperature reaches 220 degrees F, which is the setting point for jelly.
Step 4: Finish and Flavor the Jelly
Remove the pot from the heat and skim off any foam that has formed on the surface.
Stir in the horseradish until well-mixed, giving the jelly a unique flavor.
Step 5: Process or Store the Jelly
Prepare a hot water bath by bringing a pot of water to a hard boil.
Process the pint jars in the water bath for 10 minutes, starting the timer once the water reaches a hard boil.
After processing, remove the jars and let them rest on the counter.
The jars will seal with a “pop” over the next 12-24 hours.
Alternatively, if you choose to skip the hot water bath for short-term storage, you can store the jelly in the fridge.
