If you ask me, spaghetti squash is one of the best veggie discoveries ever.
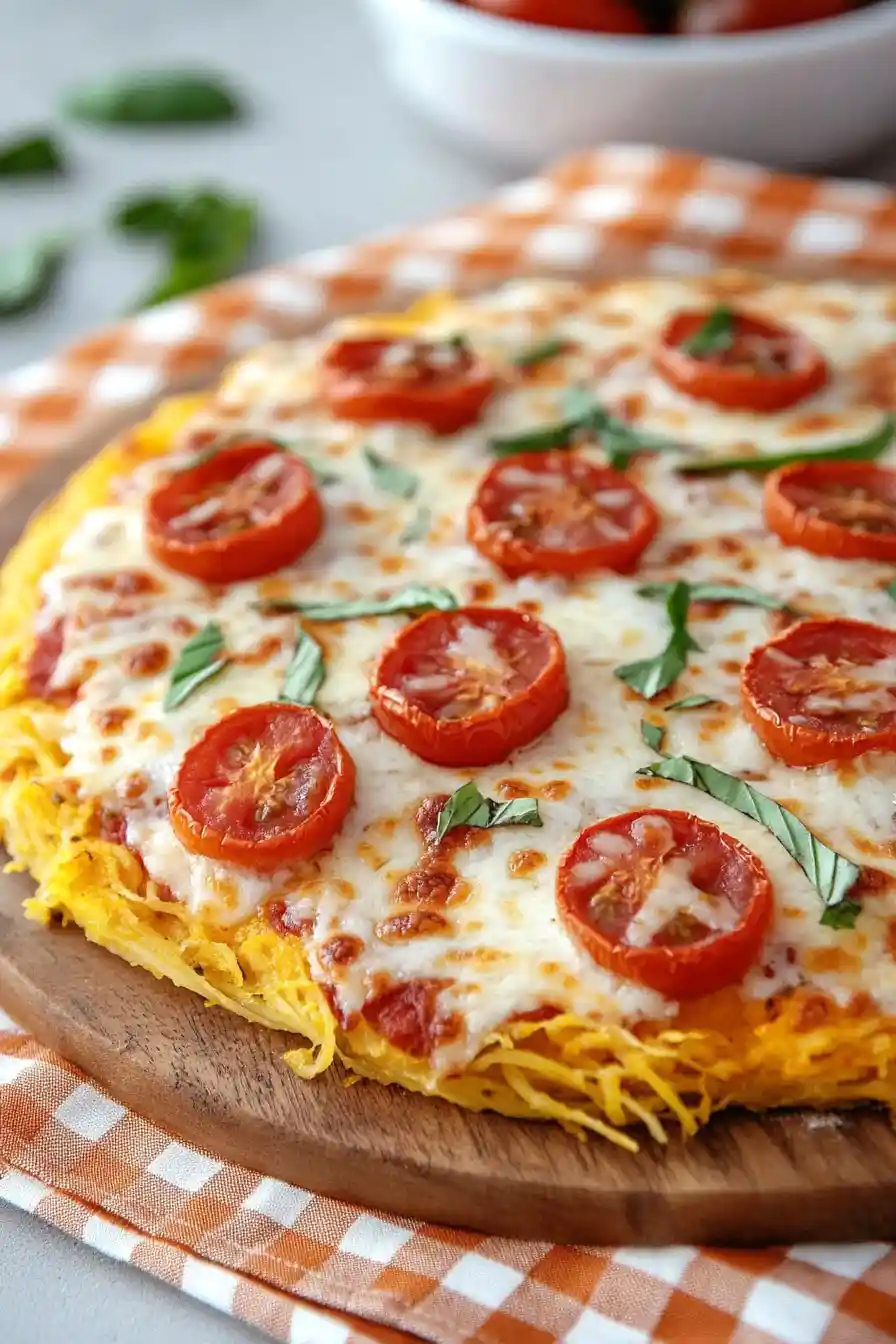
This low-carb pizza crust alternative brings all the satisfaction of traditional pizza without weighing you down. The natural strands of baked spaghetti squash combine with cheese and seasonings to create a base that holds up well to your favorite toppings.
It’s mixed with Italian herbs and a blend of cheeses that crisp up nicely in the oven, giving you those coveted crusty edges we all love about pizza. A sprinkle of garlic and a touch of salt bring out the natural sweetness of the squash.
It’s a clever way to sneak more vegetables into dinner while still getting that pizza fix we all crave now and then.
Why You’ll Love This Spaghetti Squash Pizza
- Low-carb alternative – This pizza crust swaps traditional flour for spaghetti squash, making it perfect for anyone following a keto or low-carb diet.
- Gluten-free friendly – Since it’s made with just spaghetti squash, eggs, and cheese, this crust is naturally gluten-free and great for those with dietary restrictions.
- Simple ingredients – You only need 4 basic ingredients for the crust, plus your favorite toppings to make it your own.
- Extra serving of vegetables – This clever recipe sneaks in an extra serving of vegetables while still giving you that satisfying pizza experience you’re craving.
What Kind of Spaghetti Squash Should I Use?
For making pizza crust, you’ll want to look for a small to medium spaghetti squash that feels heavy for its size and has a firm, pale yellow rind without any soft spots. While larger squash might seem like a better value, they tend to be more watery and can make your crust soggy. The best spaghetti squash for this recipe will be around 3-4 pounds – anything bigger than that might release too much moisture. When you’re at the store, give the squash a tap – it should sound hollow, and the skin should be too hard to pierce with your fingernail. If you’re having trouble finding fresh spaghetti squash, they’re typically in season from early fall through winter, but many grocery stores carry them year-round.
Options for Substitutions
Looking to make some swaps in this low-carb pizza recipe? Here’s what you can try:
- Spaghetti squash: This is the star ingredient that can’t really be substituted since it’s the base of the crust. However, if you can’t find spaghetti squash, you might want to try a different recipe using cauliflower rice instead.
- Eggs: The eggs are important as a binder, but if you’re vegan, you can try using 2 flax eggs (2 tablespoons ground flaxseed mixed with 6 tablespoons water, let sit for 15 minutes). Note that the crust might be a bit more fragile.
- Mozzarella cheese: Feel free to use other melting cheeses like provolone or monterey jack. For dairy-free needs, you can try dairy-free mozzarella shreds, though the texture might be slightly different.
- Garlic salt: You can swap this with a mix of regular salt and garlic powder, or use Italian seasoning with a pinch of salt for extra flavor.
- Nonstick cooking spray: A light brush of olive oil or any cooking oil works just as well here.
Watch Out for These Mistakes While Cooking
The biggest challenge when making spaghetti squash pizza crust is dealing with excess moisture, which can make your crust soggy instead of crispy – after cooking your squash, let it cool completely and squeeze out as much liquid as possible using a clean kitchen towel or cheesecloth.
Getting the right texture also depends on spreading the crust evenly on your baking sheet – aim for about 1/4 inch thickness throughout, and make sure to create a slight rim around the edges to hold your toppings.
To prevent a soft, floppy crust, don’t skip the pre-baking step before adding your toppings – bake the crust alone until it’s golden brown and feels firm to the touch, which usually takes about 15-20 minutes.
For the crispiest results, avoid overloading your pizza with wet toppings, and if using vegetables, consider pre-cooking them to remove excess moisture that could make your crust wet.
What to Serve With Spaghetti Squash Pizza?
Since this pizza has a lighter, low-carb crust, it pairs really well with fresh sides that won’t weigh you down. A simple arugula salad tossed with olive oil and lemon juice makes the perfect companion, adding a peppery crunch to your meal. If you’re looking to round things out, try serving it with some roasted vegetables like Brussels sprouts or broccoli – they can even share the oven while your pizza crust is cooking. For a complete Italian-inspired spread, add a small bowl of marinated olives or a caprese skewer on the side.
Storage Instructions
Keep Fresh: This spaghetti squash pizza crust stays good in the fridge for up to 3 days. Just wrap it tightly in plastic wrap or place it in an airtight container. I recommend storing the plain crust without toppings – this way you can add fresh toppings when you’re ready to eat!
Freeze: You can freeze the pre-baked crust (without toppings) for up to 2 months. Place pieces of parchment paper between each crust if you’re stacking them, then wrap well in foil and pop in a freezer bag. This is super handy for quick weeknight dinners!
Prepare: When you’re ready to use your stored crust, let it thaw in the fridge if frozen. Then pop it in a 400°F oven for about 5-7 minutes to crisp up before adding your toppings. This extra step helps prevent any sogginess and gives you that nice pizza-like texture.
| Preparation Time | 15-20 minutes |
| Cooking Time | 70-90 minutes |
| Total Time | 85-110 minutes |
| Level of Difficulty | Medium |
Estimated Nutrition
Estimated nutrition for the whole recipe (without optional ingredients):
- Calories: 300-350
- Protein: 20-25 g
- Fat: 15-20 g
- Carbohydrates: 30-35 g
Ingredients
For the crust:
- 1/2 tsp garlic salt
- 1 small spaghetti squash
- nonstick cooking spray (I use Pam Original)
- 2 large eggs (beaten lightly)
- 1/2 cup shredded mozzarella cheese (part-skim for less moisture)
For the toppings:
- pizza sauce (I use Muir Glen organic pizza sauce)
- cherry tomato halves
- shredded mozzarella cheese
- fresh basil (finely chopped for garnish)
Step 1: Prepare and Cook the Spaghetti Squash
Preheat your oven to 400°F (200°C).
Use a small paring knife to puncture the spaghetti squash several times all over its surface.
Place the squash on a baking sheet and bake it in the preheated oven until it becomes tender, which should take about 1 hour.
Once done, allow it to cool until it is manageable to handle.
Step 2: Process the Spaghetti Squash
Once cooled, cut the spaghetti squash open lengthwise.
Use a fork to scrape out the seeds and discard them.
Then, continue using the fork to pull the spaghetti-like strands of flesh from the peel.
Wrap the pulled squash in a clean dishtowel and squeeze out as much excess water as possible.
Drying the squash is crucial for achieving a better crust texture.
Step 3: Prepare the Squash Crust Mixture
In a large mixing bowl, whisk together the eggs, shredded mozzarella, and garlic salt until well mixed.
Add the dried spaghetti squash strands to the bowl and stir until the mixture is thoroughly combined and uniform.
Step 4: Form and Bake the Squash Crust
Line a baking sheet with parchment paper and spray it lightly with nonstick cooking spray.
Transfer the squash and cheese mixture to the center of the prepared baking sheet.
Spread the mixture evenly into a 10-inch circle.
Return it to the oven and bake until the crust is golden brown, which should take about 20 minutes.
Step 5: Add Toppings and Final Bake
Once the crust has baked, remove it from the oven and spread your desired amount of pizza sauce evenly over the crust.
Add your choice of toppings, whether it’s additional cheese, vegetables, or meats.
Return the pizza to the oven and bake for an additional 10 minutes, or until the cheese is melted and bubbly.
Step 6: Serve the Pizza
Remove the pizza from the oven and allow it to cool slightly before slicing.
Enjoy your delicious, homemade spaghetti squash crust pizza hot from the oven!
