Finding the perfect apple pie recipe when someone in your family can’t have cinnamon can feel like an uphill battle. After all, most traditional apple pie recipes rely heavily on that warm spice to create that classic fall flavor we all love, and it can seem impossible to recreate that same cozy taste without it.
Fortunately, this apple pie without cinnamon delivers all the comfort and sweetness you’re craving. It uses a blend of other warm spices and lets the natural apple flavor really shine through, proving that you don’t need cinnamon to make an incredible homemade pie.
Why You’ll Love This Apple Pie
- Perfect for cinnamon-sensitive folks – Finally, an apple pie that lets the natural sweetness of the apples shine through without overpowering spices, making it ideal for those who can’t have cinnamon or simply prefer a cleaner apple flavor.
- Simple, classic ingredients – You probably already have most of these pantry staples on hand, so you can whip up this pie without a special grocery store trip.
- Foolproof recipe – With straightforward steps and basic techniques, even beginner bakers can create a beautiful, delicious pie that looks like it came from a bakery.
- Crowd-pleasing dessert – This traditional apple pie appeals to everyone and works perfectly for holidays, potlucks, or any time you want to treat your family to homemade comfort.
What Kind of Apples Should I Use?
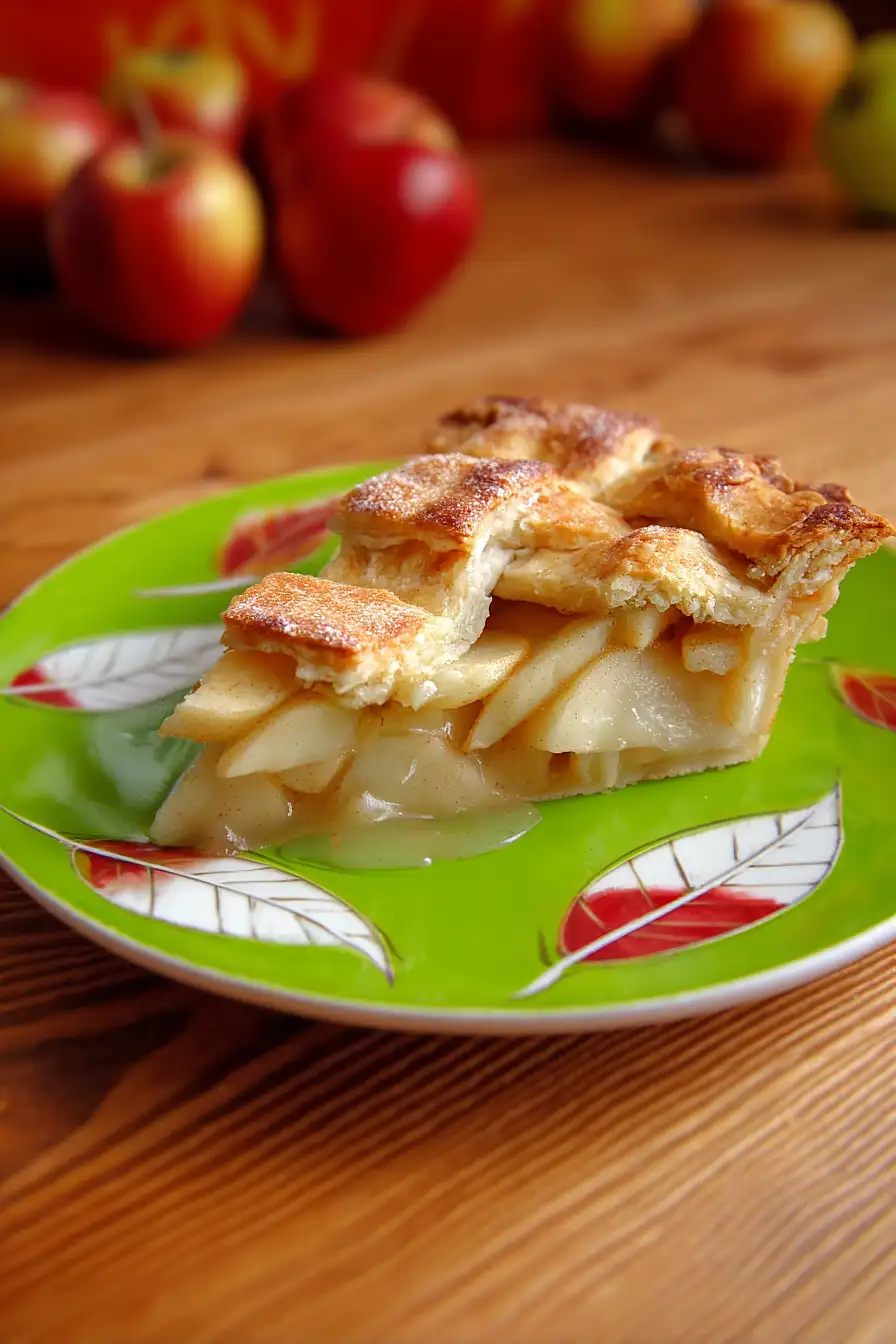
The best apples for pie are ones that hold their shape when baked and have a good balance of sweet and tart flavors. Granny Smith apples are a classic choice because they stay firm and provide that nice tangy bite, while Honeycrisp and Braeburn apples offer great texture with a bit more sweetness. You can also mix different varieties – try combining a tart apple like Granny Smith with a sweeter one like Gala or Fuji for more complex flavor. Just avoid really soft apples like Red Delicious, as they’ll turn mushy during baking and won’t give you those nice apple chunks you want in your pie.
Options for Substitutions
This simple apple pie recipe is pretty forgiving when it comes to swaps:
- Apples: Mix and match your favorite baking apples like Granny Smith, Honeycrisp, or Braeburn. You can even use a combination of different varieties for more complex flavor – just stick to firm apples that won’t turn to mush when baked.
- Lemon juice: If you’re out of fresh lemons, bottled lemon juice works fine. You can also use lime juice or even a splash of apple cider vinegar to prevent the apples from browning.
- All-purpose flour: Cornstarch works great as a thickener too – just use 2 tablespoons instead of 3. Tapioca starch is another good option if you have it on hand.
- Pie crusts: Store-bought crusts save time, but homemade works just as well. You can even make a crumb topping instead of a top crust if you prefer – just mix butter, flour, and sugar together.
- Milk: The milk is just for brushing the crust, so heavy cream, half-and-half, or even beaten egg will give you that nice golden color on top.
- Maple sugar: Regular granulated sugar works perfectly fine for sprinkling on top. Brown sugar or even a light dusting of cinnamon sugar (if you change your mind about the no-cinnamon rule) are tasty alternatives.
Watch Out for These Mistakes While Baking
The biggest mistake when making apple pie is choosing the wrong apple variety – soft apples like Red Delicious will turn to mush during baking, so stick with firm varieties like Granny Smith, Honeycrisp, or Braeburn that hold their shape.
Another common error is not pre-cooking your apples slightly, which can leave you with a gap between the filling and top crust as the apples shrink during baking – try sautéing them for 3-4 minutes before assembling your pie.
Don’t skip tossing your apple slices with lemon juice right after cutting them, as this prevents browning and adds a nice tangy balance to the sweetness.
Finally, make sure to cut several steam vents in your top crust and brush it with milk before sprinkling with sugar – this creates a beautiful golden finish and prevents the crust from puffing up too much.
What to Serve With Apple Pie?
Apple pie is perfect on its own, but a scoop of vanilla ice cream on top makes it even better – the cold creaminess pairs beautifully with the warm, sweet apples. You can also serve it with a dollop of fresh whipped cream or even a drizzle of caramel sauce if you’re feeling fancy. For something a little different, try pairing a slice with a cup of hot coffee or black tea, which complements the apple flavors nicely. Some people love serving apple pie with a slice of sharp cheddar cheese on the side – it might sound odd, but the tangy cheese actually balances out the sweetness really well.
Storage Instructions
Keep Fresh: Your apple pie will stay delicious covered loosely with foil or plastic wrap at room temperature for up to 2 days. After that, move it to the fridge where it’ll keep for another 3-4 days. I actually think apple pie tastes even better the next day once all those flavors have had time to meld together!
Freeze: Apple pie freezes really well for up to 3 months. You can freeze it whole (wrapped tightly in plastic wrap and foil) or cut it into individual slices first. I love having pre-cut pieces in the freezer for when I want just a single serving without thawing the whole pie.
Warm Up: To bring back that fresh-baked taste, warm individual slices in the microwave for 20-30 seconds or pop the whole pie in a 350°F oven for about 15 minutes. If you’re warming from frozen, let it thaw in the fridge overnight first, then warm as usual.
| Preparation Time | 30-45 minutes |
| Cooking Time | 60-70 minutes |
| Total Time | 90-115 minutes |
| Level of Difficulty | Medium |
Estimated Nutrition
Estimated nutrition for the whole recipe (without optional ingredients):
- Calories: 3000-3400
- Protein: 20-28 g
- Fat: 90-110 g
- Carbohydrates: 550-600 g
Ingredients
For the apple filling:
- 1 cup granulated sugar
- 4 tbsp lemon juice (freshly squeezed for best flavor)
- 3 tbsp all-purpose flour (I always use King Arthur all-purpose flour)
- 1 tsp vanilla extract
- 1/4 tsp salt
- 3-4 lb apples (about 8 medium, such as Honeycrisp or Granny Smith)
For the pie crust and topping:
- 2 tbsp sugar (granulated or maple sugar for a hint of caramel)
- 2 prepared pie crusts (store-bought or homemade)
- 2 tbsp milk (whole milk gives a richer color)
Step 1: Prepare the Pie Crust Base
- 2 prepared pie crusts
Grease a pie pan with butter, lard, or shortening as desired.
Roll out one of the prepared pie crusts and carefully line the greased pan with it.
Cover the crust with plastic wrap and place it in the refrigerator while you prepare the filling.
Step 2: Prep and Slice the Apples
- 3 to 4 lb apples (about 8 medium or large)
- 4 tbsp lemon juice, divided
Peel all the apples, placing each peeled apple into a large bowl filled with water and 2 tablespoons of lemon juice to prevent browning.
Once all apples are peeled, drain and discard the lemon water.
Next, cut each apple into 16 pieces (or cut large apples into wedges and smaller apples into 8 wedges, then halve those wedges) to create evenly sized pieces.
Step 3: Make the Apple Filling
- 1 cup granulated sugar
- 3 tbsp all-purpose or gluten-free flour
- 1 tsp vanilla extract
- 1/4 tsp salt
- apples (peeled and sliced from Step 2)
- 4 tbsp lemon juice, divided
In a large bowl, combine the granulated sugar, flour, vanilla extract, salt, and the remaining 2 tablespoons of lemon juice.
Add the cut apple pieces into the mixture and stir until the apples are well coated and everything is evenly distributed.
I like to gently toss rather than stir vigorously, as this keeps the apples from breaking down before baking.
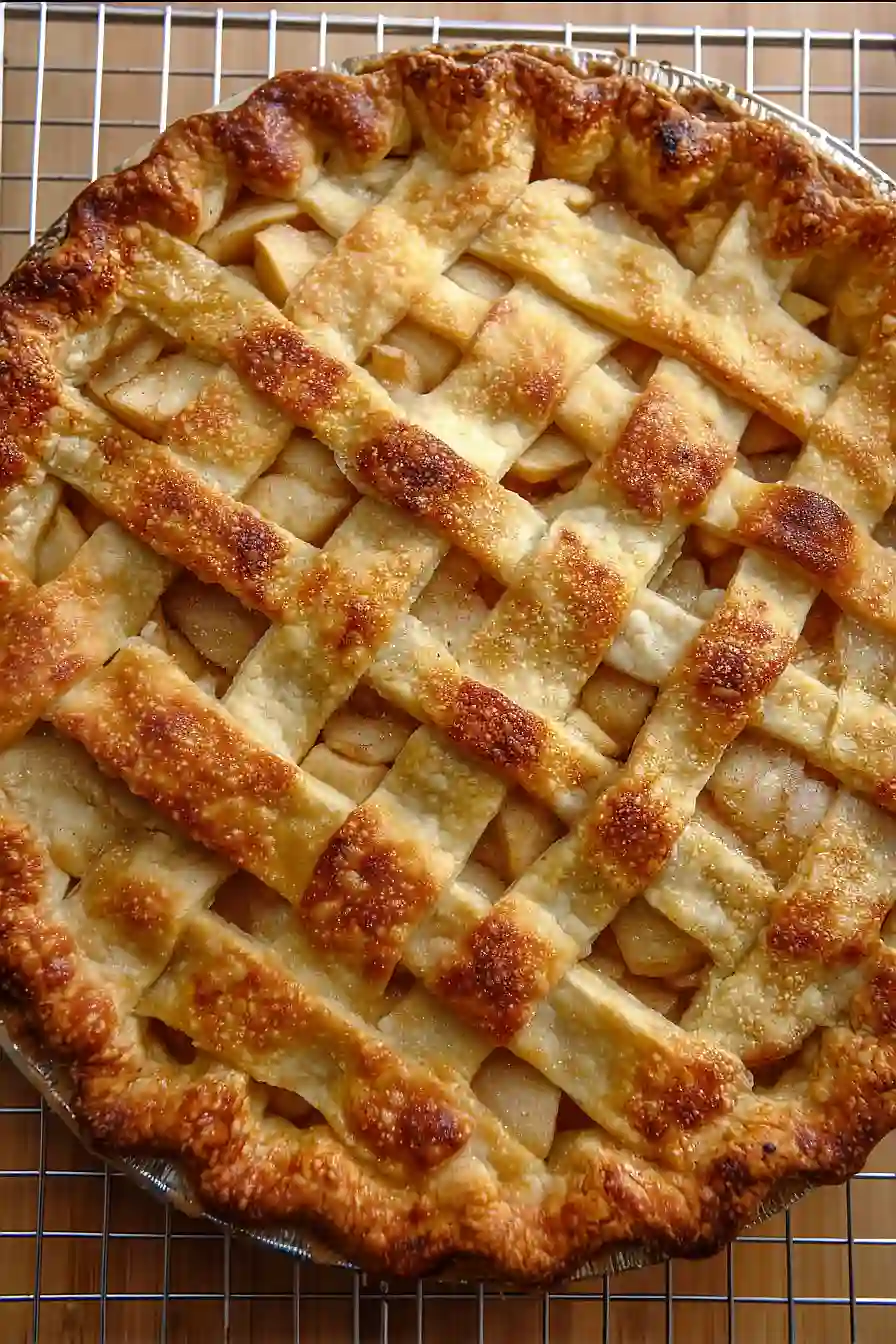
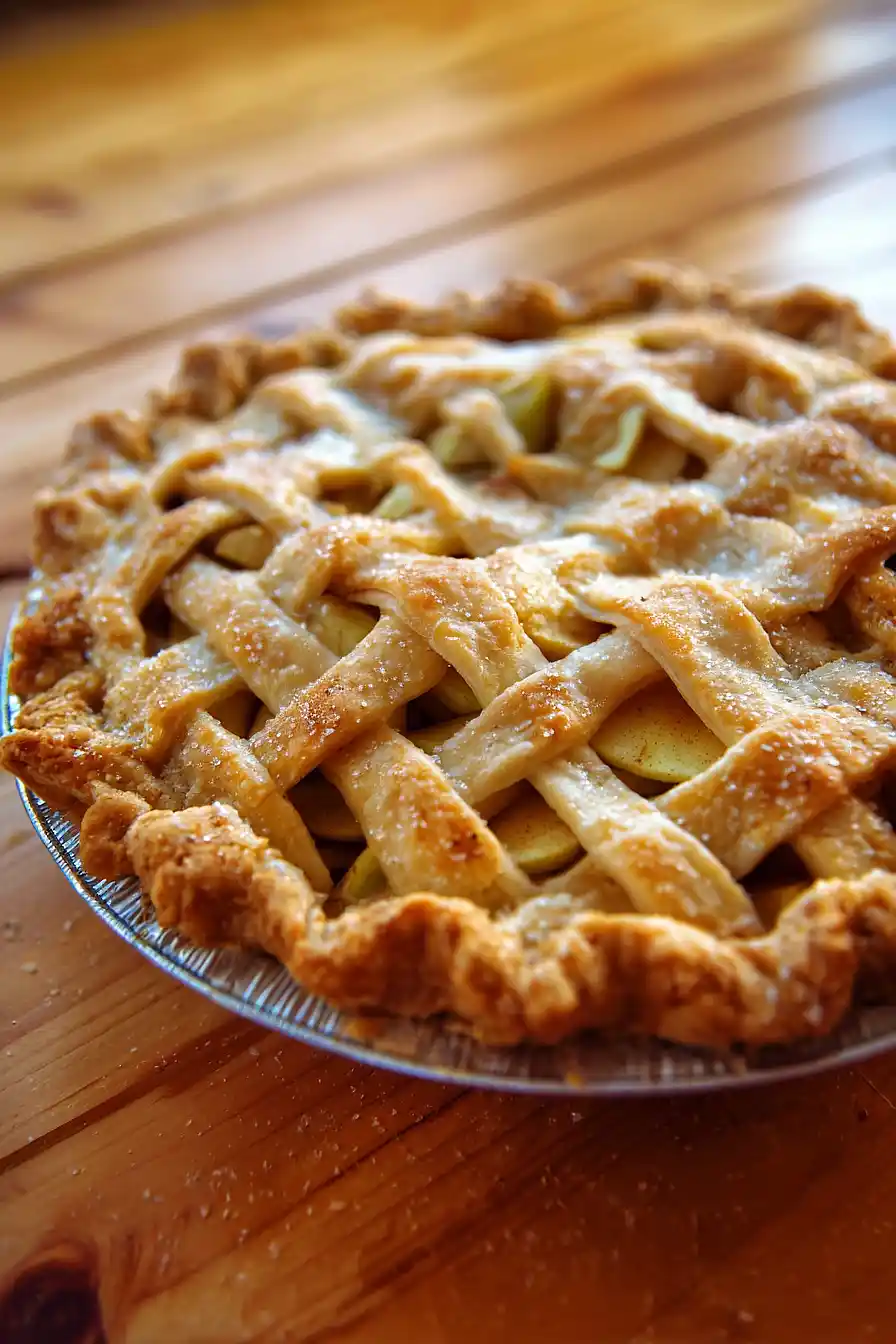
Step 4: Assemble the Pie and Create the Lattice Top
- 2 prepared pie crusts
- apple filling (from Step 3)
Preheat the oven to 425°F (220°C).
Roll out the second prepared pie crust on a floured surface and cut it into strips about 3/4 to 1 inch wide to create the lattice.
Fill the chilled pie crust-lined pan with the prepared apple mixture (from Step 3), mounding the filling just above the rim.
Lay half of the dough strips across the pie in one direction with about 1/2 inch gaps.
Fold back every other strip halfway, then lay a new strip perpendicular and alternate folding the strips to weave a lattice across the top.
Trim any excess dough and press the lattice and bottom crust edges together to seal.
Step 5: Brush, Sprinkle, and Bake the Pie
- 2 tbsp milk
- 2 tbsp sugar (granulated or maple recommended)
Brush the lattice top and crust rim with milk, then sprinkle the top evenly with granulated or maple sugar for a beautiful finish.
Place the pie in the center of the preheated oven and bake for 20 minutes at 425°F (220°C).
Reduce the oven temperature to 375°F (190°C) and bake for another 20 minutes.
If the top browns too quickly, loosely cover with foil.
Continue baking for an additional 20 minutes until the crust is golden and the filling bubbles.
I always bake my pies on a baking sheet to catch any drips—it saves so much cleanup!
Step 6: Cool and Serve the Pie
Remove the pie from the oven and let it cool for at least 2 hours before slicing.
This resting time helps the filling set and improves the flavor.
For even better taste, I recommend letting the pie rest overnight before serving.
