If you ask me, Russian Neapolitan cake is one of those desserts that sounds fancy but isn’t scary to make.
This layered cake brings together three simple flavors – vanilla, chocolate, and strawberry – just like the ice cream we all know and love. Each layer is soft and moist, with a smooth buttercream that ties everything together.
The cake gets assembled with alternating colors that create a pretty striped effect when you slice into it. It’s not too sweet, and the different flavors keep each bite interesting.
It’s the kind of dessert that makes people think you spent way more time in the kitchen than you actually did.
Why You’ll Love This Russian Neapolitan Cake
- Store-bought puff pastry shortcut – Using Pepperidge Farm puff pastry saves you hours of work while still giving you those beautiful, flaky layers that make this cake so special.
- Impressive presentation – This cake looks like it came from a fancy bakery, but it’s totally doable at home with simple techniques that anyone can master.
- Rich, creamy filling – The smooth custard filling made with egg yolks and butter creates the perfect contrast to the crispy pastry layers.
- Perfect for special occasions – Whether it’s a birthday, holiday, or dinner party, this cake will definitely wow your guests and make any celebration feel extra special.
- Make-ahead friendly – You can prepare this cake a day ahead, which actually helps the layers soften just right and makes serving so much easier.
What Kind of Puff Pastry Should I Use?
For this Russian Napoleon cake, you’ll want to use high-quality frozen puff pastry that comes in sheets rather than shells. Pepperidge Farm is a solid choice that’s widely available and gives consistent results, but other brands like Dufour or Trader Joe’s work just as well. The key is making sure your puff pastry is fully thawed before you start working with it – this usually takes about 40 minutes at room temperature. If you’re feeling ambitious, you can certainly make your own puff pastry from scratch, but the store-bought version will save you hours of work and still give you those crispy, flaky layers that make this cake so special.
Options for Substitutions
This Russian cake is pretty forgiving when it comes to swaps, so here are some options if you’re missing ingredients:
- Puff pastry: This is really the star of the show, so I’d recommend sticking with store-bought puff pastry for best results. If you can’t find Pepperidge Farm, any frozen puff pastry brand will work just fine.
- Whole milk: You can use 2% milk if that’s what you have, though the custard might be slightly less rich. Heavy cream mixed with regular milk (half and half) will make it even creamier.
- Cool Whip: Fresh whipped cream works great here – just whip 1/2 cup heavy cream with 1-2 tablespoons powdered sugar until soft peaks form. You can also use mascarpone or cream cheese (softened) for a tangier flavor.
- Unsalted butter: Salted butter is fine to use – just reduce any additional salt in the recipe. Make sure it’s at room temperature for easy mixing.
- All-purpose flour: Cornstarch works as a substitute for thickening the custard – use 2 tablespoons instead of 4 tablespoons flour and whisk it well to avoid lumps.
Watch Out for These Mistakes While Baking
The biggest mistake when making Russian Napoleon cake is rushing the pastry baking process – each puff pastry layer needs to be rolled thin and baked until golden brown, not just lightly colored, or you’ll end up with chewy layers instead of crispy ones.
Another common error is making the pastry cream too thick or lumpy, so make sure to whisk constantly while adding the hot milk to the egg mixture and strain it if needed to remove any lumps.
Don’t skip the overnight resting period after assembly, as this crucial step allows the crispy pastry layers to soften slightly from the cream, creating the perfect tender texture that makes this cake so special.
Finally, resist the urge to cut into the cake too early – waiting at least 8 hours (or preferably overnight) in the refrigerator ensures clean slices and the best flavor development.

What to Serve With Russian Neapolitan Cake?
This rich, layered cake is pretty much a showstopper on its own, so you don’t need much to go with it! A simple cup of black coffee or strong tea is perfect for cutting through all that creamy goodness and buttery puff pastry. If you’re serving it for a special occasion, a glass of dessert wine or even some fresh berries on the side can be a nice touch. Since this cake is quite decadent, I like to keep the accompaniments light and simple so the cake can really shine as the star of the dessert table.
Storage Instructions
Refrigerate: This cake needs to stay chilled since it has pastry cream and cool whip. Keep it covered in the fridge for up to 4 days. I actually think it tastes better after sitting overnight because all the flavors meld together and the pastry softens just right.
Freeze: You can freeze individual slices wrapped tightly in plastic wrap for up to 2 months. Just place them on a baking sheet first to freeze solid, then transfer to a freezer bag. This way you can grab a piece whenever you’re craving something sweet!
Serve: Let frozen slices thaw in the fridge for about 3-4 hours before serving. The texture is best when it’s nice and cold, so don’t leave it out at room temperature for too long. A chilled slice with a cup of coffee is pure heaven!
| Preparation Time | 30-45 minutes |
| Cooking Time | 20-30 minutes |
| Total Time | 50-75 minutes |
| Level of Difficulty | Medium |
Estimated Nutrition
Estimated nutrition for the whole recipe (without optional ingredients):
- Calories: 5400-5800
- Protein: 52-58 g
- Fat: 340-370 g
- Carbohydrates: 530-570 g
Ingredients
For the custard filling:
- 4 oz whipped topping (thawed Cool Whip brand is good for this)
- 1/2 tsp vanilla extract (for best aroma)
- 4 egg yolks
- 4 tbsp all-purpose flour
- 1 cup granulated sugar
- 3 1/2 cups whole milk
- 1/2 cup unsalted butter (softened, I prefer Kerrygold)
For the pastry:
- 3 lb puff pastry (thawed, I like Pepperidge Farm)
Step 1: Make the Egg Mixture
- 4 egg yolks
- 1 cup granulated sugar
- 4 tbsp all-purpose flour
- 1/2 cup whole milk
In a large bowl, beat the egg yolks and granulated sugar together using an electric mixer until the mixture is smooth and pale.
Add the flour and mix until fully incorporated, then blend in 1/2 cup of the whole milk to create a thick, smooth batter.
Step 2: Heat the Milk and Cook the Custard
- 3 cups whole milk (remaining from 3 1/2 cups)
In a saucepan, bring the remaining 3 cups of whole milk to a slight simmer over medium heat, being careful not to let it boil.
Gradually pour the hot milk into the egg mixture from Step 1, whisking constantly to prevent curdling.
Pour the combined mixture back into the saucepan and cook over medium-low heat, stirring constantly, until the custard thickens—this may take up to 15 minutes.
Once thickened, remove from the heat, press plastic wrap directly onto the surface of the custard to prevent a skin from forming, and let it cool completely.
I always make sure to stir the custard the entire time to avoid lumps.
Step 3: Prepare and Bake the Puff Pastry
- 3 lb frozen puff pastry (Pepperidge Farm brand)
While the custard cools, thaw the puff pastry sheets.
On a floured surface, roll each sheet out to approximately 12 x 16 inches.
Transfer each sheet to a baking sheet, then generously prick the surface with a fork to prevent excessive puffing.
Bake the sheets in a preheated 400°F (200°C) oven for 20 minutes or until golden brown.
Allow the pastry sheets to cool completely before handling.
Step 4: Finish the Custard Cream
- cooled custard (from Step 2)
- 1/2 cup unsalted butter, softened
- 1/2 tsp vanilla extract
- 4 oz whipped topping (thawed, such as Cool Whip)
Once the custard (from Step 2) has cooled completely, add the softened butter, 2 tablespoons at a time, mixing well between each addition to prevent the cream from separating.
Next, blend in the vanilla extract and thawed whipped topping until just combined.
The custard cream should be smooth and airy.
For an extra-silky texture, I like to give the final cream a quick whisk to lighten it further.
Step 5: Assemble the Cake Layers
- finished custard cream (from Step 4)
- 5 baked puff pastry sheets (from Step 3)
Divide the finished custard cream (from Step 4) evenly among five of the baked and cooled puff pastry sheets (from Step 3), spreading it in an even layer to the edges.
Stack the sheets to form a multi-layered cake, pressing down lightly with each layer to ensure even distribution of the cream.
Reserve the sixth pastry sheet for decoration.
Step 6: Decorate the Cake
- reserved baked puff pastry sheet (from Step 3)
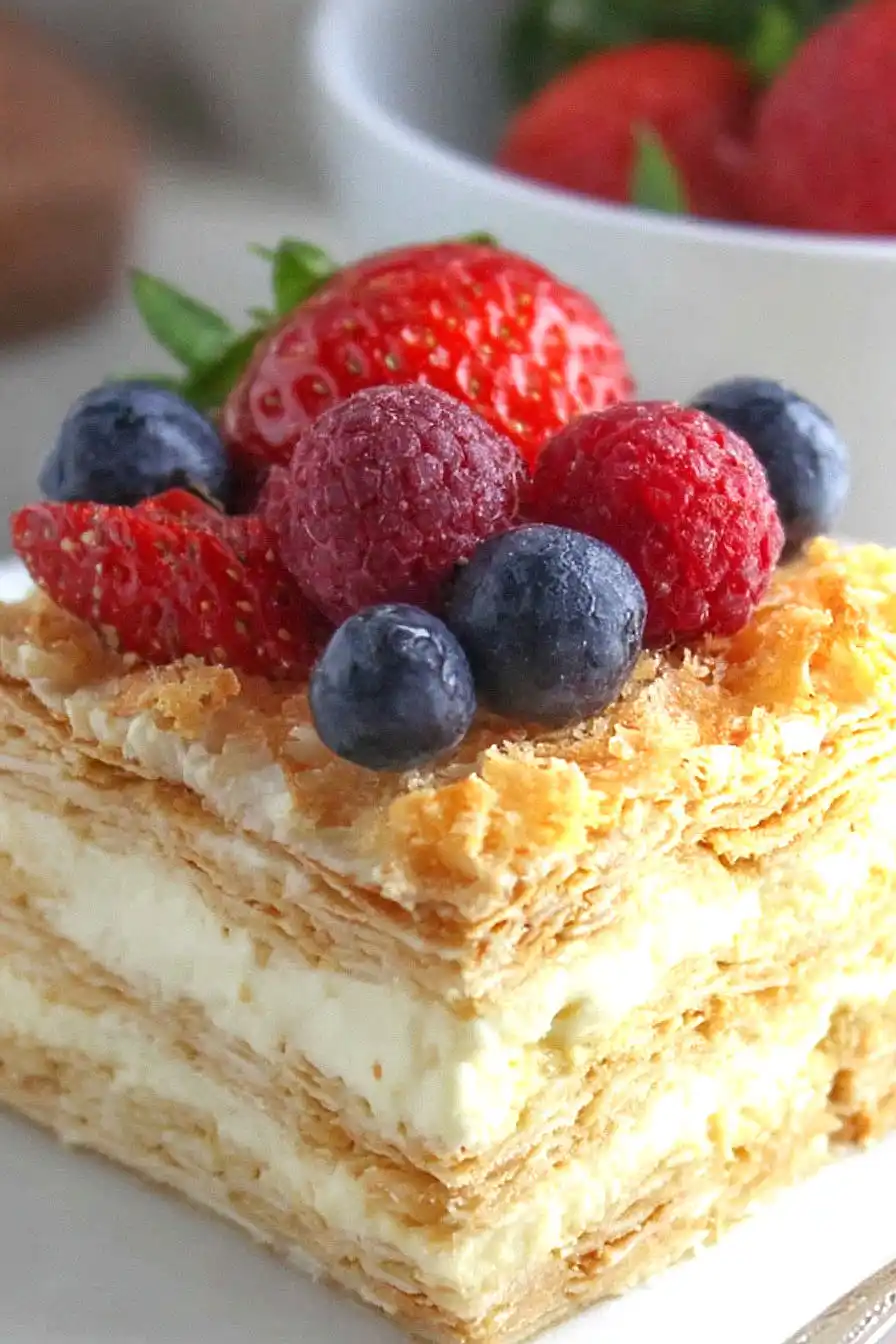
Crumble the reserved sixth puff pastry sheet into small pieces.
Press these crumbs onto the top and sides of the assembled cake, coating it thoroughly.
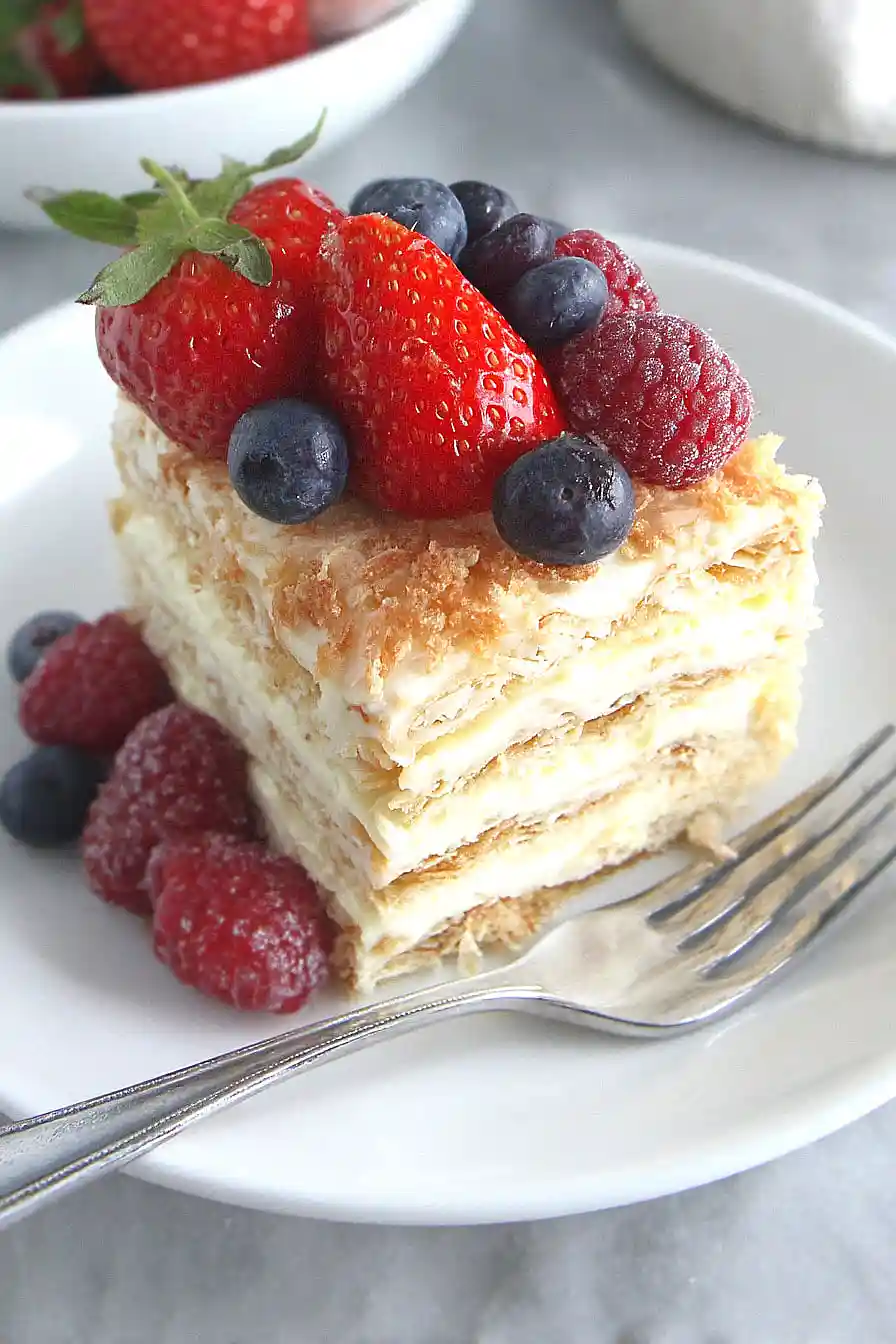
Optionally, you can decorate with fresh berries or powdered sugar.
I like to let the finished cake chill in the refrigerator for several hours before serving to allow the layers to meld together perfectly.
