Finding creative ways to use up every part of your vegetables can feel like a puzzle, especially when you’re trying to minimize food waste in the kitchen. We often toss beet greens without a second thought, even though they’re packed with nutrients and have a mild, pleasant taste that works well in many recipes.
That’s why these beet leaf buns have become such a favorite in my household – they’re a smart way to use those leftover greens, easy to make ahead of time, and they always get eaten up quickly whether served as dinner rolls or made into sandwiches for lunch boxes.
Why You’ll Love These Beet Leaf Buns
- Unique twist on bread – These buns combine traditional bread-making with beet leaves for a creative take on dinner rolls that will make your meal extra special.
- Zero-waste cooking – Instead of throwing away beet greens, this recipe puts them to delicious use, making the most of your produce while adding nutrition to your bread.
- Simple ingredients – You’ll only need basic pantry staples plus beet leaves to make these buns – no fancy ingredients required.
- Make-ahead friendly – These buns can be prepared in advance and reheated when needed, perfect for busy weeknight dinners or holiday meal prep.
What Kind of Beet Leaves Should I Use?
When it comes to beet leaves for these buns, you’ll want to look for fresh, bright green leaves that are firm and crisp, without any yellowing or wilting. You can use leaves from any variety of beets – red, golden, or striped – since the leaves are nutritionally similar and work equally well in this recipe. If you’re picking them fresh from the garden or farmers market, smaller leaves tend to be more tender and less bitter than larger ones, though larger leaves work fine when cut properly. Just make sure to give them a good wash to remove any dirt or grit, and dry them thoroughly before using them in your recipe.
Options for Substitutions
Here are some helpful substitutions you can try with this recipe:
- Beet leaves: If you can’t find beet leaves, you can use Swiss chard leaves or collard greens. Just make sure to remove the tough stems and blanch them briefly in hot water to make them more pliable.
- Milk: You can swap regular milk with plant-based alternatives like soy milk or almond milk. Just make sure to use unsweetened versions. You could also use water, but the buns won’t be as tender.
- All-purpose flour: While all-purpose flour works best for these buns, you can use bread flour for a chewier texture. You can replace up to 1 cup with whole wheat flour, but know that the buns will be denser.
- Butter: Feel free to use any neutral-flavored oil like canola or even more olive oil instead of melted butter. Vegan butter also works well here.
- Dry yeast: If you only have instant yeast, use the same amount but you can skip the proofing step with warm water and sugar – just add it directly to your dry ingredients.
- Olive oil: Any neutral cooking oil will work for coating the buns, such as vegetable oil, canola oil, or even melted butter.
Watch Out for These Mistakes While Baking
The trickiest part of making beet leaf buns is working with yeast – if your milk and water are too hot (above 110°F), you’ll kill the yeast and your dough won’t rise properly, but if they’re too cool, the activation will be slow.
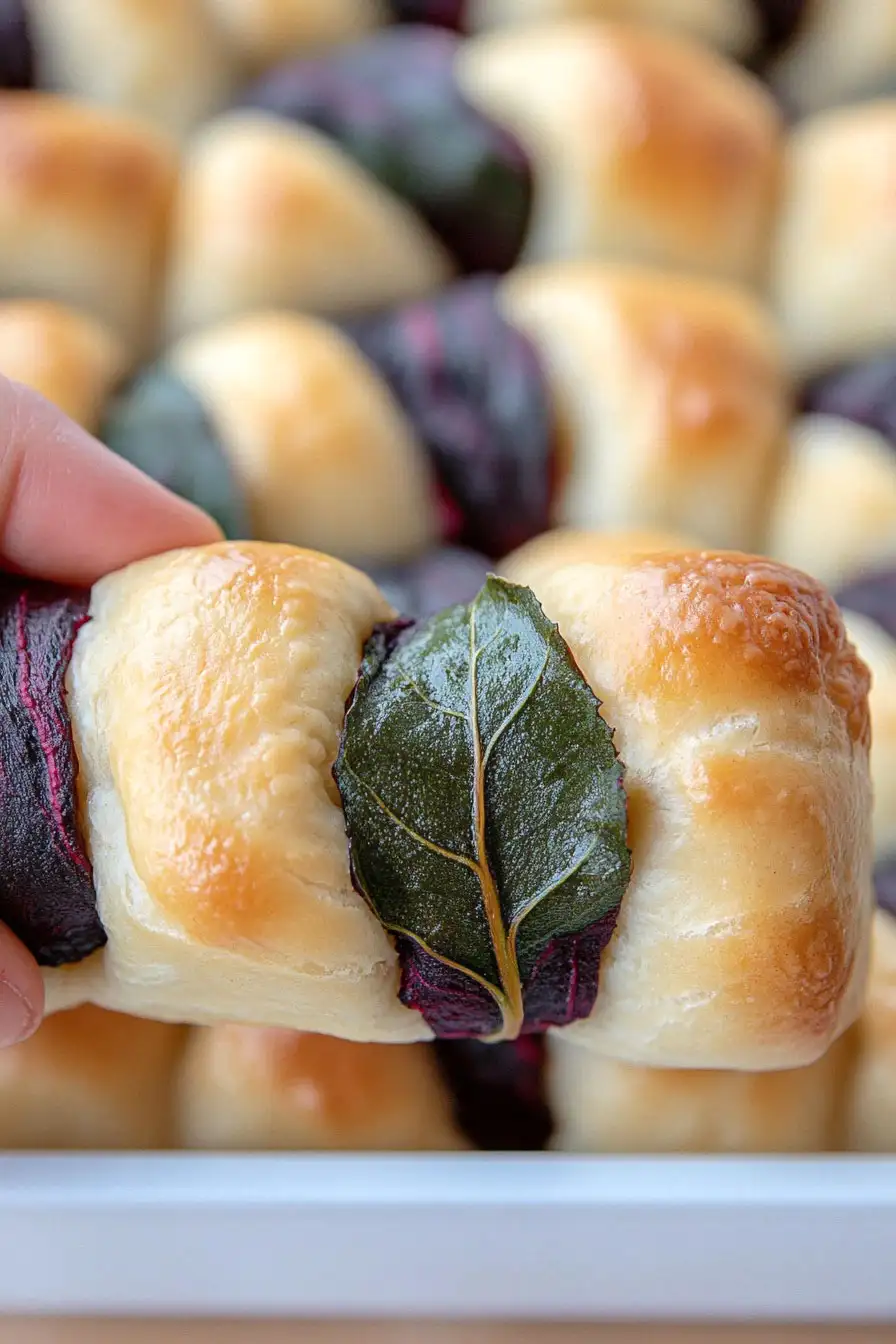
When handling beet leaves, make sure to wash them thoroughly and pat them completely dry, as excess moisture can make your buns soggy – also, remove any thick stems that could tear through the dough during baking.
Many bakers make the mistake of rushing the rising process – give your dough enough time to double in size during both rises (usually about 1 hour each), and don’t forget to place the dough in a warm, draft-free spot.
For the best texture, avoid adding too much flour when kneading – the dough should be slightly sticky but still manageable, and remember to brush the finished buns with melted butter right after baking to keep the crust soft.
What to Serve With Beet Leaf Buns?
These unique buns make a fantastic addition to any cozy dinner spread! Since they’re wrapped in beet leaves, they pair wonderfully with hearty soups and stews – try serving them alongside a bowl of beef bourguignon or mushroom soup for soaking up all those tasty juices. They’re also great companions to roasted meats like chicken or pork, especially when spread with a pat of butter while they’re still warm. For a simple lunch option, split these buns and use them to make sandwiches filled with your favorite cold cuts, cheese, and fresh vegetables.
Storage Instructions
Keep Fresh: These beet leaf buns stay fresh at room temperature for up to 2 days when kept in a paper bag or bread box. The paper bag helps maintain the perfect crust while letting the bread breathe. For longer storage, pop them in an airtight container in the fridge for up to 5 days.
Freeze: These buns are great for freezing! Let them cool completely, then place them in a freezer bag, squeezing out as much air as possible. They’ll keep well for up to 3 months in the freezer. I like to freeze them in smaller portions so I can thaw just what I need.
Refresh: To bring back that fresh-baked taste, sprinkle a few drops of water on the buns and warm them in a 350°F oven for about 5 minutes. If frozen, let them thaw at room temperature first. This quick refresh makes them taste almost like they just came out of the oven!
| Preparation Time | 30-45 minutes |
| Cooking Time | 20-30 minutes |
| Total Time | 1-2 hours |
| Level of Difficulty | Medium |
Estimated Nutrition
Estimated nutrition for the whole recipe (without optional ingredients):
- Calories: 1200-1400
- Protein: 30-40 g
- Fat: 40-50 g
- Carbohydrates: 180-200 g
Ingredients
For the beet leaves:
- 16 small or 18 large beet leaves
For the dough:
- 2 tsp dry yeast (I use Fleischmann’s Active Dry Yeast)
- 3 1/2 to 4 cups all-purpose flour
- 1 tsp sea salt
- 2 tbsp melted butter (I like Kerrygold unsalted butter for this)
- 1/2 cup warmed water
- 1 cup warmed milk (whole milk works best)
- 1 tsp sugar
For assembly:
- olive oil
Step 1: Prepare the Beet Leaves
Begin by thoroughly washing the beet leaves to ensure they are clean.
Place them into a large bowl and cover with very hot water.
Allow the leaves to soak and heat gently for about 15 minutes.
Once done, remove the leaves from the water and lay them out to dry on a kitchen towel while you prepare the dough.
Step 2: Make the Dough
In a large bowl or the bowl of a stand mixer, combine warm milk, water, sugar, and yeast.
Whisk these ingredients together and let the mixture sit for about 10 to 15 minutes, or until it becomes bubbly and foamy.
This indicates that the yeast is active and ready.
Step 3: Combine Ingredients and Knead the Dough
Once the yeast mixture is foamy, add flour, melted butter, and salt.
If you’re using a stand mixer, attach the dough hook and mix the dough on low speed until it’s mostly combined.
For hand mixing, use a wooden spoon to achieve a shaggy, mostly combined dough.
Turn the mixer to a higher speed and knead the dough for about 5 minutes until it pulls away from the bowl and appears smooth.
For hand-kneading, turn the dough onto the counter and knead until smooth, about 15 minutes.
Step 4: Let the Dough Rise
Remove the dough from the mixer (if applicable), lightly oil the bowl, and return the dough back to it.
If kneading by hand, also lightly oil a bowl and place the dough inside.
Cover with a towel and allow it to rise for 1-2 hours, or until it has doubled in size.
Step 5: Shape the Buns
Prepare a baking tray by greasing it with some olive oil and set it aside.
Once the dough has risen, punch it down to release the air and turn it out onto the counter.
Divide the dough into 16 equal pieces.
Take one piece and shape it into a small log.
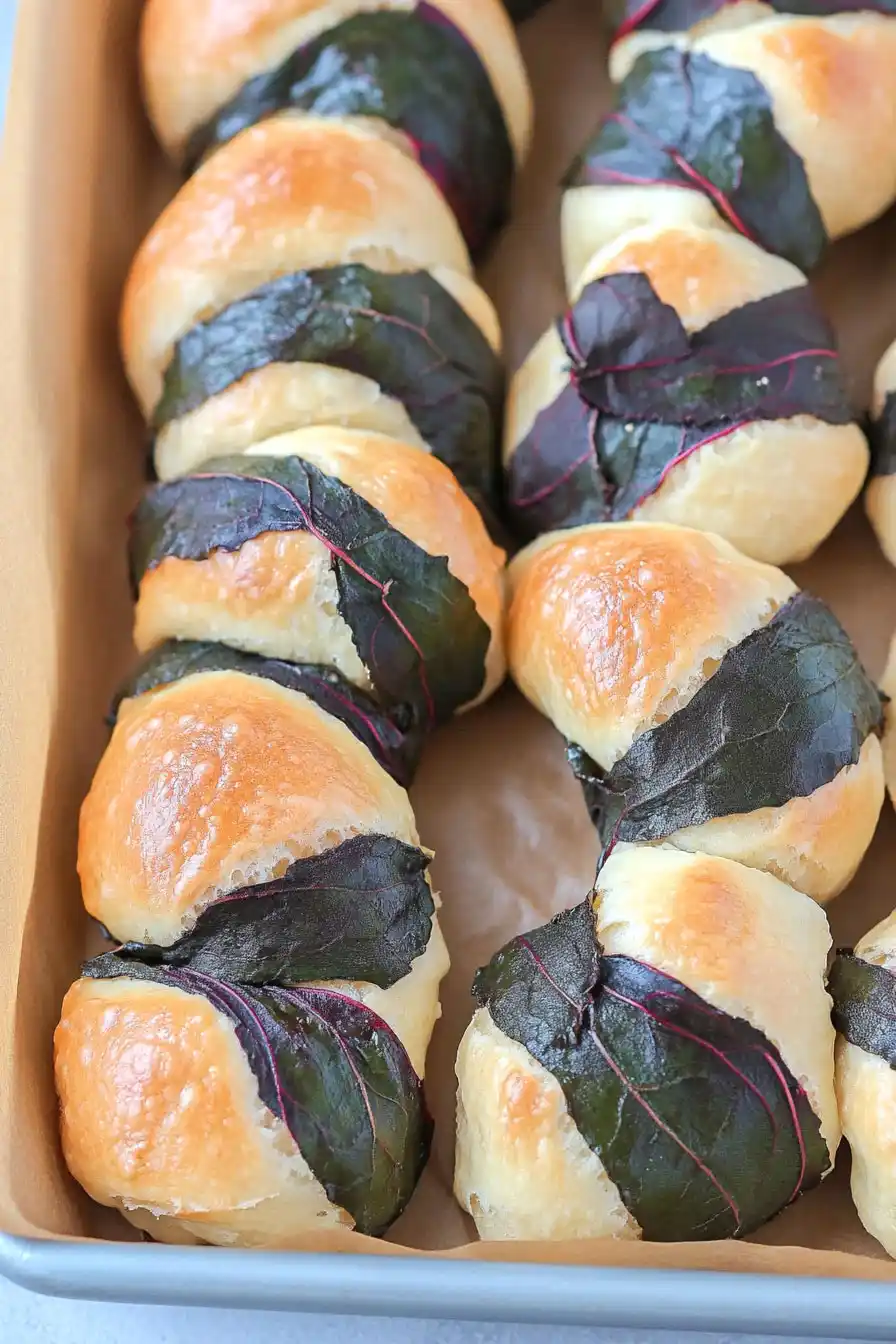
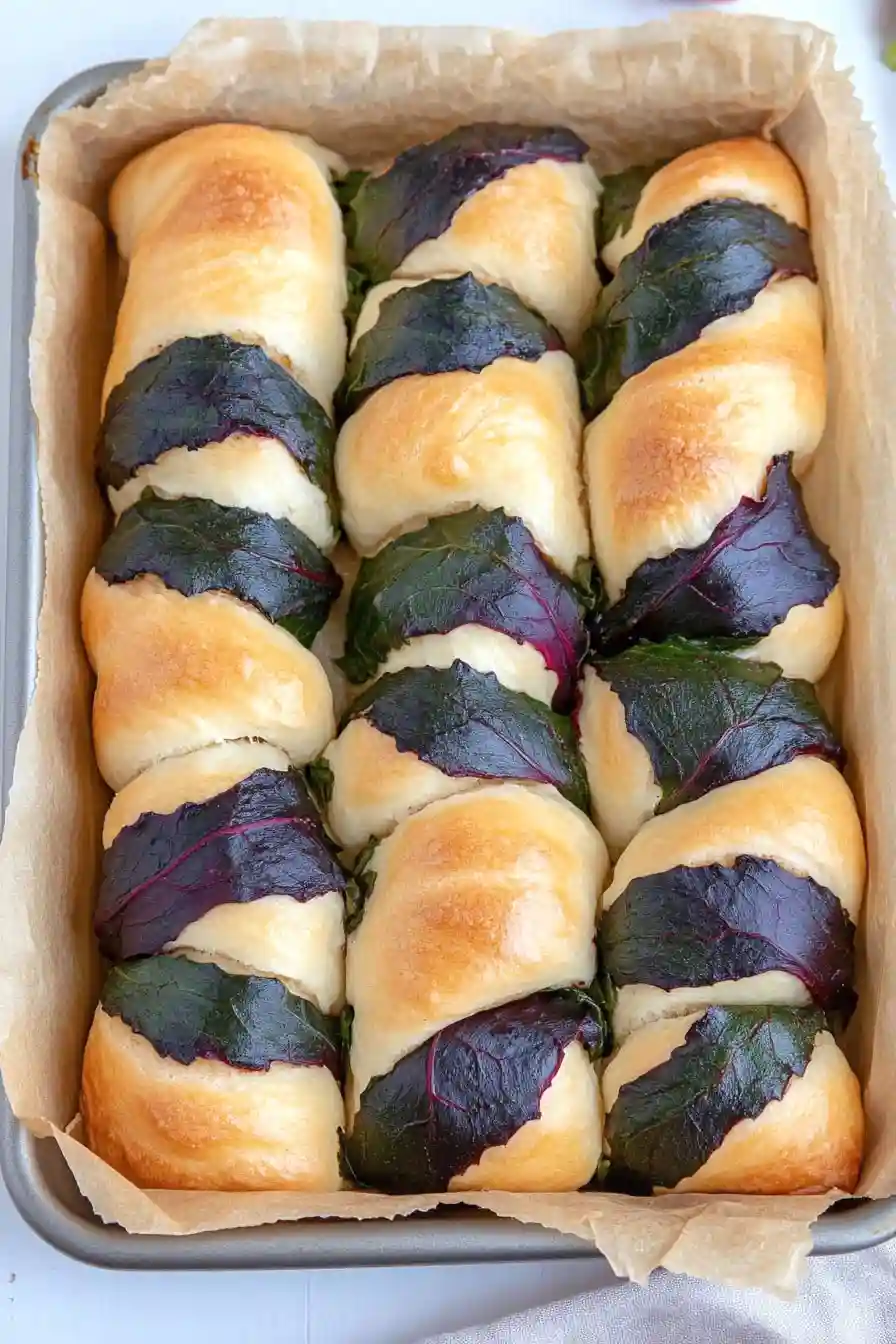
Wrap a beet leaf around the dough log and place it on the prepared baking tray.
Repeat this process with the remaining dough pieces.
Cover the tray with a towel and let the buns rest until they have doubled in size, approximately 45 minutes to 1 hour.
Step 6: Bake the Buns
Preheat your oven to 350°F (175°C).
Once the buns have risen, bake them in the preheated oven until they are golden brown, about 20 minutes.
Allow the buns to cool slightly before serving.
They are best enjoyed warm.
