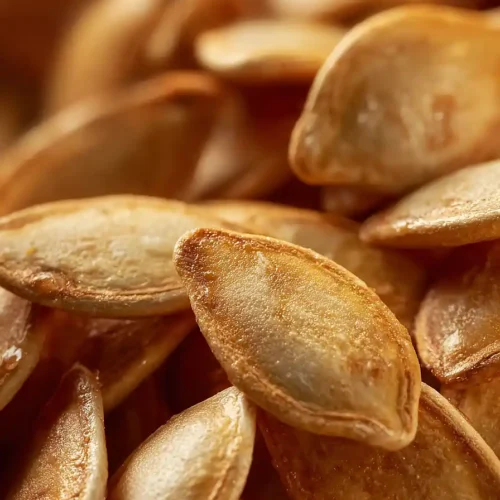
Crispy Sea Salt and Vinegar Pumpkin Seeds
Delicious Crispy Sea Salt and Vinegar Pumpkin Seeds recipe with step-by-step instructions.
Ingredients
For the soaking:
- seeds from 1 pumpkin (separated and cleaned)
- 3 tbsp white vinegar (I prefer distilled white vinegar)
- 1 hot pepper (optional for extra kick)
- 1 tbsp sea salt
For the roasting:
- 1/4 tsp flaked sea salt (I use Maldon)
- olive oil (just enough to coat)
- pinch of flaked sea salt
Instructions
- First, ensure your pumpkin seeds are separated and thoroughly cleaned of any pumpkin flesh. Place the cleaned seeds into a bowl and cover them with water. Add the white vinegar, 1 tablespoon of sea salt, and the optional sliced hot pepper. Stir to combine, ensuring the seeds are submerged. I find soaking them overnight really infuses that tangy flavor deep into the seed; it's worth the wait!
- The next day, drain the brined seeds well and transfer them to a dry bowl. Drizzle with just enough olive oil to lightly coat them, then toss with 1/4 teaspoon of flaked sea salt. This initial salting helps develop a good crust. Preheat your oven to 325°F (160°C). I always preheat my oven while I'm doing this step to make the workflow efficient.
- Spread the seasoned seeds in a single layer on a baking sheet. Bake for 8 minutes, then remove, stir the seeds to promote even browning, and sprinkle with a pinch of additional flaked sea salt. Return to the oven and repeat this stir-and-salt process two more times, baking for 8 minutes each interval. If desired, after the first 8-minute bake, you can sprinkle a little extra white vinegar for more tang.
- After the final 8-minute bake, check the seeds for dryness and crispness. They should be golden brown and crunchy. If they still feel soft or moist, continue baking, stirring and checking every 5 minutes, until they reach your desired crispness. The goal is a uniform toast and a satisfying crunch. Don't be afraid to give them a taste test during this stage; I often do to make sure they're perfectly seasoned!