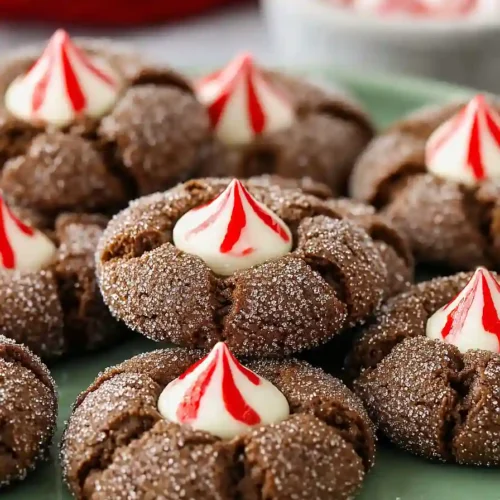
Simple Peppermint Chocolate Thumbprint Cookies
Delicious Simple Peppermint Chocolate Thumbprint Cookies recipe with step-by-step instructions.
Ingredients
For the cookie dough:
- 1 egg (room temperature)
- 1/2 cup brown sugar (packed)
- 1/2 cup unsweetened cocoa powder (for deeper chocolate flavor)
- 1/4 tsp salt
- 1 tsp baking soda
- 1.25 cups all-purpose flour (I use King Arthur all-purpose)
- 1 tsp vanilla extract
- 1/2 cup granulated sugar
- 10 tbsp unsalted butter (softened to room temperature)
For rolling:
- 3 tbsp granulated sugar (for coating)
For the filling:
- 26 peppermint candy cane Hershey's Kisses (or any peppermint chocolate kiss)
Instructions
- Preheat your oven to 350°F and line a baking sheet with parchment paper. While the oven heats, measure out all your dry ingredients—flour, cocoa powder, baking soda, and salt—into a small bowl and whisk them together. This ensures even distribution of the leavening agent and cocoa throughout the dough. Having everything prepped and ready means you can work smoothly through the mixing process without interruptions.
- In a large bowl, beat the softened butter with 1/2 cup brown sugar and 1/2 cup granulated sugar (reserve the 3 tablespoons of granulated sugar for coating) until the mixture is light and fluffy, about 2-3 minutes. This creaming process incorporates air into the dough, which helps create cookies with a tender crumb. I like to scrape down the sides of the bowl halfway through to ensure all the butter is properly incorporated—it makes a real difference in texture.
- Add the room temperature egg and vanilla extract to the creamed butter and sugars, then mix until fully combined. Now add the dry ingredient mixture from Step 1 to the wet mixture and fold everything together until just combined—avoid overmixing, as this can develop too much gluten and result in tough cookies. The dough should be thick and cohesive but not overworked.
- Portion the dough into 26 balls using about 1 tablespoon of dough per ball—an ice cream scoop works perfectly for this. Pour the reserved 3 tablespoons of granulated sugar into a shallow dish, then roll each dough ball in the sugar until fully coated. The sugar coating will create a subtle crystalline crust on the cookies that contrasts beautifully with the chewy interior. Arrange the coated balls evenly on your prepared baking sheet, spacing them about 2 inches apart.
- Bake the cookies for 6-7 minutes—they should look slightly underbaked and still have a soft appearance on top. Don't overbake them at this stage, as they'll continue to cook slightly after you remove them from the oven and will firm up as they cool. This is the key to getting that perfect chewy-yet-structured thumbprint cookie texture.
- Remove the baking sheet from the oven and immediately press one peppermint Hershey's Kiss gently into the center of each warm cookie—the residual heat will soften the candy enough to create a proper indent while it holds its shape. Let the cookies rest on the baking sheet for 2-3 minutes to set slightly, then transfer them to a wire rack to cool completely. I find that this two-stage cooling process helps the cookies develop the right structure without cracking around the candy.