If you ask me, white chicken chili is one of those recipes everyone should have in their back pocket.
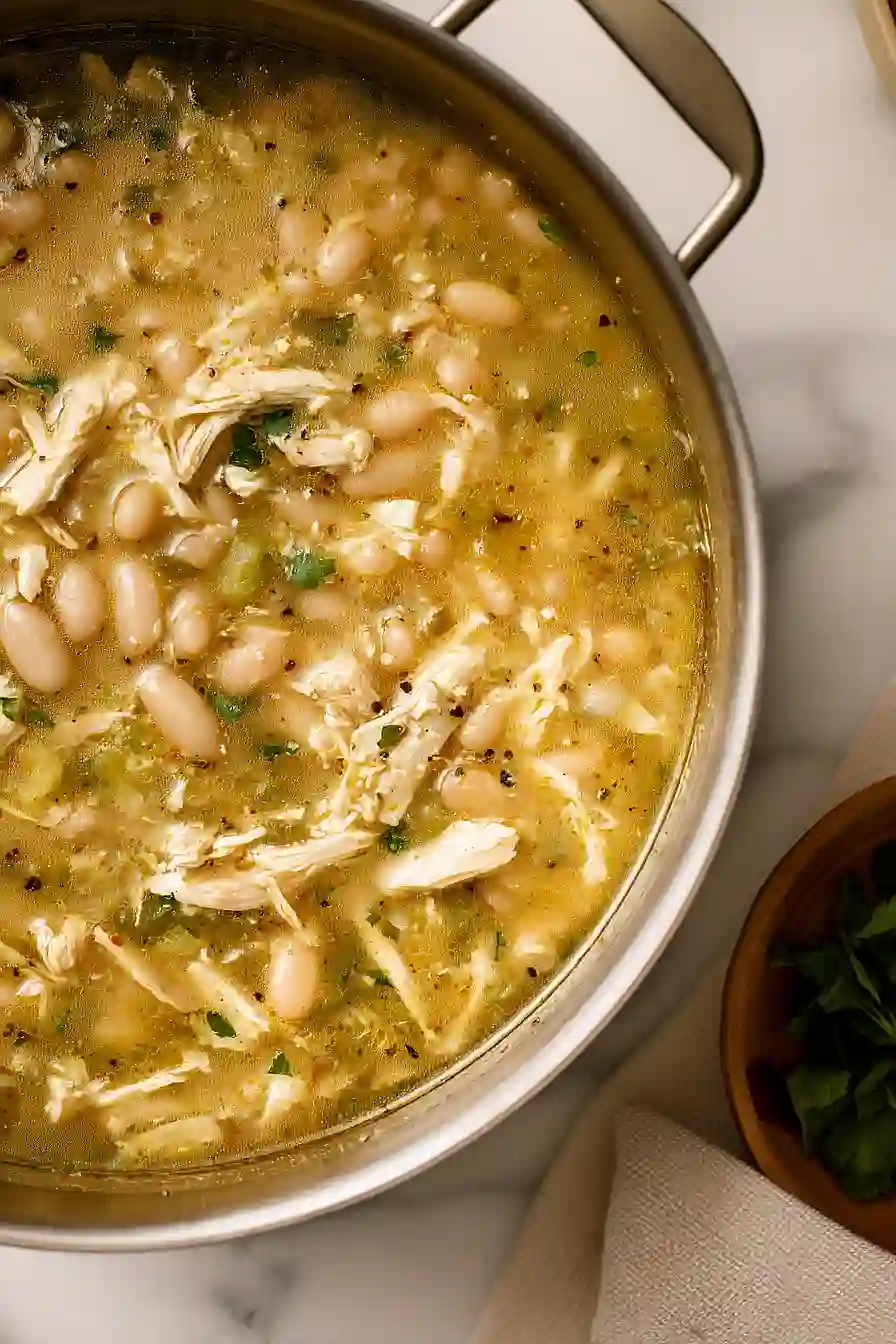
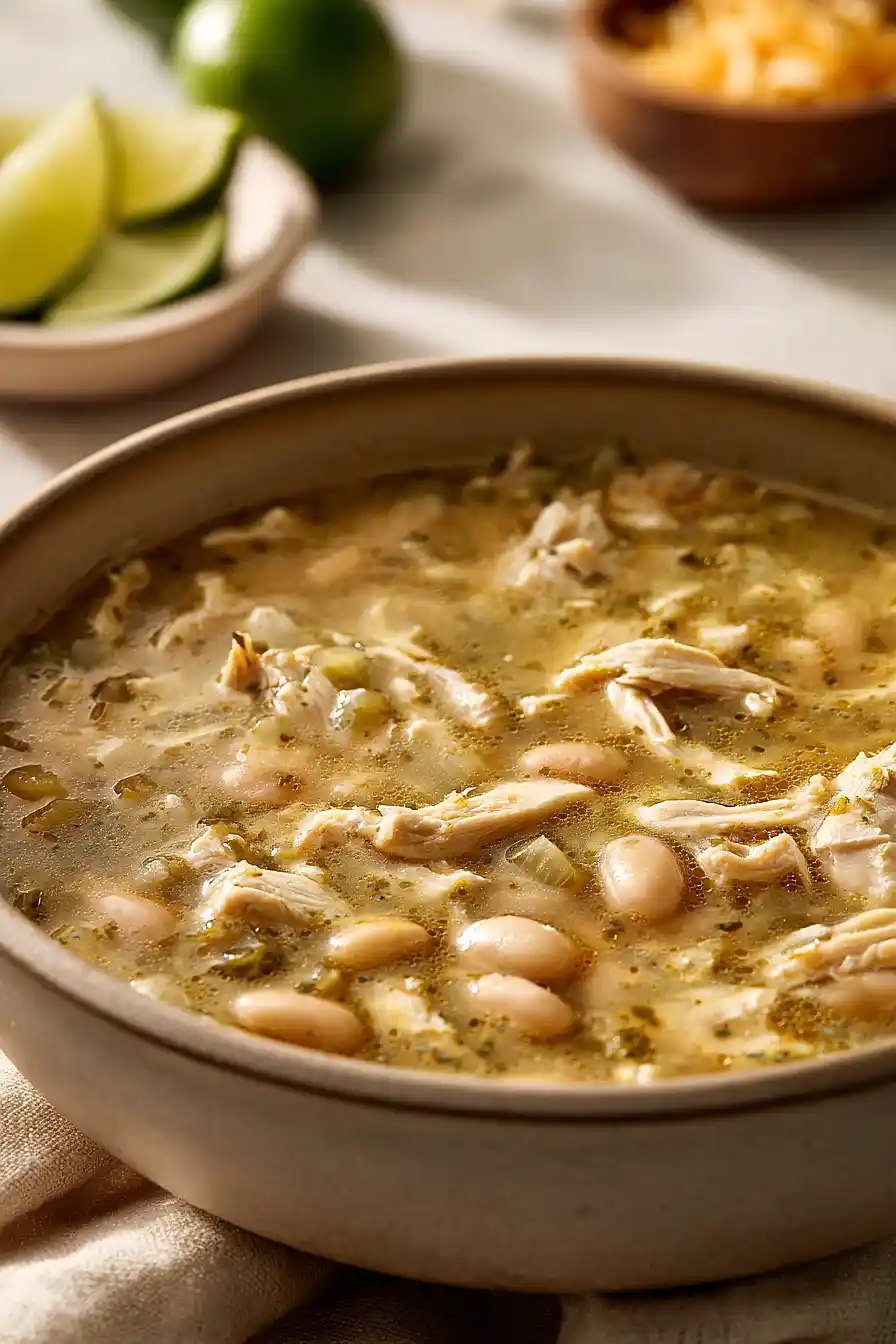
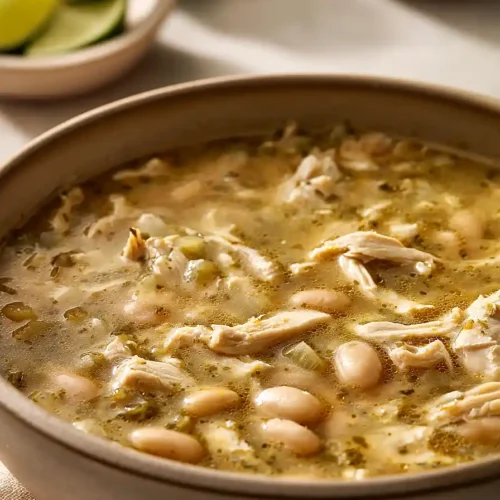
This Dutch oven version is a cozy, comforting bowl that’s loaded with tender chicken, creamy cannellini beans, and green chiles. The broth gets its warmth from cumin, oregano, and just a hint of cayenne pepper.
It simmers away in one pot while you go about your day. Fresh cilantro and lime juice brighten everything up at the end, and you get to pile on toppings like cheese, sour cream, and avocado.
It’s a weeknight-friendly dinner that feeds a crowd without much fuss, perfect for chilly evenings when you want something hearty.
Why You’ll Love This White Chicken Chili
- Quick weeknight dinner – This chili comes together in just 30-40 minutes, making it perfect for busy evenings when you need something satisfying on the table fast.
- One-pot meal – Everything cooks in a single dutch oven, which means less cleanup and more time to relax after dinner.
- Rotisserie chicken shortcut – Using store-bought rotisserie chicken saves you tons of prep time without sacrificing any flavor.
- Customizable heat level – You can easily adjust the spiciness by adding or removing jalapeños, cayenne, and red pepper flakes to suit your family’s taste preferences.
- Fun toppings bar – Set out all the toppings and let everyone customize their own bowl with cheese, avocado, sour cream, and tortilla strips for a build-your-own dinner experience.
What Kind of Chicken Should I Use?
The beauty of white chicken chili is that you can use whatever cooked chicken you have on hand or whatever fits your schedule. A store-bought rotisserie chicken is honestly the easiest route – just pull off the meat and you’re done, plus it adds great flavor since it’s already seasoned. If you prefer to cook your own, you can poach, bake, or even use leftover grilled chicken breasts or thighs. Dark meat from the thighs will give you a juicier, more flavorful chili, while white meat from the breasts keeps things leaner. Just make sure your chicken is fully cooked before adding it to the pot, and shred or cube it into bite-sized pieces so it’s easy to eat.
Options for Substitutions
This white chicken chili is pretty forgiving when it comes to swaps:
- Cooked chicken: Rotisserie chicken is super convenient, but you can also use leftover roasted chicken, poached chicken breasts, or even turkey. If you’re starting from raw, just simmer boneless chicken breasts in the broth for about 20 minutes, then shred.
- Cannellini beans: Great Northern beans or navy beans work just as well here. In a pinch, you could even use pinto beans, though they’ll change the color slightly.
- Green chiles: If you can’t find canned green chiles, use 1 cup of fresh roasted poblano peppers (chopped) or add an extra jalapeño or two.
- Fresh cilantro: Not a cilantro fan? Swap it with fresh parsley or just leave it out entirely. The chili will still taste great.
- Chicken broth: Vegetable broth works fine if that’s what you have on hand. For more richness, try half broth and half chicken stock.
- Lime juice: Lemon juice can substitute in equal amounts if you’re out of limes.
- Heat level: Feel free to adjust the jalapeño, red pepper flakes, and cayenne to your taste. For a milder version, skip the cayenne and remove the jalapeño seeds. For more heat, leave everything in.
Watch Out for These Mistakes While Cooking
The biggest mistake when making white chicken chili is adding the chicken too early or letting it simmer too long, which turns perfectly good meat into dry, rubbery bits – add your rotisserie chicken near the end and just heat it through to keep it tender and juicy.
Don’t skip blending that cup of beans with broth, as this step creates the creamy, thick texture that makes white chili different from regular soup, and if you forget, your chili will be too thin and watery.
Be careful with your heat levels by tasting as you go, since the combination of jalapeños, green chiles, red pepper flakes, and cayenne can sneak up on you – start with less cayenne and add more at the end if needed.
Finally, resist the urge to crank up the heat once everything’s in the pot, as a gentle boil (not a rolling one) prevents the beans from breaking apart and keeps the flavors from getting bitter.
What to Serve With White Chicken Chili?
I love serving white chicken chili with warm cornbread or corn muffins on the side – they’re perfect for soaking up all that creamy, flavorful broth. You can also set out a basket of tortilla chips for scooping, or make some quesadillas on the side for an extra hearty meal. A simple Mexican-style rice or cilantro lime rice pairs really well with the chili, or you could keep things light with a crunchy cabbage slaw dressed with lime juice. Don’t forget that this chili is already pretty filling on its own, so sometimes all you need is a cold beer or margarita to round out the meal!
Storage Instructions
Store: This white chicken chili actually tastes even better the next day after all the flavors have had time to mingle. Keep it in an airtight container in the fridge for up to 4 days. Just hold off on adding the toppings until you’re ready to serve each portion.
Freeze: White chicken chili is one of my favorite freezer meals! Let it cool completely, then portion it into freezer-safe containers or bags for up to 3 months. I like to freeze it in individual servings so I can grab just what I need for a quick lunch or dinner.
Reheat: Warm the chili on the stovetop over medium-low heat, stirring occasionally until heated through. You can also microwave individual portions for 2-3 minutes, stirring halfway through. If it seems too thick after storing, just add a splash of chicken broth to loosen it up.
| Preparation Time | 10-15 minutes |
| Cooking Time | 20-25 minutes |
| Total Time | 30-40 minutes |
| Level of Difficulty | Medium |
| Servings | 6 servings |
Estimated Nutrition
Estimated nutrition for the whole recipe (without optional ingredients):
- Calories: 1800-2000
- Protein: 130-150 g
- Fat: 50-60 g
- Carbohydrates: 180-200 g
Ingredients
For the chilli:
- 1 tsp salt
- 30 oz cannellini beans (drained and rinsed)
- 1/3 cup fresh cilantro (chopped, added at the end)
- 0.5 tsp red pepper flakes
- 32 oz low-sodium chicken broth
- 4 cups cooked chicken (shredded or chunked)
- 3 tbsp extra virgin olive oil (or any neutral oil like canola)
- 1.5 cups sweet onion (diced into 1/2-inch pieces)
- 1 tsp dried oregano
- 1 jalapeño (diced, seeds removed for less heat)
- 1 tbsp fresh lime juice
- 1 tsp black pepper
- 2 tsp minced garlic
- 1 tbsp ground cumin (freshly ground preferred for more flavor)
- 0.25 tsp cayenne pepper
- 8 oz mild green chiles (canned is fine, drained)
For Toppings (optional):
- diced avocado (optional, adds creaminess)
- diced green onions
- shredded cheddar cheese
- diced tomatoes (optional, adds brightness)
- sliced black olives
- tortilla chip strips (optional, adds crunch)
- sour cream
Step 1: Prepare Your Mise en Place and Cook the Aromatics
- 3 tbsp extra virgin olive oil
- 1.5 cups sweet onion, diced
- 1 jalapeño, diced
- 8 oz mild green chiles, drained
Gather all your ingredients and prep work: dice the sweet onion into 1/2-inch pieces, dice the jalapeño with seeds removed, mince the garlic, drain and rinse the cannellini beans, drain the canned green chiles, and measure out all your spices.
Heat your Dutch oven over medium-high heat and add the olive oil.
Once shimmering, add the diced onion, jalapeño, and drained green chiles.
Cook for about 7 minutes, stirring occasionally, until the onion becomes soft and translucent—this builds the flavor foundation of your chili.
Step 2: Build Flavor with Garlic and Spice Blooming
- 2 tsp minced garlic
- 1 tbsp ground cumin
- 1 tsp dried oregano
- 1 tsp salt
- 1 tsp black pepper
- 0.5 tsp red pepper flakes
- 0.25 tsp cayenne pepper
Add the minced garlic to the pot and cook for 1-2 minutes, stirring constantly, until fragrant—this prevents the garlic from burning while releasing its aromatics into the oil.
Now add all your dried spices: ground cumin, dried oregano, salt, black pepper, red pepper flakes, and cayenne pepper.
Stir everything together for about 30 seconds to bloom the spices in the hot oil, which intensifies their flavors and distributes them evenly throughout the chili base.
Step 3: Create a Creamy Base by Blending Beans
- 1 cup cannellini beans
- 2 tbsp low-sodium chicken broth
While the aromatics and spices are blooming in the pot, take 1 cup of the drained cannellini beans and blend them with 2 tablespoons of the chicken broth until completely smooth.
This creates a naturally creamy texture for your chili without any dairy—the bean puree will thicken the broth and add body.
I like blending some beans rather than using all whole beans because it gives the chili a silkier mouthfeel while keeping plenty of texture from the remaining whole beans.
Step 4: Build the Chili Base
- 30 oz low-sodium chicken broth
- 4 cups cooked chicken
- blended bean mixture from Step 3
- 29 oz cannellini beans, whole
Pour the remaining 30 oz chicken broth into the pot with the aromatics and spices, stirring well to combine.
Add the shredded or chunked cooked chicken, the blended bean mixture from Step 3, and the remaining whole cannellini beans (about 29 oz).
Stir everything together thoroughly, then bring the mixture to a gentle boil over medium-high heat.
Once it reaches a boil, reduce the heat to medium and let it simmer gently for 7-10 minutes—this allows all the flavors to meld together while the beans warm through completely.
Step 5: Finish with Fresh Lime and Cilantro
- 1 tbsp fresh lime juice
- 1/3 cup fresh cilantro, chopped
Stir in the fresh lime juice and add the chopped fresh cilantro, stirring to distribute evenly.
Let it return to a gentle boil for just 1 minute so the cilantro infuses into the broth.
Taste the chili carefully and adjust the seasonings as needed—you may want more salt, lime juice, or heat depending on your preferences.
The lime juice brightens the heavy, creamy flavors of the beans and adds a fresh counterpoint to the spices.
Step 6: Serve with Your Favorite Toppings
- diced avocado
- sour cream
- diced green onions
- shredded cheddar cheese
- diced tomatoes
- sliced black olives
- tortilla chip strips
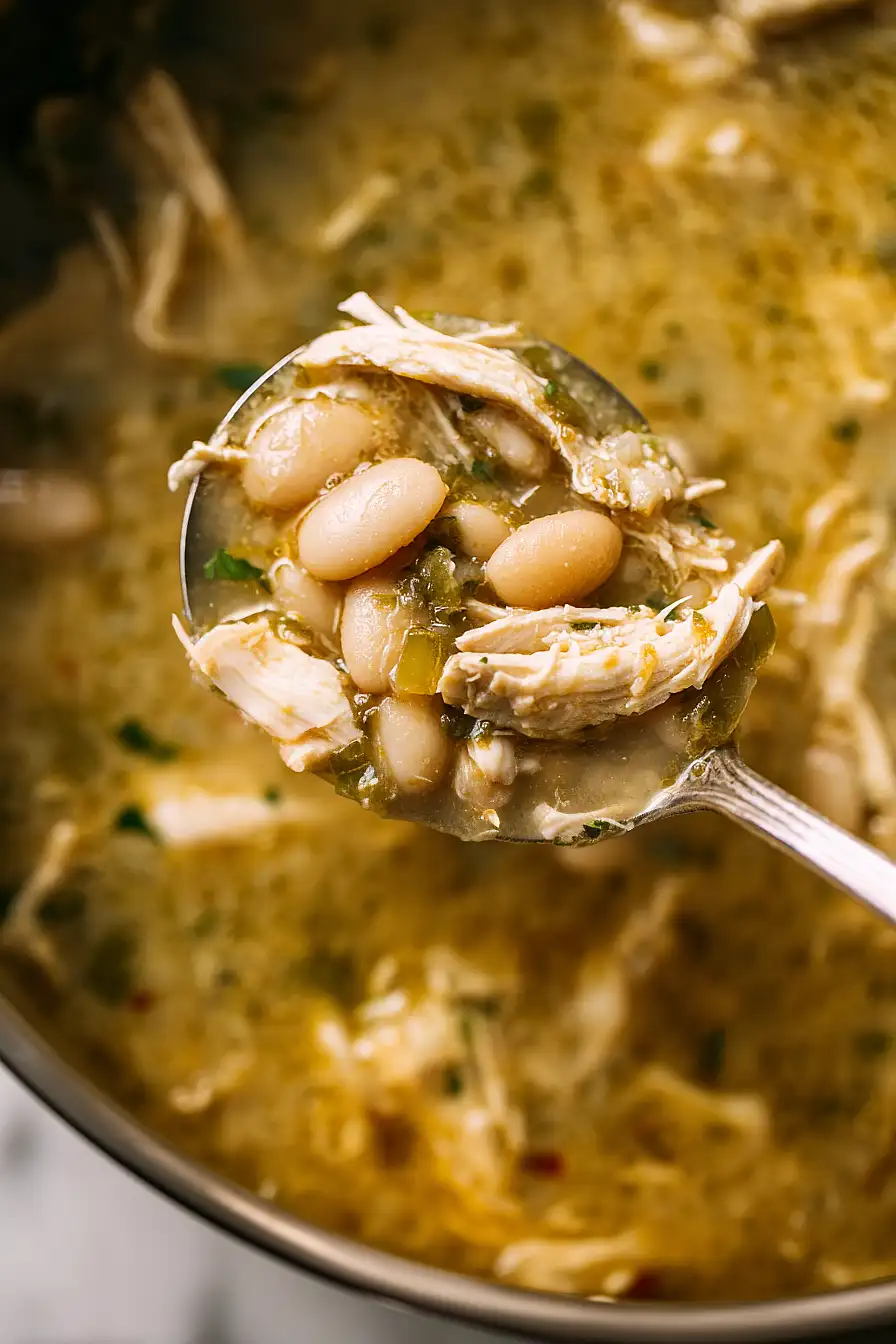
Ladle the hot chili into bowls and set out all your desired toppings for guests to customize their bowls.
The beauty of this chili is its versatility—each person can build their own bowl with the toppings they love, from creamy avocado and sour cream to fresh green onions, cheese, tomatoes, olives, and crispy tortilla chips.
I recommend having everything prepped and ready to go at serving time so everyone can load up their bowl exactly how they like it.
30-Minute Dutch Oven White Chicken Chili
Ingredients
For the chilli:
- 1 tsp salt
- 30 oz cannellini beans (drained and rinsed)
- 1/3 cup fresh cilantro (chopped, added at the end)
- 0.5 tsp red pepper flakes
- 32 oz low-sodium chicken broth
- 4 cups cooked chicken (shredded or chunked)
- 3 tbsp extra virgin olive oil (or any neutral oil like canola)
- 1.5 cups sweet onion (diced into 1/2-inch pieces)
- 1 tsp dried oregano
- 1 jalapeño (diced, seeds removed for less heat)
- 1 tbsp fresh lime juice
- 1 tsp black pepper
- 2 tsp minced garlic
- 1 tbsp ground cumin (freshly ground preferred for more flavor)
- 0.25 tsp cayenne pepper
- 8 oz mild green chiles (canned is fine, drained)
For Toppings (optional):
- diced avocado (optional, adds creaminess)
- diced green onions
- shredded cheddar cheese
- diced tomatoes (optional, adds brightness)
- sliced black olives
- tortilla chip strips (optional, adds crunch)
- sour cream
Instructions
- Gather all your ingredients and prep work: dice the sweet onion into 1/2-inch pieces, dice the jalapeño with seeds removed, mince the garlic, drain and rinse the cannellini beans, drain the canned green chiles, and measure out all your spices. Heat your Dutch oven over medium-high heat and add the olive oil. Once shimmering, add the diced onion, jalapeño, and drained green chiles. Cook for about 7 minutes, stirring occasionally, until the onion becomes soft and translucent—this builds the flavor foundation of your chili.
- Add the minced garlic to the pot and cook for 1-2 minutes, stirring constantly, until fragrant—this prevents the garlic from burning while releasing its aromatics into the oil. Now add all your dried spices: ground cumin, dried oregano, salt, black pepper, red pepper flakes, and cayenne pepper. Stir everything together for about 30 seconds to bloom the spices in the hot oil, which intensifies their flavors and distributes them evenly throughout the chili base.
- While the aromatics and spices are blooming in the pot, take 1 cup of the drained cannellini beans and blend them with 2 tablespoons of the chicken broth until completely smooth. This creates a naturally creamy texture for your chili without any dairy—the bean puree will thicken the broth and add body. I like blending some beans rather than using all whole beans because it gives the chili a silkier mouthfeel while keeping plenty of texture from the remaining whole beans.
- Pour the remaining 30 oz chicken broth into the pot with the aromatics and spices, stirring well to combine. Add the shredded or chunked cooked chicken, the blended bean mixture from Step 3, and the remaining whole cannellini beans (about 29 oz). Stir everything together thoroughly, then bring the mixture to a gentle boil over medium-high heat. Once it reaches a boil, reduce the heat to medium and let it simmer gently for 7-10 minutes—this allows all the flavors to meld together while the beans warm through completely.
- Stir in the fresh lime juice and add the chopped fresh cilantro, stirring to distribute evenly. Let it return to a gentle boil for just 1 minute so the cilantro infuses into the broth. Taste the chili carefully and adjust the seasonings as needed—you may want more salt, lime juice, or heat depending on your preferences. The lime juice brightens the heavy, creamy flavors of the beans and adds a fresh counterpoint to the spices.
- Ladle the hot chili into bowls and set out all your desired toppings for guests to customize their bowls. The beauty of this chili is its versatility—each person can build their own bowl with the toppings they love, from creamy avocado and sour cream to fresh green onions, cheese, tomatoes, olives, and crispy tortilla chips. I recommend having everything prepped and ready to go at serving time so everyone can load up their bowl exactly how they like it.
