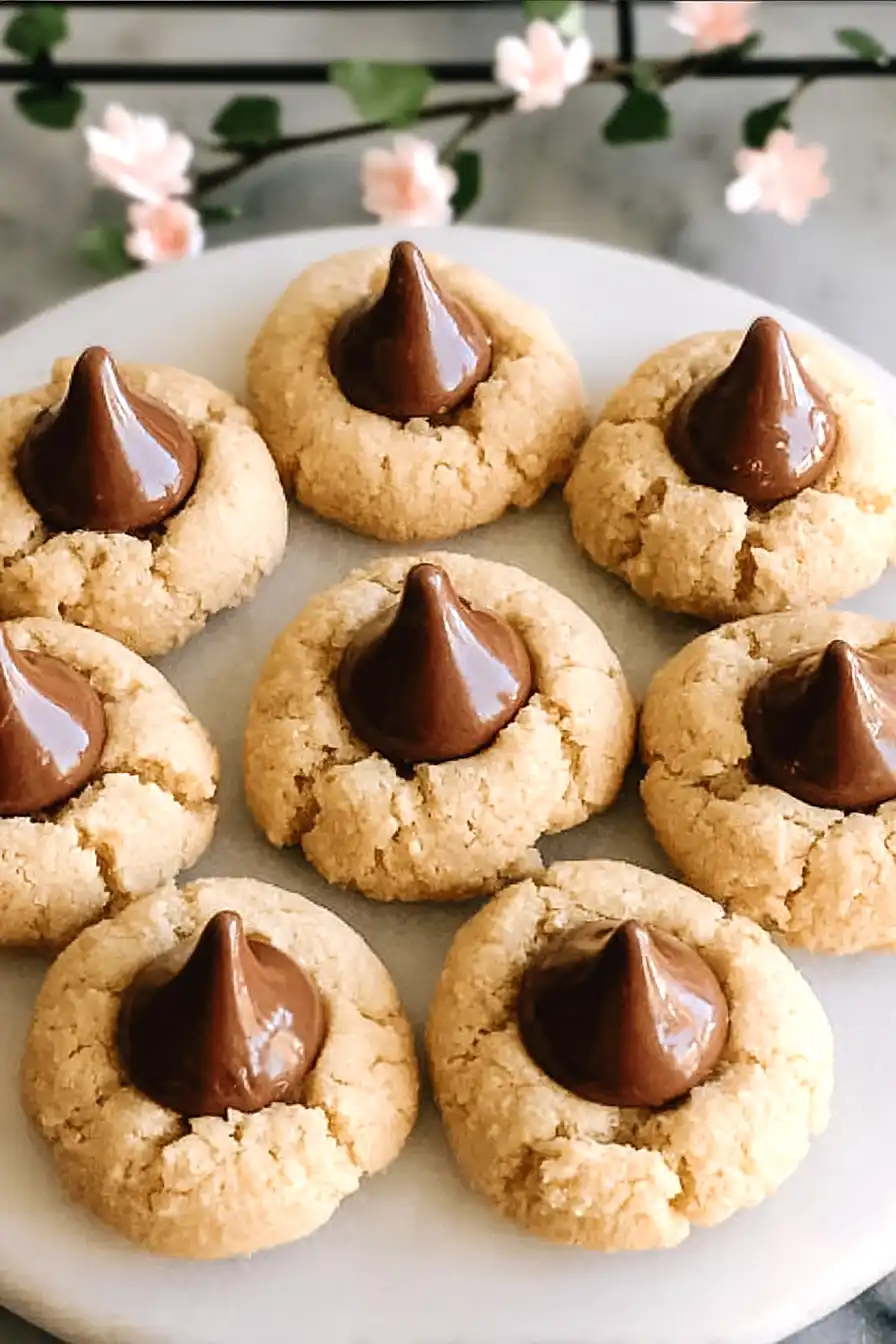
Here is my favorite blossom cookie recipe, with a simple sugar cookie base instead of peanut butter, topped with a chocolate Hershey Kiss in the center that melts just slightly when you press it in.
These cookies are perfect for anyone with peanut allergies or if you just prefer a sweeter, more buttery cookie. I like to roll them in colored sugar before baking to make them look pretty for parties or cookie exchanges.

Why You’ll Love These Hershey Kiss Blossom Cookies
- Peanut-free version – Perfect for anyone with peanut allergies or those who simply prefer a buttery cookie base instead of peanut butter.
- Quick and easy – These cookies come together in under 30 minutes, making them ideal for last-minute baking or when you need a sweet treat fast.
- Simple ingredients – You probably have everything you need in your pantry already—just basic baking staples plus a bag of Hershey’s Kisses.
- Classic holiday favorite – These cookies are always a hit at cookie exchanges, holiday parties, or as homemade gifts that look as good as they taste.
What Kind of Butter Should I Use?
For these blossom cookies, you’ll want to use regular unsalted or salted butter – either works fine, though if you’re using salted butter, you might want to cut back slightly on the added salt. The most important thing is making sure your butter is properly softened to room temperature, which means it should be soft enough to leave an indent when you press it but not melted or greasy. If your butter is too cold, it won’t cream properly with the sugar and your cookies might turn out dense instead of tender. You can leave butter out on the counter for about 30-60 minutes before baking, or if you’re in a hurry, cut it into small cubes to help it soften faster.

Options for Substitutions
These classic cookies are pretty straightforward, but here are some swaps you can make if needed:
- Butter: You can use margarine or shortening in place of butter, though butter gives the best flavor. If using salted butter, skip the added salt in the recipe.
- All-purpose flour: While all-purpose flour works best for the right texture, you can substitute up to half with whole wheat flour for a slightly nuttier taste. Just know your cookies will be a bit denser.
- Milk: Any milk works here – whole, 2%, almond, or even water in a pinch. It’s just there to bring the dough together.
- Hershey’s Kisses: Get creative with the chocolate! Try Hugs (the striped ones), dark chocolate Kisses, caramel-filled Kisses, or even Rolos for a fun twist.
- Vanilla extract: Almond extract makes a nice change if you want a different flavor profile. Use the same amount, but know it has a stronger taste.
- Powdered sugar: The powdered sugar coating is totally optional. You can skip it for a simpler look, or roll the cookies in regular granulated sugar before baking instead.
Watch Out for These Mistakes While Baking
The biggest mistake with these cookies is pressing the Hershey’s Kiss in too early – wait until the cookies come straight out of the oven while they’re still hot and soft, otherwise the chocolate won’t stick properly and may fall off once cooled.
Another common error is skipping the chilling step for your dough, which leads to cookies that spread too much and lose their shape, so pop the dough in the fridge for at least 30 minutes if it feels too soft to handle.
Don’t overbake these cookies thinking they need to look golden brown all over – pull them out when the edges are just set but the centers still look slightly underdone, as they’ll continue cooking on the hot pan.
If you’re rolling the dough balls in powdered sugar, make sure your hands and the dough are cool, because warm dough will melt the sugar and create a gummy coating instead of that pretty crackled finish.
What to Serve With Hershey Kiss Blossom Cookies?
These cookies are perfect on their own, but they’re even better with a cold glass of milk for dunking. If you’re putting together a cookie platter for a party or holiday gathering, they pair nicely with other classic cookies like chocolate chip, snickerdoodles, or sugar cookies. For an afternoon treat, serve them alongside hot cocoa or coffee, which complements the chocolate kiss on top. You could also set out a small bowl of extra Hershey’s Kisses on the side for anyone who wants an extra chocolate fix while enjoying their cookies.
Storage Instructions
Store: These cookies stay soft and delicious when kept in an airtight container at room temperature for up to a week. Just make sure the Hershey’s Kisses are completely set before stacking them, or they might stick together a bit.
Freeze: You can freeze these cookies for up to 3 months in a freezer-safe container with parchment paper between the layers. They thaw quickly at room temperature in about 20 minutes, making them perfect for unexpected guests or when you need a quick treat.
Make Ahead: The dough can be made ahead and refrigerated for up to 3 days before baking. You can also freeze the dough balls (without the Kisses) for up to 2 months, then bake them straight from frozen, adding just a minute or two to the baking time.
| Preparation Time | 15-20 minutes |
| Cooking Time | 8-10 minutes |
| Total Time | 23-30 minutes |
| Level of Difficulty | Easy |
Estimated Nutrition
Estimated nutrition for the whole recipe (without optional ingredients):
- Calories: 2850-3050
- Protein: 28-34 g
- Fat: 115-125 g
- Carbohydrates: 420-440 g
Ingredients
- 1 cup granulated sugar
- 1/2 cup unsalted butter, softened (room temperature)
- 2 tbsp milk
- 1 1/2 tsp vanilla extract
- 35 Hershey’s Kisses (unwrapped)
- 1/4 tsp salt
- 1/4 tsp baking soda
- 1/2 cup powdered sugar (for rolling)
- 1 egg
- 2 cups all-purpose flour (I use King Arthur flour)
Step 1: Preheat the Oven and Prepare Ingredients
- 35 Hershey’s Kisses (unwrapped)
Preheat your oven to 350°F (175°C).
Unwrap all of the Hershey’s Kisses and set them aside.
Line a baking sheet with parchment paper so the cookies don’t stick.
Step 2: Mix the Wet Ingredients
- 1/2 cup unsalted butter, softened (room temperature)
- 1 cup granulated sugar
- 1 egg
- 1 1/2 tsp vanilla extract
In a mixing bowl, use a stand mixer or hand mixer to beat the softened unsalted butter, granulated sugar, egg, and vanilla extract together until the mixture is smooth and fluffy.
This forms the creamy base for your cookies.
Step 3: Combine Dry Ingredients
- 2 cups all-purpose flour
- 1/4 tsp salt
- 1/4 tsp baking soda
In a separate bowl, whisk together the all-purpose flour, salt, and baking soda until evenly combined.
This ensures the rising agents are well-dispersed throughout the dough.
Step 4: Finish the Dough
- dry ingredients from Step 3
- wet ingredients from Step 2
- 2 tbsp milk
Gradually add the flour mixture to the creamed wet mixture, mixing as you go.
Pour in the milk and continue mixing until a soft, uniform dough forms.
I like to scrape down the sides of the bowl to make sure everything is fully incorporated.
Step 5: Shape and Roll the Cookies
- cookie dough from Step 4
- 1/2 cup powdered sugar (for rolling)
Scoop out small amounts of dough and shape into 1-inch balls.
If you like a pretty finish and a hint of sweetness, roll each ball in powdered sugar.
Place the balls evenly spaced on your prepared baking sheet.
Step 6: Bake the Cookies
- shaped cookie dough from Step 5
Bake the cookies in the preheated oven for 8 to 10 minutes, or until they are just starting to brown on the edges.
Remove from the oven and allow them to cool on the baking sheet for 1-2 minutes.
Step 7: Finish and Cool the Cookies
While the cookies are still slightly warm, gently press a Hershey’s Kiss into the center of each one.
Transfer the cookies to a wire rack to finish cooling completely before serving.
I find waiting helps the chocolate set nicely so they don’t smudge.

30-Minute Hershey Kiss Blossom Cookies Without Peanut Butter
Ingredients
- 1 cup granulated sugar
- 1/2 cup unsalted butter, softened (room temperature)
- 2 tbsp milk
- 1 1/2 tsp vanilla extract
- 35 Hershey's Kisses (unwrapped)
- 1/4 tsp salt
- 1/4 tsp baking soda
- 1/2 cup powdered sugar (for rolling)
- 1 egg
- 2 cups all-purpose flour (I use King Arthur flour)
Instructions
- Preheat your oven to 350°F (175°C). Unwrap all of the Hershey's Kisses and set them aside. Line a baking sheet with parchment paper so the cookies don't stick.
- In a mixing bowl, use a stand mixer or hand mixer to beat the softened unsalted butter, granulated sugar, egg, and vanilla extract together until the mixture is smooth and fluffy. This forms the creamy base for your cookies.
- In a separate bowl, whisk together the all-purpose flour, salt, and baking soda until evenly combined. This ensures the rising agents are well-dispersed throughout the dough.
- Gradually add the flour mixture to the creamed wet mixture, mixing as you go. Pour in the milk and continue mixing until a soft, uniform dough forms. I like to scrape down the sides of the bowl to make sure everything is fully incorporated.
- Scoop out small amounts of dough and shape into 1-inch balls. If you like a pretty finish and a hint of sweetness, roll each ball in powdered sugar. Place the balls evenly spaced on your prepared baking sheet.
- Bake the cookies in the preheated oven for 8 to 10 minutes, or until they are just starting to brown on the edges. Remove from the oven and allow them to cool on the baking sheet for 1-2 minutes.
- While the cookies are still slightly warm, gently press a Hershey's Kiss into the center of each one. Transfer the cookies to a wire rack to finish cooling completely before serving. I find waiting helps the chocolate set nicely so they don’t smudge.
