I’ve always loved finding new ways to make healthy meals that actually taste good. As someone who tries to eat better without spending hours in the kitchen, protein bowls have become my go-to lunch option. This quinoa bowl is one of those recipes I keep coming back to, especially on busy weekdays when I need something filling but don’t want to order takeout.
The best part about this protein quinoa bowl is how simple it is to put together. I often prep the ingredients on Sunday while I’m making dinner, so I can quickly assemble it during the week. My kids even started asking for it in their lunch boxes – and trust me, getting them excited about quinoa was not something I expected!
Whether you’re looking to meal prep for the week ahead or just want a nutritious lunch that won’t leave you hungry an hour later, this recipe has you covered. It’s the kind of meal that makes you feel good about what you’re eating, without sacrificing flavor.
Why You’ll Love This Quinoa Bowl
- Protein-packed and nutritious – With quinoa and chickpeas as the base, this bowl delivers a complete protein source while being entirely plant-based and filled with nutrients.
- Meal prep friendly – You can prepare the components ahead of time and assemble fresh bowls throughout the week, making it perfect for busy schedules.
- Customizable – The basic recipe works as a template – you can swap ingredients based on what you have or add your favorite toppings to make it your own.
- Fresh and filling – The combination of creamy avocado, crunchy cucumbers, and tangy pickled onions creates a satisfying meal that keeps you full without feeling heavy.
- Diet-friendly – This bowl is naturally vegetarian, gluten-free, and can easily be made vegan by skipping the yogurt sauce.
What Kind of Quinoa Should I Use?
You’ll find three main types of quinoa at most grocery stores: white, red, and black – and any of them will work great in this protein bowl. White quinoa tends to be the mildest in flavor and fluffiest in texture, making it a favorite for many home cooks. Red and black quinoa have a slightly crunchier texture and nuttier flavor, plus they hold their shape a bit better in salads and bowls. If you’re new to quinoa, start with white variety since it’s the most versatile and widely available. Just remember to rinse your quinoa well before cooking to remove the natural coating called saponin, which can make it taste bitter.

Options for Substitutions
This protein bowl is super adaptable and you can make several swaps based on what you have in your kitchen:
- Quinoa: While quinoa is a protein powerhouse, you can swap it with other grains like brown rice, farro, or bulgur wheat. Just cook according to package instructions for each grain.
- Persian cucumbers: Regular English cucumbers work just fine – just cut them into smaller pieces. You could also use mini cucumbers if that’s what you have.
- Chickpeas: Feel free to use other beans like white beans or black beans, or even swap with grilled tofu or tempeh for a different protein source.
- Pickled red onions: If you don’t have pickled onions, try quick-pickling thinly sliced raw red onions in lemon juice for 10 minutes, or use regular raw red onions.
- Aleppo pepper: You can substitute with a mix of regular red pepper flakes and sweet paprika (use about 3/4 paprika to 1/4 pepper flakes).
- Fresh mint/parsley: Other fresh herbs like cilantro, dill, or basil would work well too. Use what you have!
- Avocado: If avocados aren’t ripe or available, try using hummus or a drizzle of tahini for that creamy element.
Watch Out for These Mistakes While Cooking
The biggest mistake when preparing quinoa bowls is not rinsing the quinoa thoroughly before cooking, which can leave a bitter, soapy taste from its natural coating called saponin – make sure to rinse it in a fine-mesh strainer until the water runs clear.
Another common error is overcooking the quinoa, so keep an eye on it and remove from heat as soon as you see the tiny spiral germs release from the seeds and the water is absorbed – this usually takes about 15-20 minutes.
To keep your avocados from browning too quickly, toss them in a little lemon juice before adding to the bowl, and when preparing the chickpeas, make sure to pat them completely dry before seasoning and roasting to achieve that perfect crispy exterior.
For the best texture contrast, avoid mixing all ingredients together right away – instead, layer them thoughtfully and add the garlic yogurt sauce just before serving to prevent everything from getting mushy.
What to Serve With Quinoa Bowls?
Since this quinoa bowl is already packed with protein and veggies, it makes a complete meal on its own, but there are some nice ways to round it out! A warm piece of pita bread or naan makes a great addition – perfect for scooping up any extra garlic yogurt sauce left in the bowl. For a refreshing side, try a simple cucumber-mint infused water or a glass of crisp lemonade to complement the Mediterranean flavors. If you’re extra hungry, you could add some grilled chicken or salmon on top, though the chickpeas already provide plenty of protein for a filling meal.
Storage Instructions
Keep Components: For the best results, store each component of your quinoa bowl separately in airtight containers. The prepared quinoa, chickpeas, and garlic yogurt sauce will stay good in the fridge for up to 5 days. Keep the cut veggies like cucumbers and tomatoes in their own container, and wait to cut the avocado until you’re ready to eat.
Meal Prep: This bowl is perfect for meal prep! You can cook the quinoa and chickpeas, and prepare the garlic yogurt sauce in advance. When packing for lunches, layer the ingredients with the sauce on the bottom, quinoa and chickpeas next, and keep the fresh vegetables and avocado separate until ready to eat.
Pack: If you’re taking this to work or school, pack the fresh herbs, Aleppo pepper, and olive oil separately. This way, you can add them right before eating to keep everything fresh and crisp. The herbs will stay perky, and your bowl will taste just as good as when freshly made!
| Preparation Time | 10-15 minutes |
| Cooking Time | 30-45 minutes |
| Total Time | 40-60 minutes |
| Level of Difficulty | Medium |
Estimated Nutrition
Estimated nutrition for the whole recipe (without optional ingredients):
- Calories: 950-1100
- Protein: 30-35 g
- Fat: 50-60 g
- Carbohydrates: 100-110 g
Ingredients
For the quinoa bowls:
- 3 cups cooked quinoa
- pickled red onions (homemade for best flavor)
- Aleppo pepper (optional, for a mild heat)
- 2 avocados (diced just before serving)
- 2 Persian cucumbers (thinly sliced)
- fresh mint and/or parsley leaves
- 1 cup cherry tomatoes (halved)
For the smoky chickpeas:
- 1 tsp smoked paprika (gives a rich, smoky flavor)
- extra virgin olive oil (California Olive Ranch is a favorite)
- pinch of cayenne pepper (adjust to your spice preference)
- 1/4 tsp sea salt
- 1/2 tsp cumin powder
- 1.5 cups cooked chickpeas (drained and rinsed well)
For the sauce:
- garlic yogurt sauce (homemade for ultimate freshness)
Step 1: Prepare the Quinoa
Cook the quinoa according to your preferred recipe or package instructions.
This typically involves rinsing the quinoa under cold water, adding it to a pot with water or broth, bringing it to a boil, and then simmering until the liquid is absorbed and the quinoa is fluffy.
While the quinoa is cooking, proceed with preparing the smoky chickpeas.
Step 2: Preheat Oven and Prepare Chickpeas
Preheat the oven to 425°F and line a baking sheet with parchment paper for easy cleanup.
Place the chickpeas on the prepared baking sheet.
Drizzle with olive oil, then sprinkle generously with smoked paprika, cumin, salt, and a pinch of cayenne pepper.
Toss the chickpeas to ensure they’re evenly coated with the oil and seasonings, then spread them out in a single layer on the baking sheet.
Step 3: Roast Chickpeas
Roast the chickpeas in the preheated oven for 20 to 30 minutes.
Keep an eye on them towards the end of the cooking time to ensure they reach a golden brown and crisp texture without burning.
Once done, remove them from the oven and set aside.
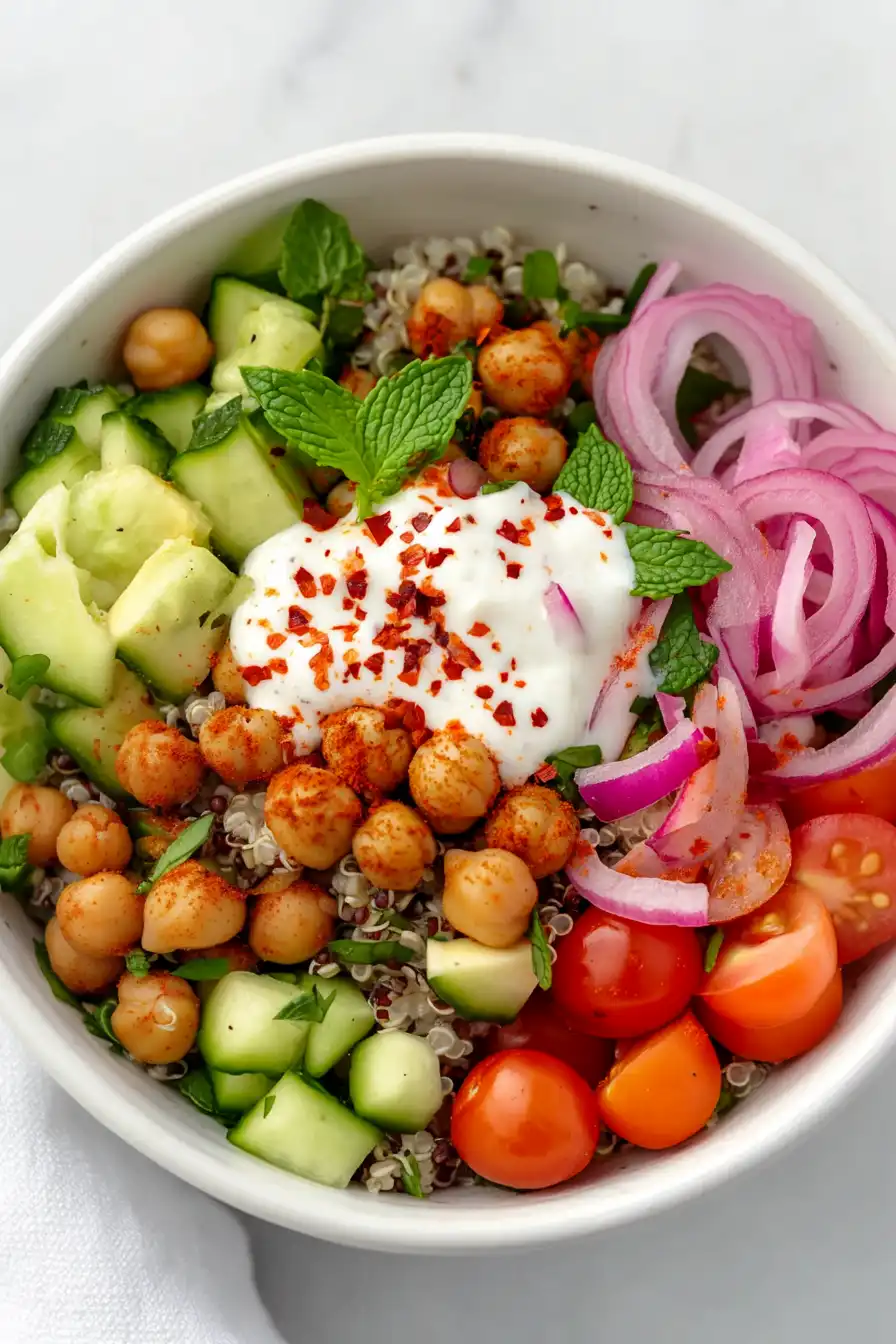
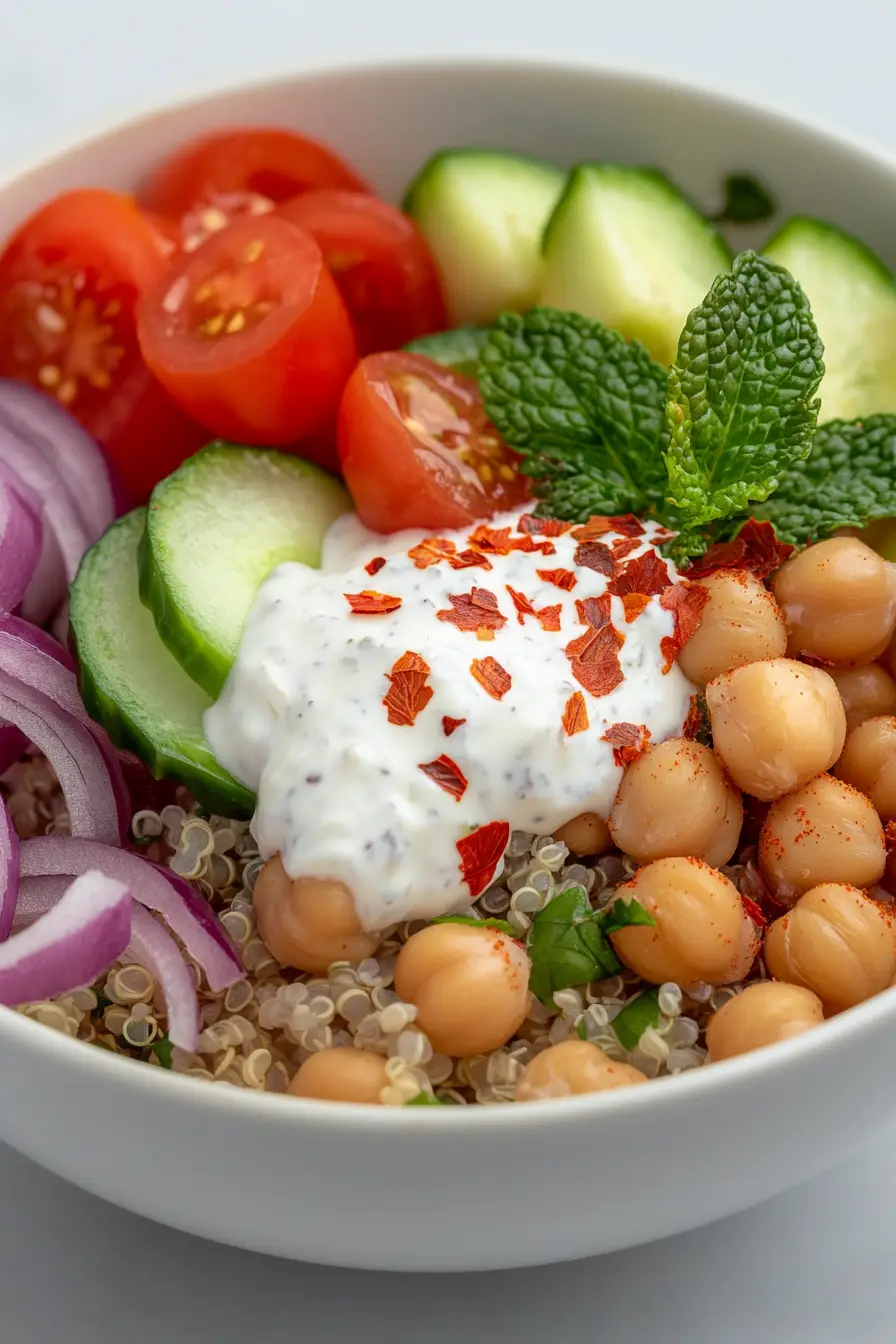
Step 4: Assemble the Bowls
In individual bowls, begin assembling by adding a base layer of the cooked quinoa.
Top with the smoky chickpeas, fresh slices or chunks of cucumber, diced tomatoes, and sliced avocado.
To each bowl, add some pickled onions, mint leaves, and a sprinkle of Aleppo pepper for extra flavor and color.
Step 5: Add Finishing Touches and Serve
Drizzle each assembled bowl with a generous spoonful of garlic yogurt sauce to add creaminess and tang.
Serve immediately while the chickpeas are still warm for a delightful and satisfying meal.
