Growing up, I thought gravy only came from those powdered packets at the grocery store. That’s what we used at home, and I never questioned it. The first time I saw my mother-in-law make gravy from scratch using roasted chicken drippings, I was genuinely shocked.
Turns out, making your own gravy isn’t some mysterious kitchen magic – it’s actually pretty straightforward once you know the basics. While those store-bought packets are convenient, there’s something special about making gravy from the same pan where your chicken just cooked. It picks up all those good flavors that would otherwise go to waste.
Why You’ll Love This Roasted Chicken Gravy
- Rich homemade gravy – This isn’t your average store-bought gravy – it’s made from real chicken drippings and herbs, giving you that deep, savory flavor that only comes from scratch cooking.
- Perfect for holidays – This recipe makes enough gravy to generously serve a crowd, making it ideal for Thanksgiving, Christmas, or any special family dinner.
- Basic pantry ingredients – You’ll only need common herbs and kitchen staples to make this gravy, no fancy or hard-to-find ingredients required.
- Foolproof method – The step-by-step instructions ensure you’ll get smooth, lump-free gravy every time, even if you’re new to making homemade gravy.
What Kind of Chicken Should I Use?
For this gravy recipe, you’ve got two main chicken options working together – a whole spatchcocked chicken and bone-in, skin-on pieces. The combination is actually perfect because you’ll get the best of both worlds when it comes to drippings and flavor. For the whole chicken, look for one that’s fresh and has a pinkish color with no dark spots. When picking out the thighs and drumsticks, make sure they’re roughly the same size so they cook evenly, and check that the skin is intact since it adds tons of flavor to your gravy. If you can’t find fresh chicken pieces, frozen ones will work too – just make sure they’re completely thawed before cooking.
Options for Substitutions
Let’s talk about what you can swap in this recipe while still getting that perfect gravy:
- Chicken cuts: While the recipe calls for a mix of whole spatchcocked chicken plus thighs and drumsticks, you can use any combination of bone-in, skin-on pieces. Just keep the total weight similar and remember that white meat cooks faster than dark meat.
- Dried herbs: Don’t have all the dried herbs? You can use Italian seasoning as a substitute for the oregano, rosemary, thyme, and marjoram. If using fresh herbs instead of dried, triple the amounts listed.
- All-purpose flour: For a gluten-free option, use rice flour or cornstarch (use 2 tablespoons instead of 3). Just mix with cold liquid first to prevent lumps.
- Dark soy sauce: If you don’t have dark soy sauce, you can use regular soy sauce plus a tiny drop of molasses, or skip it altogether – it’s mainly for color.
- Vegetable oil: While the recipe specifically says not to use butter or olive oil, you can use any neutral-flavored oil with a high smoke point like canola, sunflower, or grapeseed oil.
- Chicken broth: In a pinch, you can use bouillon cubes dissolved in water (follow package instructions for ratio), but reduce any added salt in the recipe.
Watch Out for These Mistakes While Cooking
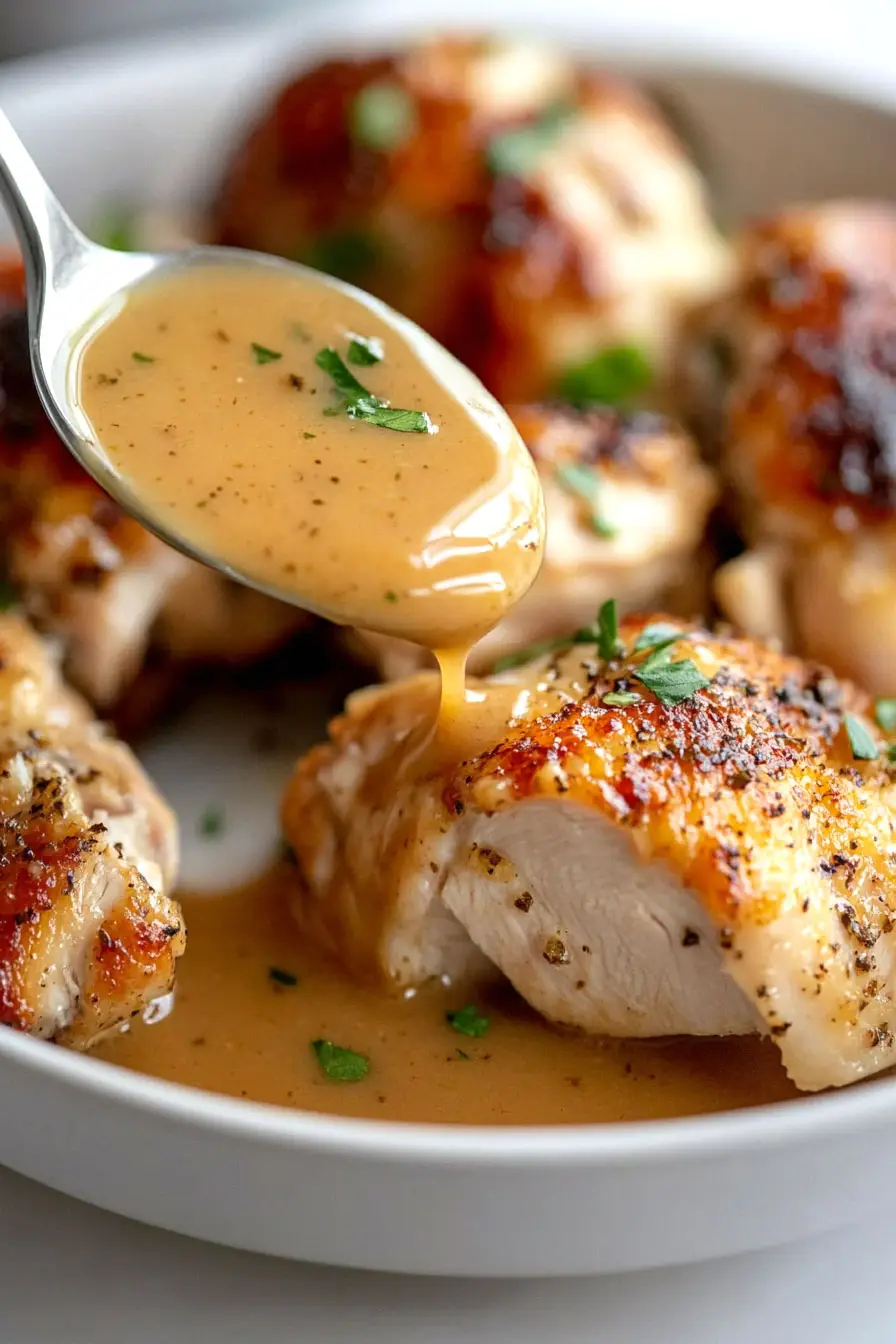
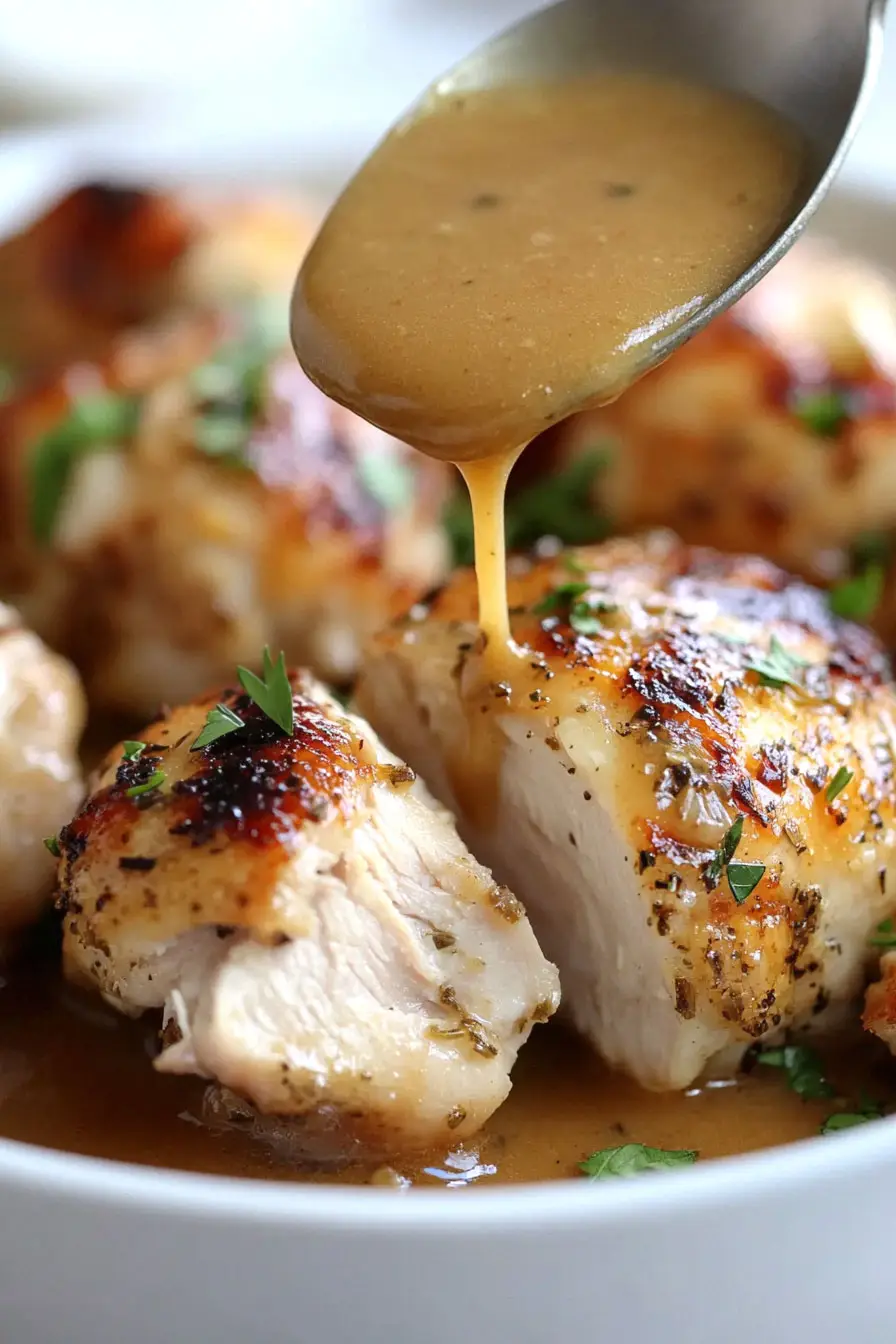
The biggest challenge when making roasted chicken gravy is ending up with lumpy sauce, which happens when you add flour directly to hot liquid – instead, make a smooth paste with the flour and a bit of cold broth before adding it to your pan drippings. Another common mistake is rushing the process of developing flavor – take your time to scrape up all the brown bits (fond) from the bottom of the roasting pan, as these contain concentrated chicken flavor that will make your gravy taste amazing. When it comes to seasoning, avoid the temptation to add salt too early in the process, since the liquid will reduce and concentrate the saltiness – it’s better to taste and adjust at the very end. For the smoothest possible gravy, strain it through a fine-mesh sieve before serving to catch any remaining bits of herbs or unexpected lumps.
What to Serve With Roasted Chicken Gravy?
This rich, savory gravy is begging to be paired with classic comfort food sides that can soak up all that delicious sauce. Creamy mashed potatoes are the obvious choice – they create the perfect base for spooning generous amounts of gravy over top. You can also serve it with fluffy white rice, roasted root vegetables like carrots and parsnips, or steamed green beans for a complete meal. For a cozy Sunday dinner feel, add some warm dinner rolls or crusty bread on the side to make sure you don’t leave a single drop of gravy behind!
Storage Instructions
Keep Fresh: Your homemade gravy will stay good in an airtight container in the fridge for up to 4 days. It might thicken up a bit while chilling, but don’t worry – that’s totally normal! Just give it a good stir when you’re ready to use it again.
Freeze: This gravy freezes really well! Pour it into freezer-safe containers or ice cube trays (perfect for smaller portions) and it’ll keep for up to 3 months. I like to make extra just to freeze – it’s so handy having homemade gravy ready to go for quick weeknight dinners.
Reheat: To warm up your gravy, pop it in a saucepan over low heat and whisk occasionally until it’s hot. If it seems a bit thick, just add a splash of chicken broth or water to thin it out. For microwave reheating, use medium power and stir every 30 seconds until heated through.
| Preparation Time | 15-30 minutes |
| Cooking Time | 45-60 minutes |
| Total Time | 60-90 minutes |
| Level of Difficulty | Medium |
Estimated Nutrition
Estimated nutrition for the whole recipe (without optional ingredients):
- Calories: 2900-3200
- Protein: 240-260 g
- Fat: 190-210 g
- Carbohydrates: 40-50 g
Ingredients
For the chicken:
- 3.6 lb whole chicken (spatchcocked for even cooking)
- 1 tsp dried thyme
- 1 tsp dried oregano
- 1 tsp dried rosemary
- 1 tbsp vegetable oil
- 1 tsp kosher salt (Diamond Crystal preferred)
- 1 tsp dried sage
- 3/4 tsp dried marjoram
- 3.6 lb mixed chicken pieces (bone-in, skin-on for richer flavor)
- 1/2 tsp black pepper
For the gravy:
- 3/4 tsp dark soy sauce (for color and umami)
- salt, as needed
- 3 tbsp all-purpose flour (King Arthur is my go-to)
- 1 1/2 cups low-sodium chicken broth
- pepper, as needed
Step 1: Prepare the Chicken
Start by patting the chicken skin dry with paper towels.
Leave the chicken uncovered in the fridge overnight to allow the skin to dry out completely.
This step helps in achieving a crispy exterior when roasting.
Step 2: Preheat and Set Up Your Tray
Preheat your oven to 240°C/465°F (or 220°C for fan-forced ovens).
Line a baking tray with foil, then add a layer of parchment paper on top.
Place a rack on the lined tray where you’ll place the chicken later.
Step 3: Season and Arrange the Chicken
Mix your chosen rub in a bowl.
Pat the chicken skin dry once more with paper towels.
Drizzle the chicken with oil and rub it all over, then sprinkle generously with the rub mixture.
Use your hands to ensure the herbs and spices get into all the cracks and crevices of the chicken.
Place the seasoned chicken on the rack.
- For thigh and drumstick pieces, arrange with skin side up.
- For butterflied/spatchcocked chicken, arrange breast side up, with the tail end pointing towards the back of the oven.
Step 4: Roast the Chicken
Roast the chicken accordingly:
- Thighs and drumsticks: Roast for about 35 minutes, or until the internal temperature reaches 75°C/165°F, or juices run clear when pierced.
- Butterflied/spatchcocked chicken: Roast for 45 minutes, or until the internal temperature is 66°C/151°F for the breast and 75°C/165°F at the joint between the leg and thigh.
If needed, for extra browning, turn on the grill/broiler to high for 1 to 3 minutes, but be very careful as the browning happens quickly.
Step 5: Rest and Make the Gravy
Tent the roasted chicken loosely with foil to retain the crispy skin and allow it to rest for 5 minutes.
Meanwhile, scrape every bit of juice, fat, and browned bits from the tray into a saucepan.
Turn the stove to medium heat; as the juices start to bubble, add flour and whisk to combine.
Slowly pour in broth while continuing to whisk.
Add soy sauce or gravy browner, along with pepper.
Stir continuously for 3 to 5 minutes as the gravy thickens to a syrupy consistency.
Adjust salt to taste just before removing from the heat, then pour into a serving jug.
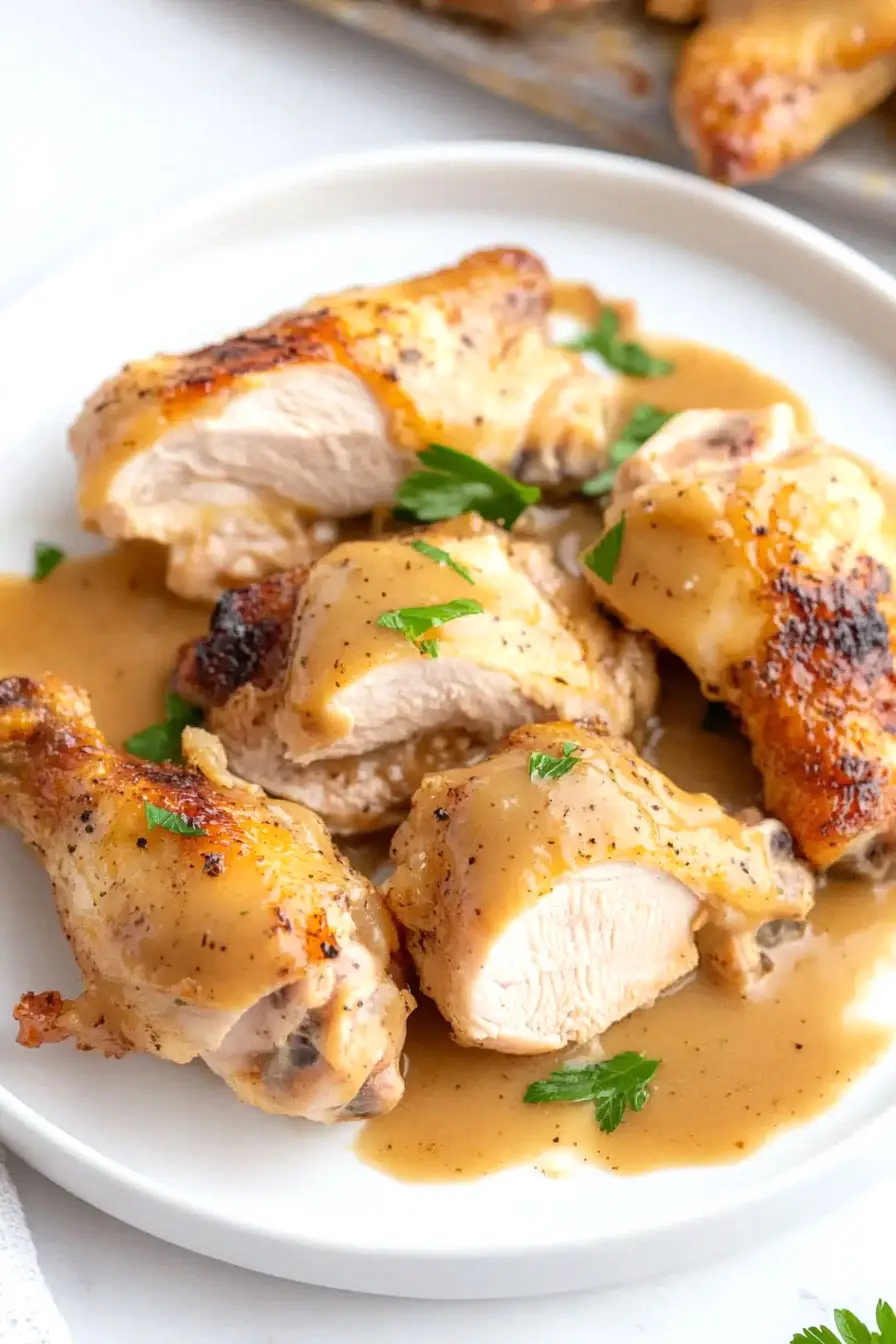
Step 6: Carve and Serve
Carve the chicken as you would a traditional roast chicken:
- Cut the breast into 3 or 4 pieces.
- Cut the thighs in half along the bone.
Pile the carved chicken pieces onto a serving plate and garnish with parsley or other fresh herbs if desired.
Serve with the prepared gravy for a delicious, succulent meal!
