Here is my favorite bread machine pumpkin bread recipe, with warm spices, real pumpkin puree, and a moist, tender crumb that comes together so easily in your bread machine.
This pumpkin bread is what I make every fall when the weather starts getting cooler. I love how the whole house smells like cinnamon and nutmeg while it’s baking. Perfect with a cup of coffee in the morning, don’t you think?
Why You’ll Love This Pumpkin Bread
- Bread machine convenience – Just add your ingredients to the machine and let it do all the mixing, kneading, and baking for you – no need to dirty extra bowls or worry about timing.
- Perfect fall flavors – The combination of pumpkin puree and warm cinnamon creates that cozy autumn taste you crave all season long.
- Simple pantry ingredients – You probably already have most of these basic baking staples in your kitchen, making this an easy recipe to whip up anytime.
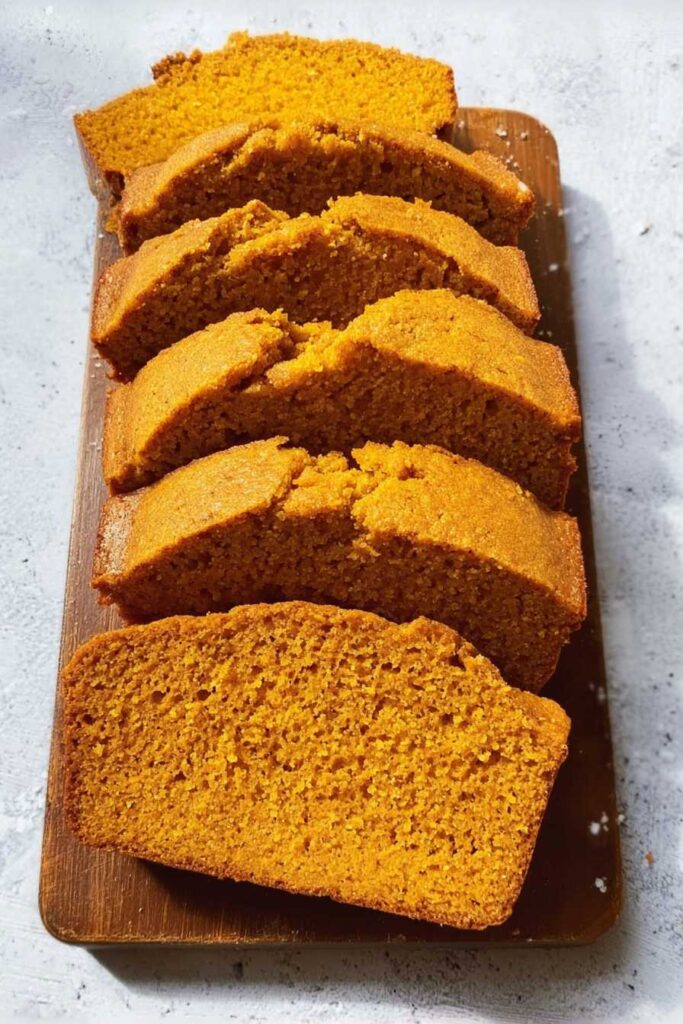
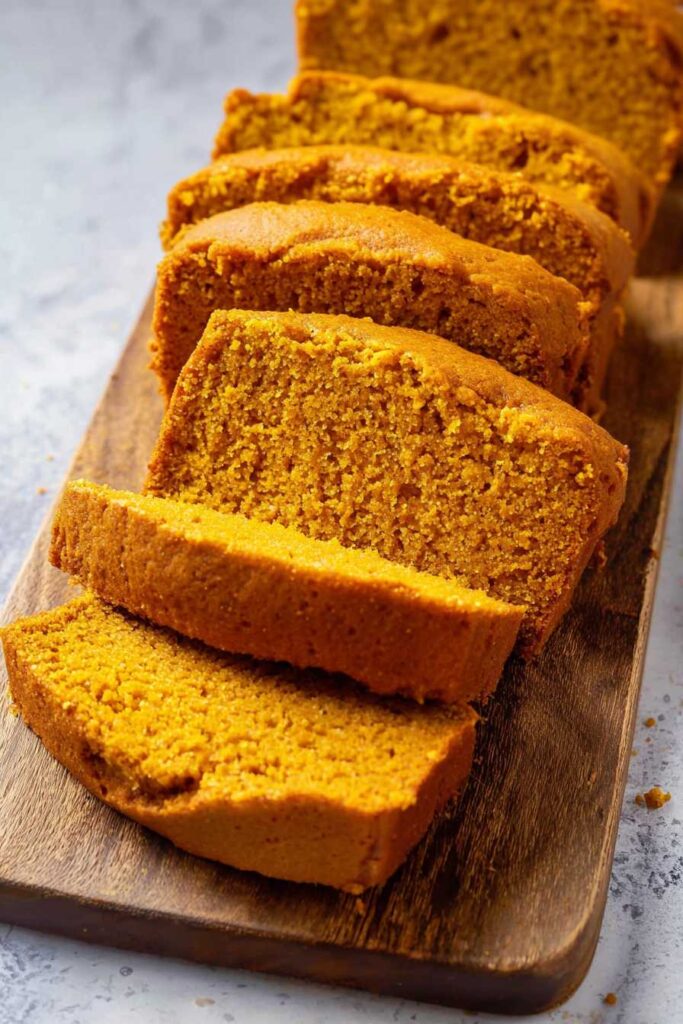
- Moist and tender texture – The pumpkin puree keeps this bread incredibly soft and moist, while the butter adds richness that makes every slice irresistible.
- Great for meal prep – This bread stays fresh for days and makes a perfect breakfast, snack, or even dessert throughout the week.
What Kind of Pumpkin Puree Should I Use?
For this bread machine pumpkin bread, canned pumpkin puree is your best bet and will give you the most consistent results. Look for 100% pure pumpkin puree (not pumpkin pie filling, which has spices already added) – brands like Libby’s work perfectly. You can also make your own puree from scratch using sugar pumpkins or butternut squash, but make sure to drain any excess moisture by letting it sit in a fine-mesh strainer for about 30 minutes before using. Fresh puree tends to be a bit more watery than canned, so this step helps prevent your bread from becoming too dense or gummy.
Options for Substitutions
This pumpkin bread recipe is pretty forgiving when it comes to swaps – here are some options that work well:
- Pumpkin puree: You can substitute with butternut squash puree, sweet potato puree, or even applesauce for a different flavor profile. Just make sure whatever you use has a similar thick consistency.
- Unsalted butter: Vegetable oil, melted coconut oil, or applesauce work as replacements. Use about 6 tablespoons of oil or melted coconut oil, or ¾ cup applesauce for a lighter version.
- All purpose flour: You can use whole wheat flour for half the amount, or try a 1:1 gluten-free flour blend if needed. The texture might be slightly different but still tasty.
- Brown sugar: White sugar works fine, or you can use coconut sugar for a slightly different flavor. You could also try maple syrup – just reduce it to about 6 tablespoons and cut back on other liquids slightly.
- Eggs: For each egg, you can use ¼ cup applesauce, mashed banana, or a flax egg (1 tablespoon ground flaxseed mixed with 3 tablespoons water, let sit for 5 minutes).
- Cinnamon: Feel free to add other warm spices like nutmeg, ginger, or allspice. Pumpkin pie spice is a great all-in-one substitute – use about 1½ teaspoons instead of just the cinnamon.
Watch Out for These Mistakes While Baking
The biggest mistake when making bread machine pumpkin bread is adding ingredients in the wrong order – always follow your machine’s manual since most require wet ingredients first, then dry ingredients, with leavening agents like baking soda and baking powder added last to prevent premature activation.
Another common error is using pumpkin pie filling instead of pure pumpkin puree, which contains added spices and sugar that can throw off the recipe’s balance and make your bread too sweet or dense.
Make sure your butter is at room temperature before starting, as cold butter won’t mix properly and can create an uneven texture, and resist the urge to open the lid during the mixing cycle since this can disrupt the machine’s timing.
Finally, let the bread cool completely in the pan for at least 10 minutes before removing it – hot bread is fragile and can break apart if handled too soon.
What to Serve With Pumpkin Bread?
This warm, spiced pumpkin bread is perfect on its own, but I love serving it with a pat of butter or a generous spread of cream cheese for extra richness. It pairs beautifully with your morning coffee or an afternoon cup of tea, making it a great snack any time of day. For a cozy fall breakfast, try toasting a slice and topping it with a drizzle of maple syrup or honey. You can also serve it alongside a bowl of vanilla ice cream for a simple dessert that really highlights those warm cinnamon and pumpkin flavors.
Storage Instructions
Keep Fresh: Your pumpkin bread will stay moist and delicious when wrapped tightly in plastic wrap or stored in an airtight container at room temperature for up to 5 days. I actually think it tastes even better the next day once all those warm spices have had time to meld together!
Freeze: This bread freezes wonderfully for up to 3 months. Wrap the whole loaf or individual slices in plastic wrap, then place in a freezer bag. I love slicing it before freezing so I can grab just what I need for breakfast or a quick snack.
Thaw: To enjoy your frozen pumpkin bread, just let it thaw at room temperature for about an hour, or pop individual slices in the toaster straight from the freezer. A light toast brings back that fresh-baked texture and makes it taste like you just pulled it from the bread machine.
| Preparation Time | 15-20 minutes |
| Cooking Time | 60-90 minutes |
| Total Time | 75-110 minutes |
| Level of Difficulty | Easy |
Estimated Nutrition
Estimated nutrition for the whole recipe (without optional ingredients):
- Calories: 1950-2100
- Protein: 25-30 g
- Fat: 85-95 g
- Carbohydrates: 285-305 g
Ingredients
- 2 large eggs (at room temperature for better incorporation)
- 1 tsp vanilla extract
- 1 tsp baking powder
- 1 tsp ground cinnamon
- 1 tsp baking soda (ensure it’s fresh for proper leavening)
- 1 cup pumpkin puree (I use Libby’s pumpkin puree)
- 8 tbsp unsalted butter (melted and cooled to room temperature, I like Kerrygold unsalted butter for this)
- 1/2 cup granulated sugar
- 2 cups all-purpose flour
- 1/2 tsp salt
- 1/2 cup packed light brown sugar
Step 1: Prepare the Wet Ingredients
- 2 large eggs
- 8 tbsp unsalted butter, softened
Lightly beat the eggs in a small bowl.
Soften the unsalted butter in the microwave until just spreadable but not melted.
This will help the butter incorporate smoothly into the batter.
Step 2: Add Ingredients to the Bread Pan
- 1 cup pureed pumpkin
- beaten eggs from Step 1
- softened butter from Step 1
- 2 cups all-purpose flour
- 1/2 cup granulated sugar
- 1/2 cup packed light brown sugar
- 1 tsp vanilla extract
- 1 tsp baking soda
- 1 tsp baking powder
- 1/2 tsp salt
- 1 tsp ground cinnamon
Make sure the bread machine is unplugged and remove the bread pan.
Add the pureed pumpkin, beaten eggs (from Step 1), and softened butter (from Step 1) into the bread pan.
Then, add the all-purpose flour, granulated sugar, light brown sugar, vanilla extract, baking soda, baking powder, salt, and ground cinnamon.
Adding the ingredients with the pan outside the machine helps to avoid accidental spills inside the bread maker.
Step 3: Bake the Pumpkin Bread
Secure the bread pan with all ingredients into the bread machine.
Close the lid, plug in the machine, and select the right setting for Sweet Quick Bread or Cake with a light crust color, based on your machine’s model.
Press start and let the machine mix, rise, and bake the pumpkin bread.
I recommend checking your manual for the best setting—using the right function is key for perfect quick bread texture.
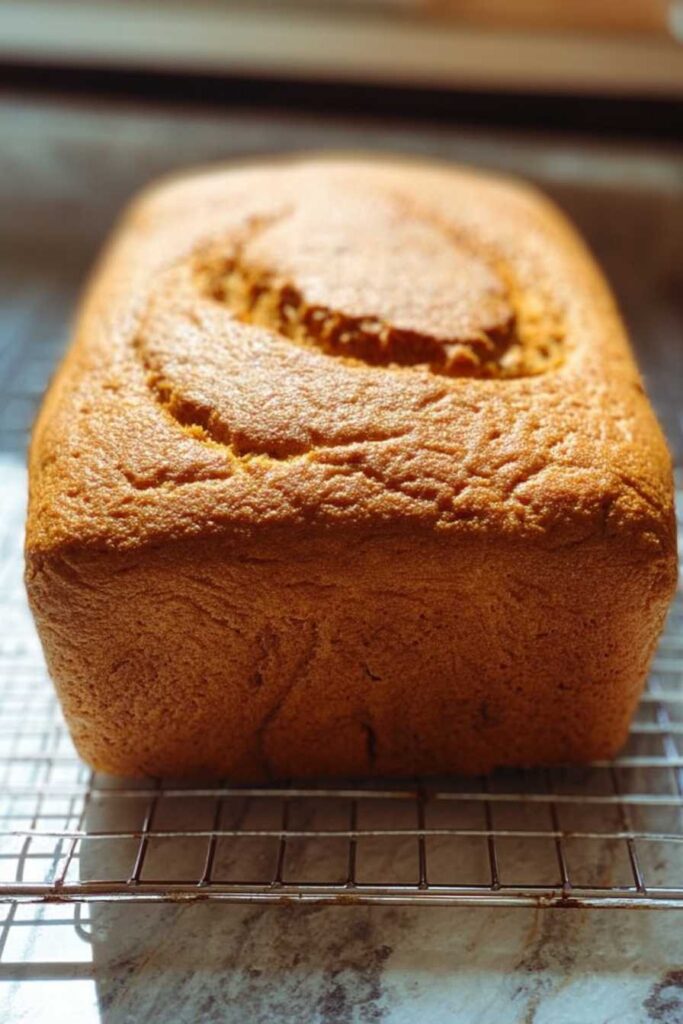
Step 4: Cool the Bread Slightly in the Bread Pan
When the baking cycle finishes, unplug the bread machine and carefully remove the hot bread pan using oven mitts.
Place the bread pan on a wooden cutting board and allow the bread to rest inside the pan for 10 minutes.
This helps to set the bread, making it easier to remove without breaking.
Step 5: Test and Finish Cooling the Bread
After the initial cooling, use oven mitts to gently remove the pumpkin bread from the pan and transfer it to a wire rack to cool completely.
Optionally, test for doneness by inserting a long wooden skewer into the center; it should come out clean.
Don’t forget to remove the mixing paddle if it’s stuck in the loaf.
To avoid crumbling, I always let the bread cool for at least 2 hours before slicing—it’s worth the wait for perfect slices.
