I used to think Halloween snacks had to be complicated until my kids taught me otherwise. They were more excited about the simple apple slices with marshmallow “teeth” we threw together last minute than the fancy cupcakes I spent hours decorating.
That’s when I realized the best spooky treats are often the easiest ones. These apple monster mouths take about five minutes to make, and kids love helping with the assembly. Plus, parents can feel good knowing there’s actual fruit hiding under all that Halloween fun.

Why You’ll Love These Apple Monster Mouths
- Super quick and easy – These fun treats come together in just 10-15 minutes with no cooking required, making them perfect for last-minute snacks or party prep.
- Kid-friendly fun – Children love making these spooky snacks themselves, and the silly monster faces always get them giggling while they eat their fruit.
- Only four simple ingredients – You probably already have apples, peanut butter, marshmallows, and lemon juice in your kitchen, so no special shopping trip needed.
- Healthy snack in disguise – Kids get their fruit and protein while thinking they’re eating a fun treat, making snack time both nutritious and entertaining.
- Perfect for Halloween parties – These spooky apple monsters are a hit at school parties, playdates, or any time you want to add some silly fun to snack time.
What Kind of Apples Should I Use?
Red apples are called for in this recipe, and you have some great options to choose from. Red Delicious, Gala, or Fuji apples all work well since they’re naturally sweet and have that bright red color that makes the “monster mouths” look more fun. If you want something with a bit more tartness to balance the sweet peanut butter and marshmallows, Honeycrisp or even red-skinned Braeburn apples are perfect choices. Just make sure to pick apples that are firm and crisp – you want them to hold their shape when you cut them into wedges and won’t get mushy when you add the lemon juice to keep them from browning.

Options for Substitutions
This fun snack is pretty simple, but here are some swaps you can make if needed:
- Red apples: Green apples like Granny Smith work great too and give you a nice tart flavor. You can also use any apple variety you have on hand – just make sure they’re crisp and fresh.
- Smooth peanut butter: If you have peanut allergies, try almond butter, sunflower seed butter, or even cream cheese for a different taste. Crunchy peanut butter works too, though it might be a bit messier.
- Mini marshmallows: No mini marshmallows? Cut regular marshmallows into smaller pieces with kitchen scissors. You could also use white chocolate chips or even small pieces of white cheese for a savory twist.
- Lemon juice: This keeps your apples from browning, but you can use lime juice or even a bit of orange juice instead. In a pinch, you can skip it if you’re serving right away.
Watch Out for These Mistakes While Cooking
The biggest mistake when making apple monster mouths is not treating the apple slices with lemon juice right away, which causes them to turn brown and look unappetizing within minutes. To keep your monster mouths looking fresh, brush or dip each apple slice in lemon juice immediately after cutting, and if you’re making them ahead of time, store the treated slices in the refrigerator covered with a damp paper towel. Another common error is using too much peanut butter, which makes the marshmallow “teeth” slide around and fall out – a thin, even layer works best and helps the marshmallows stick properly. For the cleanest cuts and most appealing monster mouths, use a sharp knife to create smooth wedges in the apple slices, and choose firm, crisp apples that won’t get mushy when you bite into them.
What to Serve With Apple Monster Mouths?
These spooky apple treats are perfect on their own as a fun snack, but they work great as part of a Halloween party spread alongside other themed goodies like pumpkin cookies or orange cheese cubes. You could also pack them in lunchboxes with some crackers and string cheese for a balanced meal that kids will actually get excited about. If you’re serving them at a party, try putting out some apple cider or chocolate milk for dipping and drinking. They’re also awesome as an after-school snack with a glass of regular milk to balance out the peanut butter.
Storage Instructions
Keep Fresh: These silly apple monster mouths are best enjoyed right after making them, but you can store them in the fridge for up to 2 days. Keep them in an airtight container with a damp paper towel to prevent the apple slices from browning too much.
Make Ahead: You can prep the apple slices a few hours ahead by cutting them and tossing with lemon juice to keep them from turning brown. Store the prepared apples in the fridge and assemble the monster mouths with peanut butter and marshmallows right before serving for the best look and taste.
Serve: These fun snacks don’t need any reheating since they’re meant to be enjoyed cold and crispy. Just take them out of the fridge and they’re ready to make everyone giggle! The marshmallow ‘teeth’ might get a little soft after a day, but they’ll still taste great.
| Preparation Time | 10-15 minutes |
| Cooking Time | 0 minutes |
| Total Time | 10-15 minutes |
| Level of Difficulty | Easy |
Estimated Nutrition
Estimated nutrition for the whole recipe (without optional ingredients):
- Calories: 350-400
- Protein: 7-9 g
- Fat: 15-18 g
- Carbohydrates: 55-65 g
Ingredients
- white miniature marshmallows
- lemon juice
- smooth peanut butter (I prefer Skippy creamy peanut butter)
- red apples
Step 1: Prepare the Apple Slices
- red apples
- lemon juice
Quarter the red apples and remove the core pieces.
Immediately sprinkle the apple quarters with lemon juice to prevent them from browning.
Then, cut each quarter into smaller slices suitable for holding the peanut butter and marshmallows.
Step 2: Spread Peanut Butter on Apple Slices
- smooth peanut butter
- apple slices from Step 1
Take each apple slice and spread about two teaspoons of smooth peanut butter onto one side.
This will act as the glue for your marshmallow ‘teeth’.
I find that letting the peanut butter come to room temperature makes spreading easier.
Step 3: Assemble the Apple Teeth
- white miniature marshmallows
- peanut butter-coated apple slices from Step 2
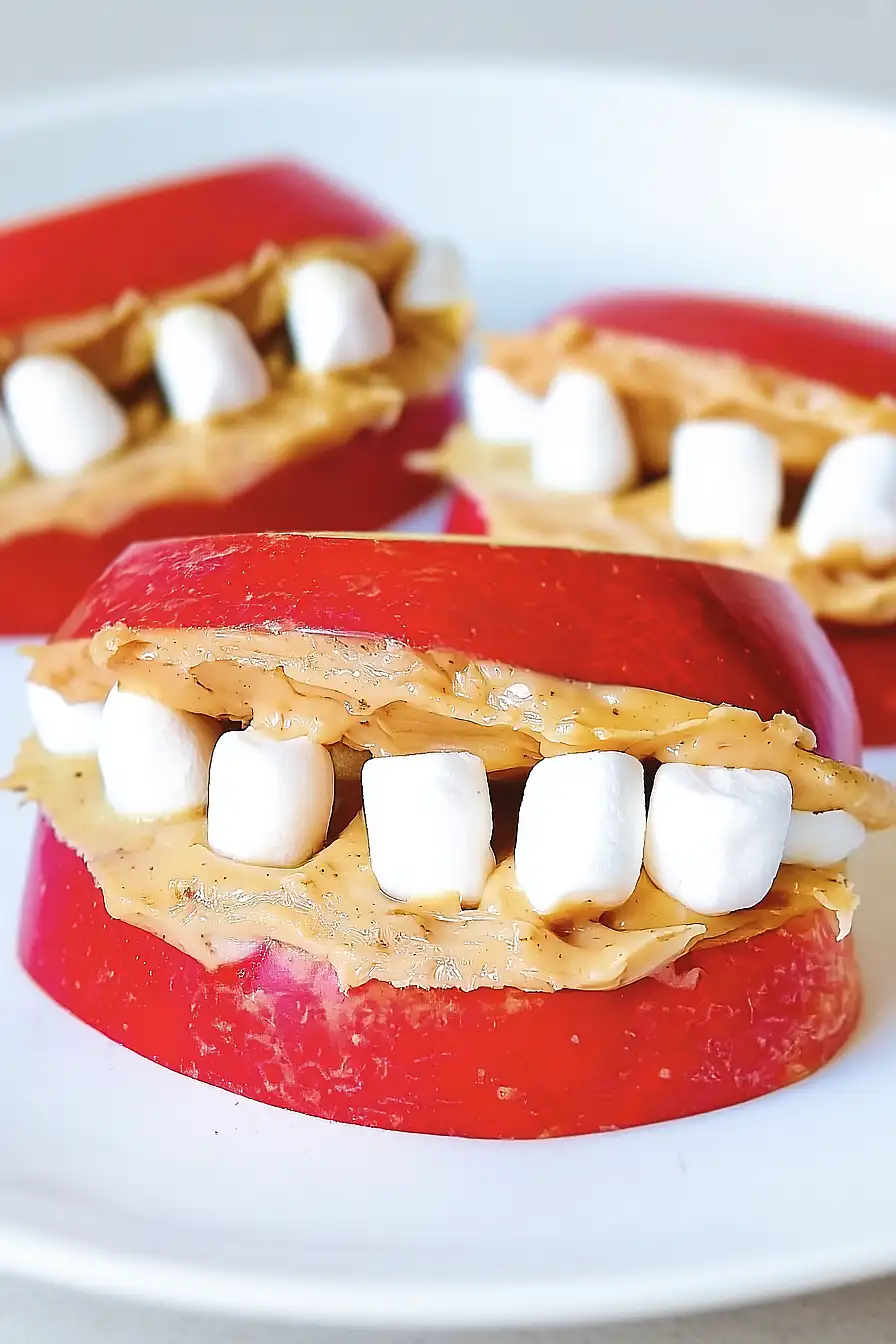
Place a row of white miniature marshmallows along the peanut butter-covered side of one apple slice.
Then, sandwich them with another peanut butter-coated apple slice, pressing gently but firmly so the marshmallows stick and resemble ‘teeth’.
Repeat for all slices to create a spooky and fun treat!
