Growing up, I thought apple pie had to be made with that thick, traditional pie crust. It’s what my grandmother always used, and when I tried making it myself, the dough would end up tough as a rock. My first attempts were so bad, my kids started calling them “apple bricks” instead of apple pies.
That’s because I was overthinking the whole thing—trying to recreate grandma’s precise technique when there was an easier way all along. Using store-bought puff pastry instead of traditional pie crust is like finding a cheat code for baking. The flaky layers happen naturally, and you get that perfect golden top without any fancy tricks.

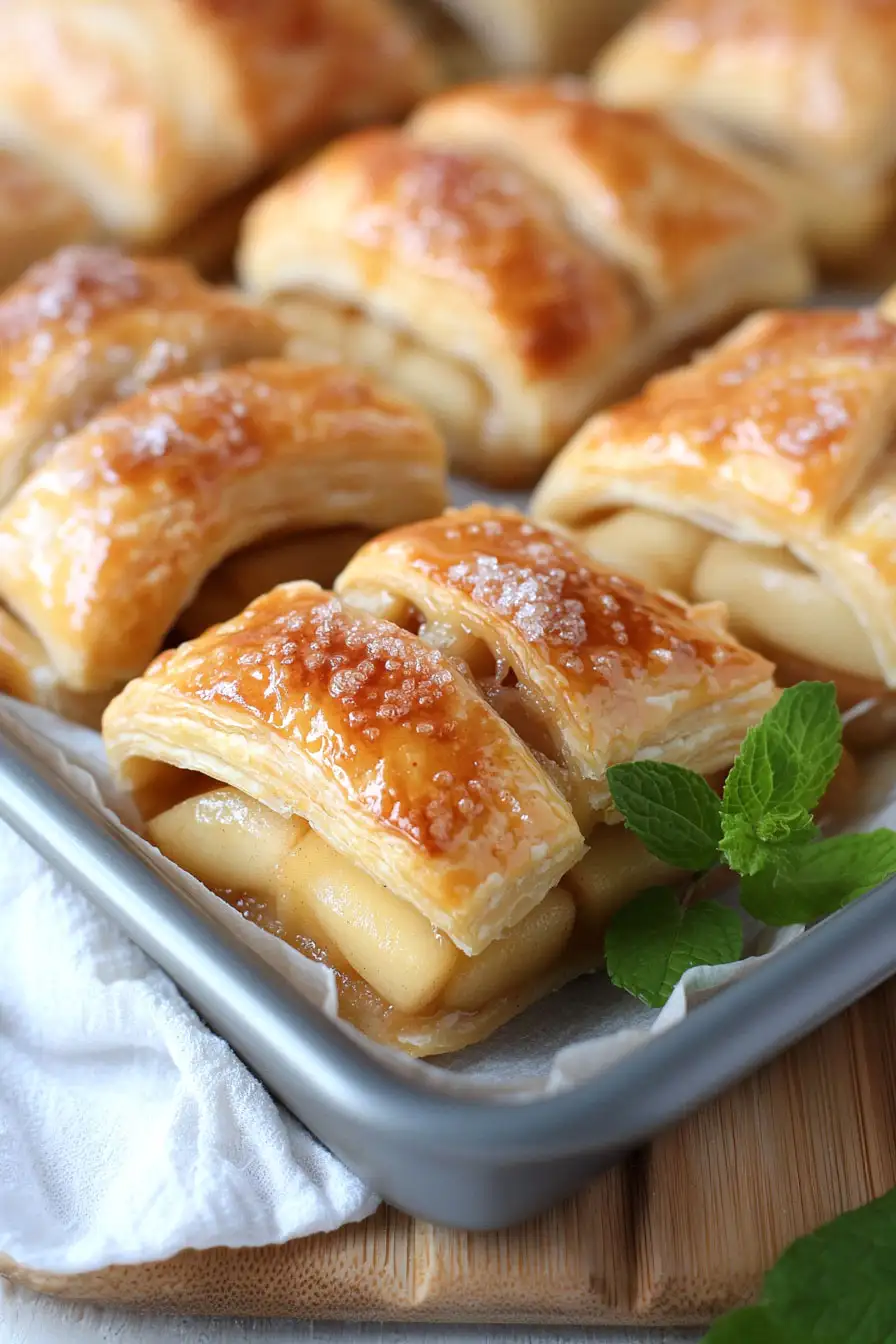
Why You’ll Love This Apple Pie
- Quick and easy – Using puff pastry instead of traditional pie crust cuts down prep time significantly – you can have this pie ready in under an hour!
- Simple ingredients – With just 7 basic ingredients that you might already have in your kitchen, this pie is super convenient to make on a whim.
- Flaky, buttery crust – Store-bought puff pastry creates an incredibly light and crispy crust with minimal effort – no pastry-making skills required.
- Perfect for beginners – If you’ve been intimidated by making pie from scratch, this simplified version gives you all the flavor without the fuss of traditional pie-making.
What Kind of Apples Should I Use?
For apple pie, you’ll want to choose apples that hold their shape when baked and offer a good balance of sweet and tart flavors. Granny Smith apples are a classic choice because they stay firm during baking and their tartness works well with the added sugar. If you prefer something less tart, Honeycrisp or Pink Lady apples are great alternatives that still maintain their structure in the oven. You can even mix two different apple varieties to create more complex flavors – try combining Granny Smith with Honeycrisp for a perfect balance. Just make sure to avoid softer apples like Red Delicious, as they tend to turn mushy when baked.
Options for Substitutions
Let me share some helpful swaps for this easy apple pie recipe:
- Puff pastry: This is the key ingredient that’s hard to substitute. While you could use pie crust in a pinch, it won’t give you that same flaky, airy texture that makes this dessert special. I recommend sticking with puff pastry.
- Apples: Any firm baking apple works great here! Try Granny Smith for tartness, or Honeycrisp, Gala, or Fuji for sweeter options. Just avoid softer apples like Red Delicious that can turn mushy.
- Brown sugar: Out of brown sugar? Mix regular white sugar with a teaspoon of molasses. Or just use white sugar on its own – though you’ll miss some of that caramel-like flavor.
- Large-grain sugar: For the topping, regular granulated sugar works fine, or you can skip it altogether. Turbinado or demerara sugar are good alternatives too.
- Egg wash: If you’re out of eggs, brush the top with milk or cream instead. The browning won’t be quite as nice, but it’ll still work!
Watch Out for These Mistakes While Baking
The biggest challenge when working with puff pastry is temperature control – using it straight from the fridge will make it crack and break, while letting it get too warm will make it sticky and impossible to handle, so let it thaw at room temperature for about 20-30 minutes until it’s just pliable.
A common mistake is overloading the pastry with too many apple slices or not cutting them uniformly – aim for thin, even slices (about 1/8 inch thick) and arrange them in a single layer to ensure they cook evenly and don’t make the pastry soggy.
The egg wash is crucial for that golden-brown finish, but don’t forget to brush it on evenly and avoid letting it pool in the corners or it will prevent the pastry from rising properly.
For the crispiest bottom crust, pre-heat your baking sheet in the oven and avoid using a glass pie dish, as it doesn’t conduct heat as well as metal.

What to Serve With Apple Pie?
When it comes to apple pie, ice cream is always my go-to sidekick – there’s just something magical about warm pie meeting cold, creamy vanilla ice cream! If you’re feeling fancy, you can switch things up with a scoop of caramel or cinnamon ice cream instead. A dollop of freshly whipped cream is another classic choice that never disappoints, especially with a light dusting of cinnamon on top. For a morning or afternoon treat, serve your pie with a hot cup of coffee or spiced chai tea – the warm spices in both complement the cinnamon-apple filling perfectly.
Storage Instructions
Counter or Fridge: Your apple pie can sit at room temperature, covered with foil or in an airtight container, for up to 2 days. If you want it to last longer, pop it in the fridge where it’ll stay good for up to 5 days. Just cover it well to prevent it from drying out or picking up other flavors.
Freeze: This pie freezes really well! Let it cool completely, then wrap it tightly in plastic wrap and aluminum foil. It’ll keep in the freezer for up to 3 months. I like to freeze individual slices too – they’re perfect for when you need a quick dessert fix!
Warm Up: To bring back that fresh-baked taste, warm individual slices in a 350°F oven for about 10-15 minutes. If you’re warming up a frozen pie, let it thaw in the fridge overnight first. The puff pastry will crisp up nicely again in the oven!
| Preparation Time | 15-20 minutes |
| Cooking Time | 20-30 minutes |
| Total Time | 35-50 minutes |
| Level of Difficulty | Easy |
Estimated Nutrition
Estimated nutrition for the whole recipe (without optional ingredients):
- Calories: 800-900
- Protein: 10-15 g
- Fat: 40-50 g
- Carbohydrates: 100-110 g
Ingredients
For the filling:
- 2 tbsp unsalted butter (I like Kerrygold unsalted butter for this)
- 1/4 cup brown sugar
- 1 tsp ground cinnamon
- 3 medium apples (Granny Smith or Honeycrisp, peeled, cored, and sliced 1/4-inch thick)
For the pastry:
- 1 egg (beaten for egg wash)
- 1 sheet puff pastry (thawed according to package directions, I use Pepperidge Farm)
- 2 tbsp large-grain sugar (for sprinkling)
Step 1: Prepare Baking Sheet and Skillet
Preheat your oven to 400˚F.
Line a large baking sheet with parchment paper and set it aside.
In parallel, preheat a large skillet over medium heat.
Add 2 tablespoons of butter to the skillet along with 3 peeled, cored, and sliced apples.
Cook for a few minutes until the apples begin to soften.
Step 2: Caramelize the Apples
Sprinkle 1 teaspoon of cinnamon and ¼ cup of brown sugar over the softened apples in the skillet.
Continue to cook the mixture for another 5-7 minutes, stirring occasionally, until the apples are fully soft and caramelized.
Remove the skillet from the heat and allow the apples to cool slightly.
Step 3: Prepare the Puff Pastry
Take the thawed puff pastry dough and place it on a countertop or cutting board.
Cut the dough in half lengthwise.
Place one half of the dough onto the prepared baking sheet lined with parchment paper.
Step 4: Assemble the Puff Pastry with Caramelized Apples
Scoop the caramelized apple slices into the center of the dough, leaving about a 1-inch border around the edges.
Whisk an egg in a small bowl.
Using a pastry brush, brush the edges of the puff pastry with the egg wash to help seal it.
Step 5: Seal and Vent the Pastry
Place the second half of the dough over the apples.
Seal the edges by pinching them together along the sides.
With a paring knife, make a few cuts in the center of the pastry to act as vents, allowing steam to escape during baking.
Step 6: Apply Egg Wash and Bake
Brush the top of the puff pastry with additional egg wash and sprinkle raw or coarse sugar on top for added texture and sweetness.
Bake in the preheated oven at 400˚F for about 20 minutes, or until the top is golden brown and flaky.
Once baked, allow it to cool briefly before serving.
