Finding a simple dessert that both kids and adults will get excited about can be tricky, especially when you’re dealing with picky eaters or trying to beat the summer heat. Store-bought ice cream sandwiches are always a hit, but they can get expensive and are often loaded with ingredients you can’t even pronounce.
That’s where these cool whip ice cream sandwiches come to the rescue: they’re incredibly easy to make with just a few ingredients, cost a fraction of what you’d spend at the store, and you can customize them with whatever cookies or flavors your family loves most.

Why You’ll Love These Cool Whip Ice Cream Sandwiches
- Only 3 ingredients – You probably already have these simple items in your pantry and freezer, making this an easy last-minute dessert.
- No-bake dessert – No need to turn on the oven or worry about baking skills – just assemble and freeze for a foolproof treat.
- Kid-friendly activity – This is a fun recipe to make with little ones who love getting their hands involved in the kitchen.
- Make-ahead convenience – These freeze beautifully, so you can make a batch ahead of time and have a cool treat ready whenever you need it.
- Budget-friendly – Using affordable ingredients like Cool Whip and graham crackers, you can make a dozen ice cream sandwiches for a fraction of what store-bought ones cost.
What Kind of Whipped Topping Should I Use?
You can absolutely use Cool Whip for this recipe, but any store-brand frozen whipped topping will work just as well and save you some money. The key is making sure whatever brand you choose is the regular, not light version – you want that creamy richness for the best texture. If you’re feeling fancy, you can even make your own whipped cream, but honestly, the convenience of the frozen stuff is hard to beat for a recipe like this. Just make sure your whipped topping is completely thawed before you start assembling your ice cream sandwiches, or it’ll be too hard to spread evenly.
Options for Substitutions
This simple treat is pretty forgiving when it comes to swaps, so feel free to get creative:
- Cool Whip: If you don’t have Cool Whip, you can use any frozen whipped topping or even make your own by whipping heavy cream with a bit of powdered sugar. Just make sure it’s thick enough to hold its shape when frozen.
- Graham crackers: Swap these out for chocolate graham crackers, vanilla wafers, or even digestive biscuits for a different flavor. Just make sure whatever you choose is sturdy enough to hold the filling without breaking.
- Oreos: Feel free to use any sandwich cookie you like – chocolate chip cookies, vanilla wafers, or even homemade cookies work great. You could also crush up different cookies like chocolate wafers or gingersnaps for variety.
- Mix-ins: Want to jazz things up? Try folding mini chocolate chips, crushed cookies, or even a bit of peanut butter into the Cool Whip before assembling your sandwiches.
Watch Out for These Mistakes While Making
The biggest mistake when making Cool Whip ice cream sandwiches is not letting the Cool Whip soften slightly at room temperature for about 10-15 minutes before assembling, which makes spreading much easier and prevents the graham crackers from breaking.
Another common error is not pressing the sandwich layers together firmly enough – you want to gently but securely press so the Cool Whip spreads to the edges without squishing out completely.
To avoid messy, crumbly sandwiches, crush your Oreos into small chunks rather than fine powder, and make sure to freeze the assembled sandwiches for at least 2-3 hours before serving so they hold their shape when you bite into them.
For the cleanest cuts and best presentation, wrap each sandwich individually in plastic wrap before freezing, which also prevents freezer burn and makes them easier to grab for a quick treat.

What to Serve With Cool Whip Ice Cream Sandwiches?
These frozen treats are perfect on their own, but they’re even better when you turn dessert time into a fun spread! I love setting out a variety of toppings like chocolate chips, sprinkles, or crushed nuts so everyone can roll their sandwiches in whatever sounds good. Fresh berries like strawberries or raspberries make a nice, refreshing side that cuts through all that creamy sweetness. You could also serve them alongside some cold milk or even hot chocolate if you’re enjoying them during cooler weather – the temperature contrast is surprisingly delicious!
Storage Instructions
Freeze: These ice cream sandwiches need to be stored in the freezer to keep their shape and creamy texture. Wrap each sandwich individually in plastic wrap or parchment paper, then place them in a freezer-safe container or zip-top bag. They’ll stay fresh for up to 2 months in the freezer.
Make Ahead: This is actually the perfect make-ahead dessert! I like to assemble a whole batch on Sunday and have them ready for the week. Just make sure to freeze them for at least 2-3 hours before serving so the Cool Whip firms up properly and doesn’t squish out when you bite into them.
Serve: Let the sandwiches sit out for just 2-3 minutes before eating if they’re super frozen – this makes them easier to bite into without the graham crackers cracking. If you’re serving them at a party, you can take them out about 5 minutes early so they’re at the perfect consistency.
| Preparation Time | 20-30 minutes |
| Cooking Time | 120-180 minutes |
| Total Time | 140-210 minutes |
| Level of Difficulty | Easy |
Estimated Nutrition
Estimated nutrition for the whole recipe (without optional ingredients):
- Calories: 1750-1950
- Protein: 10-14 g
- Fat: 80-90 g
- Carbohydrates: 255-275 g
Ingredients
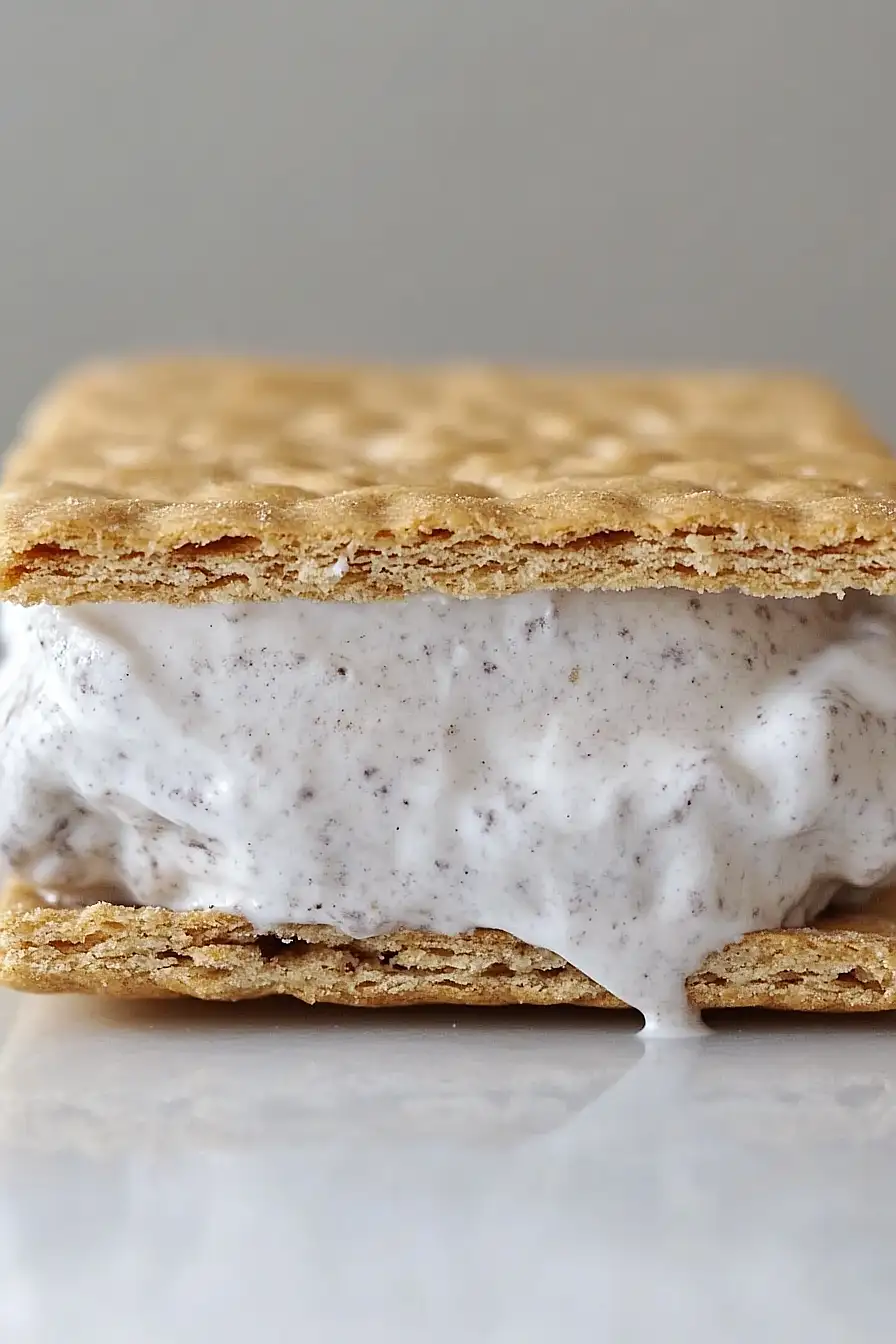
- 8 oz whipped topping (like Cool Whip, thawed for easier spreading)
- 12 chocolate sandwich cookies (crushed into medium crumbs)
- 24 graham cracker sheets (I prefer Honey Maid)
Step 1: Soften the Whipped Topping
- 8 oz whipped topping (such as Cool Whip, 226 g)
Remove the whipped topping from the freezer and let it sit at room temperature for 20 to 30 minutes to thaw and become soft.
This will make it much easier to combine with your cookie crumbs in the next step.
Step 2: Crush the Chocolate Sandwich Cookies
- 12 chocolate sandwich cookies (such as Oreos)
While the whipped topping softens, crush the chocolate sandwich cookies into fine crumbs.
Place the cookies in a sealed bag and crush them with a rolling pin or meat tenderizer, or pulse them in a food processor or blender until they become crumbs.
Step 3: Make the Cookie Filling
- softened whipped topping (from Step 1)
- crushed chocolate sandwich cookies (from Step 2)
In a medium bowl, add the softened whipped topping (from Step 1) and gently stir in the crushed cookie crumbs (from Step 2) until well combined.
The mixture should be light and fluffy.
I like to fold gently to keep the filling airy.
Step 4: Assemble the Ice Cream Sandwiches
- 24 graham cracker sheets
- cookie filling (from Step 3)
Break each large graham cracker sheet into two squares, or keep them whole for bigger sandwiches.
Spoon two to three heaping tablespoons of the cookie filling (from Step 3) onto one graham cracker.
Place another graham cracker on top and gently press down to form a sandwich.
Use a spatula to smooth the edges for a neat finish.
Step 5: Freeze the Sandwiches
Arrange the assembled sandwiches on a sheet pan lined with parchment or wax paper.
Place the pan in the freezer and freeze for 2 to 3 hours, or until the sandwiches are firm.
I find that letting them fully set makes for a perfect texture.
Step 6: Serve and Store
Once the sandwiches are firm, they are ready to serve.
Enjoy immediately or store them in a freezer bag for up to 3–4 weeks.
For a fun twist, you can roll the sandwich edges in extra crushed cookies or sprinkles before freezing.
