Finding a weeknight dinner that actually gets the whole family excited can feel like an impossible task. Between picky eaters, busy schedules, and that constant question of “what’s for dinner?” it’s easy to fall into the same rotation of boring meals that leave everyone disappointed.
That’s where these fried chicken cutlets come to the rescue: they’re crispy and satisfying, quick enough for busy weeknights, and simple enough that even hesitant cooks can nail them every time.

Why You’ll Love These Fried Chicken Cutlets
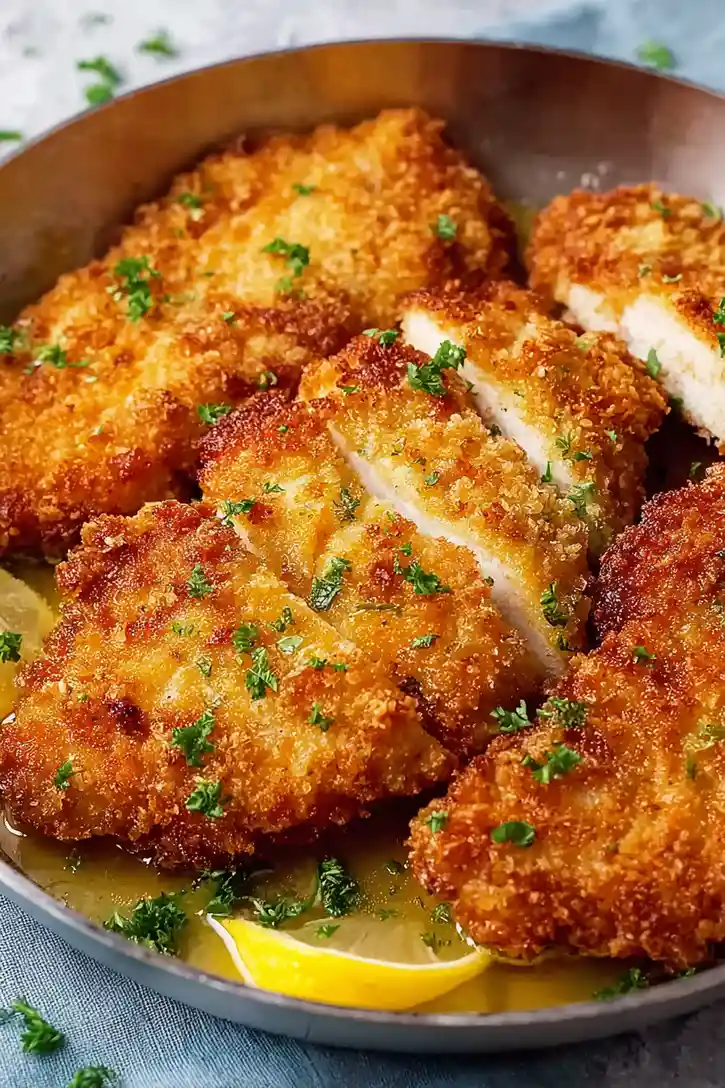
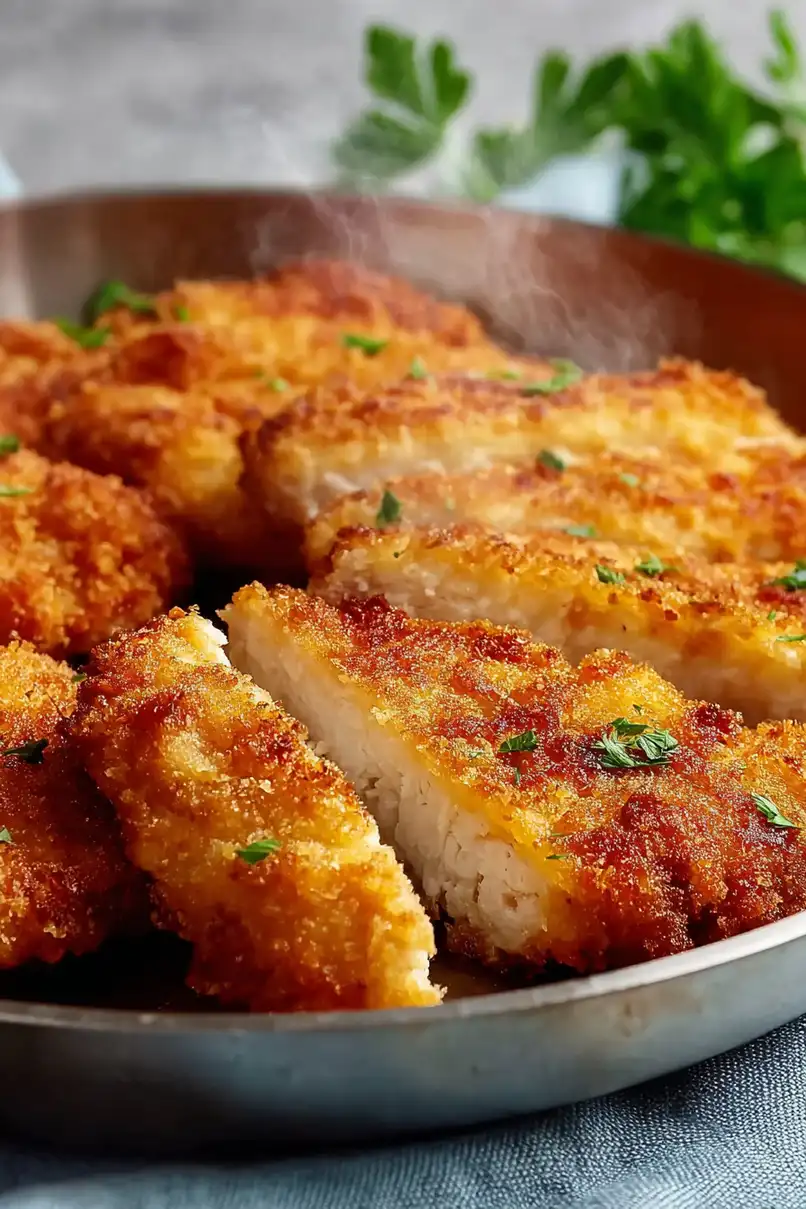
- Crispy, golden coating – The panko breadcrumbs create that perfect crunch we all crave, while the seasoned flour adds extra flavor to every bite.
- Tender, juicy chicken – The marinade with lemon juice and garlic keeps the chicken moist and flavorful, so you’ll never end up with dry meat.
- Quick weeknight dinner – Ready in under an hour, these cutlets are perfect when you want something satisfying without spending all evening in the kitchen.
- Kid-friendly favorite – The mild flavors and crispy texture make this a hit with the whole family, and it pairs well with just about any side dish.
- Simple ingredients – You probably have most of these pantry staples on hand already, making this an easy go-to recipe when you need dinner fast.
What Kind of Chicken Should I Use?
For the best fried chicken cutlets, you’ll want to use boneless, skinless chicken breasts that are fresh rather than frozen if possible. Look for chicken breasts that are similar in size so they cook evenly, and don’t be afraid to pound them to an even thickness of about ½ inch – this helps them cook through without drying out. If your chicken breasts are particularly thick, you can slice them horizontally to create thinner cutlets, or use a meat mallet to gently flatten them. Fresh chicken will give you the juiciest results, but if you’re using frozen, make sure to thaw it completely and pat it dry before marinating.
Options for Substitutions
This crispy chicken cutlet recipe is pretty adaptable, so here are some swaps you can make:
- Chicken breasts: You can use chicken thighs instead for juicier results, or even pork cutlets if you want to switch up the protein. Just pound them to the same thickness for even cooking.
- Panko bread crumbs: Regular bread crumbs work fine, though you won’t get quite the same crunch. You can also make your own by pulsing day-old bread in a food processor.
- All purpose flour: You can substitute with whole wheat flour or even cornstarch for a lighter coating. If using cornstarch, use about 3 tablespoons instead of 1/4 cup.
- Lemon juice and zest: Lime juice and zest make a great substitute, or you can use white wine vinegar if you’re out of citrus. Just use the same amounts.
- Dried oregano: Fresh oregano works too – just use about 3 times the amount since fresh herbs are less concentrated. Italian seasoning or dried basil are also good alternatives.
- Frying oil: Any neutral oil with a high smoke point works – vegetable oil, canola oil, or even avocado oil. You need enough to come about halfway up the cutlets in your pan.
Watch Out for These Mistakes While Cooking
The biggest mistake when making fried chicken cutlets is not pounding the chicken breasts to an even thickness, which leads to uneven cooking where some parts are overcooked while others remain undercooked – aim for about 1/2 inch thickness throughout.
Another common error is letting your oil temperature drop too low or get too hot, so use a thermometer to keep it steady at 350°F for golden, crispy results without burning the panko coating.
Don’t skip the marinating step with the olive oil and lemon juice mixture, as this not only adds flavor but helps tenderize the meat, and make sure to set up your breading station in order (flour, beaten eggs, seasoned panko) to create a proper coating that won’t fall off during frying.
Finally, avoid overcrowding the pan when frying, as this drops the oil temperature and creates soggy cutlets instead of crispy ones – cook in batches if needed and let each cutlet drain on paper towels before serving.
What to Serve With Fried Chicken Cutlets?
These crispy chicken cutlets are perfect with a simple side salad dressed with lemon vinaigrette, which cuts through the richness of the fried coating nicely. I love serving them over a bed of pasta with marinara sauce for an easy chicken parmigiana-style meal, or alongside roasted vegetables like zucchini, bell peppers, or broccoli. Mashed potatoes or rice pilaf also make great companions to soak up any extra lemon and herb flavors. For a lighter option, try them sliced over mixed greens with cherry tomatoes and a drizzle of balsamic dressing.
Storage Instructions
Refrigerate: Your crispy fried chicken cutlets will keep their great flavor in the fridge for up to 3 days when stored in an airtight container. I like to place a paper towel on the bottom to absorb any excess moisture. They’re perfect for quick lunches or dinner leftovers throughout the week.
Freeze: These cutlets freeze really well for up to 3 months! Let them cool completely first, then wrap each piece individually in plastic wrap or place them in a freezer bag with parchment paper between layers. This way you can grab just what you need for a quick meal.
Warm Up: To bring back that crispy texture, reheat your cutlets in a 375°F oven for about 10-15 minutes until heated through. You can also use an air fryer at 350°F for 5-7 minutes. Skip the microwave if you want to keep them from getting soggy – the oven method really brings back that nice crunch.
| Preparation Time | 30-45 minutes |
| Cooking Time | 12-14 minutes |
| Total Time | 42-59 minutes |
| Level of Difficulty | Medium |
Estimated Nutrition
Estimated nutrition for the whole recipe (without optional ingredients):
- Calories: 1700-2000
- Protein: 130-160 g
- Fat: 100-120 g
- Carbohydrates: 70-90 g
Ingredients
For the marinade:
- 1 tsp dried oregano
- 1/4 cup olive oil (extra virgin preferred)
- 3 cloves garlic (freshly minced for best flavor)
- 1/2 tsp salt
- 1 tbsp lemon juice
For the breading:
- 1/4 cup all-purpose flour
- 1/2 tsp lemon zest
- 1/2 tsp dried oregano
- 1 cup panko breadcrumbs (for extra crispiness)
- 1/2 tsp salt
For the chicken and frying:
- 1/2 cup oil (like vegetable oil, for frying)
- 3-4 boneless, skinless chicken breasts (halved horizontally into cutlets)
- Fresh parsley (chopped, for garnish, optional)
- 2 large eggs (whisked well)
Step 1: Prepare and Tenderize the Chicken
- 3 to 4 chicken breasts
Using a sharp knife, slice each chicken breast in half lengthwise to create thinner cutlets.
Place the chicken halves into a resealable plastic bag and use a meat tenderizer or rolling pin to pound them gently until they reach an even thickness of about 1/4 inch.
This ensures even cooking and tender results.
Step 2: Make the Marinade and Marinate Chicken
- 1/4 cup olive oil
- 1 tbsp lemon juice
- 3 garlic cloves, minced
- 1 tsp dried oregano
- 1/2 tsp salt
- chicken cutlets (from Step 1)
In a mixing bowl, whisk together the olive oil, lemon juice, minced garlic cloves, dried oregano, and salt until well combined.
Pour this marinade over the pounded chicken cutlets (from Step 1), seal the bag or cover the dish, and toss to ensure all pieces are coated evenly.
Let the chicken marinate for at least 30 minutes in the refrigerator to infuse the flavors.
I find that a longer marination brings out even more juiciness in the chicken.
Step 3: Prepare Breading Stations
- 2 eggs
- 1/4 cup all-purpose flour
- 1 cup panko breadcrumbs
- 1/2 tsp dried oregano
- 1/2 tsp lemon zest
- 1/2 tsp salt
While the chicken is marinating, set up your breading stations.
In one shallow bowl, whisk the eggs until well blended.
In a second bowl, combine the flour, panko breadcrumbs, dried oregano, lemon zest, and salt and mix thoroughly.
This will be the coating for the chicken to ensure a crunchy exterior.
Step 4: Coat the Chicken Cutlets
- marinated chicken cutlets (from Step 2)
- beaten eggs (from Step 3)
- breadcrumb-flour mixture (from Step 3)
Remove the marinated chicken cutlets (from Step 2) from the marinade.
Dip each piece first into the beaten eggs (from Step 3), making sure it is fully coated, then allow the excess to drip off.
Next, dredge the chicken in the breadcrumb-flour mixture (from Step 3), pressing lightly to adhere the coating.
Repeat with all chicken cutlets.
Step 5: Fry the Chicken Cutlets
- 1/2 cup oil (for frying)
- breaded chicken cutlets (from Step 4)
Heat about 1/2 cup of oil in a large skillet over medium heat, making sure the oil covers about 1/4 inch up the sides of the pan.
Fry the breaded chicken cutlets (from Step 4) in batches, without crowding the pan.
Cook for 6-7 minutes on each side, or until golden brown and cooked through.
Transfer cooked chicken to a paper towel-lined plate to drain.
For extra crispiness, I sometimes let the chicken rest on a wire rack for a couple of minutes after frying.
Step 6: Garnish and Serve
- parsley, for garnish (optional)
Sprinkle the fried chicken cutlets with additional salt if desired.
Slice the cutlets and arrange on a serving platter.
Garnish with fresh chopped parsley for a burst of color and freshness, then serve immediately.
