I’ve been eating with my cycle for about a year now, and honestly, it’s changed how I think about food. During my luteal phase—that’s the two weeks before your period starts—my body craves extra magnesium, B vitamins, and complex carbs. Instead of fighting those chocolate cravings, I lean into them with recipes that actually support what my body needs.
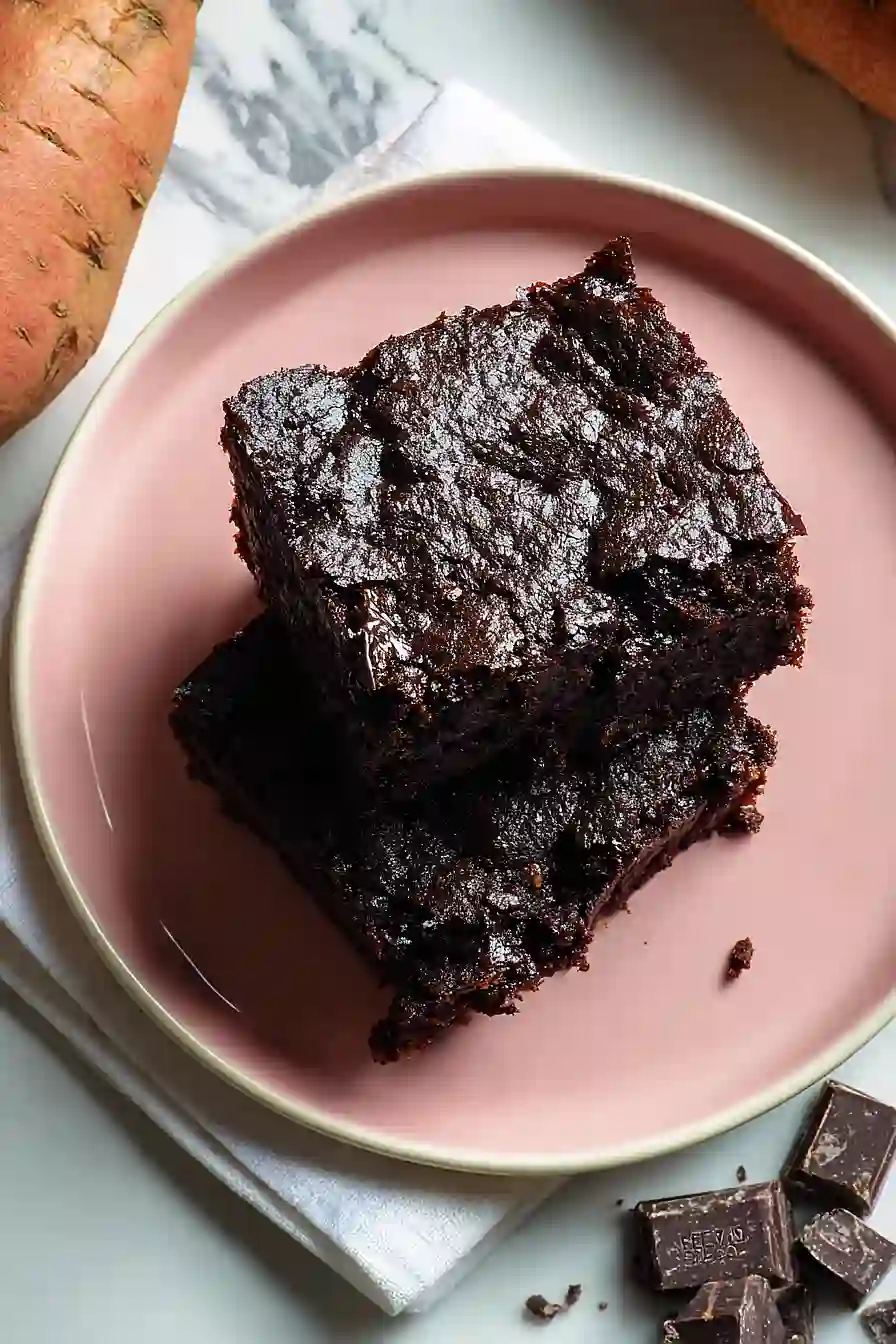
That’s where these brownies come in. They’re packed with sweet potato for those complex carbs and B vitamins, plus cocoa powder loaded with magnesium. I make a batch every month when I hit that phase and know the cravings are coming. My kids don’t even realize they’re eating something hormone-supportive. They just know Mom made brownies.
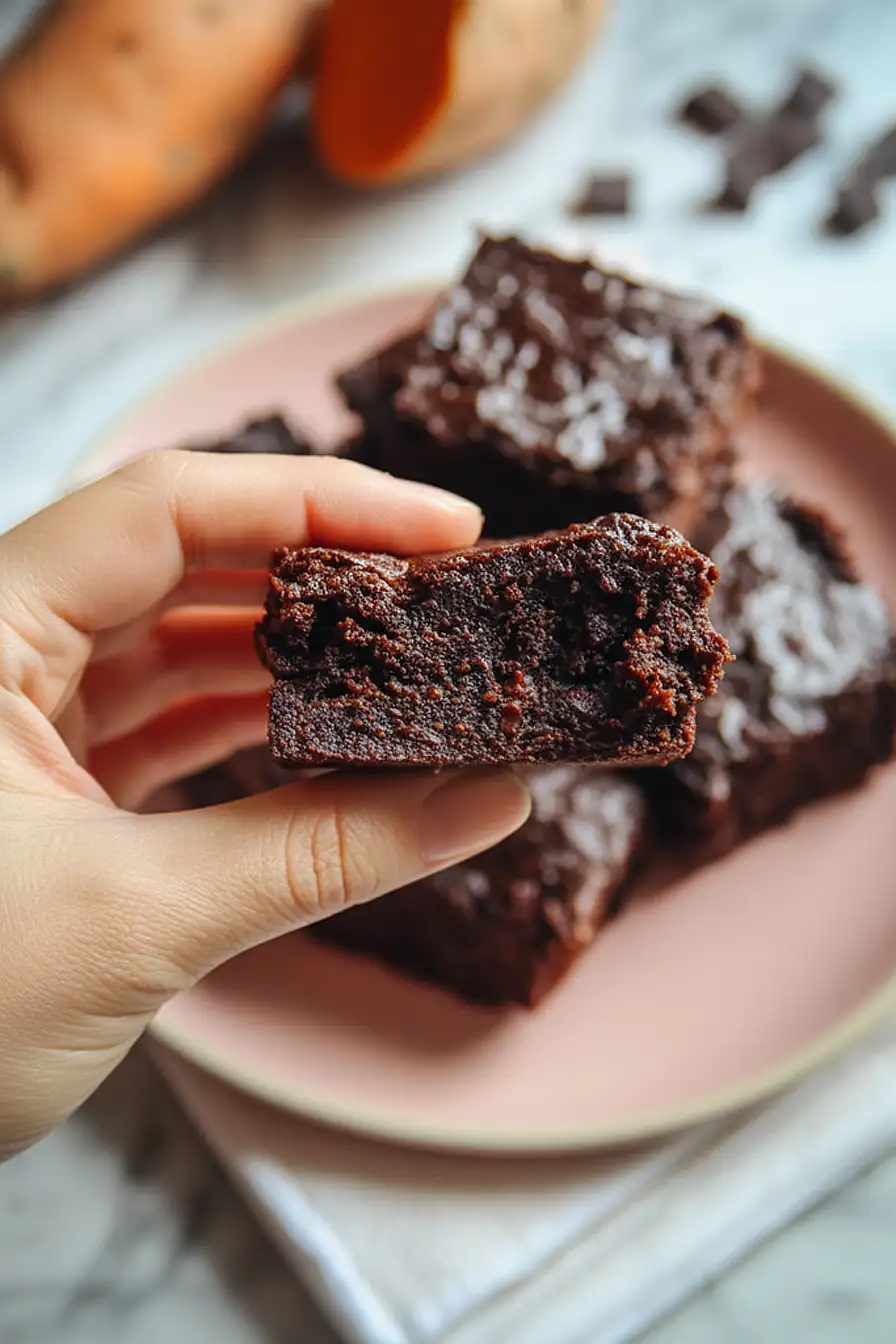
Want them fudgy? Bake for less time. Prefer a cake-like texture? Leave them in a bit longer. Either way, you’re getting a brownie that tastes like a treat but works with your body instead of against it.
Why You’ll Love These Luteal Phase Sweet Potato Brownies
- Hormone-supporting ingredients – These brownies are packed with nutrients like magnesium from cocoa and complex carbs from sweet potato that can help support your body during the luteal phase of your cycle.
- Naturally sweetened – Using maple syrup instead of refined sugar means you can satisfy your chocolate cravings without the blood sugar crash that often comes with traditional brownies.
- Healthier comfort food – You get all the fudgy, chocolatey goodness of regular brownies but with added protein from almond butter and eggs, plus the nutritional benefits of sweet potato.
- Simple ingredients – Everything you need is probably already in your pantry or easy to find at any grocery store.
- Perfect for meal prep – Make a batch at the beginning of the week and you’ll have a satisfying snack ready whenever cravings hit during your luteal phase.
What Kind of Sweet Potato Should I Use?
For these brownies, you can use either orange-fleshed sweet potatoes (often labeled as “yams” in grocery stores) or the paler Japanese sweet potatoes – both work great. The orange variety will give you a slightly sweeter, moister brownie, while the Japanese ones have a drier texture that some people prefer for baking. You’ll want to cook your sweet potato until it’s really soft and mashable, either by baking, microwaving, or boiling it. Make sure to let it cool completely before adding it to your batter, and mash it up really well so you don’t end up with chunks in your brownies.

Options for Substitutions
These brownies are pretty forgiving when it comes to swapping ingredients:
- Sweet potato: You can use canned pumpkin puree or butternut squash puree instead. Just make sure it’s plain puree, not pie filling with added spices and sugar.
- Almond butter: Any nut or seed butter works here – try cashew butter, sunflower seed butter, or peanut butter. Just make sure it’s the natural kind without added oils or sugar.
- Eggs: For a vegan version, use 2 flax eggs (2 tablespoons ground flaxseed mixed with 6 tablespoons water, let sit for 5 minutes) or 1/2 cup unsweetened applesauce.
- Maple syrup: Honey or agave nectar can replace the maple syrup in equal amounts. Keep in mind this will change the flavor slightly.
- Cocoa powder: Don’t substitute this one – regular cocoa powder is what gives these brownies their chocolate base. Make sure you’re using unsweetened cocoa powder, not hot chocolate mix.
- Chocolate chips: Use whatever chocolate you prefer – dark, semi-sweet, or even dairy-free chips. You can also chop up a chocolate bar if you don’t have chips on hand.
- Cacao nibs: These add crunch, but you can leave them out or replace them with chopped nuts like walnuts or pecans.
Watch Out for These Mistakes While Baking
The biggest mistake you can make with these brownies is not letting your mashed sweet potato cool completely before mixing it with the other ingredients – warm sweet potato can scramble the eggs and make your batter lumpy instead of smooth.
Another common error is overbaking, which turns fudgy brownies into dry, cake-like squares, so pull them out when a toothpick inserted in the center comes out with a few moist crumbs, not completely clean.
Since almond butter can vary in consistency between brands, if your batter seems too thick to spread easily, add a tablespoon of milk or water to loosen it up.
Finally, resist the urge to cut into these brownies right away – letting them cool for at least 30 minutes helps them firm up and makes slicing much cleaner and easier.
What to Serve With Sweet Potato Brownies?
These brownies are pretty rich and fudgy on their own, so I like keeping things simple when serving them. A scoop of vanilla ice cream or some whipped coconut cream on top makes them feel extra special for dessert, and the cool creaminess balances out the dense chocolate perfectly. If you’re having them as an afternoon snack, they pair really well with a cup of coffee or a glass of cold milk. You could also crumble them over Greek yogurt for breakfast or serve them alongside fresh berries like raspberries or strawberries to cut through the sweetness.
Storage Instructions
Store: Keep your brownies in an airtight container at room temperature for up to 3 days, or in the fridge for up to a week. I actually prefer them cold from the fridge because they get this nice fudgy texture that’s perfect with a cup of coffee or tea.
Freeze: These brownies are great for stashing away when you need a quick treat. Cut them into squares and wrap individually in plastic wrap, then store in a freezer bag for up to 3 months. Perfect for having a sweet potato brownie ready whenever your luteal phase cravings hit!
Enjoy: If you’ve frozen them, just thaw at room temperature for about 30 minutes or pop one in the microwave for 15-20 seconds for that warm, gooey brownie experience. They’re honestly delicious straight from the freezer too if you like a firmer, almost truffle-like texture.
| Preparation Time | 20-30 minutes |
| Cooking Time | 25-30 minutes |
| Total Time | 45-60 minutes |
| Level of Difficulty | Medium |
| Servings | 12 pieces |
Estimated Nutrition
Estimated nutrition for the whole recipe (without optional ingredients):
- Calories: 2500-2700
- Protein: 40-48 g
- Fat: 150-160 g
- Carbohydrates: 310-340 g
Ingredients
- 1 1/4 cups sweet potato (mashed and smooth, I use organic canned for better texture)
- 1 cup almond butter (I prefer Barney Butter for its extra creamy consistency)
- 2 eggs (room temperature, about 70°F, to help the batter emulsify)
- 1 1/2 tsp vanilla extract
- 1/2 cup maple syrup
- 1 cup cocoa powder (sifted to remove lumps for a smoother batter)
- 1/2 tsp baking soda
- 1/2 tsp cinnamon
- 1 1/4 tsp salt
- 1 tbsp instant espresso powder
- 1 cup chocolate chips (I use Guittard bittersweet for a deeper cocoa flavor)
- 1/3 cup cacao nibs (optional, adds a nice crunch and earthy depth)
Step 1: Prepare the Oven and Mise en Place
- 1 cup cocoa powder
Preheat your oven to 350°F and line an 8×8 inch baking dish with parchment paper or lightly grease it.
While the oven heats, sift the cocoa powder into a small bowl to remove any lumps—this ensures a smooth, lump-free batter.
Measure out all remaining ingredients and have them ready, including the sweet potato, almond butter, eggs, maple syrup, vanilla extract, and chocolate chips.
Having everything prepared before you start mixing means you can work efficiently and won’t have to hunt for ingredients mid-process.
Step 2: Create the Wet Ingredient Base
- 1 1/4 cups sweet potato
- 1 cup almond butter
- 2 eggs
- 1 1/2 tsp vanilla extract
- 1/2 cup maple syrup
In a large bowl, combine the mashed sweet potato, almond butter, room temperature eggs, vanilla extract, and maple syrup.
Whisk these together until the mixture is smooth and well combined, about 1-2 minutes.
The room temperature eggs are important here—they help the almond butter emulsify into the batter more evenly, creating a better texture.
I find that starting with this wet base first makes it easier to incorporate the dry ingredients without overmixing later.
Step 3: Combine Dry Ingredients and Integrate into Batter
- cocoa powder mixture from Step 1
- 1/2 tsp baking soda
- 1/2 tsp cinnamon
- 1 1/4 tsp salt
- 1 tbsp instant espresso powder
In a separate small bowl, whisk together the sifted cocoa powder, baking soda, salt, cinnamon, and instant espresso powder.
This pre-mixing prevents dry streaks in your final batter.
Pour the dry ingredient mixture into the wet ingredients from Step 2 and fold together gently with a spatula until just combined—stop as soon as you don’t see any dry streaks.
Overmixing at this stage can make the brownies tough, so restraint is key.
Step 4: Add Mix-ins and Transfer to Pan
- batter from Step 3
- 1 cup chocolate chips
- 1/3 cup cacao nibs
Fold the chocolate chips and cacao nibs (if using) into the batter from Step 3 until evenly distributed.
Pour the batter into your prepared 8×8 inch baking dish and smooth the top gently with a spatula.
I like to reserve a few chocolate chips to scatter on top before baking—it creates a nice visual finish and ensures you get chocolate in every bite.
Step 5: Bake and Cool
Bake at 350°F for 25 minutes, until a toothpick inserted into the center comes out with just a few moist crumbs—don’t overbake, as these brownies will continue to set slightly as they cool.
Remove from the oven and let cool in the pan for at least 15 minutes before cutting.
If you can wait, cooling for 30 minutes will give you cleaner cuts and a better texture.
Classic Luteal Phase Sweet Potato Brownies
Ingredients
- 1 1/4 cups sweet potato (mashed and smooth, I use organic canned for better texture)
- 1 cup almond butter (I prefer Barney Butter for its extra creamy consistency)
- 2 eggs (room temperature, about 70°F, to help the batter emulsify)
- 1 1/2 tsp vanilla extract
- 1/2 cup maple syrup
- 1 cup cocoa powder (sifted to remove lumps for a smoother batter)
- 1/2 tsp baking soda
- 1/2 tsp cinnamon
- 1 1/4 tsp salt
- 1 tbsp instant espresso powder
- 1 cup chocolate chips (I use Guittard bittersweet for a deeper cocoa flavor)
- 1/3 cup cacao nibs (optional, adds a nice crunch and earthy depth)
Instructions
- Preheat your oven to 350°F and line an 8x8 inch baking dish with parchment paper or lightly grease it. While the oven heats, sift the cocoa powder into a small bowl to remove any lumps—this ensures a smooth, lump-free batter. Measure out all remaining ingredients and have them ready, including the sweet potato, almond butter, eggs, maple syrup, vanilla extract, and chocolate chips. Having everything prepared before you start mixing means you can work efficiently and won't have to hunt for ingredients mid-process.
- In a large bowl, combine the mashed sweet potato, almond butter, room temperature eggs, vanilla extract, and maple syrup. Whisk these together until the mixture is smooth and well combined, about 1-2 minutes. The room temperature eggs are important here—they help the almond butter emulsify into the batter more evenly, creating a better texture. I find that starting with this wet base first makes it easier to incorporate the dry ingredients without overmixing later.
- In a separate small bowl, whisk together the sifted cocoa powder, baking soda, salt, cinnamon, and instant espresso powder. This pre-mixing prevents dry streaks in your final batter. Pour the dry ingredient mixture into the wet ingredients from Step 2 and fold together gently with a spatula until just combined—stop as soon as you don't see any dry streaks. Overmixing at this stage can make the brownies tough, so restraint is key.
- Fold the chocolate chips and cacao nibs (if using) into the batter from Step 3 until evenly distributed. Pour the batter into your prepared 8x8 inch baking dish and smooth the top gently with a spatula. I like to reserve a few chocolate chips to scatter on top before baking—it creates a nice visual finish and ensures you get chocolate in every bite.
- Bake at 350°F for 25 minutes, until a toothpick inserted into the center comes out with just a few moist crumbs—don't overbake, as these brownies will continue to set slightly as they cool. Remove from the oven and let cool in the pan for at least 15 minutes before cutting. If you can wait, cooling for 30 minutes will give you cleaner cuts and a better texture.
