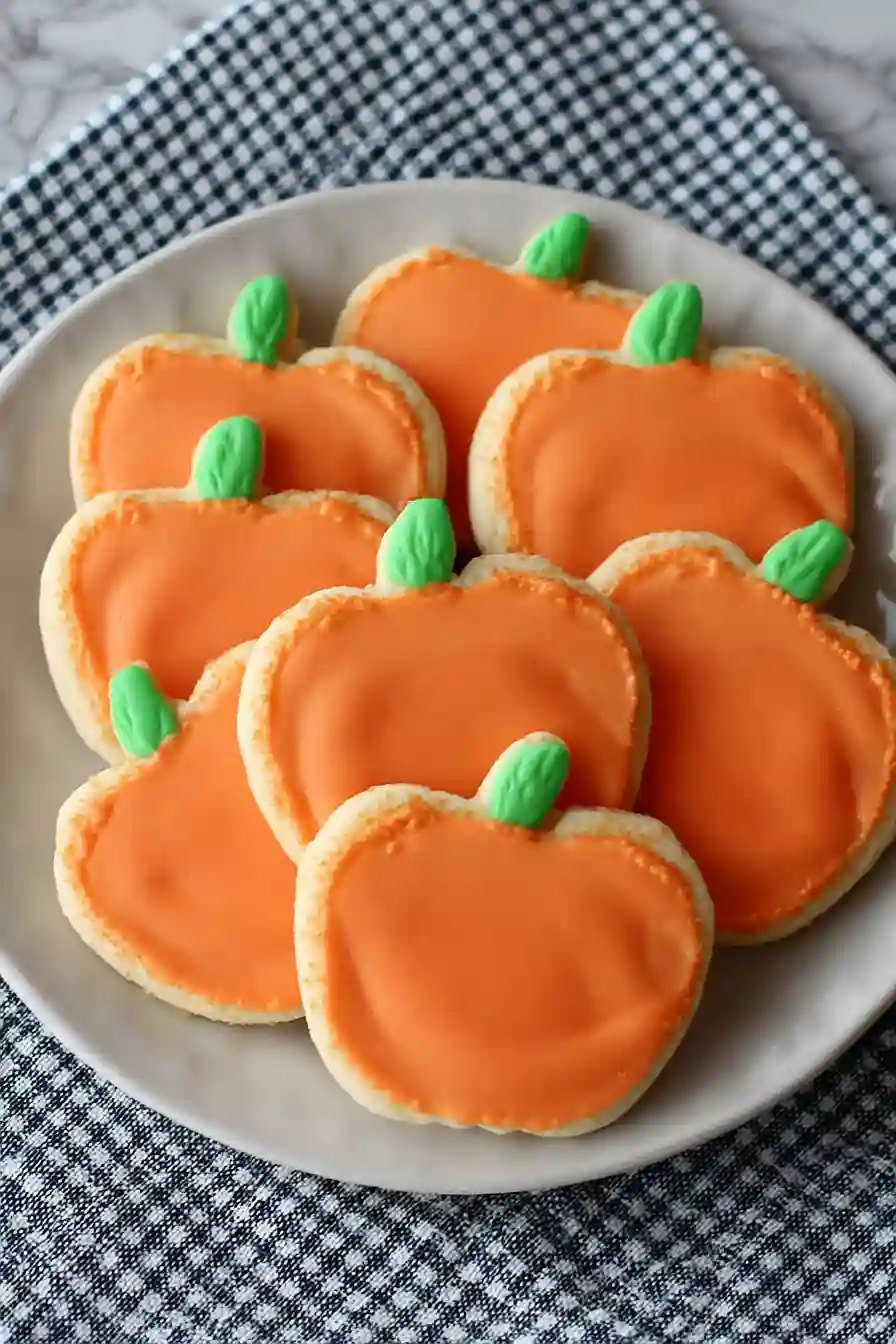
If you ask me, royal icing pumpkin cookies are the perfect fall treat.
These soft pumpkin cookies get topped with smooth royal icing that dries to a nice finish. The warm spices in the cookie dough pair with the sweet icing coating.
The cookies start with real pumpkin puree mixed into a simple dough with cinnamon and nutmeg. Once baked and cooled, they get dipped in royal icing that sets up firm and glossy.
They’re great for Halloween parties or autumn gatherings, and kids love helping decorate them with orange and white icing.
Why You’ll Love These Royal Icing Pumpkin Cookies
- Perfect for fall decorating – These cookies give you a fun canvas to practice your decorating skills with the smooth royal icing, making them ideal for Halloween parties or autumn gatherings.
- Simple ingredients you probably have – No fancy ingredients needed here – just basic baking staples like butter, sugar, flour, and confectioners’ sugar that most home bakers keep on hand.
- Quick baking time – At under an hour from start to finish, you can whip up a batch of these festive cookies without spending your whole day in the kitchen.
- Kid-friendly activity – The decorating part is perfect for getting little ones involved, and they’ll love helping you create colorful pumpkin designs.
- Great for gifting – Once decorated and dried, these cookies travel well and make thoughtful homemade gifts for neighbors, teachers, or coworkers during the fall season.
What Kind of Butter Should I Use?
For these pumpkin cookies, stick with unsalted butter so you can control the salt level in your dough. Make sure your butter is truly at room temperature – it should give slightly when you press it but not be melty or greasy. If you’re in a hurry, you can cut your butter into small cubes and let it sit out for about 30 minutes, or grate cold butter and let it come to room temperature quickly. Avoid using margarine or butter substitutes here, as real butter gives these cookies their rich flavor and helps them hold their shape better when you’re rolling and cutting them into pumpkin shapes.
Options for Substitutions
These cookies are pretty forgiving when it comes to swaps, so here are some options if you need to make changes:
- Unsalted butter: You can use salted butter instead – just reduce the added salt to 1/4 teaspoon. Margarine works too, though the cookies won’t have quite the same rich flavor.
- All-purpose flour: Don’t skip the sifting step as it really makes a difference in texture. If you only have self-rising flour, omit the salt completely since it’s already included.
- Vanilla extract: The recipe already suggests using half almond extract, but you could also try orange extract for a citrus twist that pairs nicely with pumpkin themes.
- Confectioners’ sugar: You can make your own by blending regular granulated sugar in a food processor until powdery, though store-bought gives smoother results for icing.
- Milk for icing: Heavy cream, half-and-half, or even water will work for the icing. Cream makes it richer, while water keeps it lighter. Start with less liquid than called for and add gradually until you get the right consistency.
- Food coloring: Gel food coloring works better than liquid since it won’t thin out your icing as much. You can also use natural alternatives like turmeric for yellow or beet juice for pink tones.
Watch Out for These Mistakes While Baking
The biggest mistake when making sugar cookies is skipping the flour sifting step, which can lead to dense, tough cookies instead of the tender texture you want – take the extra minute to sift that flour for much better results. Another common error is rolling the dough too thin, which causes the cookies to spread too much and lose their pumpkin shape during baking, so aim for about 1/4 inch thickness. When it comes to the royal icing, many people make it too thin by adding milk all at once – instead, add just a teaspoon at a time until you reach that perfect consistency where it sticks to the back of a spoon but still spreads smoothly. Finally, don’t rush the decorating process by adding icing to warm cookies, as this will cause the icing to melt and run off, ruining all your hard work.
What to Serve With Royal Icing Pumpkin Cookies?
These decorated cookies are perfect on their own, but they’re even better paired with a warm cup of coffee, hot chocolate, or spiced apple cider. The sweet royal icing and buttery cookie base make them a great addition to any fall dessert spread alongside other seasonal treats like caramel apples or pumpkin bread. I love setting these out at Halloween parties or autumn gatherings where guests can admire the pretty decorations while enjoying them with their favorite warm beverage. For a cozy afternoon treat, try dunking them lightly in milk or serving them with a scoop of vanilla ice cream for an extra indulgent dessert.
Storage Instructions
Keep Fresh: Once your royal icing has completely dried (usually 4-6 hours), store these pumpkin cookies in an airtight container at room temperature for up to one week. Layer them between sheets of parchment paper so the icing doesn’t stick together or get damaged.
Freeze: These decorated cookies freeze really well for up to 3 months! Make sure the icing is totally set first, then wrap them individually in plastic wrap before placing in a freezer container. This prevents any cracking or chipping of your pretty decorations.
Make Ahead: You can bake the plain cookies up to 2 days ahead and store them in an airtight container before decorating. The cookie dough also freezes beautifully for up to 3 months – just thaw it in the fridge overnight before rolling and cutting your pumpkin shapes.
| Preparation Time | 30-45 minutes |
| Cooking Time | 8-10 minutes |
| Total Time | 38-55 minutes |
| Level of Difficulty | Medium |
Estimated Nutrition
Estimated nutrition for the whole recipe (without optional ingredients):
- Calories: 2800-3000
- Protein: 30-35 g
- Fat: 140-150 g
- Carbohydrates: 370-390 g
Ingredients
For the cookies:
- 2 tsp vanilla extract (I use McCormick pure vanilla extract)
- 2/3 cup granulated sugar
- 1 large egg
- 1/2 tsp salt
- 2 1/2 cups all-purpose flour (sifted for a lighter texture and to remove lumps)
- 1 cup unsalted butter (softened to room temperature)
For the icing:
- 1 1/2 cups powdered sugar
- 2 tbsp milk (whole milk preferred for richer icing)
- Food coloring (optional, for festive designs)
Step 1: Cream Butter and Sugar
- 1 cup unsalted butter, softened (2 sticks)
- 2/3 cup granulated sugar
In the bowl of an electric mixer, beat the softened unsalted butter and granulated sugar together on medium speed until light and fluffy.
This usually takes around 2-3 minutes.
Scrape down the sides of the bowl as needed to ensure even mixing.
Step 2: Add Egg and Vanilla
- 1 large egg
- 2 tsp vanilla extract (or 1 tsp almond and 1 tsp vanilla combined)
Add the egg and vanilla extract (or the combination of vanilla and almond extract if you prefer) to the creamed butter and sugar.
Mix on medium speed until fully incorporated.
I like to use a combination of vanilla and almond for a more complex flavor.
Step 3: Combine Dry Ingredients and Incorporate
- 2 1/2 cups sifted unbleached all-purpose flour
- 1/2 tsp salt
In a separate bowl, whisk together the sifted unbleached all-purpose flour and salt.
With the mixer on low speed, gradually add the dry ingredients to the wet mixture, mixing until just incorporated and a dough forms.
Avoid over-mixing to keep the cookies tender.
Step 4: Chill the Dough
Wrap the cookie dough in plastic wrap and refrigerate for 30 minutes.
This resting time makes the dough easier to handle and helps the cookies keep their shape during baking.
Step 5: Roll, Cut, and Bake the Cookies
- cookie dough from Step 4
- extra unbleached all-purpose flour (for dusting; from ingredient list)
Preheat your oven to 350°F (175°C).
Line a cookie sheet with parchment paper or a silicone baking mat.
On a floured surface, roll out the chilled dough to about 1/4 inch thickness.
Use cookie cutters to shape the cookies and place them onto the prepared baking sheet.
Bake for 8–10 minutes, until the edges are just starting to turn golden but the cookies are still pale and set.
Let them rest on the baking sheet until firm before transferring to a wire rack to cool completely.
I always make sure to underbake slightly for a softer texture once cooled.
Step 6: Prepare the Icing
- 1 1/2 cups powdered sugar
- 2 tbsp milk, more as needed
- food coloring (optional)
While the cookies are cooling, sift the powdered sugar into a bowl.
Add 2 tablespoons of milk and food coloring, if using, and stir until smooth and thick but spreadable.
Adjust the consistency by adding either more milk (for thinning) or more sugar (for thickening) as needed.
This icing is simple to customize—sometimes I like to use a variety of colors for a festive touch.
Step 7: Ice and Finish the Cookies
Once the cookies are completely cooled, spread or pipe the prepared icing from Step 6 onto them.
Allow the icing to set completely before serving or storing.
The cookies will have a soft, tender texture if not overbaked.
