If you ask me, heart-shaped sugar cookies are one of the sweetest ways to show someone you care.
These classic Valentine’s Day treats bring smiles to faces and warmth to hearts with their simple charm and homemade touch. The buttery, soft cookies have just the right amount of sweetness, with a smooth surface that’s perfect for decorating.
I love how the dough comes together easily – just like the sugar cookies my mom used to make – and the fun part is cutting out those cute heart shapes. A sprinkle of colored sugar or a drizzle of icing adds that special finishing touch.
They’re the kind of cookies that make Valentine’s Day feel extra special, whether you’re sharing them with your kids’ classmates or surprising someone special with a heartfelt treat.
Why You’ll Love These Sugar Cookies
- Perfect texture – These cookies have crisp edges and a soft center thanks to the perfect ratio of butter to flour, plus the secret ingredient – cornstarch – that keeps them tender.
- No chilling required – The dough is ready to roll and cut right after mixing, making these cookies a great last-minute treat you can whip up in under an hour.
- Kid-friendly activity – Rolling, cutting, and decorating these heart-shaped cookies makes for a fun family baking project that creates sweet memories along with sweet treats.
- Make-ahead friendly – The dough can be made ahead and frozen for up to 3 months, so you’ll always have cookie dough ready when the craving hits.
- Basic pantry ingredients – You probably have most of these ingredients in your kitchen already, except maybe the pink sugar and food coloring.
What Kind of Butter Should I Use?
For sugar cookies, unsalted butter is definitely the way to go since it gives you complete control over the saltiness of your cookies. Make sure to use real butter – not margarine or butter substitutes – as these can affect both the texture and taste of your finished cookies. Room temperature butter is crucial here (leave it out for about an hour before baking), as it’ll cream better with the sugar and create that perfect cookie texture. If you’re in a hurry, you can cut your butter into small cubes to help it soften faster, but avoid microwaving it as melted butter will change how your cookies spread during baking.
Options for Substitutions
Making these cute cookies but missing something? Here are some helpful swaps you can try:
- Unsalted butter: If you only have salted butter, that works too – just skip the added salt in the recipe. Margarine can work in a pinch, but the cookies won’t have quite the same rich taste and texture.
- Cornstarch: No cornstarch? Replace it with an equal amount of all-purpose flour. The cookies will be slightly less tender, but still tasty!
- Pink food coloring: You can use any natural alternatives like beet powder or strawberry powder. Start with 1-2 teaspoons and adjust for your desired shade of pink.
- Pink decorative sugar: Regular white sugar works fine for decorating, or try crushed freeze-dried strawberries for a natural pink color. You could also use regular sprinkles or skip the decoration entirely.
- Vanilla essence: You can swap this with almond extract (use half the amount) or even strawberry extract for a different flavor profile.
Watch Out for These Mistakes While Baking
The temperature of your butter is crucial – using butter that’s too soft or melted will lead to cookies that spread and lose their heart shape, while cold butter won’t cream properly with sugar, so make sure it’s truly at room temperature (you should be able to easily press your finger into it).
Rolling out cookie dough at the wrong temperature is another common mistake – if the dough feels sticky, it’s too warm and needs more time in the fridge, while dough that’s too cold will crack when rolled; aim for dough that’s cool but pliable, typically after 30-45 minutes of chilling.
When it comes to baking, even a minute too long can turn these cookies from perfectly crisp to overly brown, so start checking them about 2 minutes before the recommended baking time and look for edges that are just barely starting to turn golden.
For the best texture and shape retention, roll your dough to an even 1/4 inch thickness throughout, and don’t skip the step of chilling your cut-out cookies for 10-15 minutes before they go into the oven – this extra time helps them maintain their crisp heart shape while baking.

What to Serve With Sugar Cookies?
These sweet heart-shaped cookies are perfect for pairing with your favorite hot or cold drinks! A cold glass of milk is the traditional choice – it’s perfect for dunking these buttery treats. If you’re feeling fancy, serve them alongside hot chocolate topped with whipped cream, or pair them with a cup of coffee or tea for an afternoon treat. For a special Valentine’s Day dessert spread, try placing these cookies on a platter with some fresh strawberries and chocolate-covered treats to create a pretty pink-and-red theme that everyone will love.
Storage Instructions
Keep Fresh: These sweet heart-shaped cookies stay fresh when stored in an airtight container at room temperature. Place pieces of parchment paper between layers to prevent sticking, and they’ll keep their charm for up to 7 days. The container helps maintain their crispness and prevents them from becoming too soft.
Freeze: Want to make these cookies ahead? You can freeze them both decorated or undecorated! Place them in a freezer-safe container with parchment paper between layers and they’ll stay good for up to 3 months. The dough can also be frozen – just wrap it well in plastic wrap and pop it in a freezer bag.
Make Ahead: You can prepare the cookie dough up to 2 days in advance and keep it chilled in the fridge. Just wrap it tightly in plastic wrap and let it sit at room temperature for about 15 minutes before rolling out. This is super handy when you’re planning for a Valentine’s Day party or special occasion!
| Preparation Time | 30-45 minutes |
| Cooking Time | 12-15 minutes |
| Total Time | 42-60 minutes |
| Level of Difficulty | Medium |
Estimated Nutrition
Estimated nutrition for the whole recipe (without optional ingredients):
- Calories: 2100-2300
- Protein: 20-25 g
- Fat: 160-180 g
- Carbohydrates: 250-270 g
Ingredients
For the uncolored dough:
- 1/2 cup unsalted butter ( मैं Kerrygold अनसाल्टेड बटर वापरातो)
- 2 cups flour
- 6.6 tbsp cornstarch
- 1/3 tsp coarse salt (kosher salt is fine)
- 1/2 cup sugar (granulated sugar is best)
- 1 egg (large)
- 1.5 tsp vanilla extract
For the pink dough:
- 2 cups flour (I use King Arthur all-purpose flour)
- 1/3 tsp coarse salt
- 1/2 cup unsalted butter
- 6.6 tbsp cornstarch
- 1/2 cup sugar
- 1 egg
- 1.5 tsp vanilla extract
- pink food coloring (gel food coloring for vibrant color)
For decorating:
- 1/4 cup pink decorative sugar
Step 1: Prepare the Uncolored Cookie Dough
Begin by sifting together 2 cups of flour, 40g of cornstarch, and about 1/3 teaspoon of salt into a large bowl.
Whisk the dry ingredients to ensure they are well incorporated.
In a stand mixer fitted with a paddle attachment, cream together 1/2 cup of room temperature butter and 1/2 cup of sugar until light and fluffy.
Mix in 1 1/2 teaspoons of vanilla extract, followed by adding one egg to the mixture.
On low speed, add the dry mixture to the wet ingredients and mix until almost combined.
Scrape down the bowl and mix once more until just combined.
Roll the dough out to a 1/4 inch thickness between two layers of plastic for easy transfer and clean-up, place it on a baking sheet, and refrigerate to chill.
Step 2: Prepare the Pink Cookie Dough
Repeat the above steps to make a second batch of dough, but this time add a few drops of soft pink food coloring to the butter and sugar mixture along with the vanilla extract to create a pink dough.
Once the dough is mixed, roll it out to a 1/4 inch thickness.
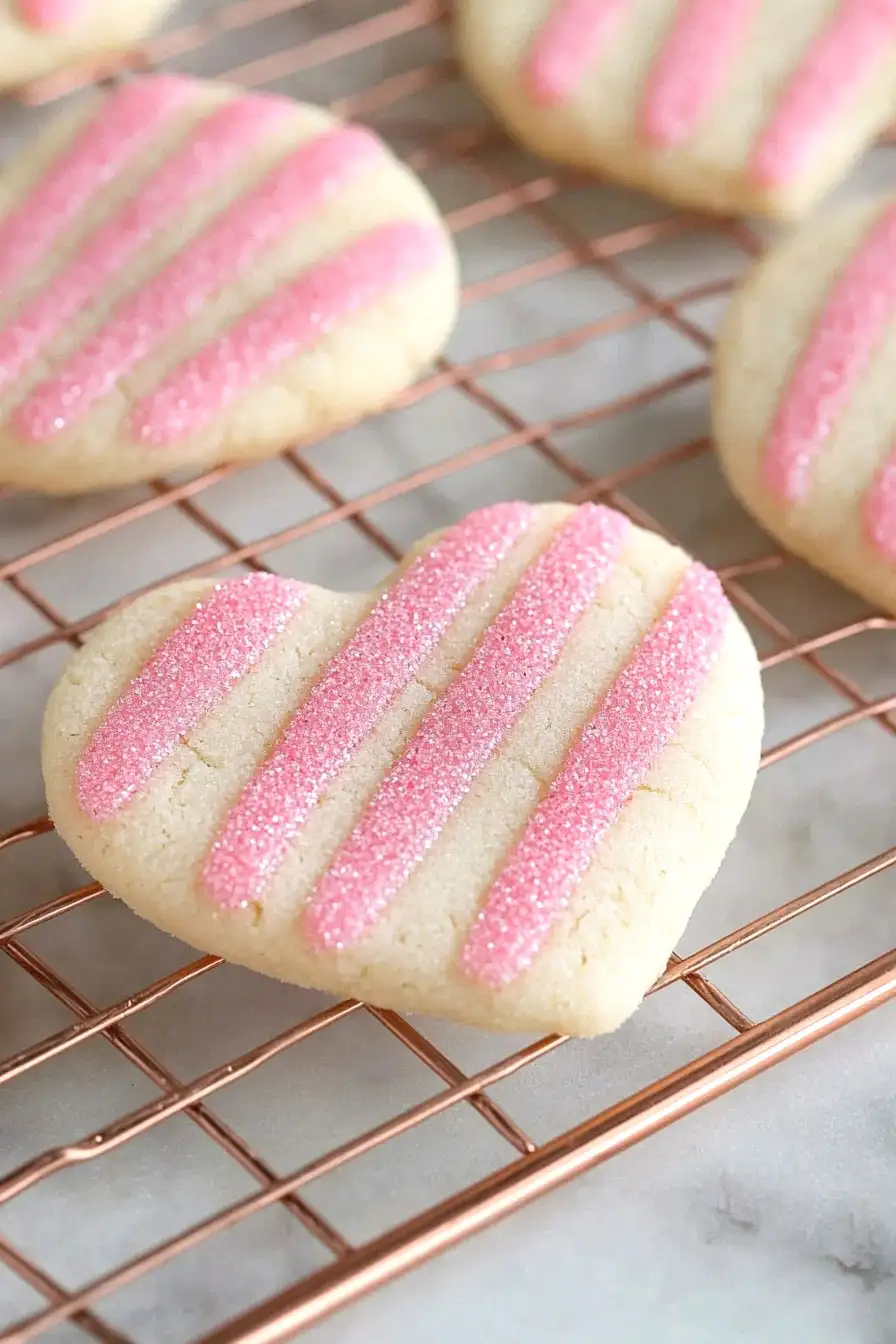
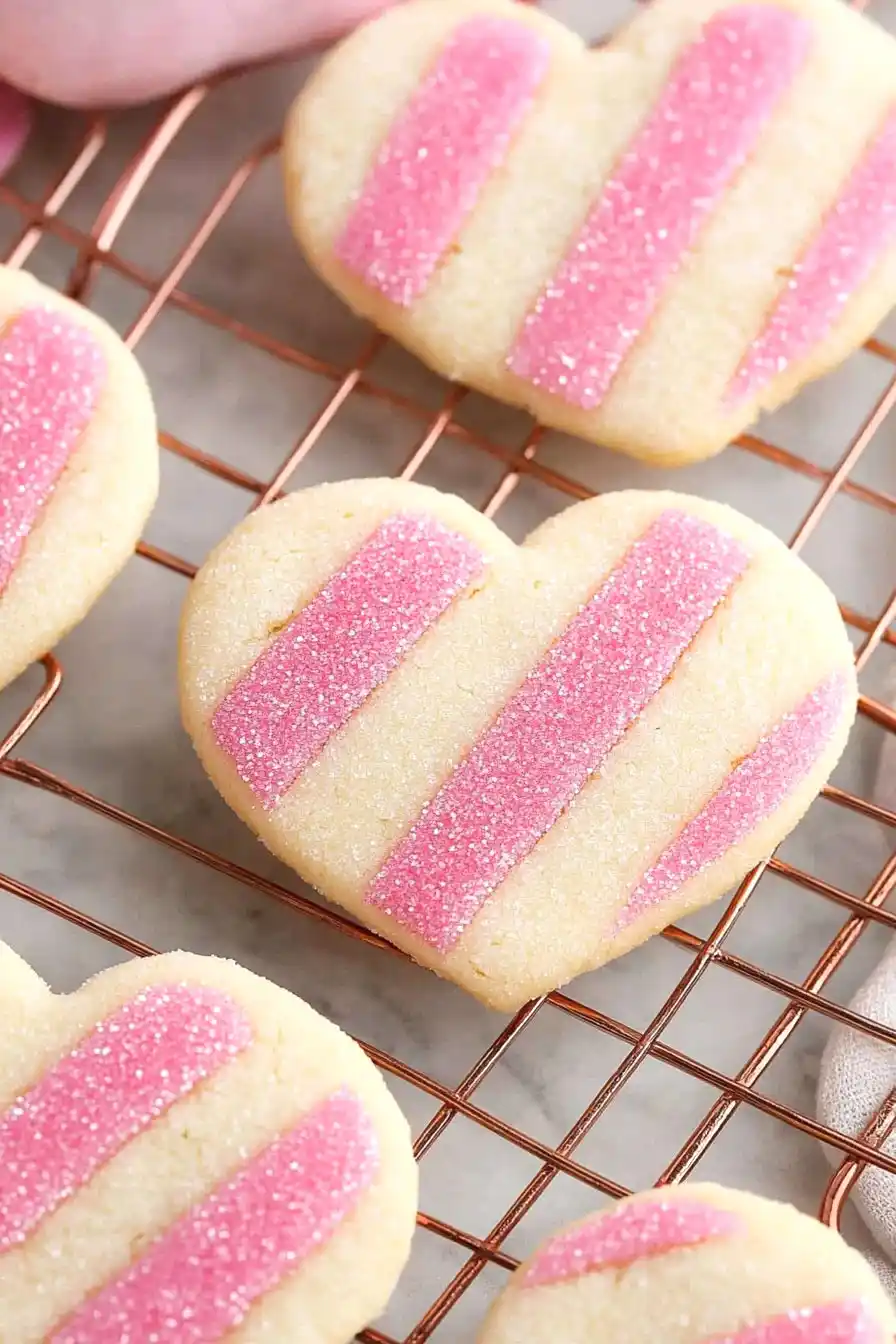
Sprinkle about 1/4 cup of pink sanding sugar over the dough and gently roll to press the sugar into the dough.
Cover with plastic, transfer to a baking sheet, and chill in the refrigerator for at least 20 minutes to firm up.
Step 3: Cut and Layer the Doughs
After the dough has chilled, use a ruler and a sharp knife to cut both the uncolored and pink dough into 1/2 inch strips.
Begin layering the pink and white strips so they are touching, alternating the colors to create a striped pattern.
Cover the layered dough with a sheet of plastic wrap or parchment paper and roll gently to create a seal.
Transfer the layered dough back to the refrigerator for another chill.
Step 4: Shape and Bake the Cookies
Preheat your oven to 375 degrees F.
Once the dough has firmed up, use a heart-shaped cookie cutter to cut out the cookies.
Carefully place each cookie on a baking sheet lined with parchment paper or a silicone baking sheet.
Bake the cookies for about 12 minutes until set but not browned.
Allow them to cool on the sheet for a few minutes before transferring to a wire rack to cool completely.
Enjoy your layered pink and white heart cookies!
