I never thought I’d be making yogurt in a rice cooker of all things. Growing up, yogurt always came from the grocery store in those little plastic containers, and that’s just how it was. When my friend told me she makes hers in a rice cooker, I thought she was joking.
Turns out, making yogurt in a rice cooker isn’t weird at all – it’s actually pretty smart. The steady, gentle heat is perfect for turning regular milk into creamy yogurt, and it’s way easier than traditional methods. If you’ve got a rice cooker sitting in your cabinet, you’re already halfway to homemade yogurt.
Why You’ll Love This Homemade Yogurt
- Cost-effective – Making yogurt at home costs a fraction of store-bought versions, and you can keep using your homemade yogurt as a starter for future batches.
- Just 2 ingredients – All you need is milk and a small amount of yogurt as a starter – that’s it! No additives, preservatives, or complicated ingredients required.
- Hands-off preparation – While it takes several hours to make, most of that time is just waiting – you’ll only need about 10 minutes of actual hands-on work.
- Multi-purpose kitchen hack – Your rice cooker isn’t just for rice anymore! This method shows how versatile this common kitchen appliance can be.
- Customizable – You can control the thickness and tanginess of your yogurt by adjusting the straining time and fermentation period.
What Kind of Milk Should I Use?
For making homemade yogurt, whole milk tends to give you the thickest, creamiest results, but you can use any type of cow’s milk you have on hand. Regular 2% or even skim milk will work just fine, though the final yogurt might be a bit thinner. If you’re using store-bought milk, ultra-filtered milk can give you an extra thick yogurt, while ultra-pasteurized milk might take a bit longer to set up. Just make sure to avoid using non-dairy alternatives like almond or soy milk in this recipe – they won’t culture the same way as regular milk does. A good tip is to bring your milk to room temperature before starting, as this helps the culturing process happen more evenly.
Options for Substitutions
When making homemade yogurt, you’ve got some wiggle room with ingredients, but some things are non-negotiable. Here’s what you need to know:
- Milk: You can use whole, 2%, or even 1% milk – just know that the fat content will affect how thick your yogurt turns out. Whole milk makes thicker, creamier yogurt, while lower-fat milk produces thinner results. Ultra-filtered milk works too, but avoid using non-dairy milk as it won’t culture properly without special starters.
- Starter yogurt: Any plain, unflavored yogurt with live active cultures will work as your starter – it doesn’t have to be Danish. Just make sure it’s fresh and contains live bacteria (check the label). Greek yogurt works too, but don’t use flavored varieties or ones with added fruits or sweeteners.
- Blanket/towel: Any thick fabric will do – a heavy bath towel, fleece blanket, or even a few kitchen towels stacked together. The key is having something that provides good insulation to keep the yogurt warm while it cultures.
Watch Out for These Mistakes While Making
The biggest challenge when making homemade yogurt is temperature control – heating your milk above 180°F (82°C) will result in grainy, curdled yogurt, while not heating it enough won’t kill the unwanted bacteria that can prevent proper fermentation.
Another crucial mistake is stirring the yogurt starter into milk that’s too hot – always wait until the milk cools to about 110-115°F (43-46°C), or you’ll kill the good bacteria needed for fermentation (an easy test is if you can hold your finger in it for 10 seconds).
The final common error is disturbing the yogurt during the fermentation process – resist the urge to peek or move the rice cooker, as maintaining a consistent warm temperature is key to achieving thick, creamy yogurt.
For the best results, use whole milk and make sure your starter yogurt contains active cultures and is at room temperature before mixing it in.
What to Serve With Homemade Yogurt?
Fresh homemade yogurt is super versatile and makes a great base for both sweet and savory dishes. For breakfast, try topping it with a drizzle of honey, fresh berries, and a sprinkle of granola – this combo never gets old! You can also use it as a base for savory dips by mixing in herbs, cucumber, and garlic to make something like tzatziki. If you’re into meal prep, portion the yogurt into small containers and add different toppings like nuts, jam, or fresh fruit for grab-and-go breakfasts or snacks throughout the week.
Storage Instructions
Keep Fresh: Once your homemade yogurt is ready, transfer it to clean glass jars or containers with tight-fitting lids. It will stay fresh in the refrigerator for up to 2 weeks. The longer it sits, the tangier it becomes, so keep that in mind when enjoying it throughout the week.
Save Starter: Remember to save about 1/2 cup of your homemade yogurt to use as a starter for your next batch! Keep this portion in a separate small container in the fridge, and try to use it within 5-7 days for the best results.
Portion: You can divide your yogurt into smaller portions right after it’s made. Fill individual containers for grab-and-go breakfast or snacks throughout the week. Just remember to give it a gentle stir if any whey separates to the top – that’s totally normal!
| Preparation Time | 20-30 minutes |
| Cooking Time | 8-12 hours |
| Total Time | 8-12 hours 30 minutes |
| Level of Difficulty | Medium |
Estimated Nutrition
Estimated nutrition for the whole recipe (without optional ingredients):
- Calories: 700-800
- Protein: 30-35 g
- Fat: 30-35 g
- Carbohydrates: 50-55 g
Ingredients
- 1 blanket or large towel
- 1 liter milk (whole milk recommended for creamier yogurt)
- 1/2 cup plain yogurt (use a brand with active cultures like Fage)
Step 1: Gather Equipment and Ingredients
First, ensure you have everything you need before starting: 1 liter of milk, 1/2 cup of yogurt (or 1 container of Denmark Plain Yogurt), a thermometer, a rice cooker, a ceramic or glass bowl that fits inside the rice cooker, and a blanket or thick towel.
Step 2: Heat the Milk
Pour the milk into the chosen ceramic or glass bowl.
Heat it to 181°F (83°C).
You can do this by placing the bowl inside a rice cooker and heating for 2-3 hours, using the stovetop for 15-20 minutes, or microwaving for under 10 minutes.
Use the thermometer to ensure the milk reaches the correct temperature.
Step 3: Cool the Milk
After reaching the target temperature, allow the milk to cool down to 110°F (43°C).
This cooling process can take 3-4 hours naturally.
To expedite, place the bowl in an ice bath, monitoring with the thermometer to reach the desired temperature.
Step 4: Inoculate the Milk
Once cooled, take about a cup of the warm milk and whisk in the yogurt until evenly combined.
This mixture will serve as your starter.
Whisk this starter back into the rest of the milk, ensuring it’s well integrated.
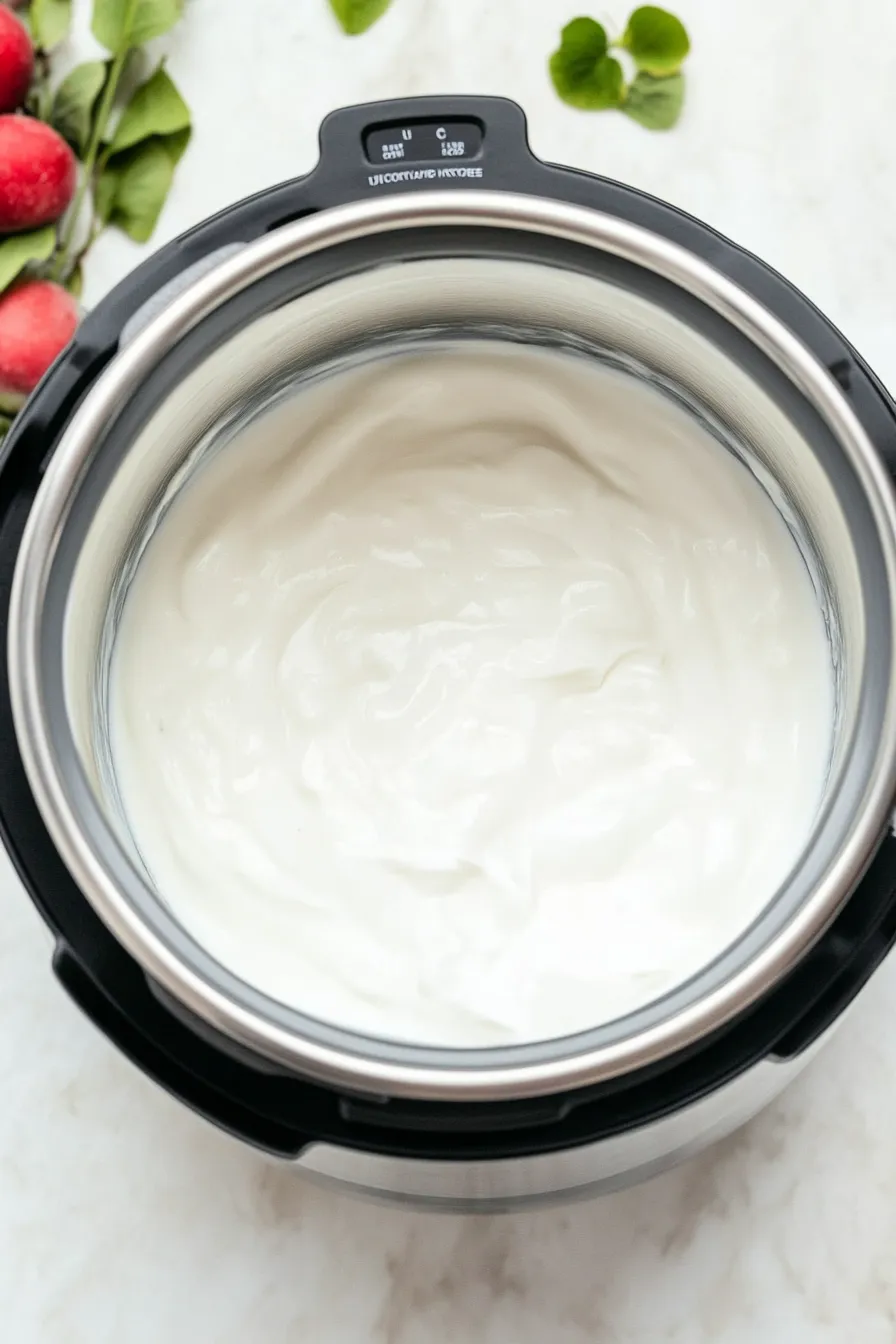
Step 5: Incubate the Yogurt
Place the freshly inoculated milk back into the rice cooker.
Cover the rice cooker with a thick towel or blanket, which will help retain heat and create an optimal environment for culturing.
Step 6: Wait for the Yogurt to Set
Allow the yogurt to incubate for at least 8 hours.
After this time, check to see if it has set to your preferred firmness.
If it needs more time, let it continue to incubate.
