I’ll be honest—I avoided using my air fryer for the longest time because I thought it was just another kitchen gadget that would collect dust. But then I tried making chicken tenders in it, and now I get why everyone’s obsessed with these things.
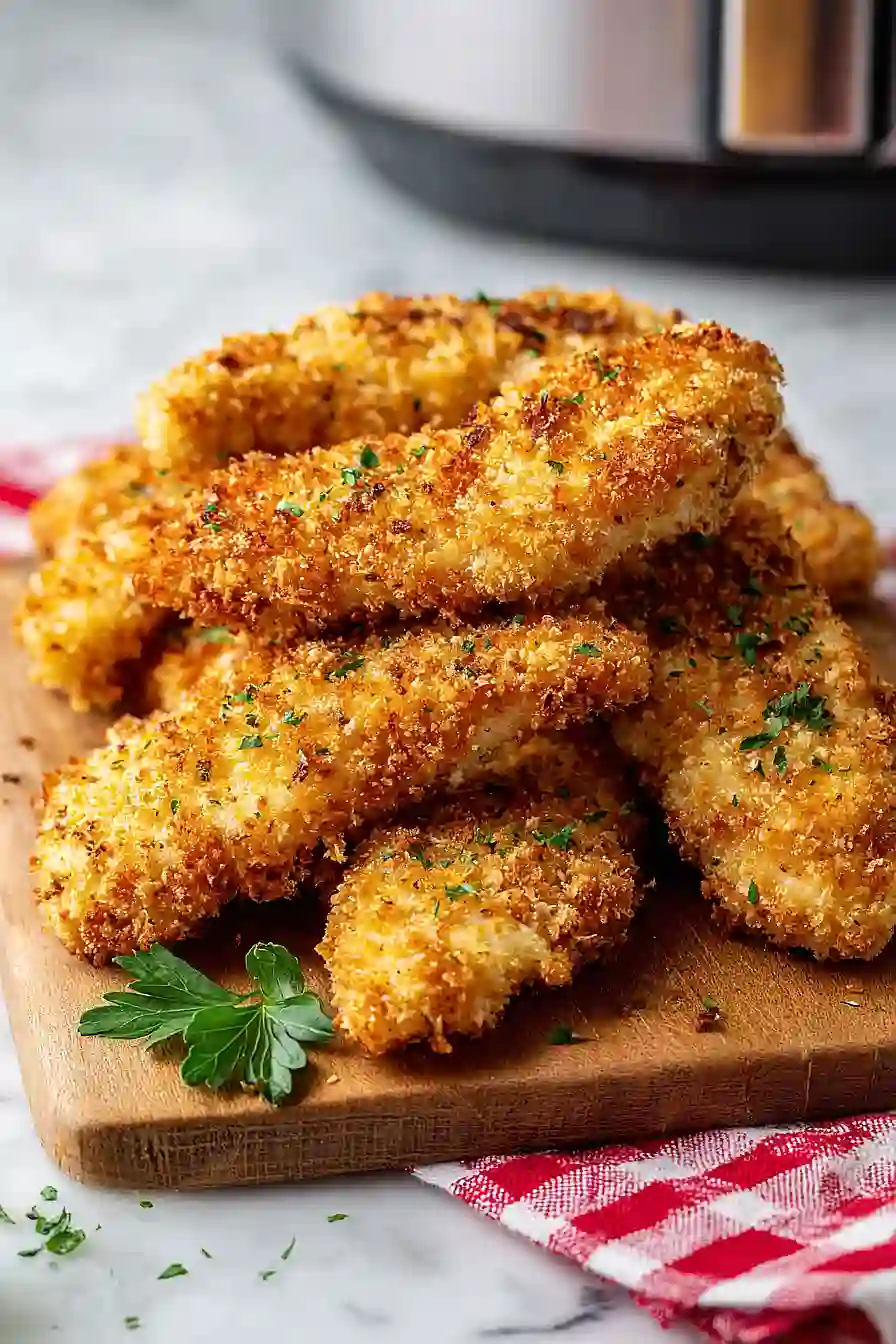
Air fryer chicken tenders come out crispy on the outside and juicy on the inside, without having to deal with a pot of hot oil or heating up your whole kitchen. Plus, they’re ready in about 15 minutes, which is perfect for those nights when the kids are hungry and you need dinner on the table fast. The secret is in the double breadcrumb coating—regular breadcrumbs mixed with panko—and a quick spray of olive oil to help everything brown up nicely.
Why You’ll Love These Chicken Tenders
- Quick and easy – Ready in under 35 minutes, these chicken tenders are perfect for busy weeknights when you need dinner on the table fast.
- Healthier than fried – The air fryer gives you crispy, golden chicken tenders without all the oil and mess of deep frying.
- Simple ingredients – You probably already have everything you need in your pantry and fridge to make these tonight.
- Kid-approved favorite – These crispy tenders are always a hit with children and adults alike, making them a stress-free dinner option.
- Minimal cleanup – The air fryer means no greasy pans or splatters to scrub, so you can enjoy your meal without dreading the dishes.
What Kind of Chicken Tenders Should I Use?
You can use either store-bought chicken tenders (also called chicken tenderloins) or make your own by slicing chicken breasts into strips – both work perfectly fine for this recipe. If you’re buying pre-cut tenders, look for ones that are roughly the same size so they cook evenly in the air fryer. Fresh chicken is always great, but frozen tenders work too as long as you thaw them completely and pat them dry before breading. The key is making sure your chicken isn’t too wet when you start the breading process, otherwise the coating won’t stick as well and you’ll end up with a soggy mess instead of that crispy exterior we’re going for.

Options for Substitutions
This recipe is pretty straightforward, but here are some swaps you can make if needed:
- Chicken tenders: If you can’t find chicken tenders, just cut chicken breasts into strips about 1 inch wide. They’ll cook just as well and taste the same.
- Eggs: For an egg-free version, try using buttermilk or plain yogurt as your wet coating. The chicken will still get crispy and golden.
- Breadcrumbs and panko: You can use all breadcrumbs or all panko if that’s what you have on hand. For a gluten-free option, crushed cornflakes or gluten-free breadcrumbs work great. You could also try crushed crackers for a different flavor.
- Olive oil spray: Any cooking spray works here – avocado oil, vegetable oil, or even melted butter brushed on will give you that crispy finish.
- Lemon: While lemon adds a nice fresh touch, you can skip it or swap it for lime if that’s what you have. It’s mainly for serving, so it’s totally optional.
Watch Out for These Mistakes While Cooking
The biggest mistake people make with air fryer chicken tenders is overcrowding the basket, which prevents proper air circulation and leaves you with unevenly cooked, less crispy tenders – always cook in batches with space between each piece.
Skipping the oil spray is another common error that results in dry, pale breading instead of that golden, crispy coating you’re after, so don’t be shy about giving both sides a good spray before cooking.
To avoid dry, rubbery chicken, use an instant-read thermometer and pull the tenders out when they hit 160°F internally – they’ll continue cooking to a safe 165°F while resting.
Finally, resist the urge to flip the tenders too early or too often, as this can cause the breading to fall off; wait the full 5-6 minutes before flipping just once for the best results.
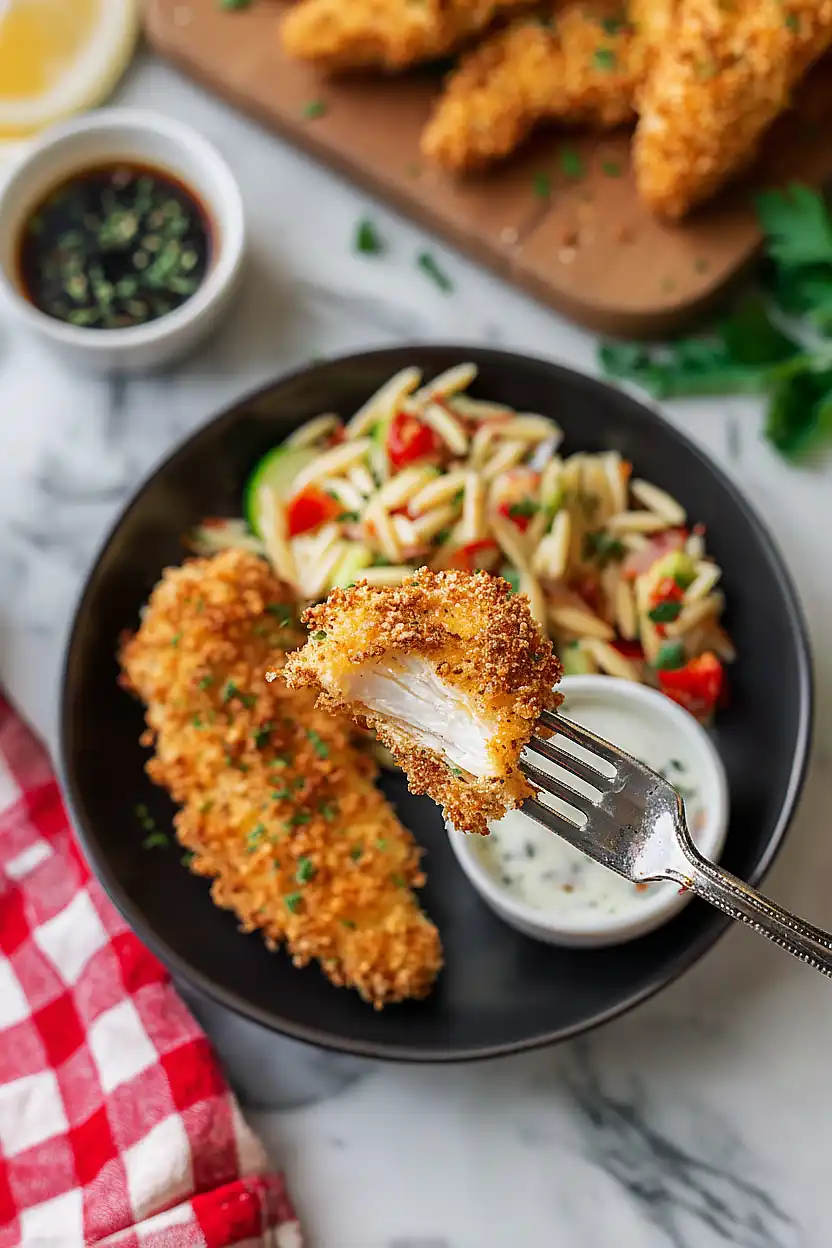
What to Serve With Air Fryer Chicken Tenders?
These crispy chicken tenders are perfect with classic dipping sauces like honey mustard, ranch, or barbecue sauce on the side. I love pairing them with simple sides like french fries or sweet potato fries, a basic coleslaw, or a fresh garden salad with whatever dressing you have on hand. If you want to make it more of a meal, try serving them over mac and cheese or alongside some roasted vegetables like broccoli or green beans. You can also slice them up and toss them into a wrap with lettuce, tomatoes, and your favorite sauce for an easy lunch option.
Storage Instructions
Store: Keep your leftover chicken tenders in an airtight container in the fridge for up to 4 days. They’re great for quick lunches or snacks throughout the week, and honestly taste pretty good cold too if you’re in a rush!
Freeze: These chicken tenders freeze really well for up to 3 months. Let them cool completely, then arrange them in a single layer on a baking sheet and freeze until solid. After that, transfer them to a freezer bag so they don’t stick together.
Reheat: The air fryer is your best friend for reheating these! Pop them back in at 350°F for about 5 minutes and they’ll crisp right back up. You can also use the oven at 375°F for 8-10 minutes if you’re reheating a bigger batch.
| Preparation Time | 15-20 minutes |
| Cooking Time | 10-15 minutes |
| Total Time | 25-35 minutes |
| Level of Difficulty | Easy |
| Servings | 12 pieces |
Estimated Nutrition
Estimated nutrition for the whole recipe (without optional ingredients):
- Calories: 950-1100
- Protein: 70-85 g
- Fat: 30-38 g
- Carbohydrates: 60-70 g
Ingredients
- 12 chicken tenders
- 2 large eggs (beaten lightly in a shallow bowl)
- 1.5 tsp salt
- freshly ground black pepper (to taste)
- 3/4 cup breadcrumbs
- 3/4 cup panko breadcrumbs (for extra crispiness)
- 1 tsp garlic powder
- 1/2 tsp smoked paprika
- olive oil spray (for even coating and browning)
- lemon (for serving)
Step 1: Prepare the Mise en Place and Season the Chicken
- 12 chicken tenders
- 1.5 tsp salt
- freshly ground black pepper
Pat the chicken tenders dry with paper towels—this is crucial for getting a crispy coating in the air fryer.
Season all the chicken tenders evenly on both sides with salt and freshly ground black pepper.
Set the seasoned chicken aside on a clean plate while you prepare the breading station.
Step 2: Set Up the Breading Station
- 2 large eggs
- 3/4 cup breadcrumbs
- 3/4 cup panko breadcrumbs
- 1 tsp garlic powder
- 1/2 tsp smoked paprika
In one shallow bowl, combine the breadcrumbs, panko breadcrumbs, garlic powder, and smoked paprika—mix these together thoroughly so the seasonings are distributed evenly.
In a separate shallow bowl, lightly beat the eggs.
I like to use wider, flatter bowls for this step because they make it easier to coat the chicken without making a mess.
Arrange both bowls side by side along with your seasoned chicken and a clean plate for the breaded tenders.
Step 3: Bread the Chicken Tenders
- seasoned chicken tenders from Step 1
- egg mixture from Step 2
- breadcrumb mixture from Step 2
Working with one tender at a time, dip it into the egg bowl, coating all sides, then immediately transfer it to the breadcrumb mixture and press gently to ensure the coating adheres well.
Shake off any excess breadcrumbs and place the coated tender on the clean plate.
Continue until all 12 tenders are breaded.
For extra crispy results, I like to let the breaded tenders sit on the plate for a few minutes—this helps the coating set slightly before air frying.
Step 4: Oil and Prepare for Air Frying
- breaded chicken tenders from Step 3
- olive oil spray
Lightly spray both sides of each breaded chicken tender with olive oil spray, ensuring even coverage.
This spray is essential for browning and crisping the coating in the air fryer.
While you’re spraying, preheat your air fryer to 400°F so it reaches temperature by the time you’re ready to cook.
Step 5: Air Fry the Chicken Tenders
- oiled chicken tenders from Step 4
Once the air fryer reaches 400°F, arrange the chicken tenders in a single layer in the basket—work in batches if needed to avoid overcrowding, as this ensures even cooking and browning.
Cook for 5 to 6 minutes per side (10 to 12 minutes total), flipping halfway through.
The tenders are done when they’re golden brown and crispy on the outside and the internal temperature reaches 165°F when checked with a meat thermometer.
Step 6: Finish and Serve
- cooked chicken tenders from Step 5
- lemon
Remove the cooked chicken tenders from the air fryer and let them rest on a clean plate for a minute or two—this allows the coating to set.
Serve immediately with fresh lemon wedges on the side for brightness and flavor.
The tenders are best enjoyed right away while they’re still crispy.

Crunchy Air Fryer Chicken Tenders
Ingredients
- 12 chicken tenders
- 2 large eggs (beaten lightly in a shallow bowl)
- 1.5 tsp salt
- freshly ground black pepper (to taste)
- 3/4 cup breadcrumbs
- 3/4 cup panko breadcrumbs (for extra crispiness)
- 1 tsp garlic powder
- 1/2 tsp smoked paprika
- olive oil spray (for even coating and browning)
- lemon (for serving)
Instructions
- Pat the chicken tenders dry with paper towels—this is crucial for getting a crispy coating in the air fryer. Season all the chicken tenders evenly on both sides with salt and freshly ground black pepper. Set the seasoned chicken aside on a clean plate while you prepare the breading station.
- In one shallow bowl, combine the breadcrumbs, panko breadcrumbs, garlic powder, and smoked paprika—mix these together thoroughly so the seasonings are distributed evenly. In a separate shallow bowl, lightly beat the eggs. I like to use wider, flatter bowls for this step because they make it easier to coat the chicken without making a mess. Arrange both bowls side by side along with your seasoned chicken and a clean plate for the breaded tenders.
- Working with one tender at a time, dip it into the egg bowl, coating all sides, then immediately transfer it to the breadcrumb mixture and press gently to ensure the coating adheres well. Shake off any excess breadcrumbs and place the coated tender on the clean plate. Continue until all 12 tenders are breaded. For extra crispy results, I like to let the breaded tenders sit on the plate for a few minutes—this helps the coating set slightly before air frying.
- Lightly spray both sides of each breaded chicken tender with olive oil spray, ensuring even coverage. This spray is essential for browning and crisping the coating in the air fryer. While you're spraying, preheat your air fryer to 400°F so it reaches temperature by the time you're ready to cook.
- Once the air fryer reaches 400°F, arrange the chicken tenders in a single layer in the basket—work in batches if needed to avoid overcrowding, as this ensures even cooking and browning. Cook for 5 to 6 minutes per side (10 to 12 minutes total), flipping halfway through. The tenders are done when they're golden brown and crispy on the outside and the internal temperature reaches 165°F when checked with a meat thermometer.
- Remove the cooked chicken tenders from the air fryer and let them rest on a clean plate for a minute or two—this allows the coating to set. Serve immediately with fresh lemon wedges on the side for brightness and flavor. The tenders are best enjoyed right away while they're still crispy.
