Growing up, chocolate covered cherries were always something we bought at the drugstore around Christmas. You know the ones – those mass-produced boxes with cherries swimming in syrupy liquid. I never imagined making them at home until my daughter asked why we couldn’t create our own.
Turns out, homemade chocolate covered cherries are actually pretty simple to make – and they taste way better than the store-bought kind. While they do take a bit of patience (you’ll need to let them set for a few days), the actual hands-on work is straightforward. Plus, you get to control exactly what goes into them, which means no weird ingredients you can’t pronounce.
Why You’ll Love These Chocolate Covered Cherries
- Perfect homemade gift – These sweet treats make wonderful presents for holidays, special occasions, or just because – package them in a pretty box and watch faces light up.
- Simple ingredients – You only need 5 basic ingredients to make these classic candies at home, and they’re all easy to find at your local grocery store.
- Cost-effective – Making your own chocolate covered cherries costs much less than buying fancy boxed chocolates, and you get to control the quality of ingredients.
- Fun to make – Dipping cherries in chocolate is an enjoyable kitchen project that’s perfect for getting kids involved or spending time with friends.
What Kind of Cherries Should I Use?
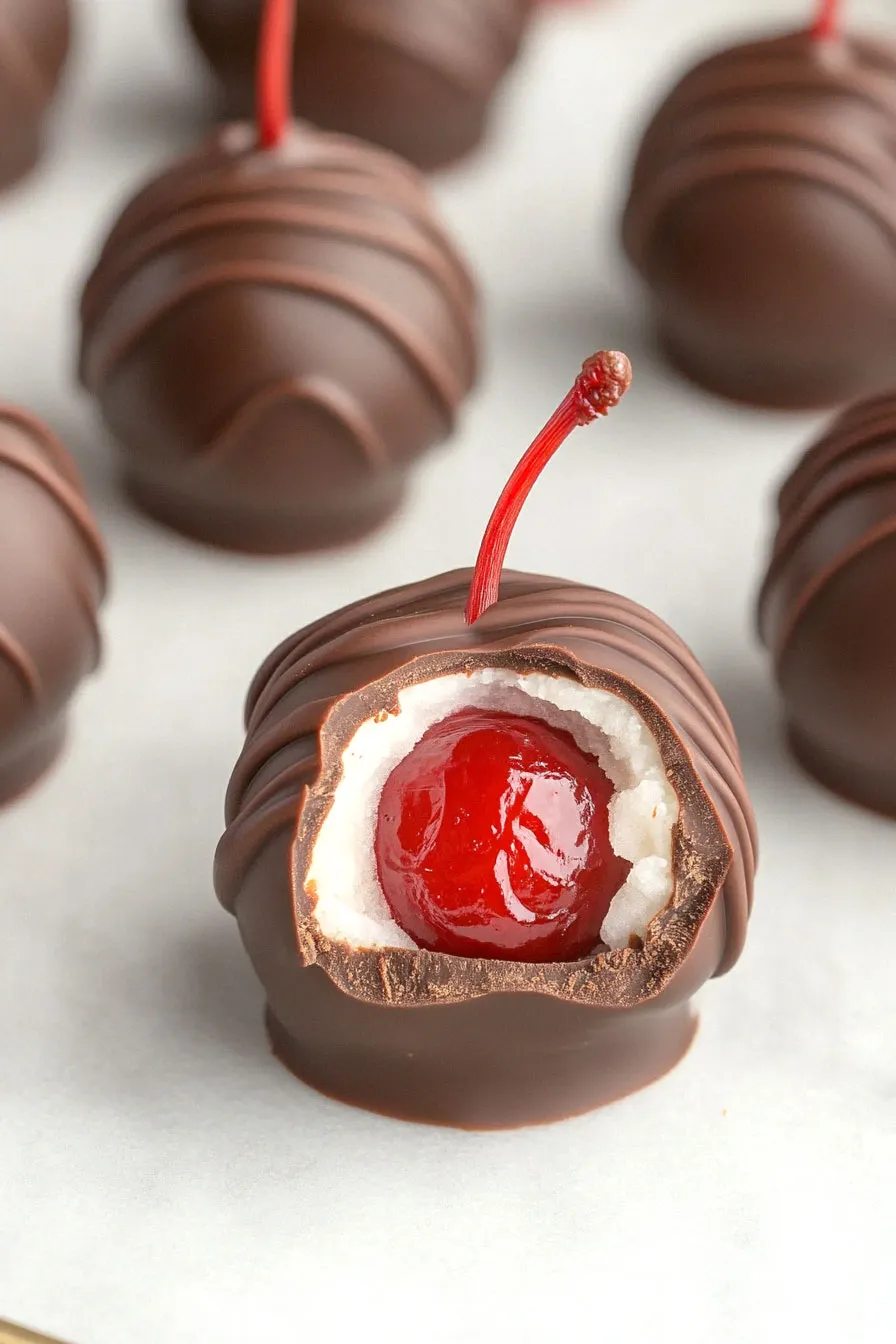
Maraschino cherries are the classic choice for chocolate covered cherries, and they’re really the best option for this recipe. You’ll want to look for bright red maraschino cherries with stems intact – the stems make dipping much easier and give that traditional candy shop look. Make sure to drain your cherries well and pat them completely dry with paper towels before using them, as any extra moisture can prevent the chocolate from sticking properly. While you might be tempted to use fresh cherries, they contain too much natural moisture and won’t work well for this type of candy making. The best maraschino cherries for this recipe are the firm, crisp ones typically found in the cocktail section of your grocery store.
Options for Substitutions
While this classic treat has some ingredients that are pretty essential, there are a few substitutions you can try:
- Maraschino cherries: These are pretty crucial for the authentic taste, but in a pinch, you can use dried cherries soaked in juice overnight. Just know the result will be different from traditional chocolate covered cherries.
- Corn syrup: You can replace corn syrup with honey or golden syrup. The texture might be slightly different, but these alternatives will help achieve a similar consistency in the filling.
- Chocolate coating: Any good quality chocolate will work here – dark, milk, or even white chocolate. Just make sure to use real chocolate, not candy melts, for the best taste. If using chocolate chips, add 1 tablespoon of coconut oil per cup to help with smooth melting.
- Butter: You can use margarine instead of butter, though butter gives the best flavor. For dairy-free options, coconut oil (in solid form) can work, but the filling might be slightly softer.
- Powdered sugar: This is essential for the right texture and can’t really be substituted. If you’re out, you can make your own by blending regular sugar in a food processor until very fine.
Watch Out for These Mistakes While Making
The biggest challenge when making chocolate covered cherries is not drying the cherries thoroughly enough – excess moisture can cause the chocolate coating to seize up, so pat each cherry completely dry with paper towels and let them air dry for an additional 30 minutes.
When working with the fondant filling, avoid making it too soft or too firm – the perfect consistency should be like play-dough, achieved by gradually adding powdered sugar until you can roll it without sticking to your hands.
Temperature control is crucial when melting chocolate – using too high heat or getting even a drop of water in the chocolate will make it grainy and unusable, so stick to gentle heat (around 90°F for milk chocolate or 94°F for dark chocolate) and use completely dry utensils.
For the smoothest coating, let the cherries chill thoroughly between each step – after wrapping in fondant and again after dipping in chocolate – this prevents the layers from mixing and gives you that classic professional look.
What to Serve With Chocolate Covered Cherries?
These sweet treats are perfect for serving alongside other dessert items at your next party or gathering! I love to arrange chocolate covered cherries on a dessert platter with complementary treats like vanilla ice cream, whipped cream, or a hot cup of coffee. Since these cherries are pretty rich, they pair really nicely with plain shortbread cookies or simple butter cookies that won’t compete with their flavor. For a fun holiday spread, try serving them alongside other chocolate-dipped fruits like strawberries or orange segments to create a beautiful dessert board that everyone will love.
Storage Instructions
Keep Fresh: These chocolate covered cherries need to be stored in an airtight container in the refrigerator. They’ll stay fresh and tasty for up to 2 weeks, and the filling actually gets better as it sits! Place wax paper between layers to prevent them from sticking together.
Room Temperature: You can keep these treats at room temperature for up to 2 days if your house isn’t too warm. Just make sure to store them in a cool, dry place away from direct sunlight to prevent the chocolate from melting or developing a white film on the surface.
Make Ahead: These cherries are perfect for making ahead! In fact, many people say they taste even better after sitting for a few days because the filling becomes more liquid-like. You can make them up to 2 weeks before you plan to serve them – just keep them in the fridge until you’re ready to share.
| Preparation Time | 20-30 minutes |
| Cooking Time | 10-15 minutes |
| Total Time | 30-45 minutes |
| Level of Difficulty | Medium |
Estimated Nutrition
Estimated nutrition for the whole recipe (without optional ingredients):
- Calories: 2800-3000
- Protein: 10-15 g
- Fat: 150-160 g
- Carbohydrates: 400-420 g
Ingredients
For the cherries:
- 60 maraschino cherries (with stems, drained well)
For the filling:
- 2 cups powdered sugar (sifted for a smoother filling)
- 3 tbsp corn syrup
- 3 tbsp softened butter (I use Cabot unsalted butter)
For the coating:
- 1 lb chocolate coating (good quality compound chocolate for easy melting and setting)
Step 1: Prepare Cherries and Gather Ingredients
Start by draining the cherries thoroughly and placing them on paper towels to dry.
Meanwhile, gather all the ingredients you’ll need for the recipe to ensure a smooth and organized process.
Step 2: Make the Dough
In a medium bowl, stir together the butter and corn syrup until the mixture is smooth.
Gradually mix in the confectioners’ sugar, kneading the mixture until it forms a pliable dough.
This mixture will serve as the sweet wrapping for your cherries.
Step 3: Wrap Cherries in Dough
Take about 1 teaspoon of dough and wrap it evenly around each cherry.
Ensure the dough fully covers the cherry.
Place the wrapped cherries on a tray and chill them in the refrigerator until they become firm.
Step 4: Prepare Coating
In a heavy saucepan, melt the confectioners’ coating over low heat.
Stir continuously to prevent burning and to maintain a smooth texture.
This will be the outer layer for your cherry confections.
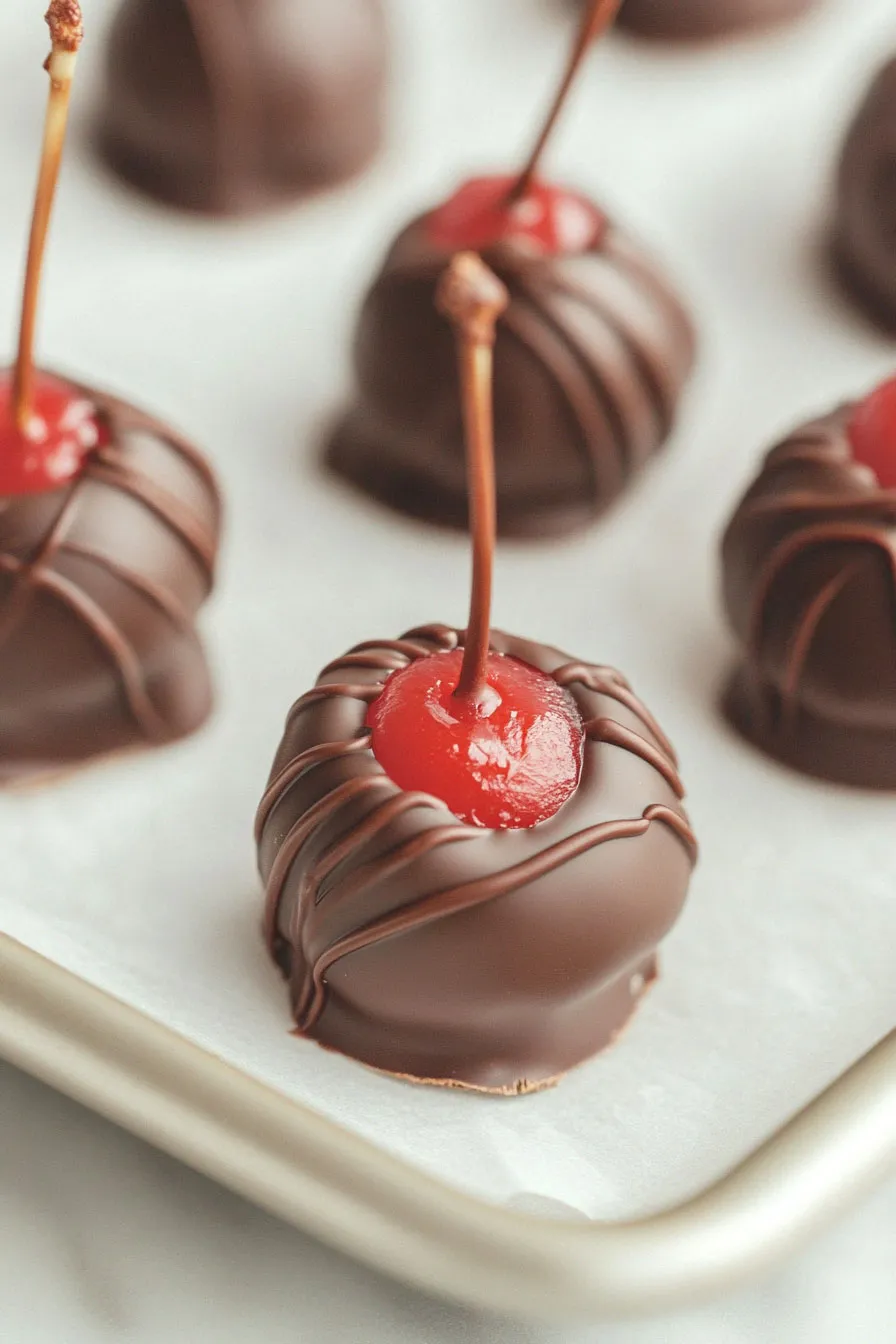
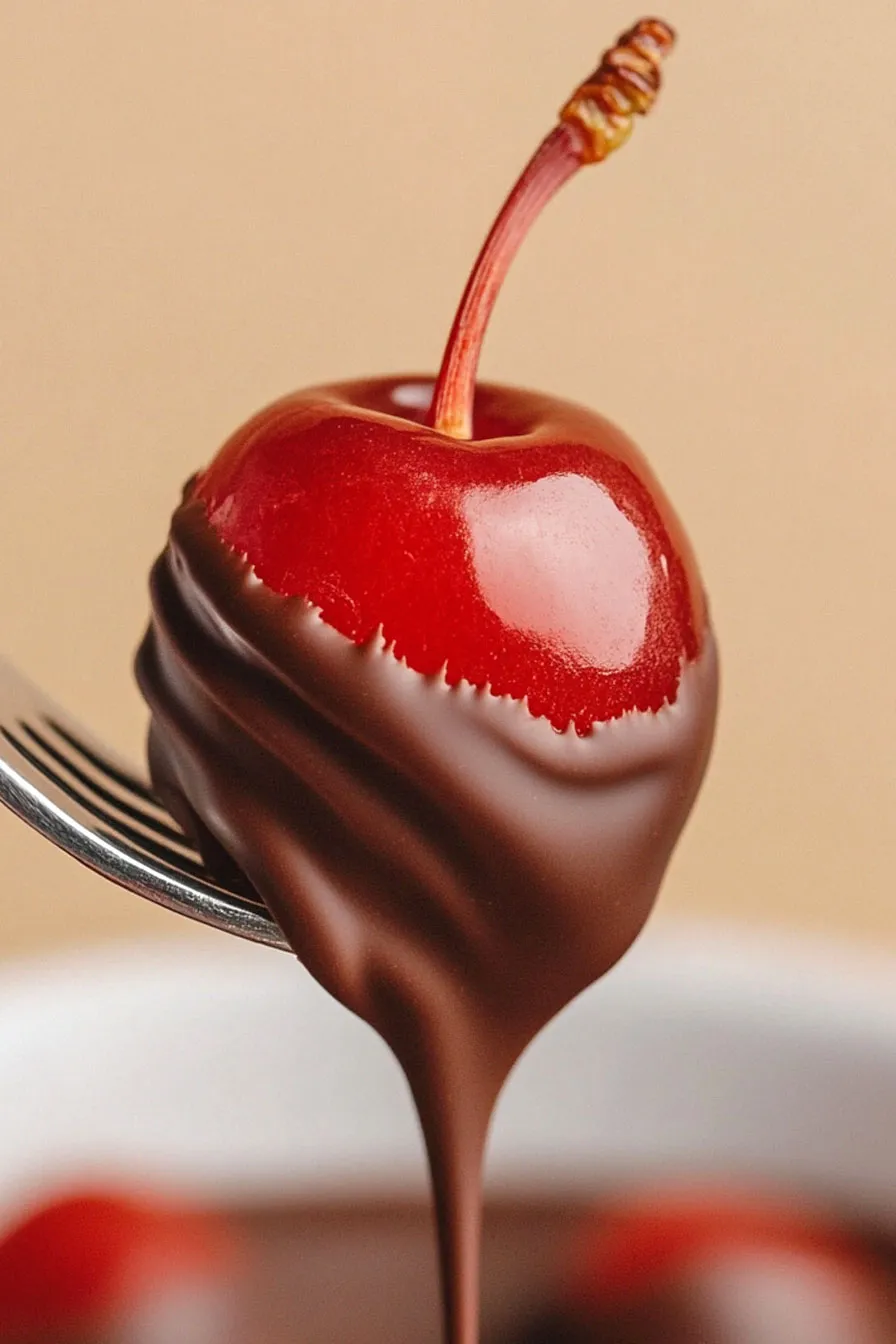
Step 5: Dip and Set the Cherries
Hold each cherry by the stem and dip it into the melted coating.
Ensure that the cherry is fully immersed and coated.
Place each dipped cherry on waxed paper-lined sheet trays.
Once all cherries are coated, chill them in the refrigerator until the coating is set firmly.
Step 6: Store and Enjoy
Once the coating has set, transfer the cherries to an airtight container.
Store them in a cool place to maintain their freshness.
Enjoy these delightful cherry treats as a sweet indulgence or as a charming gift!
