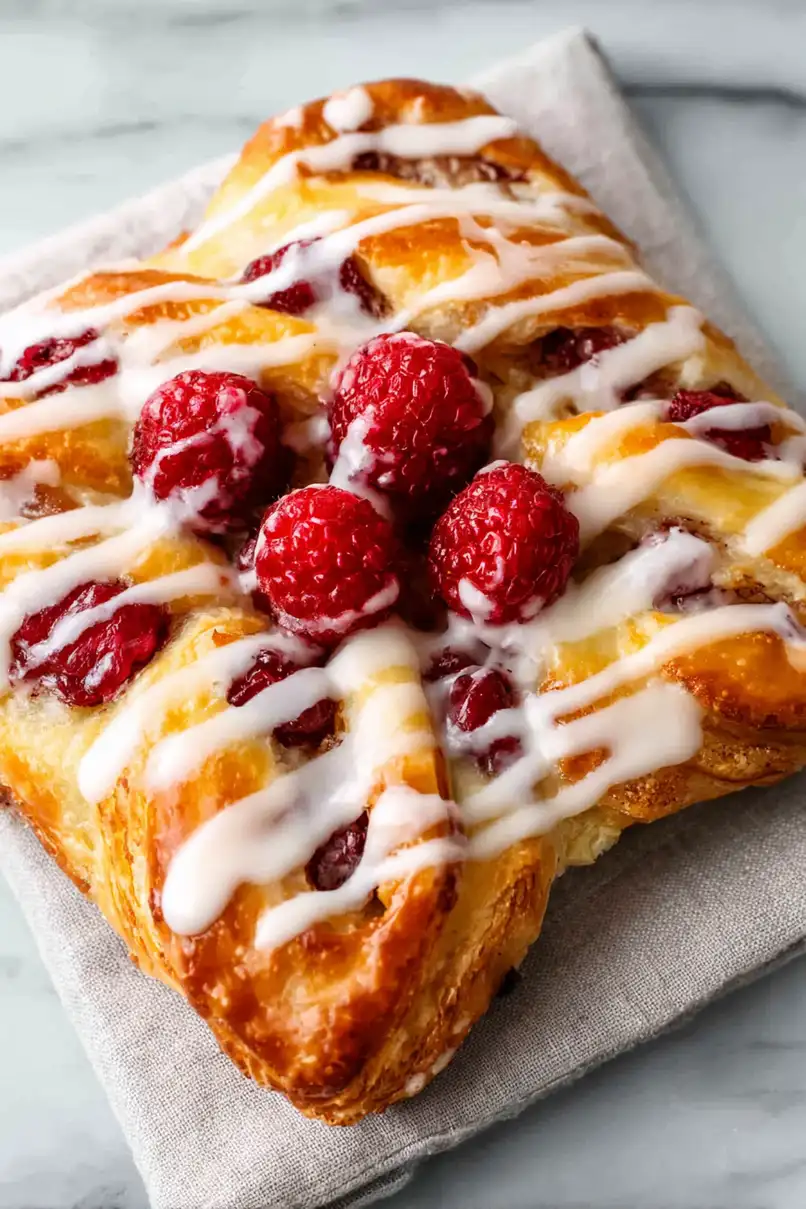
Growing up, I thought Danish pastries were something you could only get at fancy bakeries. My mom would bring them home as special weekend treats, and I always assumed they were too complicated to make at home. The raspberry ones were my favorite, but I never dared to try making them myself.
Turns out, I was completely wrong about homemade Danish being difficult. With a few shortcuts and the right technique, you can make these sweet, flaky pastries right in your own kitchen. And the best part? They’re actually pretty simple once you know the tricks – no professional baking experience required.
Why You’ll Love This Raspberry Danish
- Quick and easy – Using store-bought puff pastry means you can have bakery-style danish ready in under an hour, perfect for weekend brunches or special breakfasts.
- Simple ingredients – With basic pantry staples and fresh raspberries, you can create these impressive pastries without any fancy ingredients or special equipment.
- Make-ahead friendly – You can prepare these danish the night before and bake them fresh in the morning, making breakfast prep a breeze.
- Customizable sweetness – The recipe lets you adjust the powdered sugar to match your taste preferences, so you can make them as sweet or subtle as you like.
What Kind of Raspberries Should I Use?
Fresh raspberries are the star of this danish, but don’t worry if you can’t find them in season. While fresh berries will give you the best texture and bright flavor, you can substitute frozen raspberries in a pinch – just make sure to thaw and drain them well to avoid making your pastry soggy. When shopping for fresh raspberries, look for plump, firm berries with a deep red color and no signs of mold or mushiness. It’s best to use them within 1-2 days of purchase, and give them a gentle rinse just before using. If you’re buying them in those little plastic containers from the store, take a peek at the bottom to check for any squished or moldy berries hiding underneath.
Options for Substitutions
Need to make some swaps? Here are some helpful substitutions for this danish recipe:
- Puff pastry: This is really the foundation of a danish, so I recommend sticking with puff pastry. While you could make it from scratch, frozen works perfectly fine. In a real pinch, you could use croissant dough from a can, but the texture won’t be quite the same.
- Raspberries and raspberry jam: Feel free to swap these with any other berries or fruit jam combo – strawberries with strawberry jam, blueberries with blueberry jam, or even mixed berries work great. If using frozen berries, thaw and drain them well first.
- Cream cheese: Mascarpone cheese makes a good substitute, though it’s a bit richer. You could also use Neufchâtel cheese for a lighter option.
- Lemon zest and juice: Orange zest and juice work just as well for both the filling and glaze. For the glaze, you can also use milk or water instead of lemon juice for a plain sweet glaze.
- Egg wash: If you need an egg-free option, you can brush the pastry with milk or cream before baking. The shine won’t be quite as nice, but it’ll still work.
Watch Out for These Mistakes While Baking
The biggest challenge when working with puff pastry is temperature control – if it gets too warm, it becomes sticky and difficult to handle, but if it’s too cold, it will crack when you fold it. For best results, thaw your puff pastry in the refrigerator overnight and work with it when it’s just pliable enough to fold, usually after 5-10 minutes at room temperature.
Another common mistake is overfilling the danish – too much filling will leak out during baking and prevent the pastry from puffing properly, so stick to about 1-2 tablespoons of filling per danish. The cream cheese mixture should be completely smooth before using, so make sure it’s truly at room temperature and well-mixed to avoid lumpy danishes.
For the crispiest results, don’t skip brushing the egg wash on the pastry edges, and be sure your oven is fully preheated to the right temperature – a too-cool oven will result in dense, greasy pastries instead of light, flaky layers.
What to Serve With Raspberry Danish?
These sweet and flaky raspberry danish pastries are perfect for breakfast or brunch, and they pair wonderfully with a hot cup of coffee or tea. If you’re hosting a breakfast spread, try serving them alongside some savory options like scrambled eggs or a breakfast casserole to balance out the sweetness. For a lovely weekend brunch setup, I like to include some fresh fruit on the side – think mixed berries, sliced peaches, or citrus segments that complement the raspberry filling. You can also add a dollop of whipped cream or a scoop of vanilla yogurt on the plate for an extra special touch.
Storage Instructions
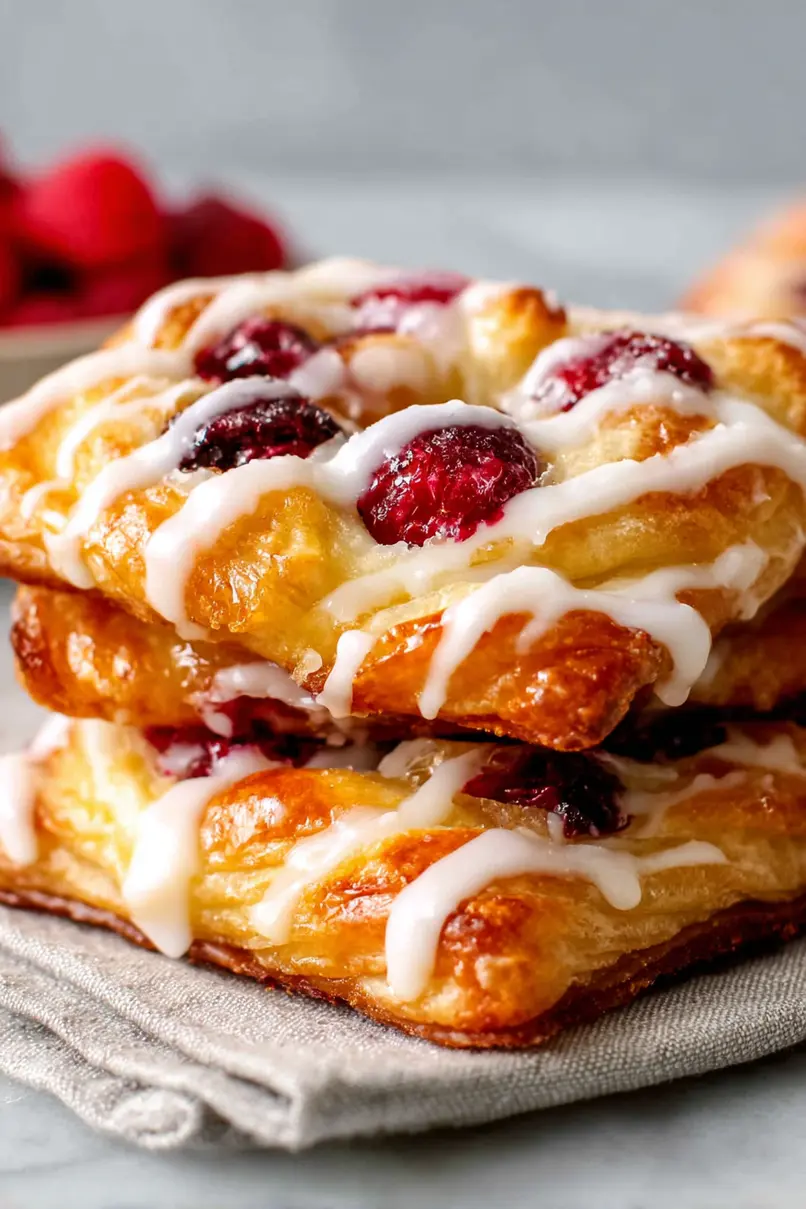
Keep Fresh: These raspberry danishes are best enjoyed the day they’re baked, but you can keep them in an airtight container at room temperature for up to 2 days. If you live in a warm climate, it’s better to pop them in the fridge, where they’ll stay good for up to 4 days.
Make Ahead: Want to prep these ahead? You can assemble the danishes and freeze them unbaked! Place them on a baking sheet, freeze until solid, then transfer to a freezer bag. They’ll keep for up to 1 month. When ready to bake, just pop them in the oven straight from frozen, adding a few extra minutes to the baking time.
Refresh: To bring back that fresh-baked taste, warm your stored danish in a 300°F oven for about 5 minutes. The pastry will crisp up nicely, making it almost as good as fresh from the oven. Just wait for the glaze to cool before enjoying!
| Preparation Time | 20-30 minutes |
| Cooking Time | 15-20 minutes |
| Total Time | 35-50 minutes |
| Level of Difficulty | Medium |
Estimated Nutrition
Estimated nutrition for the whole recipe (without optional ingredients):
- Calories: 1200-1400
- Protein: 15-20 g
- Fat: 70-80 g
- Carbohydrates: 150-160 g
Ingredients
For the pastry:
- 3 sheets frozen puff pastry (thawed according to package directions)
- 1 egg yolk (reserve egg white for glazing)
For the raspberry layer:
- 1 cup fresh raspberries
- 1/4 cup raspberry preserves (I use Bonne Maman)
For the cream cheese filling:
- 1 tsp vanilla extract
- 1 tsp lemon zest (freshly grated for best flavor)
- 1/4 cup powdered sugar
- 8 oz cream cheese (softened to room temperature for easy mixing)
For the icing:
- 2–3 tsp lemon juice
- 1/2 cup powdered sugar (sifted for a smooth icing)
Step 1: Prepare Puff Pastry
- 3 sheets frozen puff pastry
Thaw the frozen puff pastry sheets according to the manufacturer’s instructions.
While the pastry is thawing but still cool, preheat your oven to 400ºF (200ºC) and line two large baking sheets with parchment paper.
Step 2: Prepare Baking Sheets and Egg Wash
- 1 egg yolk (keep egg white for glazing)
Separate the egg yolk from the white.
Reserve the egg white for glazing the pastries later.
I find brushing the pastries with egg white gives them a beautiful golden sheen.
Step 3: Shape the Pastry Squares
- 3 sheets frozen puff pastry (thawed from Step 1)
Once thawed, cut the puff pastry sheets into 12 squares, each about 5 x 5 inches (12.5 x 12.5 cm).
Fold each corner of the squares into the center and press the corners down so they stick.
Prick the center of each square a few times with a fork.
Arrange the folded squares on the prepared baking sheets, making sure to leave some space between each one for puffing.
Step 4: Glaze and Fill the Pastries
- egg white (reserved from Step 2)
Lightly brush the tops of each folded pastry with the reserved beaten egg white from Step 2.
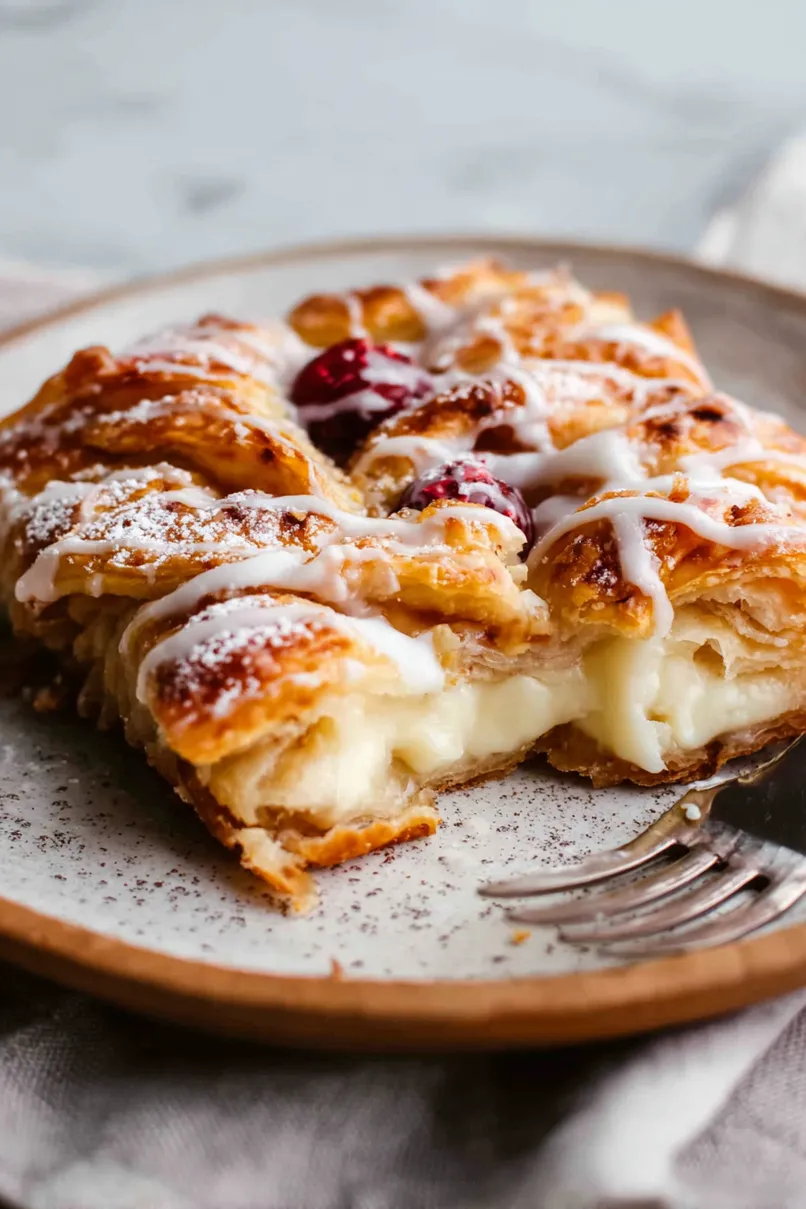
Place a generous spoonful of cream cheese filling (prepared as per the recipe description) into the center of each pastry.
Top with a spoonful of the raspberry and jam mixture.
Distribute the filling and topping evenly among all pastries so you use up everything.
Step 5: Bake the Pastries
Bake the filled pastries in the preheated oven for 15 to 20 minutes, or until they are puffed and beautifully golden brown.
Transfer the pastries to wire racks and let them cool completely.
Step 6: Prepare and Drizzle Icing
Once the pastries are cool, sieve powdered sugar to remove lumps, then mix it in a small bowl with lemon juice until the icing reaches a drizzling consistency.
Drizzle the icing over the cooled pastries for a sweet finish.
For an extra citrusy flavor, I like to use freshly squeezed lemon juice in the icing.
