Finding that perfect homemade bread recipe can feel like searching for a needle in a haystack. Between juggling work deadlines and family commitments, most of us don’t have time to spend hours in the kitchen kneading dough and waiting for it to rise, especially when the results aren’t guaranteed to turn out well.
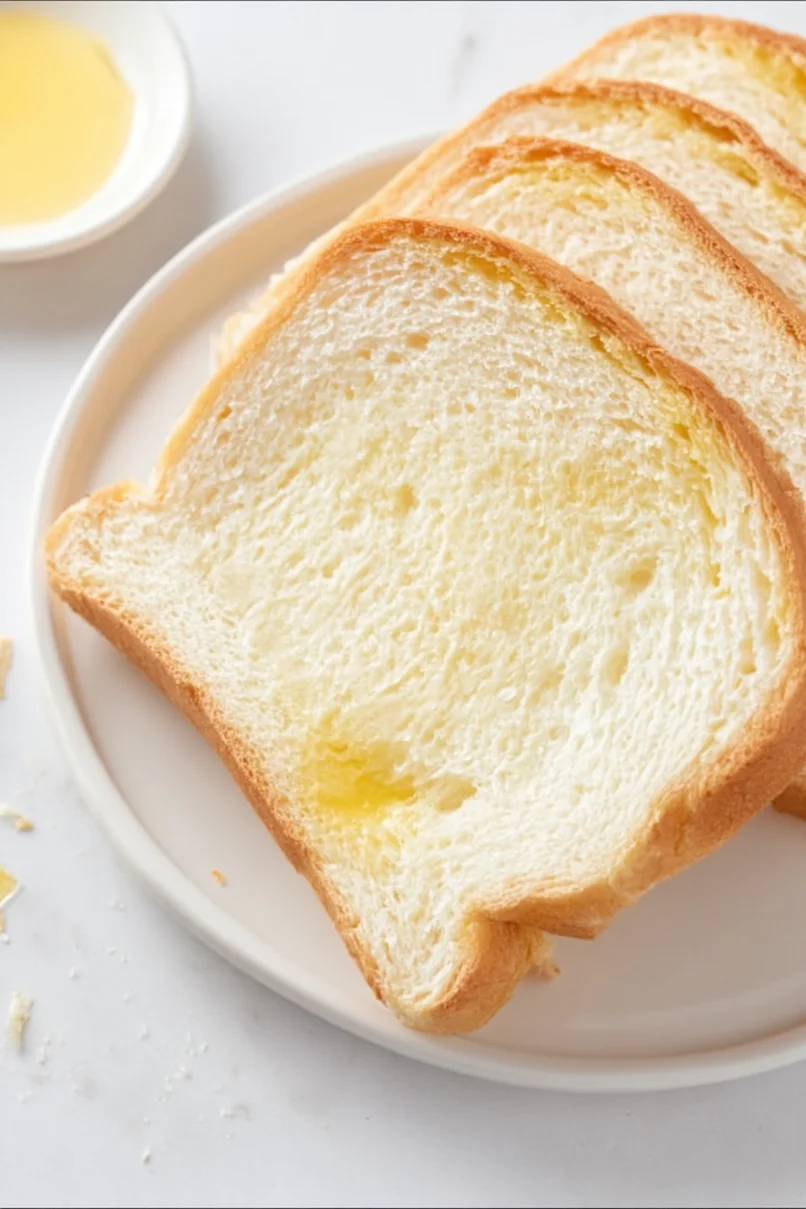
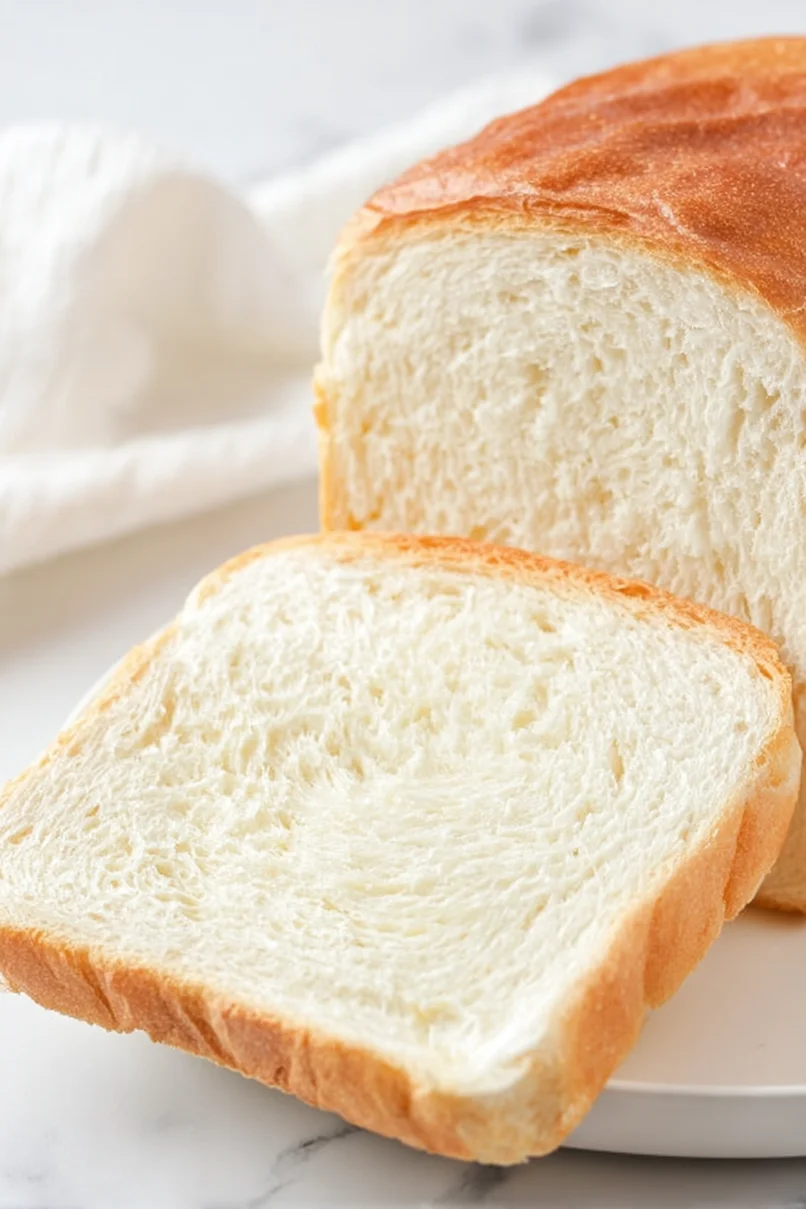
That’s why this egg yolk bread has become my go-to recipe – it’s straightforward to make, reliable every time, and has that rich, satisfying texture that makes you wonder why you ever bought bread from the store. Plus, it’s one of those recipes that’s forgiving enough for beginners but still produces results that’ll make you feel like a seasoned baker.
Why You’ll Love This Egg Yolk Bread
- Rich, tender texture – The combination of eggs, milk, and butter creates an incredibly soft and fluffy bread that’s perfect for sandwiches or morning toast.
- Basic pantry ingredients – You likely have most of these ingredients in your kitchen already – no special trips to the store needed.
- Homemade bread satisfaction – There’s nothing quite like the smell of fresh bread baking in your oven, and this recipe gives you that wonderful homemade bread experience without complicated techniques.
- Versatile recipe – This bread works great for everything from morning toast to sandwich bread, and even French toast the next day (if it lasts that long!).
- Freezer-friendly – You can make multiple loaves and freeze them for later, making this a practical choice for busy families.
What Kind of Flour Should I Use?
Both all-purpose flour and bread flour will work well in this recipe, but each will give you slightly different results. Bread flour contains more protein (about 12-14%) which creates more gluten, leading to a chewier texture and higher rise – perfect if you’re going for that classic bakery-style loaf. If you prefer a softer, more tender crumb, stick with all-purpose flour. Just make sure your flour is fresh and hasn’t been sitting in your pantry for too long, as older flour can affect how well your bread rises. When measuring, use the spoon-and-level method rather than scooping directly with the measuring cup to avoid using too much flour, which could make your bread dense.

Options for Substitutions
This rich bread recipe can handle some ingredient swaps if needed. Here’s what you can try:
- Milk: You can use plant-based alternatives like soy milk or almond milk, but the texture might be slightly less rich. For the closest match, use whole milk substitutes. You can also use 2 cups of water mixed with 1/3 cup powdered milk.
- Butter: Margarine or oil can work in place of butter, though butter gives the best flavor. If using oil, reduce the amount to 3 tablespoons. For dairy-free options, coconut oil (in solid form) works well too.
- Sugar: Honey or maple syrup can replace sugar – use the same amount. If using liquid sweeteners, reduce the milk by 1 tablespoon to maintain the right moisture balance.
- Yeast: This is a must-have ingredient that can’t be substituted. However, you can use instant yeast instead of active dry yeast – just use 25% less (about 3 1/2 teaspoons total).
- Eggs: The eggs are pretty important for this recipe’s texture and richness. While you could try commercial egg replacers, the results won’t be quite the same, so I recommend sticking with real eggs here.
- Flour: All-purpose flour works fine instead of bread flour, though the texture might be slightly less chewy. For whole wheat, you can replace up to 2 cups of the white flour, but using more might make the bread too dense.
Watch Out for These Mistakes While Baking
The temperature of your milk-butter mixture is crucial – if it’s too hot when you add the yeast, you’ll kill these helpful little organisms, but if it’s too cold, they won’t activate properly; aim for it to be just warm to the touch (around 110°F). When kneading the dough, resist the urge to add too much flour too quickly – start with 5 cups and gradually add more only if the dough is too sticky to handle, as too much flour will result in dense, heavy bread. The rising time can make or break your bread – don’t rush it by placing the dough in a very hot spot, as this can affect the texture and flavor; instead, find a warm (not hot) draft-free area and wait until the dough has truly doubled in size. For the best golden crust, make sure to brush the loaves with butter right after they come out of the oven, when they’re still hot – this simple step will give you that soft, tender crust everyone loves.
What to Serve With Egg Yolk Bread?
This rich, tender bread is perfect for your breakfast or brunch table! Since it has a slightly sweet flavor and soft texture, it makes amazing toast spread with butter and your favorite jam or honey. For a savory option, try making sandwiches with sliced ham and cheese – the bread’s richness pairs really well with both mild and sharp flavors. You can also serve it alongside a bowl of soup or stew, where it’s perfect for soaking up all those tasty juices.
Storage Instructions
Keep Fresh: This egg yolk bread stays soft and tasty when kept in a bread bag or wrapped well in plastic wrap at room temperature. It’ll keep fresh for about 3-4 days on your counter. Just make sure it’s completely cool before storing to prevent moisture buildup.
Freeze: Want to save some for later? Let the bread cool completely, then slice it up and pop it in a freezer bag with parchment paper between the slices. It’ll stay good in the freezer for up to 3 months. I like to freeze it in smaller portions so I can thaw just what I need.
Refresh: To bring back that fresh-baked taste, pop frozen slices directly in the toaster, or wrap the whole loaf in foil and warm it in a 350°F oven for about 10 minutes. If your room-temperature bread starts getting a bit stale, a quick 10-second zap in the microwave works wonders to soften it up.
| Preparation Time | 20-30 minutes |
| Cooking Time | 35-40 minutes |
| Total Time | 55-70 minutes |
| Level of Difficulty | Medium |
Estimated Nutrition
Estimated nutrition for the whole recipe (without optional ingredients):
- Calories: 3000-3200
- Protein: 75-85 g
- Fat: 150-160 g
- Carbohydrates: 400-420 g
Ingredients
For the bread:
- 2 cups milk (warmed to about 105-115°F)
- 1/4 cup sugar
- 3 eggs (large, at room temperature)
- 6 cups all-purpose flour (I always use King Arthur)
- 2 packets yeast (4 1/2 tsp total, active dry)
- 1 1/2 tsp salt (fine sea salt is best)
- 1/4 cup butter (unsalted, I prefer Tillamook)
For brushing the loaves:
- butter (melted)
Step 1: Prepare the Milk Mixture
In a microwave-safe bowl, combine milk, sugar, and butter.
Heat the mixture in the microwave for 90 seconds or over the stove until the butter begins to melt.
Stir the mixture after heating; the milk should reach a temperature of around 115-120 degrees Fahrenheit.
Step 2: Form the Dough
In a large mixing bowl, combine 3 cups of flour, yeast, and salt.
Pour the warm milk mixture into the dry ingredients.
Add the eggs and mix well until smooth.
Gradually add the remaining 3 cups of flour, mixing until a soft dough forms.
This dough will be slightly stickier than typical yeast bread dough.
Step 3: Knead and Rise
Turn the dough out onto a lightly floured surface and knead it until it becomes smooth and elastic.
Place the kneaded dough into an oiled bowl, covering it with a damp cloth or plastic wrap.
Allow the dough to rise in a warm place for about 1 hour, or until it has doubled in size.
Step 4: Shape and Second Rise
Punch the risen dough down to deflate it, then divide it into 2 equal portions.
Shape each portion into a loaf and place them into greased 9″x5″ bread pans.
Cover the pans with a damp cloth and let the loaves rise for an additional 35 minutes.
Step 5: Bake the Bread
While the dough is undergoing its second rise, preheat your oven to 350 degrees Fahrenheit.
Once properly risen, bake the loaves for 30 minutes until they are golden brown.
After removing them from the oven, brush the tops with butter to give a lovely sheen and flavor.
Step 6: Cool and Serve
Allow the loaves to sit in their pans for 5 minutes to cool slightly before transferring them to a wire cooling rack.
Once cooled to your preference, slice the bread and enjoy!
