If you ask me, mini desserts are a genius way to indulge without going overboard.
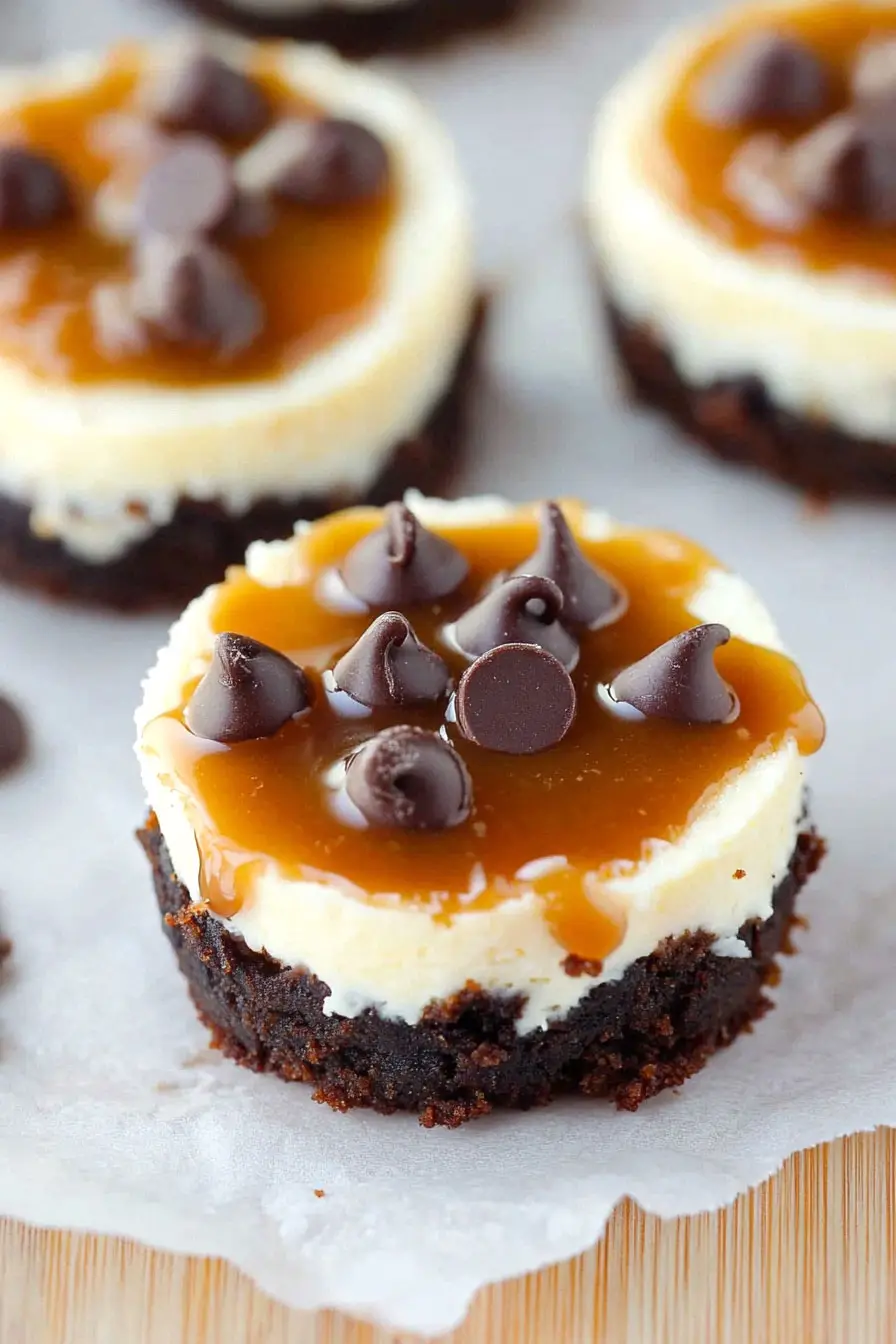
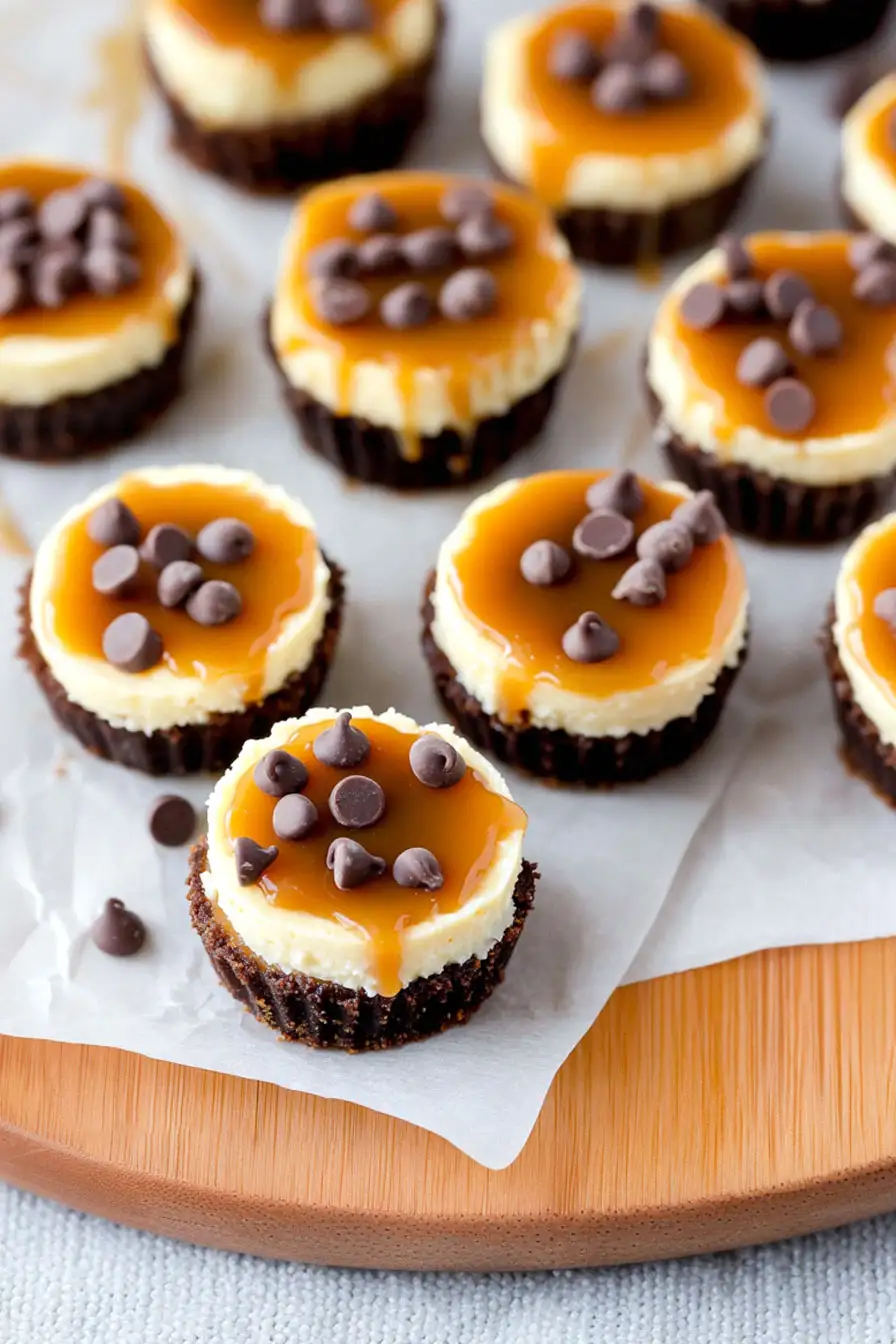
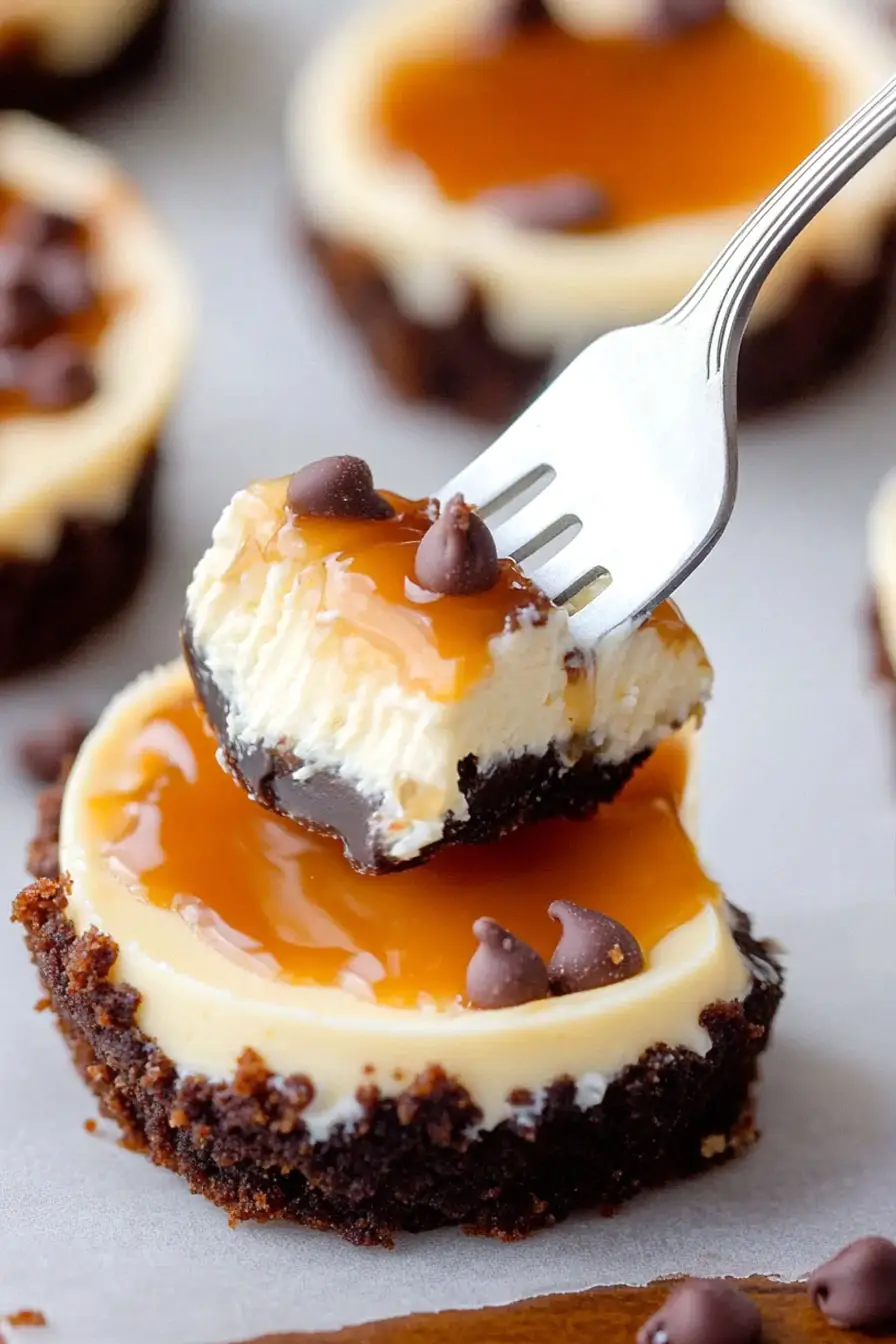
These mini salted caramel cheesecakes bring together two favorite flavors in perfect, two-bite portions. A buttery graham cracker crust holds a smooth, creamy filling that’s topped with a golden caramel drizzle and a sprinkle of sea salt.
They’re easier to make than a full-sized cheesecake, and you don’t have to worry about cracks forming on top. Plus, since they’re individual servings, they’re perfect for parties or when you want to store some for later.
It’s a crowd-pleasing treat that feels special enough for celebrations but simple enough for any time you’re craving something sweet.
Why You’ll Love These Mini Cheesecakes
- Perfect portion control – These mini cheesecakes come in individual servings, making them ideal for parties or when you want just a little sweet treat without the temptation of a whole cake.
- Make-ahead friendly – You can prepare these little desserts up to 3 days in advance and store them in the fridge, which is perfect for planning ahead for special occasions or gatherings.
- No water bath needed – Unlike traditional cheesecakes, these mini versions don’t require the fussy water bath step, making them much easier to prepare without sacrificing taste or texture.
- Crowd-pleasing combination – The classic mix of chocolate chips, Oreo crust, and salted caramel creates a dessert that combines everyone’s favorite flavors in one perfect bite.
What Kind of Cream Cheese Should I Use?
For cheesecakes, you’ll definitely want to use full-fat brick-style cream cheese – the kind that comes in a foil-wrapped block, not the spreadable kind from a tub. Philadelphia brand is the go-to choice for most bakers, but any quality block cream cheese will work just fine. The most important thing is making sure your cream cheese is properly softened to room temperature before you start mixing – this usually takes about an hour on the counter. Cold cream cheese will leave you with a lumpy batter, while overly soft or melted cream cheese can make your cheesecake too loose. If you’re in a pinch, generic store brands can work too, just make sure it’s the block variety and not whipped or reduced fat versions.
Options for Substitutions
Need to make some swaps? Here’s what works in these mini cheesecakes:
- Oreo cookies: You can swap Oreos with graham crackers (about 1½ cups crushed) or chocolate wafer cookies. Just keep the butter amount the same for the crust.
- Cream cheese: This is a must-use ingredient – don’t substitute it as it’s the base of the cheesecake. Just make sure it’s brick-style and full-fat for the right texture.
- Plain yogurt: Sour cream works perfectly here as a 1:1 swap. You can also use Greek yogurt, but the texture might be slightly different.
- Mini chocolate chips: Regular-sized chips work fine, or try other mix-ins like crushed candy bars, white chocolate chips, or leave them out completely.
- Salted caramel: Store-bought caramel sauce is totally fine if you’re short on time – just add a pinch of salt. You can also skip it or top with chocolate ganache instead.
- Vanilla essence: Vanilla extract, vanilla bean paste, or even a scraped vanilla pod will work. If using vanilla bean paste, use ¾ teaspoon since it’s more concentrated.
Watch Out for These Mistakes While Baking
The biggest challenge when making mini cheesecakes is avoiding cracks on top – the secret is to never overmix your batter once the eggs are added, as too much air incorporation leads to surface splits during baking. Another common mistake is opening the oven door while baking; resist the temptation to peek, as sudden temperature changes can cause the cheesecakes to sink in the middle. For perfectly smooth and creamy results, make sure all your ingredients (especially the cream cheese, eggs, and yogurt) are at room temperature before starting – cold ingredients lead to lumpy batter that won’t bake evenly. When making the salted caramel sauce, keep a close eye on the sugar as it cooks – it can go from perfectly amber to burnt in seconds, so have your cream ready to add as soon as you achieve that golden color. Finally, let the cheesecakes cool completely in the pan before attempting to remove them, and consider using a water bath to ensure gentle, even baking.
What to Serve With Mini Cheesecakes?
These mini salted caramel cheesecakes are perfect for serving at parties or gatherings, and there are lots of fun ways to dress them up! A scoop of vanilla ice cream on the side adds a nice temperature contrast and makes the dessert feel extra special. I love setting up a little toppings bar with extras like warm caramel sauce, chocolate sauce, whipped cream, and crushed nuts so everyone can customize their own. For a coffee-shop style presentation, serve these cute little cheesecakes with a hot cup of coffee, espresso, or even a creamy chai latte – the warm drinks pair amazingly well with the cool, creamy dessert.
Storage Instructions
Keep Fresh: These mini cheesecakes stay perfectly good in an airtight container in the fridge for up to 5 days. I like to store them without the caramel topping – this way, the crust maintains its nice texture and you can add fresh caramel when serving.
Freeze: Want to save some for later? These little treats freeze really well for up to 3 months! Just wrap each cheesecake individually in plastic wrap, then place them in a freezer container. Remember to skip the caramel topping before freezing – it’s best to add it fresh when serving.
Thaw & Serve: When you’re ready to enjoy your frozen cheesecakes, move them to the fridge the night before. Once thawed, drizzle with fresh caramel sauce just before serving. They taste just as creamy and delicious as the day you made them!
Make Ahead: These mini cheesecakes are perfect for making ahead! You can prepare them up to 2 days before your event – just keep them in the fridge and add the caramel topping right before serving. This makes party planning so much easier!
| Preparation Time | 20-30 minutes |
| Cooking Time | 25-30 minutes |
| Total Time | 145-180 minutes |
| Level of Difficulty | Medium |
Estimated Nutrition
Estimated nutrition for the whole recipe (without optional ingredients):
- Calories: 2200-2500
- Protein: 30-35 g
- Fat: 120-130 g
- Carbohydrates: 280-300 g
Ingredients
For the crust:
- 18 Oreo cookies (finely crushed into crumbs)
- 1/4 cup unsalted butter (melted)
For the filling:
- 16 oz full-fat cream cheese (softened, I prefer Philadelphia brand)
- 1 tsp vanilla extract
- 1/4 cup plain yogurt (full-fat for best texture)
- 3/4 cup white sugar
- 2 large eggs (room temperature for smooth mixing)
- 1 cup mini semi-sweet chocolate chips (Nestlé Toll House works well)
For the topping:
- salted caramel (homemade or store-bought)
Step 1: Prepare the Oven and Cupcake Pans
Preheat your oven to 350°F (177°C).
Line two 12-count cupcake pans with a total of 18 liners.
This will serve as the base for your mini cheesecakes.
Step 2: Make the Oreo Crumb Crust
In a food processor or blender, pulse whole Oreos into a fine crumb.
In a medium-sized bowl, mix the cookie crumbs with the melted butter until well combined.
Press about 1 heaping tablespoon of the mixture into the bottom of each cupcake liner.
You should have enough for around 16-18 liners.
Bake these in the oven for 5 minutes, then allow them to slightly cool as you proceed to prepare the cheesecake filling.
Step 3: Prepare the Cheesecake Filling
In a large bowl, use a handheld mixer or stand mixer fitted with a paddle attachment to beat the cream cheese on medium speed until it is completely smooth.
Scrape down the sides of the bowl as needed.
Add sugar and yogurt, and continue beating on medium speed until everything is combined.
Add the eggs one at a time, beating on low speed after each addition.
Again, scrape down the sides when necessary.
Finally, beat in the vanilla extract and mini chocolate chips until they are well incorporated.
Step 4: Fill the Crusts and Bake
Spoon the cheesecake batter into the prepared crusts until they are nearly full.
Bake each pan for 20-23 minutes.
The centers of the cheesecakes may still be slightly jiggly, which is perfectly acceptable.
They may rise during baking but will deflate as they cool.
Once baked, remove them from the oven and allow them to cool completely at room temperature for at least 1 hour.
Step 5: Chill and Add Finishing Touches
After the cheesecakes have cooled at room temperature, transfer them to the refrigerator and let them chill for at least two hours.
Before serving, top each mini cheesecake with salted caramel and additional chocolate chips, if you desire.
This will add a delightful layer of flavor and texture.
Step 6: Storing Leftover Cheesecakes
To store any leftover cheesecakes, cover them tightly and keep them in the refrigerator for up to 5 days.
This ensures that your mini cheesecakes remain fresh and delicious.
