If you ask me, ricotta ice cream is one of my favorite desserts to make at home.
This Italian-inspired frozen treat brings a smooth, creamy texture that’s different from regular ice cream. The ricotta adds a subtle tanginess and richness that makes each spoonful special.
It’s made by folding fresh ricotta into a simple cream base, with just enough sugar to keep things sweet without going overboard. A touch of vanilla and a pinch of salt help all the flavors shine through.
It’s a wonderfully simple dessert that feels a bit fancy, perfect for summer afternoons or after-dinner treats.

Why You’ll Love This Ricotta Ice Cream
- No ice cream machine needed – This no-churn recipe lets you make creamy, homemade ice cream without any special equipment – just mix, freeze, and enjoy.
- Just 5 ingredients – With only ricotta, heavy cream, condensed milk, vanilla, and salt, this recipe proves that amazing ice cream doesn’t need a long list of ingredients.
- Rich and creamy texture – The ricotta cheese adds a unique richness and super smooth texture that makes this ice cream extra special.
- Make-ahead friendly – You can make this ice cream days in advance and keep it frozen until you’re ready to serve, perfect for planning ahead for parties or dessert cravings.
What Kind of Ricotta Should I Use?
For making ricotta ice cream, whole milk ricotta is definitely the way to go – skip the part-skim versions since the extra fat helps create that perfectly creamy texture we’re after. Fresh ricotta from your local Italian deli will give you the best results, but good-quality supermarket brands like Galbani or BelGioioso work great too. Before using your ricotta, it’s worth taking a minute to drain off any excess liquid and give it a quick stir to smooth out any lumps. If your ricotta seems particularly wet or grainy, you can strain it through a fine-mesh sieve or cheesecloth for about 30 minutes before mixing it into your ice cream base.
Options for Substitutions
While this ice cream recipe is pretty straightforward, here are some helpful substitutions if you need them:
- Heavy cream: You can use whipping cream instead of heavy cream. Half-and-half isn’t recommended as it won’t whip up properly and will affect the final texture.
- Whole milk ricotta: This is really the star ingredient that you shouldn’t substitute – it gives the ice cream its signature texture and flavor. Part-skim ricotta will work in a pinch, but the result won’t be as creamy.
- Sweetened condensed milk: Since this provides both sweetness and texture, it’s best not to substitute it. However, if you must, you can use 1 cup of heavy cream mixed with 1.5 cups of sugar (heated until dissolved), though the texture might be slightly different.
- Vanilla essence: Feel free to use vanilla extract, vanilla bean paste, or even scrape a whole vanilla bean. If using vanilla bean paste or whole vanilla, use 1 tablespoon instead of 2.
- Salt: Any type of fine salt works here – table salt, fine sea salt, or kosher salt are all good options.
Watch Out for These Mistakes While Making
The biggest challenge when making ricotta ice cream is preventing ice crystals from forming, which can make your dessert grainy instead of creamy – always use whole milk ricotta and strain it through a fine-mesh sieve to remove any excess liquid before mixing. A common mistake is not chilling your ingredients properly before starting; make sure your heavy cream and ricotta are thoroughly cold, as room temperature ingredients can lead to a less smooth texture. To get the silkiest results, avoid over-mixing once you’ve combined all ingredients, as this can make the ice cream dense and heavy instead of light and airy. For the best texture, take your ice cream out of the freezer 10-15 minutes before serving to let it soften slightly, making it easier to scoop and allowing the flavors to fully develop.
What to Serve With Ricotta Ice Cream?
This rich and creamy ricotta ice cream pairs wonderfully with fresh summer fruits like peaches, berries, or figs – their natural sweetness and slight tartness balance out the creamy dessert perfectly. A drizzle of honey and a sprinkle of toasted pistachios or pine nuts adds nice crunch and brings out the Italian-inspired flavors. For chocolate lovers, try adding a few shavings of dark chocolate or a spoonful of warm espresso sauce over top. And if you’re serving this at a dinner party, a crispy biscotti on the side makes for perfect scooping and adds a lovely traditional touch.
Storage Instructions
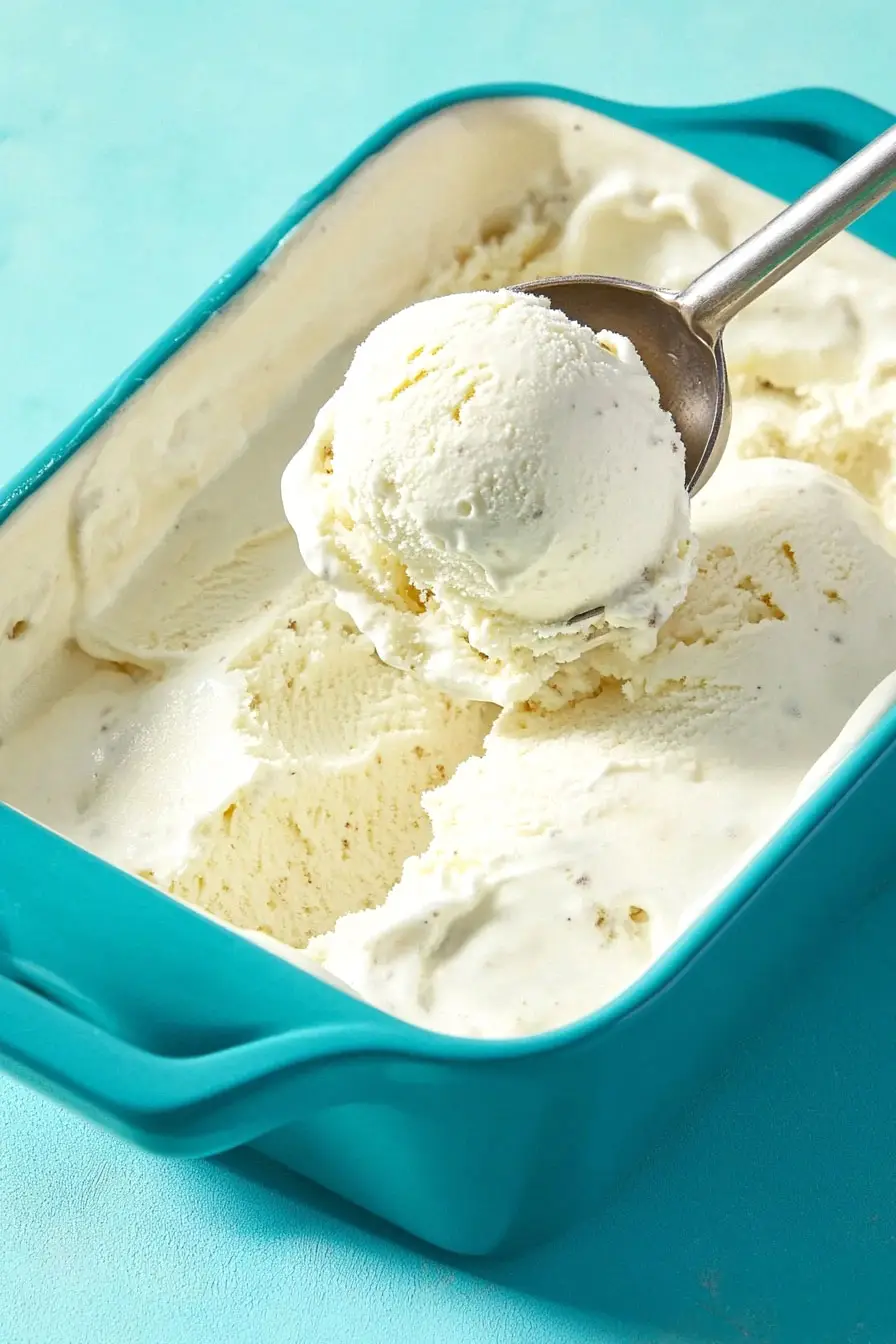
Keep Frozen: Your homemade ricotta ice cream needs to stay in the freezer, of course! Keep it in an airtight, freezer-safe container and it’ll stay fresh for up to 2 months. I like using a container with a tight-fitting lid to prevent any freezer burn from spoiling the creamy texture.
Prevent Ice Crystals: To keep your ice cream smooth and creamy, press a piece of plastic wrap directly onto the surface before putting the lid on. This helps prevent those pesky ice crystals from forming on top. Also, store it towards the back of your freezer where the temperature stays more consistent.
Serve: When you’re ready to scoop, let the ice cream sit on the counter for about 5-10 minutes to soften slightly. This makes it easier to scoop and helps bring out the rich ricotta flavor. Pro tip: run your ice cream scoop under hot water between scoops for perfect servings every time!
| Preparation Time | 15-20 minutes |
| Cooking Time | 0 minutes |
| Total Time | 240-360 minutes |
| Level of Difficulty | Easy |
Estimated Nutrition
Estimated nutrition for the whole recipe (without optional ingredients):
- Calories: 2200-2400
- Protein: 30-40 g
- Fat: 140-160 g
- Carbohydrates: 230-250 g
Ingredients
- 1/2 tsp salt
- 1 can sweetened condensed milk
- 1 cup cold heavy cream (well-chilled for easier whipping)
- 2 tbsp vanilla essence
- 2 cups whole milk ricotta cheese (drain any excess liquid for a creamier texture)
Step 1: Whip the Cream
Place the cream in the bowl of your electric mixer.
Beat the cream just until stiff peaks form.
Once the cream is whipped, transfer it to a separate bowl and set it aside.
There’s no need to wash the mixing bowl as you’ll use it again shortly.
Step 2: Prepare the Ricotta Mixture
Add the ricotta cheese, condensed milk, vanilla extract, and a pinch of salt to the mixing bowl.
Beat these ingredients on medium speed until they are smooth and thoroughly combined, creating a creamy mixture.
Step 3: Combine the Mixtures
Turn off the mixer and gently fold the previously whipped cream into the ricotta mixture.
Make sure to incorporate the cream fully but gently, preserving its airy texture to ensure a light ice cream.
Step 4: Freeze the Mixture
Pour the combined mixture into a freezer-safe container.
Place it in the freezer and allow it to freeze for 4 to 6 hours.
This time frame will let the mixture set into a smooth, creamy no-churn ice cream.
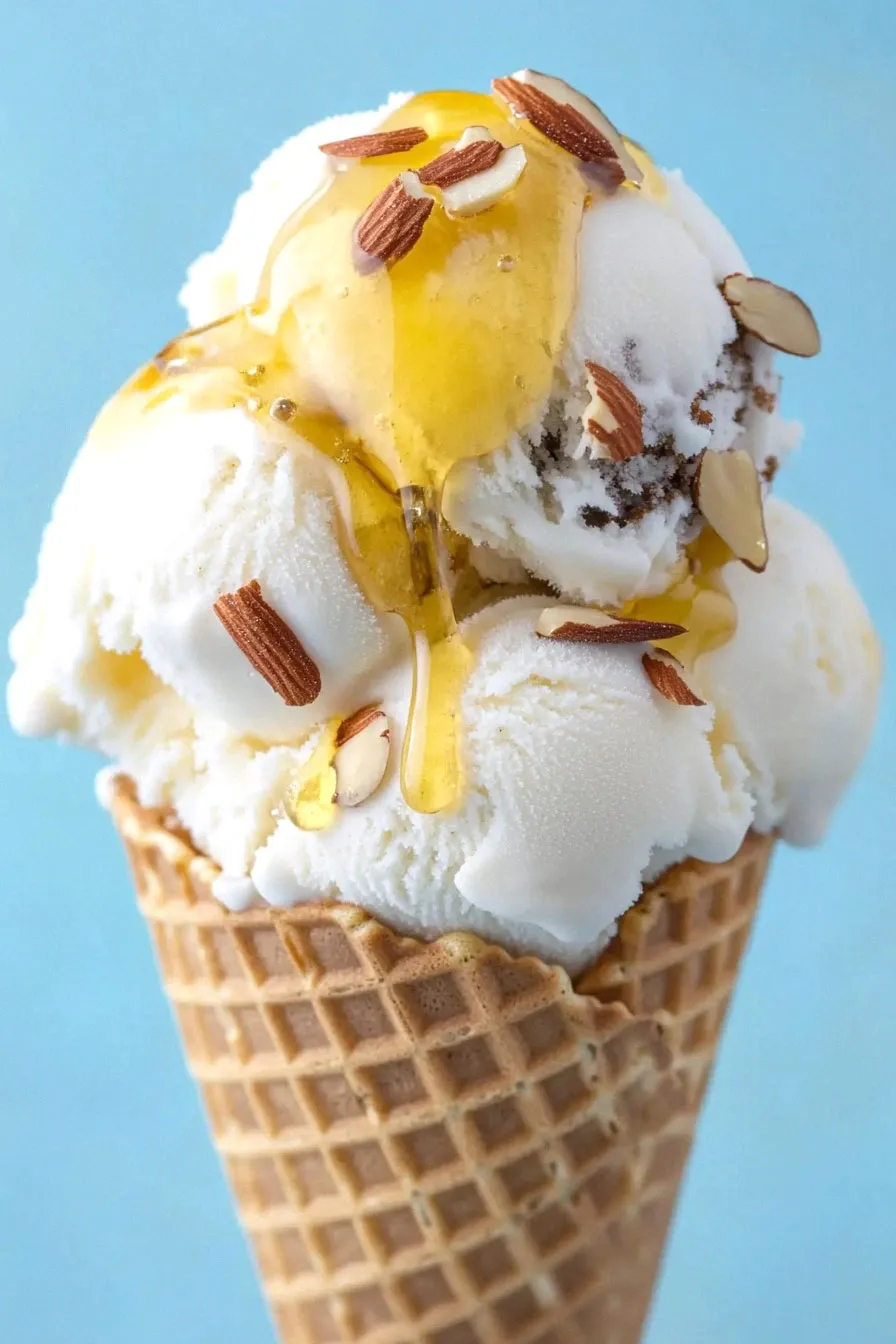
Step 5: Serve with Toppings
After 4 to 6 hours, remove the ice cream from the freezer.
Scoop out your desired portion and top it with honey and your favorite nuts for added flavor and texture.
Note that if the ice cream has been frozen longer than 6 hours, it may be difficult to scoop.
If so, let it sit at room temperature for a bit before serving.
Enjoy your homemade no-churn ice cream!
