If you ask me, make-ahead stuffed peppers are a total game-changer.
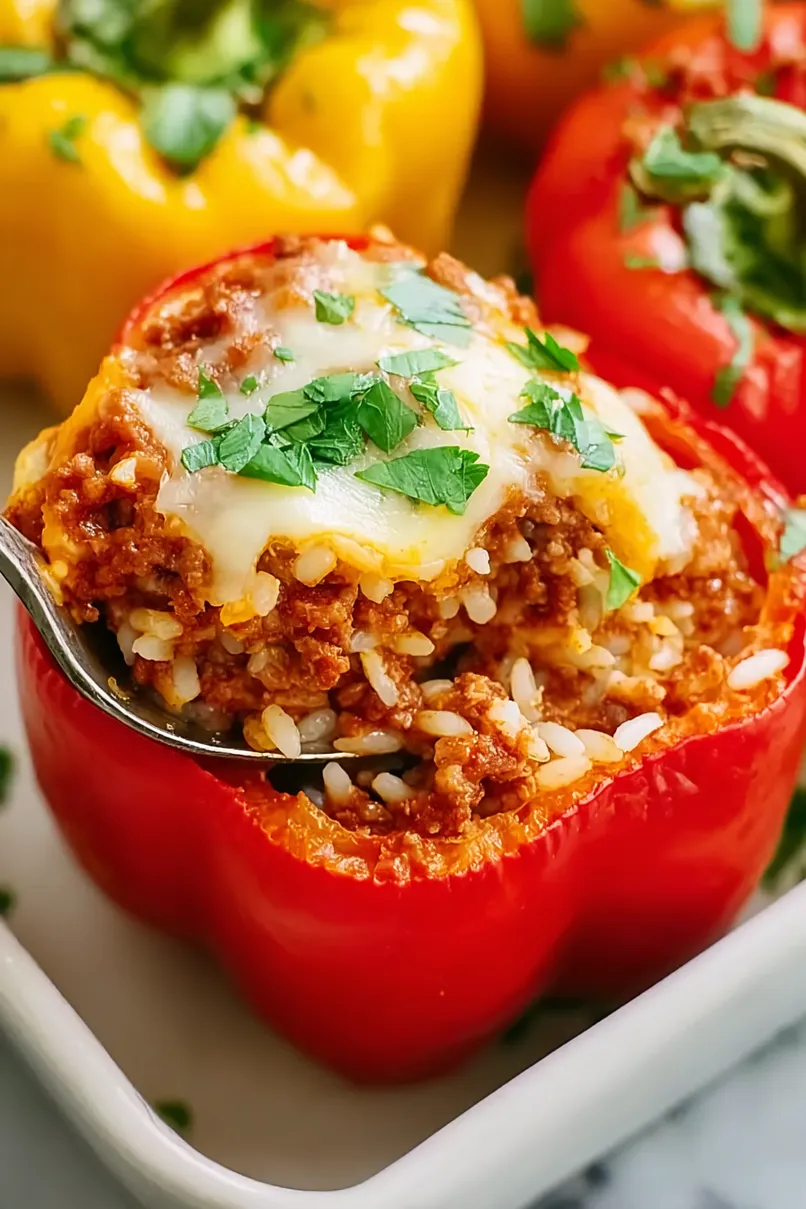
These colorful bell peppers packed with seasoned meat and rice make dinner prep so much easier, especially on those busy weeknights. The filling is a simple mix of ground beef, fluffy rice, and tomato sauce that keeps really well in the freezer.
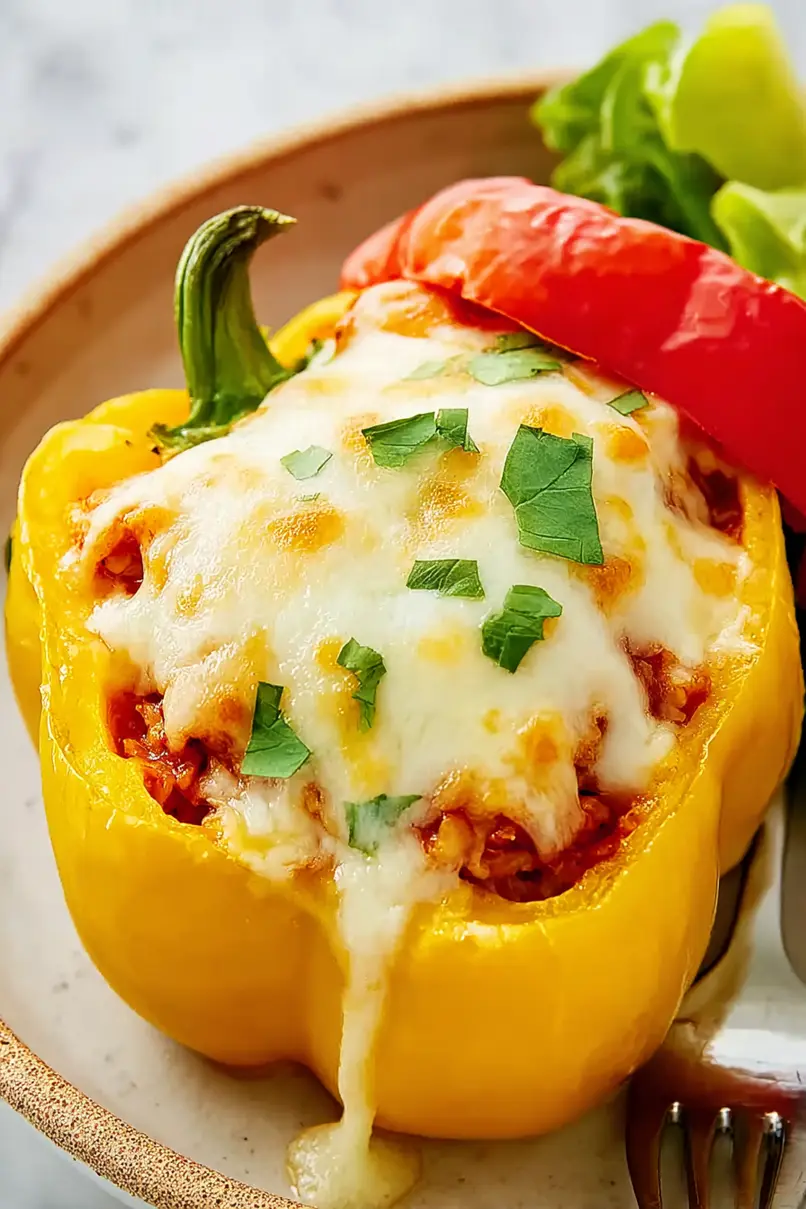
The best part is pulling these from the freezer weeks later – they taste just as good as the day you made them. Just pop them in the oven, and dinner’s basically done. A sprinkle of melted cheese on top brings everything together.
It’s a practical freezer meal that feels like real home cooking, perfect for those nights when you need something comforting but don’t have time to start from scratch.
Why You’ll Love These Stuffed Bell Peppers
- Perfect for meal prep – These peppers are specifically designed for freezing, making them ideal for busy weeks ahead. Make a batch now, freeze, and enjoy later when you need a quick dinner solution.
- Customizable recipe – You can switch up the ground beef for turkey, choose different colored peppers, or swap the cheese variety – it’s totally up to you and what your family enjoys.
- Complete meal in one dish – With protein from the beef, carbs from the rice, and vegetables from the peppers, you’ve got all your nutrition bases covered in one convenient package.
- Budget-friendly – Using simple ingredients like ground beef, rice, and bell peppers, this recipe helps you create multiple meals without breaking the bank.
- Family-sized portions – This recipe makes enough to feed a family of four, or provides plenty of individual portions for future meals.
What Kind of Bell Peppers Should I Use?
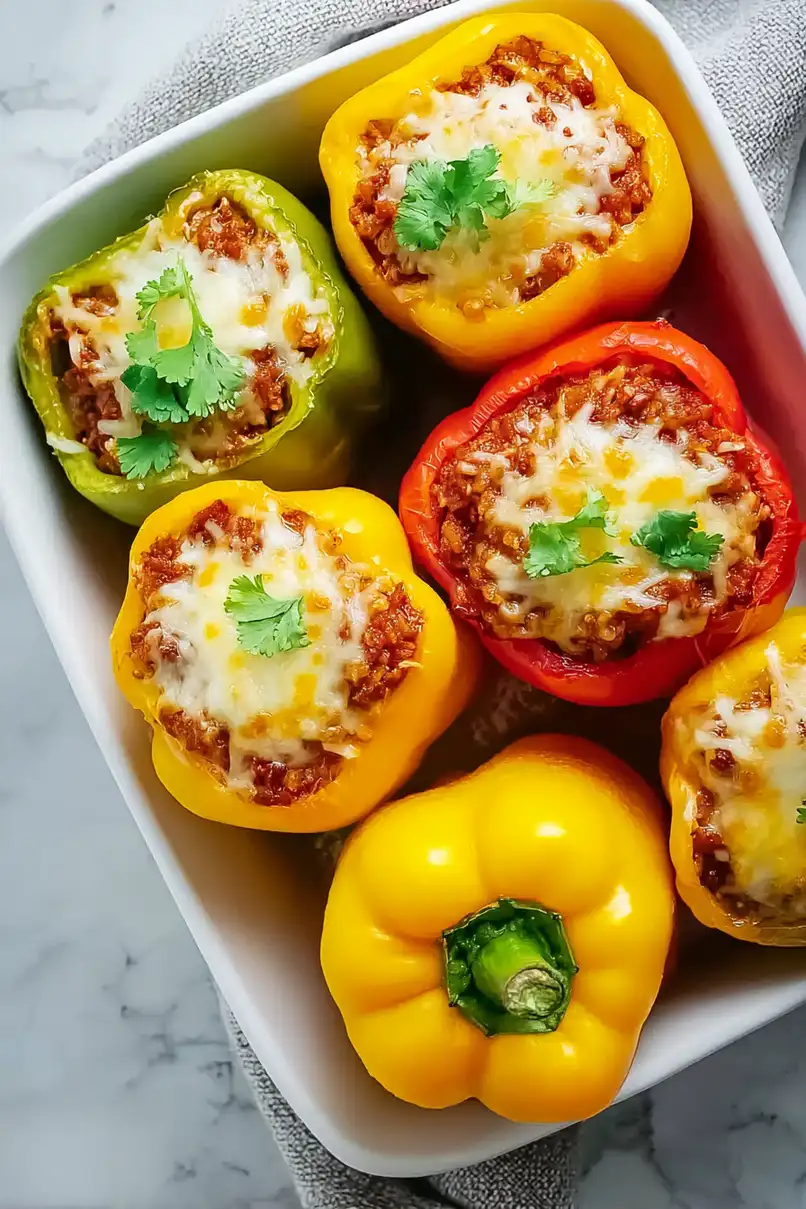
You can use any color of bell pepper for this recipe – they’re all great candidates for stuffing and freezing. Green peppers tend to be the most budget-friendly and have a slightly bitter, earthy taste, while red, yellow, and orange peppers are sweeter and a bit more expensive. When picking your peppers at the store, look for ones that can stand up straight (this helps them stay upright while baking) and feel firm and heavy for their size. For the best results when freezing, choose peppers that are similar in size so they’ll cook evenly, and avoid any with soft spots or wrinkled skin since these won’t hold up as well in the freezer.
Options for Substitutions
This freezer-friendly recipe is super adaptable! Here are some easy swaps you can try:
- Bell peppers: Any color works great here – green, red, yellow, or orange. You could even use poblano peppers for a slightly spicier kick, just remember they’re usually smaller so you might need more of them.
- Ground beef: Feel free to swap the beef with ground turkey, chicken, pork, or even plant-based alternatives like Beyond Meat. For vegetarian options, cooked lentils or a mixture of mushrooms and walnuts (pulsed in a food processor) work well too.
- Rice: White rice can be replaced with brown rice, quinoa, cauliflower rice (for low-carb), or even cooked barley. Just make sure whatever grain you use is fully cooked before mixing it in.
- Cheese: Monterey Jack or cheddar are suggested, but any melting cheese works great – try mozzarella, pepper jack for some heat, or a Mexican cheese blend. For dairy-free versions, use your favorite plant-based shredded cheese.
- Tomato sauce: If you’re out of tomato sauce, you can blend up canned diced tomatoes, or use marinara sauce. Just reduce any added salt since marinara usually comes pre-seasoned.
- Worcestershire sauce: You can substitute with soy sauce, coconut aminos, or even a splash of balsamic vinegar mixed with a pinch of sugar to get that savory depth.
Watch Out for These Mistakes While Cooking
The biggest challenge when preparing stuffed peppers for freezing is managing moisture – using raw rice in the filling can lead to a mushy texture when thawed, so always cook your rice beforehand and let it cool completely before mixing with other ingredients. A common error is overcooking the peppers before freezing – they should be just barely tender when par-boiled, as they’ll continue to soften during the final cooking process after thawing. To prevent freezer burn and maintain quality, make sure your peppers are completely cool before freezing, and wrap them individually in plastic wrap before placing them in a freezer bag – this extra step removes air pockets that can cause ice crystals to form. For the best results, drain your cooked ground beef well and avoid using extra tomato sauce in the filling, as excess liquid can make your peppers watery when reheated.
What to Serve With Stuffed Bell Peppers?
Since stuffed peppers are already packed with protein, rice, and veggies, they work great as a standalone meal, but I love adding a few simple sides to round things out. A light green salad with a tangy vinaigrette makes a perfect partner, cutting through the richness of the beef and cheese. For something warm, roasted vegetables like zucchini or carrots complement the peppers nicely without overshadowing the main dish. If you’re feeding a hungry crowd, some crusty bread on the side is always welcome for soaking up any extra sauce that escapes the peppers.
Storage Instructions
Keep Fresh: These stuffed peppers are perfect for meal prep! Place them in an airtight container and keep them in the fridge for up to 4 days. They actually taste even better the next day when all the flavors have had time to mingle together.
Freeze: Since this recipe is designed for freezing, you’re in luck! Let the peppers cool completely, then wrap each one individually in plastic wrap and aluminum foil. Place them in a freezer bag and they’ll stay good for up to 3 months. Pro tip: write the date on the bag so you know when you made them!
Reheat: When you’re ready to eat your frozen peppers, thaw them overnight in the fridge. Then pop them in the oven at 350°F for about 20-25 minutes until heated through. If you’re in a hurry, you can microwave them, covered, for 2-3 minutes, though the oven method gives the best texture. Add a sprinkle of fresh cheese on top before reheating for extra goodness!
| Preparation Time | 15-20 minutes |
| Cooking Time | 35-50 minutes |
| Total Time | 50-70 minutes |
| Level of Difficulty | Medium |
Estimated Nutrition
Estimated nutrition for the whole recipe (without optional ingredients):
- Calories: 1500-1700
- Protein: 100-110 g
- Fat: 85-95 g
- Carbohydrates: 120-130 g
Ingredients
For the peppers:
- 4 bell peppers (any color, halved and seeded)
For the filling:
- 1 can tomato sauce (I use Hunt’s 15 oz)
- 1 tbsp Worcestershire sauce
- 3 garlic cloves (minced for best flavor)
- 1 lb ground beef (80/20 lean for flavor)
- 1 tsp black pepper (freshly ground preferred)
- 1 cup cooked rice
- 1/2 cup yellow onion (finely chopped)
- 1 tbsp olive oil
- 1 tsp salt
- 1/2 tsp oregano
- 1/2 tsp dried basil
For the topping:
- 3/4 cup shredded Monterey Jack cheese (or cheddar)
Step 1: Prepare and Preheat
Start by washing the peppers thoroughly.
Slice the tops off horizontally and discard the seeds and membranes.
To ensure they stand up in the baking dish, level the bottoms if necessary.
Alternatively, you can slice the peppers in half vertically, discarding the seeds and membranes.
Place the prepared peppers in a 13×9 baking dish or casserole dish with a lid.
If you don’t have a lid, aluminum foil will work when needed.
Set them aside and preheat your oven to 350°F (175°C).
Step 2: Saute the Aromatics
Add some oil to a large skillet over medium-high heat.
Once hot, add the onion and garlic, sauteing them until they become softened and translucent, which should take about 3 to 4 minutes.
Step 3: Cook the Beef and Prepare the Sauce
Add the ground beef to the skillet, sprinkling it with a couple of pinches of salt.
Cook until the beef is browned.
While the beef is cooking, prepare the tomato sauce by combining the sauce and all the seasonings in a medium bowl.
Mix them well to incorporate the flavors.
Step 4: Combine Beef Mixture
Once the beef is fully cooked (about 5 to 7 minutes), drain any excess fat from the skillet if necessary.
Stir in the prepared tomato sauce and cooked rice, mixing until all the ingredients are well coated.
Step 5: Stuff and Bake the Peppers
Evenly stuff the prepared peppers with the beef and rice mixture, packing the filling in as needed.
If you’re planning to freeze the peppers for a future meal, stop here and freeze them.
For immediate cooking, cover the dish with foil or a lid and bake in the oven.
Red and yellow peppers will take about 30 minutes, while green peppers, being firmer, will need around 35 minutes.
Step 6: Add Cheese and Finish Baking
Remove the cover and sprinkle cheese over the top of the stuffed peppers.
Return them to the oven, uncovered, for an additional 5 minutes, allowing the cheese to melt to perfection.
Once done, serve the stuffed peppers warm.
Enjoy your delicious and hearty meal!
