If you ask me, yellow chili peppers are a hidden gem in the kitchen.
These mildly spicy peppers add just the right kick to any dish, bringing a sunny warmth that’s not too overwhelming. They’re perfect for those who want flavor without setting their taste buds on fire.
I love using them in everything from fresh salsas to stir-fries, where they add a nice crunch and subtle heat. When roasted, they develop a slightly sweet, smoky taste that’s just wonderful.
It’s a simple ingredient that can turn an everyday meal into something special, and I keep finding new ways to use them in my cooking.
Why You’ll Love These Yellow Chili Peppers
- Quick preparation – Ready in under 20 minutes, these peppers are perfect for those busy weeknights when you need something fast but tasty.
- Simple ingredients – With just 5 basic ingredients, you probably already have most of what you need in your kitchen right now.
- Budget-friendly – Using affordable yellow peppers and basic pantry staples, this recipe gives you a lot of flavor without spending much money.
- Customizable – You can easily adjust the seasonings or swap the cheese to match your taste preferences or what you have on hand.
What Kind of Yellow Peppers Should I Use?
Yellow peppers for this recipe can come in a few different forms, and you’ve got some tasty options to choose from. Hungarian wax peppers and banana peppers are both great choices – they’re similar in shape (long and slender) and have a mild, sweet flavor with just a hint of heat. When shopping, look for peppers that feel firm and heavy for their size, with smooth, bright skin and no soft spots or wrinkles. If you can’t find Hungarian or banana peppers, regular yellow bell peppers will work too, though they’ll give you a slightly different flavor profile since they’re sweeter and don’t have any heat at all. Just make sure to pick ones that are fully yellow rather than green-tinged, as they’ll be sweeter and more flavorful.
Options for Substitutions
This simple recipe can work with several ingredient swaps if needed:
- Yellow peppers: If you can’t find yellow banana or Hungarian peppers, you can use regular bell peppers (any color works, though yellow or orange will keep the color scheme). Cubanelle peppers are another good option, though they might be a bit spicier.
- Queso fresco: No queso fresco? Try using feta cheese (though use a bit less as it’s saltier), mild goat cheese, or even ricotta salata. If you’re dairy-free, try using crumbled firm tofu seasoned with a pinch of salt.
- Olive oil: You can swap olive oil with any neutral-flavored oil like avocado oil or grapeseed oil. Even melted butter works well here, giving a nice rich flavor.
- Sea salt: Any type of salt works fine here – table salt, kosher salt, or even pink Himalayan salt. Just remember that table salt is more concentrated, so use a bit less if substituting.
Watch Out for These Mistakes While Cooking
The biggest challenge when roasting yellow peppers is getting that perfect char without burning them – keep a close eye on them under the broiler and turn them every 2-3 minutes until all sides are evenly blistered. A common mistake is removing the skin while the peppers are still too hot, which not only risks burning your fingers but also makes the skin stick stubbornly to the flesh – instead, place the charred peppers in a sealed plastic bag or covered bowl for 10-15 minutes to let them steam and cool down. To maintain the peppers’ natural sweetness, avoid over-seasoning with salt at the beginning; it’s better to add salt gradually after peeling and taste as you go. For the best flavor combination, make sure your queso fresco is at room temperature when you sprinkle it over the peppers, as cold cheese won’t melt as nicely or blend with the other flavors.
What to Serve With Yellow Chili Peppers?
These tasty yellow peppers make a great side dish, but they can easily become the star of your meal with the right companions! They’re perfect alongside grilled meats like chicken or pork chops, where their mild heat and cheese topping add extra flavor to each bite. A simple rice pilaf or quinoa makes an excellent base to soak up any olive oil and cheese that might escape the peppers. Since these peppers have a Mexican-inspired twist with the queso fresco, you might want to round out your meal with warm tortillas or crusty bread to scoop up every bit of goodness.
Storage Instructions
Keep Fresh: Once your yellow chili peppers are cooked, let them cool completely and place them in an airtight container. They’ll stay good in the fridge for up to 4 days. The flavors actually get better after a day or two as they marinate in their own juices!
Pack: If you’re taking these peppers to a potluck or planning to serve them later, layer them carefully in a container to prevent crushing. Keep the queso fresco separate and sprinkle it on just before serving – this keeps everything fresh and prevents the cheese from getting soggy.
Prep Ahead: You can clean and cut the peppers up to 2 days ahead of time. Just store them in a sealed bag or container in the fridge until you’re ready to cook. This is super handy when you’re planning a dinner party or just want to get some prep work done in advance.
| Preparation Time | 10-15 minutes |
| Cooking Time | 2-4 minutes |
| Total Time | 12-19 minutes |
| Level of Difficulty | Easy |
Estimated Nutrition
Estimated nutrition for the whole recipe (without optional ingredients):
- Calories: 300-350
- Protein: 10-15 g
- Fat: 25-30 g
- Carbohydrates: 15-20 g
Ingredients
- black pepper
- 6 golden peppers
- crumbled queso fresco
- olive oil (I prefer California Olive Ranch extra virgin)
- sea salt or kosher salt
Step 1: Prepare the Peppers
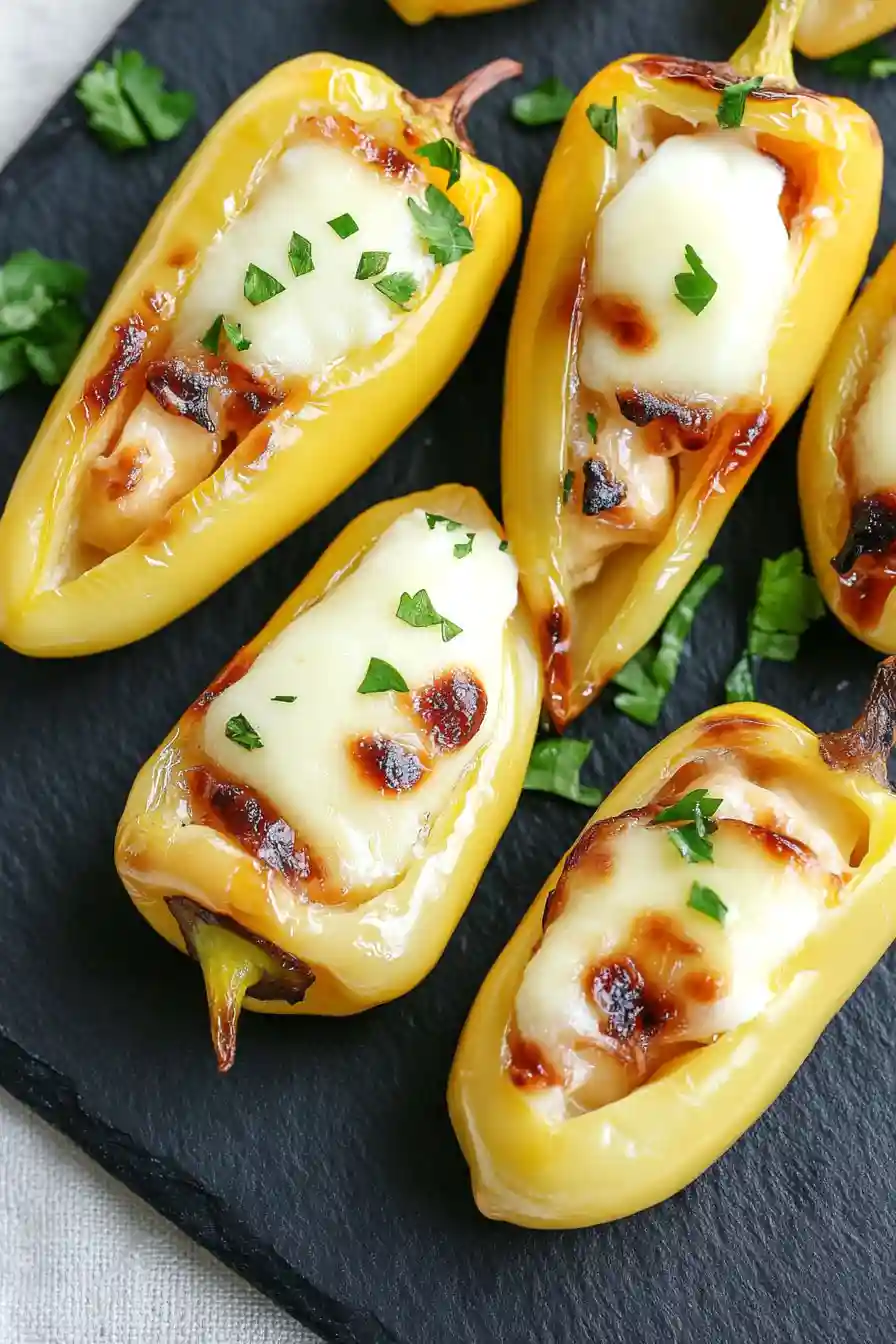
Start by carefully cutting a “T” shape into each pepper.
Make a horizontal slice across the top of the pepper, being cautious not to cut all the way around or through.
Then, from the center of the horizontal cut, slice downwards to the end of the pepper.
This should create two flaps that can be gently opened to access the interior of the pepper and remove the seeds.
Step 2: Stuff and Season the Peppers
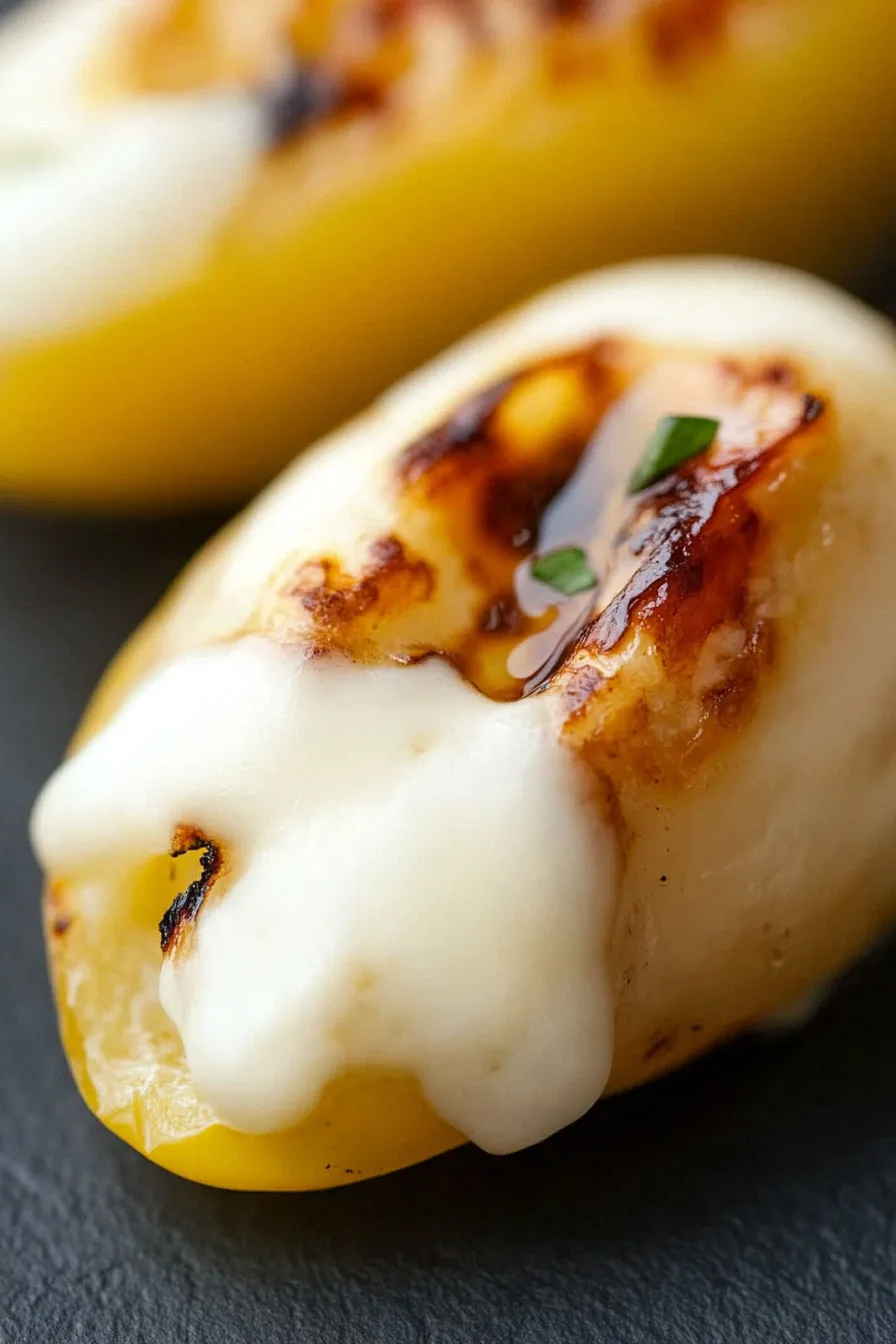
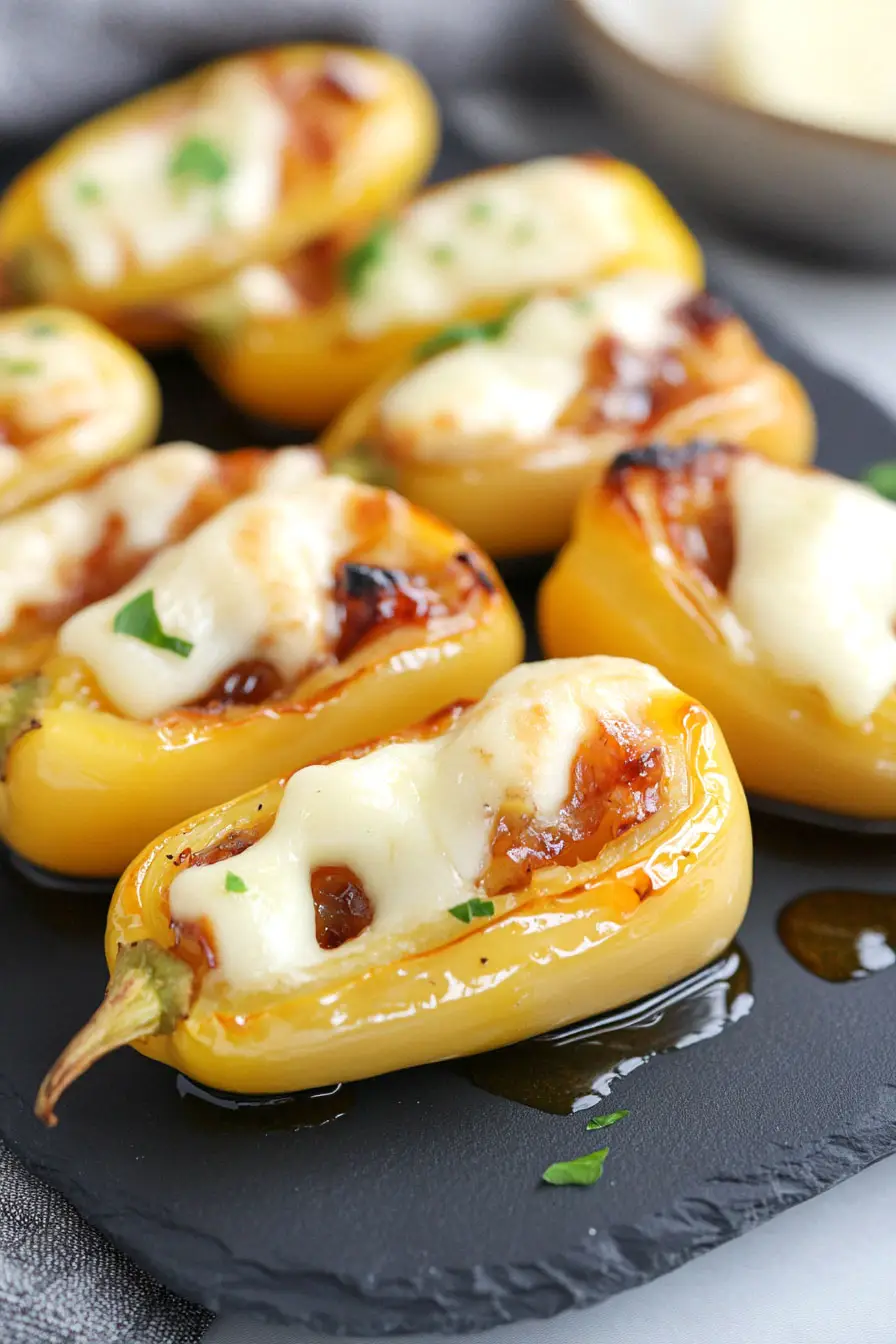
Once the peppers are cleaned of seeds, stuff them with your choice of cheese, ensuring the cheese is packed firmly inside.
Coat the exterior of the peppers with olive oil, and then season with salt and pepper to taste.
Step 3: Grill the Peppers
Preheat your grill to medium-high heat.
Place the prepared peppers directly onto the grill grates.
Close the grill lid and cook the peppers for about 2-4 minutes.
Keep an eye on them until you see grill marks forming and the cheese has melted perfectly inside.
Step 4: Serve the Grilled Peppers
Once the peppers are cooked to your liking, carefully remove them from the grill.
Serve immediately to enjoy them at their best, while the cheese is melty and the peppers are hot and flavorful.
