If you ask me, no bake cheesecake bites are a genius shortcut to dessert heaven.
These little treats are perfect for when you’re craving something sweet but don’t want to turn on the oven. Smooth cream cheese filling sits on top of a buttery graham cracker base, making each bite taste just like classic cheesecake.
They’re rolled in fun toppings like chocolate chips, crushed cookies, or nuts – whatever you have in your pantry works great. The best part? You can pop them straight from the fridge whenever you need a quick dessert fix.
It’s a foolproof recipe that kids love helping with, and they’re just the right size for parties or afternoon snacking.

Why You’ll Love These Cheesecake Bites
- No-bake convenience – Skip turning on the oven – these cheesecake bites come together without any baking, making them perfect for warm summer days or when you don’t want to heat up the kitchen.
- Make-ahead friendly – You can prepare these bites a day or two in advance, which makes them perfect for parties, gatherings, or when you want to plan ahead.
- Portion control – Each bite gives you the perfect amount of creamy cheesecake goodness, so you can enjoy just one or two without committing to a whole slice.
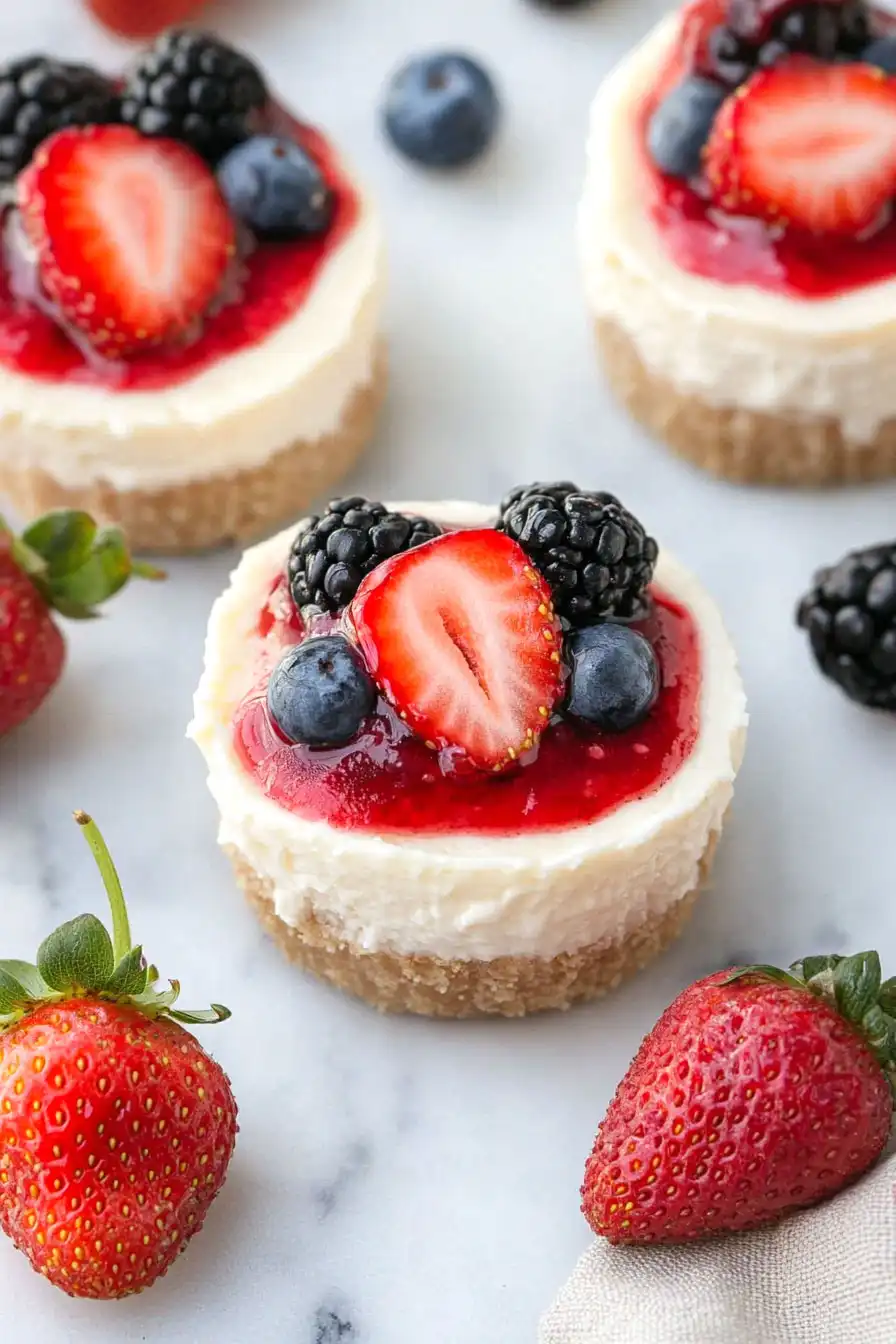
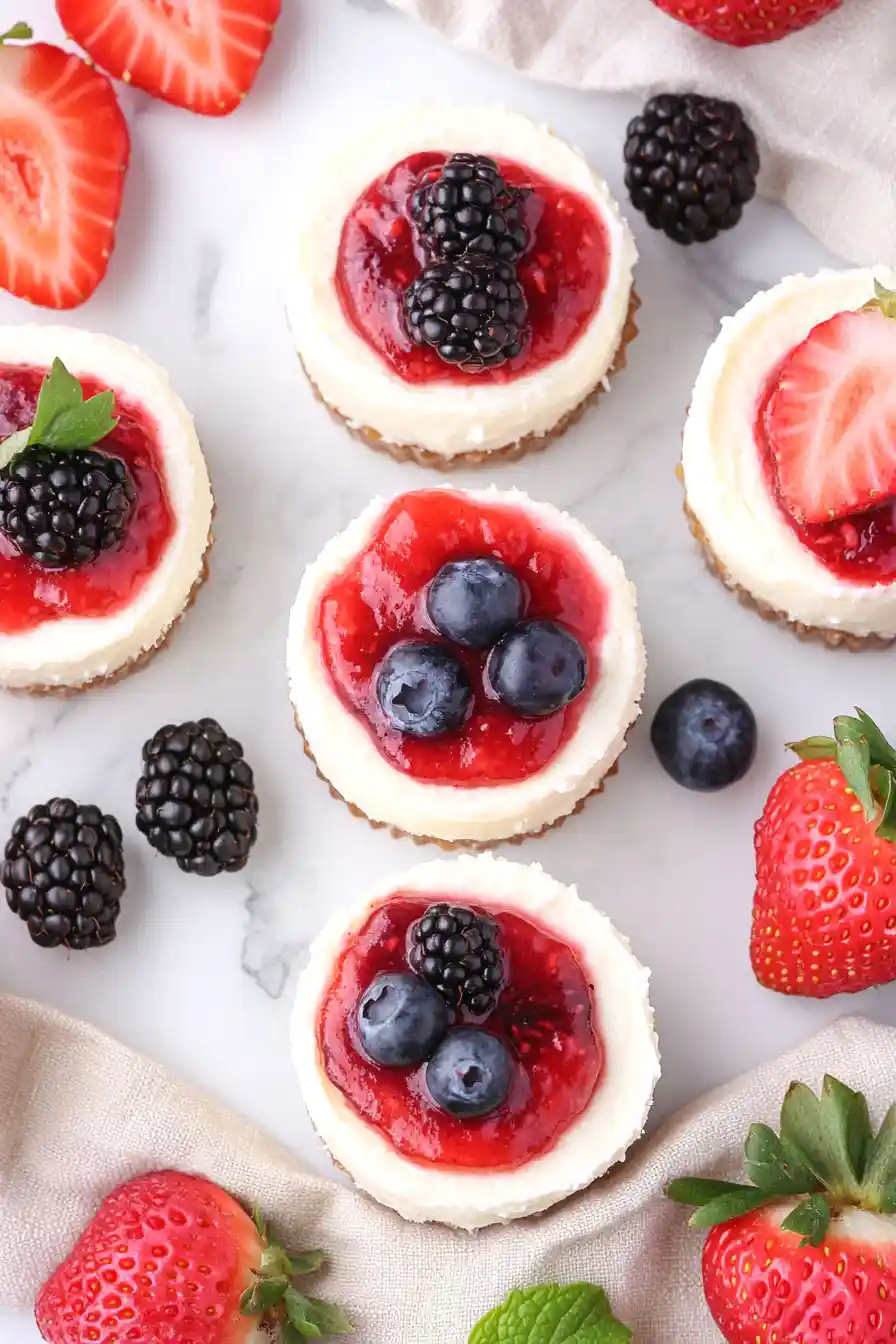
- Customizable toppings – From fresh berries to chocolate drizzle or caramel sauce, you can dress these bites up however you like to match any occasion or craving.
- Basic ingredients – You’ll only need common pantry and fridge staples to make these – no special ingredients required.
What Kind of Cream Cheese Should I Use?
For no-bake cheesecake bites, full-fat block cream cheese is the way to go – don’t be tempted to substitute with the spreadable kind that comes in tubs. The block-style cream cheese (like Philadelphia) has a firmer texture and less water content, which helps your cheesecake bites hold their shape without melting. Make sure to let it soften at room temperature for about an hour before using, as this will help prevent lumps in your mixture. If you’re in a pinch and need to use low-fat cream cheese, your bites might end up a bit softer and may not hold their shape as well, so it’s worth sticking to the full-fat version for the best results.
Options for Substitutions
This no-bake treat is pretty adaptable and here’s what you can swap if needed:
- Graham crackers: Out of graham crackers? Try using digestive biscuits, vanilla wafers, or even Oreo cookies (remove the cream filling first). Just make sure to crush them into fine crumbs.
- Cream cheese: Full-fat cream cheese is really important here – don’t use light versions as they won’t set properly. In a pinch, mascarpone cheese can work, though the texture will be slightly different.
- Heavy cream: While heavy cream gives the best results, you can use whipping cream. Just don’t substitute with half-and-half or milk – they won’t whip up properly.
- Sour cream: Plain Greek yogurt works perfectly in place of sour cream. Just make sure it’s not non-fat!
- Brown sugar: White sugar plus 1 teaspoon of molasses can replace brown sugar. Or just use all white sugar if that’s what you have.
- Lemon juice: Lime juice works just as well, or you can skip it – though it does help balance the sweetness nicely.
Watch Out for These Mistakes While Making
The biggest challenge when making no-bake cheesecake bites is getting the right texture – using cream cheese that’s too cold will result in lumpy filling, so make sure it’s properly softened at room temperature for at least 2 hours before starting.
Temperature control is crucial throughout the process – your heavy cream needs to be cold for proper whipping, but all other dairy ingredients should be at room temperature to ensure smooth mixing and prevent a grainy texture.
When pressing the graham cracker crust into your pan, avoid making it too loose or too compact – a loose crust will crumble when cutting, while over-compressing can make it too hard to bite through, so use moderate pressure with a flat-bottomed glass or measuring cup.
For clean-cut squares, freeze the cheesecake for about 30 minutes before cutting, and dip your knife in hot water between cuts, wiping it clean each time – this prevents the filling from sticking and gives you those picture-perfect edges.
What to Serve With No Bake Cheesecake Bites?
These little cheesecake bites are perfect for serving alongside fresh fruit – I especially love them with strawberries, raspberries, or sliced peaches when they’re in season. A drizzle of chocolate sauce, caramel, or fruit compote makes these treats even more special, and you can set these up as toppings so everyone can customize their own. For a coffee break or afternoon tea, I like to pair them with a hot cup of coffee or tea to balance out the richness. If you’re setting up a dessert table, these bites work really well next to other small treats like chocolate-covered strawberries or brownie bites.
Storage Instructions
Keep Fresh: These cheesecake bites need to stay cool to maintain their creamy texture. Place them in an airtight container and keep them in the fridge for up to 5 days. I like to layer them with parchment paper to prevent them from sticking together.
Freeze: Want to save some for later? These little treats freeze really well! Put them in a freezer-safe container, separating layers with parchment paper, and they’ll keep for up to 3 months. Just remember to place them in the container before adding any toppings – those are best added fresh when serving.
Thaw: When you’re ready to enjoy your frozen cheesecake bites, transfer them to the fridge and let them thaw overnight. They’ll be perfectly creamy by the next day! Add your favorite toppings just before serving for the best look and taste.
| Preparation Time | 20-30 minutes |
| Cooking Time | 5-10 minutes |
| Total Time | 3 hours 25 minutes – 3 hours 40 minutes |
| Level of Difficulty | Medium |
Estimated Nutrition
Estimated nutrition for the whole recipe (without optional ingredients):
- Calories: 3200-3500
- Protein: 30-40 g
- Fat: 240-250 g
- Carbohydrates: 300-320 g
Ingredients
For the crust:
- 1/3 cup brown sugar (firmly packed)
- 1/2 cup unsalted butter (melted and cooled)
- 2 cups graham cracker crumbs
For the filling:
- 1/3 cup white sugar (granulated sugar works best)
- 16 oz cream cheese (softened at room temperature)
- 2 tbsp sour cream (room temperature, gives better texture)
- 1 tsp lemon juice (freshly squeezed for brighter flavor)
- 1 cup cold heavy cream (full-fat for best results)
- 1/2 tsp vanilla essence (I use Nielsen-Massey vanilla extract)
Optional:
- toppings of your choice
Step 1: Prepare the Muffin Pans and Crust
Start by lining two standard 12-count muffin pans with cupcake liners.
Ensure that you have enough room in your refrigerator to accommodate both pans later in the process.
If your graham crackers aren’t crumbs yet, use a food processor to pulse them into fine crumbs.
Pour the crumbs into a medium bowl, stirring in the brown sugar and melted butter until the mixture resembles wet sand.
Spoon 1 and 1/2 tablespoons of the crust mixture into each cupcake liner and pack it down tightly using the back of a spoon.
Step 2: Optional Baking of the Crusts
You may choose to bake the crusts for 5 minutes in a preheated oven at 350°F (177°C) for added sturdiness.
However, this step is optional.
If you choose to bake, allow the crusts to cool for 10 minutes before proceeding.
If you skip baking, the crust will be slightly crumblier.
Step 3: Whip the Cream and Prepare the Filling
Using a hand mixer or a stand mixer fitted with a whisk attachment, whip the cold heavy cream into stiff peaks at medium-high speed for about 3 minutes.
Set aside once done.
In the same mixer bowl, beat the cream cheese and granulated sugar together on medium speed until smooth and creamy.
Scrape down the bowl as needed.
Add sour cream, lemon juice, and vanilla extract, then beat until smooth and combined, about 1 minute.
Ensure there are no lumps of cream cheese.
Fold the whipped cream into the cheesecake filling using your mixer on low speed or a spatula gently, to avoid deflating the whipped cream.
Step 4: Fill the Crusts
Transfer the cheesecake filling on top of the crusts using a spoon or piping bag.
Pipe or spoon about 2 tablespoons of filling over each crust.
For a neater finish, use a piping bag fitted with a large star or round tip.
Alternatively, use a plastic zipped-top bag, snip off a corner, and pipe.
Flatten the tops using the back of a spoon.
Step 5: Chill the Mini Cheesecakes
Place the mini cheesecakes in the refrigerator in their pans for at least 3 hours, or up to 2 days.
If refrigerating for longer than 3 hours, cover them with aluminum foil or plastic wrap.
Keep refrigerated until you’re ready to serve, as they soften and begin to stick to the liners after 30–60 minutes at room temperature.
Step 6: Serve and Store
Serve the mini cheesecakes with optional toppings of your choice.
Store any leftovers in the refrigerator for up to 5 days, keeping them covered to maintain freshness.
