Pan-seared scallops have always seemed like fancy restaurant food to me. But here’s the thing – you don’t need butter to make them taste amazing at home. I discovered this by accident one night when I ran out of butter but still had scallops that needed cooking. The results surprised me, and now it’s my go-to method.
I know what you’re thinking – won’t they stick to the pan? Won’t they be dry? Nope and nope. With just a few simple steps and the right temperature, these scallops turn out perfectly cooked every time. Plus, they’re healthier without all that extra fat, and you can really taste the natural sweetness of the seafood.
Whether you’re watching your dairy intake or just want to try something new, this method is worth a shot. Trust me, once you get the hang of it, you’ll wonder why you ever thought butter was necessary in the first place.

Why You’ll Love These Pan Seared Scallops
- Quick cooking time – These scallops go from pan to plate in less than 25 minutes, making them perfect for both weeknight dinners and last-minute entertaining.
- Dairy-free alternative – Using avocado oil instead of butter makes this recipe perfect for those who are dairy-free or looking to reduce their saturated fat intake.
- Simple ingredients – With just a handful of basic ingredients, you can create a restaurant-quality seafood dish right in your own kitchen.
- Healthy protein option – Scallops are naturally low in calories and high in protein, making this dish a great choice for anyone watching their waistline.
- Light and fresh flavors – The combination of white wine vinegar, lemon, and fresh herbs creates a bright, clean taste that lets the natural sweetness of the scallops shine through.
What Kind of Scallops Should I Use?
For pan-seared scallops, you’ll want to look for “dry” sea scallops rather than “wet” ones, which have been treated with chemicals and will be harder to sear properly. The size you choose matters too – larger sea scallops (often labeled as U10 or U12, meaning 10-12 per pound) are ideal for searing since they’re easier to cook without overdoing it. If you’re using frozen scallops, thaw them in the refrigerator overnight and pat them really dry with paper towels before cooking. Fresh scallops should look slightly pink or beige, with a clean ocean smell – avoid any that appear too white or have a strong fishy odor.

Options for Substitutions
Let’s talk about what you can swap in this recipe while still getting great results:
- Scallops: Fresh scallops are ideal, but frozen ones work well too – just make sure to thaw and pat them completely dry. This is one ingredient you can’t substitute as it’s the star of the dish!
- White wine vinegar: You can use rice vinegar or apple cider vinegar instead. Even white wine itself works great here – use the same amount.
- Avocado oil: Any high-heat oil will work – try grapeseed oil, light olive oil, or vegetable oil. Just avoid extra virgin olive oil as it can smoke at high temperatures.
- Shallots: No shallots? Use finely minced red onion or green onions instead – about the same amount will do.
- Fresh parsley: You can swap this with fresh chives, dill, or cilantro. If using dried parsley instead of fresh, use just 1 teaspoon since dried herbs are more concentrated.
- Lemon juice: Fresh lime juice works just as well, or you can use bottled lemon juice in a pinch – though fresh citrus gives the best flavor.
Watch Out for These Mistakes While Cooking
The biggest enemy of perfectly seared scallops is excess moisture, so make sure to thoroughly pat them dry with paper towels before cooking – even a small amount of water will prevent that golden-brown crust from forming. Another common mistake is overcrowding the pan, which causes the scallops to steam instead of sear – work in batches if needed, giving each scallop at least an inch of space. Getting the timing right is crucial: scallops only need about 2-3 minutes per side, and cooking them too long will turn them rubbery and tough. For the best results, make sure your pan is smoking hot before adding the scallops, and resist the urge to move them around – let them develop that beautiful crust by staying put until it’s time to flip them.
What to Serve With Pan Seared Scallops?
These light and tender scallops pair wonderfully with a variety of sides that won’t overpower their naturally sweet flavor. A simple risotto or angel hair pasta tossed with olive oil and garlic makes a perfect base, while roasted asparagus or sautéed green beans add a nice crunch and freshness to the plate. For a complete meal, you might want to include a light citrus salad with mixed greens and segments of orange or grapefruit, which complements the lemon notes in the scallops. If you’re keeping things low-carb, try serving them over cauliflower rice or zucchini noodles with a sprinkle of fresh herbs.
Storage Instructions
Keep Fresh: Once cooked, these pan-seared scallops are best enjoyed right away, but if you have leftovers, place them in an airtight container and keep them in the fridge for up to 2 days. The sooner you eat them, the better they’ll taste, as seafood tends to lose its perfect texture over time.
Make Ahead: While I don’t recommend cooking scallops ahead of time, you can prep the other ingredients in advance. Mix your vinegar, lemon juice, and chopped shallots up to a day before, and store them in the fridge. This way, when you’re ready to cook, you’ll only need to focus on getting those perfect golden-brown scallops!
Serve Again: If you need to eat leftover scallops, gently warm them in a pan over low heat just until they’re heated through – about 1-2 minutes. Be careful not to overcook them, as they can become tough. They’re also pretty good served cold in a seafood salad!
| Preparation Time | 10-15 minutes |
| Cooking Time | 8-10 minutes |
| Total Time | 18-25 minutes |
| Level of Difficulty | Medium |
Estimated Nutrition
Estimated nutrition for the whole recipe (without optional ingredients):
- Calories: 350-400
- Protein: 70-75 g
- Fat: 15-20 g
- Carbohydrates: 5-10 g
Ingredients
For the scallops:
- 1 tbsp avocado oil (high smoke point for searing)
- 1 lb scallops (sea scallops are best for searing)
For the sauce:
- 1 tbsp lemon juice (freshly squeezed for best flavor)
- 2 tbsp white wine vinegar
For the garnish:
- salt and pepper (to taste, freshly ground preferred)
- 1 tbsp minced shallots
- 1 tbsp chopped fresh parsley
Step 1: Thaw and Prepare the Scallops
If using frozen scallops, thaw them before cooking.
For a slow thaw, place the scallops in the refrigerator overnight.
For a quicker method, submerge the sealed bag of scallops in a bowl of cold water for about 1 hour.
Once thawed, pat the scallops dry with a paper towel and set them aside on a clean plate.
Step 2: Mix the Sauce
In a small bowl, combine white wine vinegar and lemon juice to create a tangy sauce.
Set the bowl aside, ensuring it’s close to the stove for easy access when needed.
Step 3: Cook the Scallops
Heat some avocado oil in a large pan over medium-high heat.
The pan should be hot enough to sizzle when you add the scallops.
Place the scallops in the pan, ensuring they are evenly spaced.
Let them cook undisturbed for approximately 2 minutes.
Using tongs, flip each scallop and cook for an additional 2 minutes on the opposite side.
The scallops are done when they become opaque and both sides are nicely browned.
If you have a small pan, work in batches, setting aside cooked scallops on a clean plate.
Add more avocado oil between batches, if necessary.
Step 4: Add the Sauce
Once all scallops are cooked, turn off the heat and return any batches to the pan.
Quickly pour in the vinegar and lemon mixture, tossing the scallops to ensure they are well coated with the sauce.
Step 5: Garnish and Serve
Immediately transfer the scallops to a serving bowl to prevent overcooking.
Pour any remaining sauce over the scallops.
Generously season with salt and pepper.
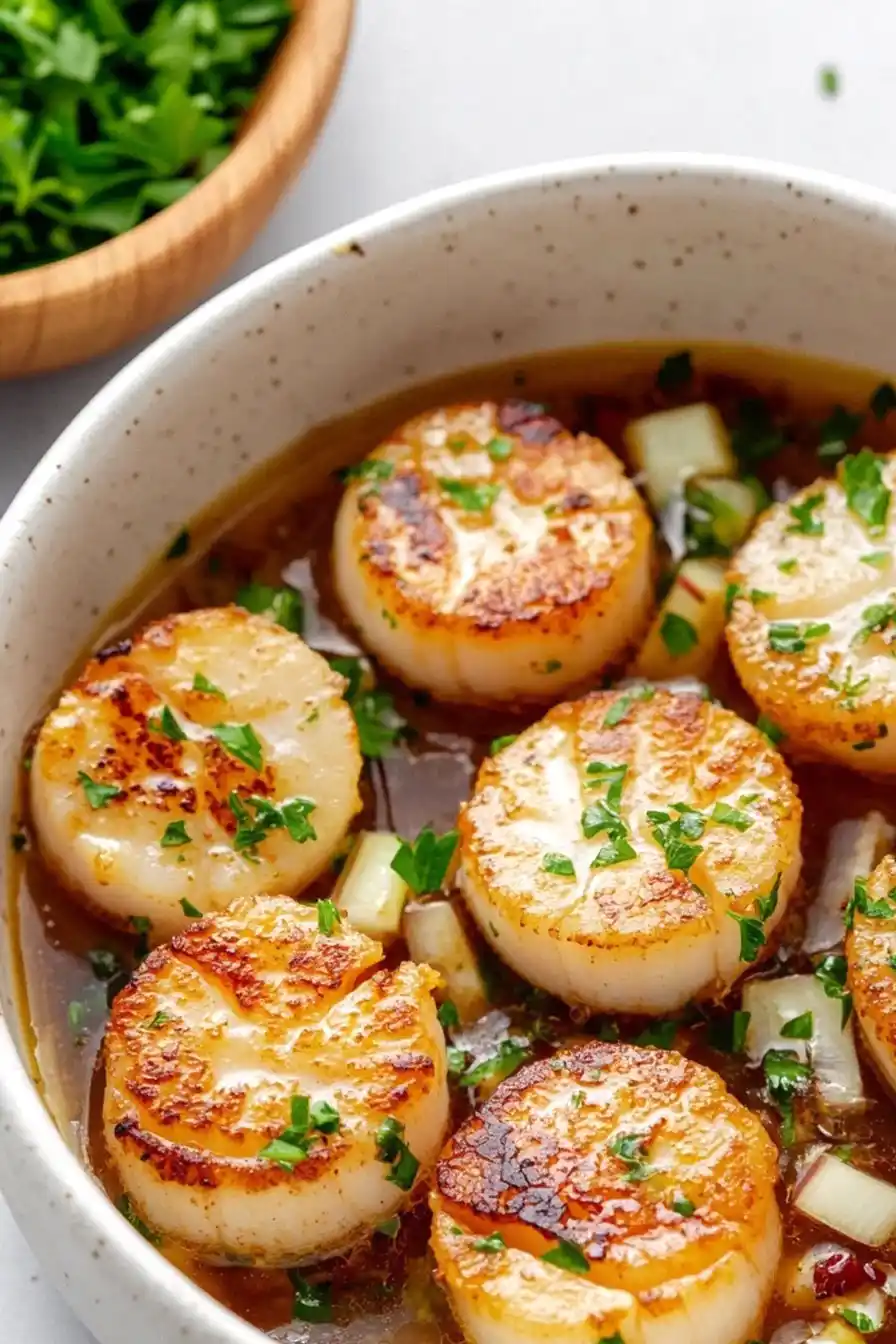
Finish by sprinkling diced shallots and chopped parsley over the top.
Serve hot and enjoy your deliciously fresh scallops!
