If you ask me, pumpkin scones are pure fall comfort in every bite.
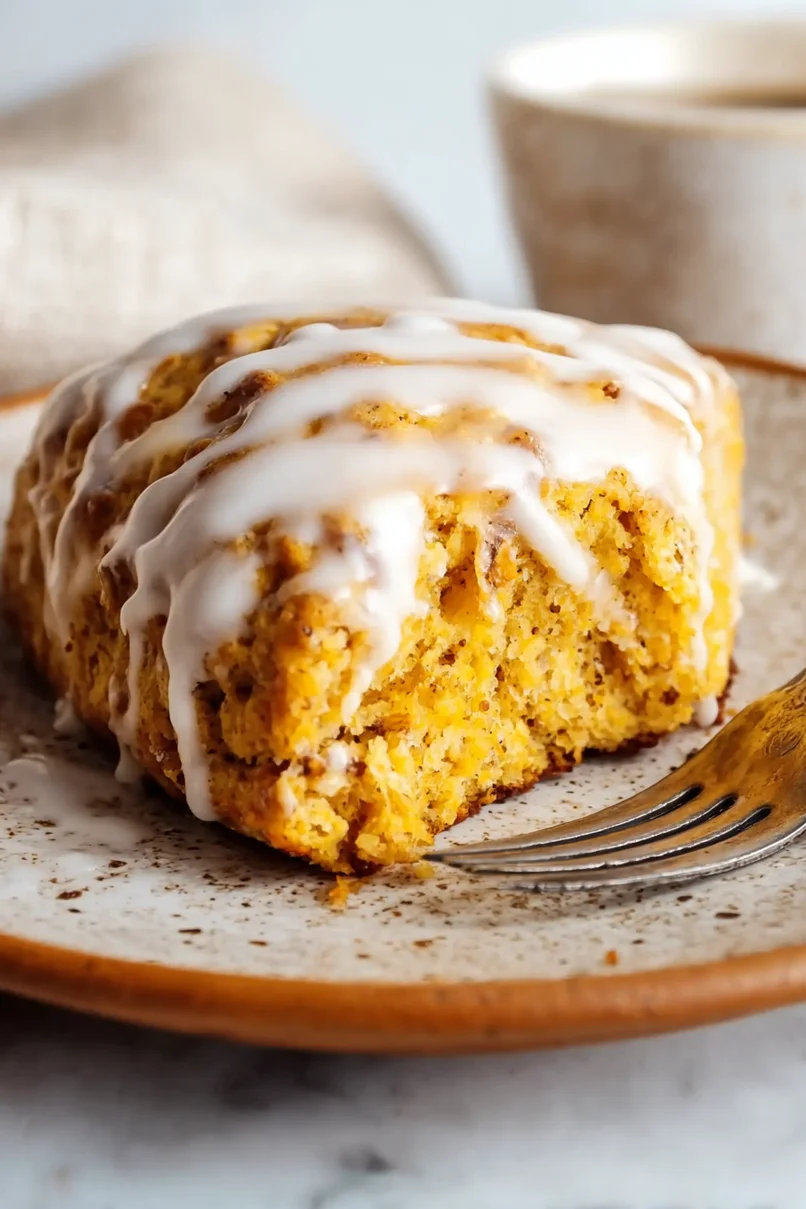
These tender, spiced scones make a cozy breakfast or afternoon treat that’s packed with warm pumpkin flavor. The soft crumb pairs perfectly with a drizzle of cold heavy cream that soaks in just right.
They’re made with real pumpkin puree and a blend of cinnamon and nutmeg that fills your kitchen with the best autumn smells. A pat of butter and that splash of cream make each bite feel like a warm hug.
It’s a simple recipe that brings all the seasonal flavors together, perfect for chilly mornings when you want something special.
Why You’ll Love These Pumpkin Scones
- Perfect fall flavors – The warm spices and pumpkin create that cozy autumn taste you crave, making your kitchen smell like a bakery.
- Quick and easy – Ready in under an hour, these scones are perfect for weekend mornings or when you need a sweet treat without spending all day in the kitchen.
- Tender, flaky texture – The heavy cream and cold butter work together to create scones that are crispy on the outside and soft on the inside, just like your favorite coffee shop.
- Simple pantry ingredients – Most of these ingredients are probably already in your kitchen, so you can whip up a batch whenever the craving hits.
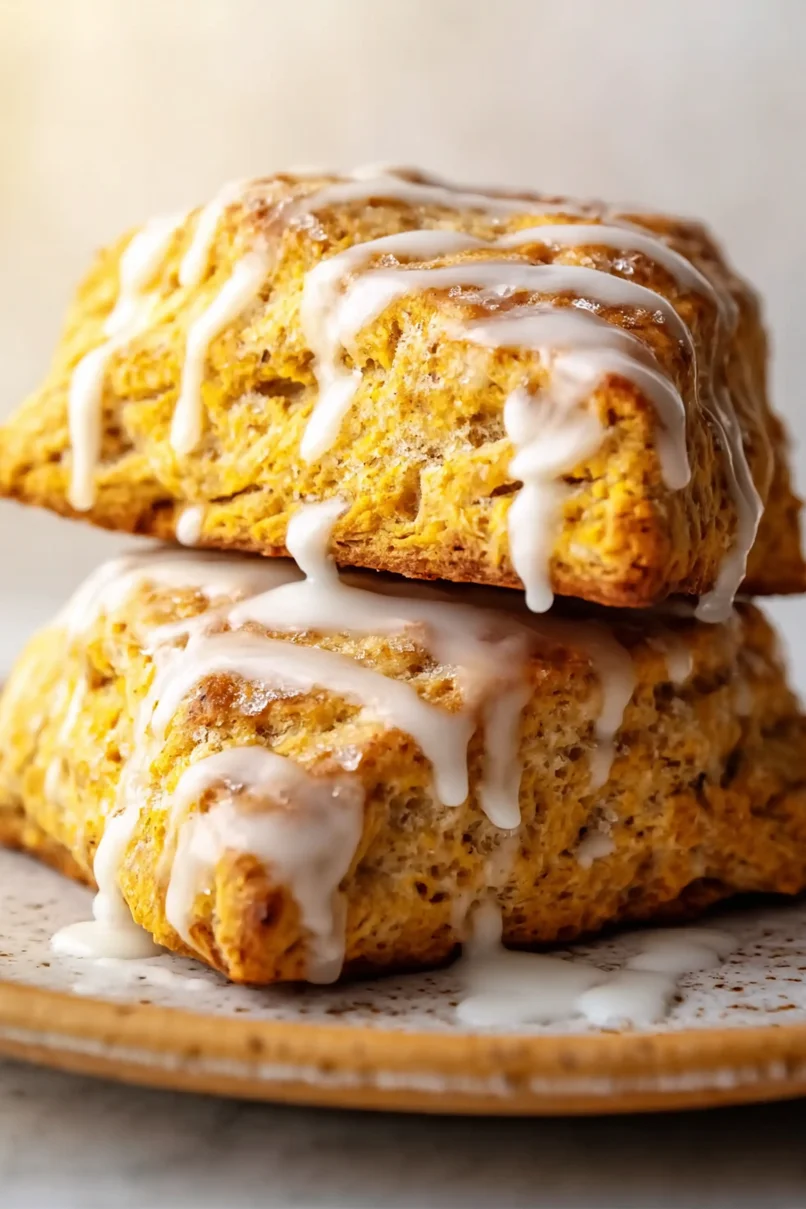
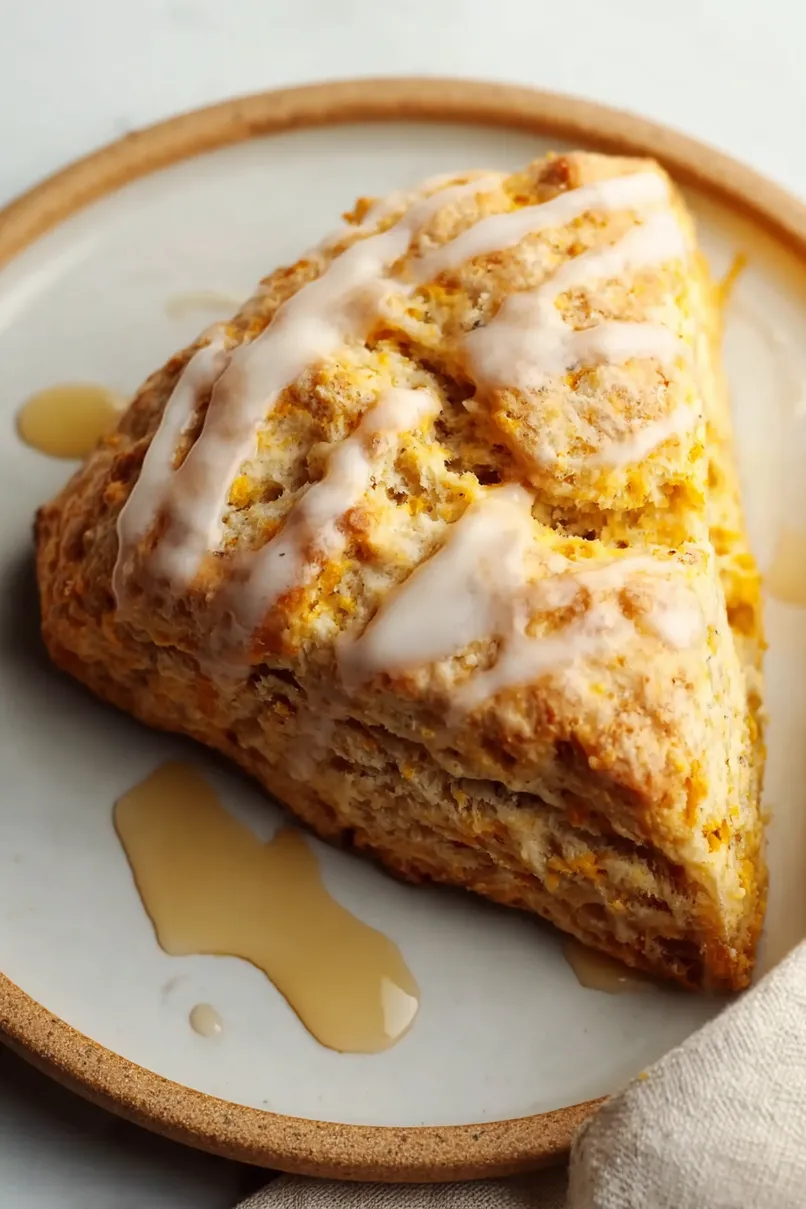
- Sweet maple glaze – The optional maple glaze adds just the right amount of sweetness and makes these scones feel extra special for breakfast or an afternoon snack.
What Kind of Pumpkin Puree Should I Use?
You can use either canned pumpkin puree or make your own fresh puree for these scones, and both will give you great results. If you’re going the canned route, make sure you’re buying plain pumpkin puree and not pumpkin pie filling, which already has spices and sugar added. Fresh pumpkin puree works wonderfully too – just roast a sugar pumpkin, scoop out the flesh, and blend it until smooth. Whether you choose canned or fresh, make sure your pumpkin puree isn’t too watery by giving it a gentle stir and draining off any excess liquid that might have separated.
Options for Substitutions
These pumpkin scones are pretty forgiving when it comes to swaps, so here are some options if you’re missing ingredients:
- All-purpose flour: You can substitute with whole wheat pastry flour for a nuttier flavor, but use about 2 tablespoons less liquid since whole wheat absorbs more moisture. Regular whole wheat flour works too but will make denser scones.
- Pumpkin puree: Sweet potato puree or butternut squash puree work great as substitutes. You can also use mashed banana, though it will change the flavor profile completely.
- Heavy cream: Half-and-half or whole milk work fine, though your scones might be slightly less rich. For a dairy-free option, try coconut cream from the thick part of a chilled can.
- Pumpkin pie spice: Make your own by mixing ½ teaspoon cinnamon, ¼ teaspoon nutmeg, ⅛ teaspoon ginger, and a pinch of cloves. Or just use extra cinnamon if that’s all you have.
- Light brown sugar: White sugar plus 1 tablespoon molasses works, or you can use coconut sugar for a slightly different flavor. Dark brown sugar is fine too – just expect a stronger molasses taste.
- Maple syrup in glaze: Honey or agave syrup work well in the glaze, or you can skip it entirely and just use powdered sugar mixed with milk for a simple glaze.
Watch Out for These Mistakes While Baking
The biggest mistake when making pumpkin scones is overworking the dough, which leads to tough, dense scones instead of light and flaky ones – mix just until the ingredients come together and you still see small pieces of butter.
Another common error is using warm butter instead of cold, so make sure your butter is straight from the fridge and cut into small cubes to create those pockets of steam that give scones their signature texture.
Don’t skip chilling the shaped scones for 15-20 minutes before baking, as this helps them hold their shape and prevents spreading, and be careful not to overbake them since the pumpkin can make it tricky to tell when they’re done – look for lightly golden edges rather than waiting for the tops to brown.
For extra flavor, brush the tops with heavy cream and sprinkle with turbinado sugar before baking, and let them cool completely before adding the glaze to prevent it from melting off.
What to Serve With Pumpkin Scones?
These pumpkin scones are perfect for a cozy fall breakfast or afternoon tea, and they pair beautifully with a hot cup of coffee or spiced chai tea. I love serving them alongside some fresh fruit like sliced apples or pears to balance out the rich, spiced flavors. For a more indulgent treat, try them with a dollop of whipped cream or even some cream cheese spread. You could also set up a little fall brunch spread with scrambled eggs and crispy bacon – the savory elements work surprisingly well with the sweet, spiced scones.
Storage Instructions
Keep Fresh: These pumpkin scones taste best when enjoyed fresh, but you can store them in an airtight container at room temperature for up to 3 days. If you made the maple glaze, wait until it’s completely set before storing to avoid a sticky mess.
Freeze: You can freeze baked scones for up to 3 months in a freezer-safe container or bag. I like to freeze them without the glaze and add it fresh when I’m ready to serve. You can also freeze the unbaked scones on a baking sheet, then transfer to a bag once solid – just bake them straight from frozen and add a few extra minutes.
Warm Up: To bring back that fresh-baked taste, warm your scones in a 350°F oven for about 5 minutes, or pop them in the toaster on a low setting. If they’re frozen, let them thaw at room temperature first, then warm them up for the best texture.
| Preparation Time | 15-20 minutes |
| Cooking Time | 25-28 minutes |
| Total Time | 40-48 minutes |
| Level of Difficulty | Medium |
Estimated Nutrition
Estimated nutrition for the whole recipe (without optional ingredients):
- Calories: 2000-2200
- Protein: 23-27 g
- Fat: 70-80 g
- Carbohydrates: 335-360 g
Ingredients
For the scones:
- 1 tsp pumpkin pie spice
- 1 large egg (at room temperature)
- 1/3 cup brown sugar
- 1/2 cup cold unsalted butter (cut into 1/2-inch cubes)
- 2 cups all-purpose flour
- 1 tsp ground cinnamon
- 1/2 cup pumpkin puree (I use Libby’s pumpkin puree)
- 1 1/2 tsp vanilla extract (for best flavor)
- Turbinado sugar (optional, for topping)
- 3 tbsp heavy cream
- 1/2 tsp salt
- 2 tsp baking powder
For the glaze:
- 1 1/2 tbsp milk
- 1 tbsp maple syrup
- 1 cup powdered sugar
- Pinch of salt
Step 1: Prepare the Sheet Tray
Line a sheet tray with parchment paper and set it aside.
This will prevent the scones from sticking and make cleanup easier.
Step 2: Make the Scone Dough
- 2 cups all-purpose flour
- 1/3 cup packed light brown sugar
- 2 tsp baking powder
- 1 tsp ground cinnamon
- 1 tsp pumpkin pie spice blend
- 1/2 tsp salt
- 1/2 cup unsalted butter, cold and cut into cubes
- 1/2 cup pumpkin puree (canned or homemade)
- 1 large egg
- 1 1/2 tsp vanilla extract
- 3 tbsp heavy cream
In a large bowl, whisk together the all-purpose flour, packed light brown sugar, baking powder, ground cinnamon, pumpkin pie spice blend, and salt.
Add the cold, cubed butter and use a pastry cutter or fork to cut it in until the pieces are about the size of lentils; it’s important to leave visible lumps of butter for flakiness.
In a separate bowl, whisk together the pumpkin puree, egg, vanilla extract, and 3 tablespoons of heavy cream.
Pour the wet ingredients into the flour mixture and gently mix until just combined without overworking the dough.
Step 3: Shape and Cut the Scones
- all-purpose flour, for dusting
Transfer the soft dough to the prepared parchment-lined sheet tray.
Pat it into a rough 8-inch disk, dusting with a little extra flour if the dough is too sticky to handle.
Cut the disk into 8 even wedges using a bench scraper or a sharp knife.
Gently pull the wedges apart on the tray so there’s space between each one.
I like to sprinkle a bit of flour on my hands to keep the dough from sticking during this step.
Step 4: Chill the Scones
Place the tray with the cut scone wedges in the freezer for at least 30 minutes.
This step helps relax the gluten and ensures the scones hold their shape and become extra flaky during baking.
While the scones chill, preheat your oven to 400°F (200°C).
Step 5: Brush, Top, and Bake the Scones
- heavy cream, for brushing
- turbinado sugar, optional, for topping
- chilled scone wedges from Step 4
After at least 30 minutes in the freezer, remove the scones (from Step 4) and brush the tops lightly with some extra heavy cream.
Sprinkle the tops with turbinado sugar for a crunchy finish, if desired.
Bake in the preheated oven for 25–28 minutes until golden brown and a toothpick comes out clean.
Step 6: Make the Maple Glaze
- 1 cup powdered sugar
- 1 tbsp maple syrup
- 1 1/2 tbsp milk
- pinch of salt
While the scones are baking, prepare the glaze by whisking together the powdered sugar, maple syrup, milk, and a pinch of salt until smooth and pourable.
You can refrigerate the glaze while the scones finish baking.
For a deeper maple flavor, I sometimes add a drop more syrup!
Step 7: Glaze and Serve the Scones
Let the freshly baked scones cool on the tray for 5–10 minutes.
Drizzle the prepared maple glaze from Step 6 over the warm scones and serve.
Enjoy!
