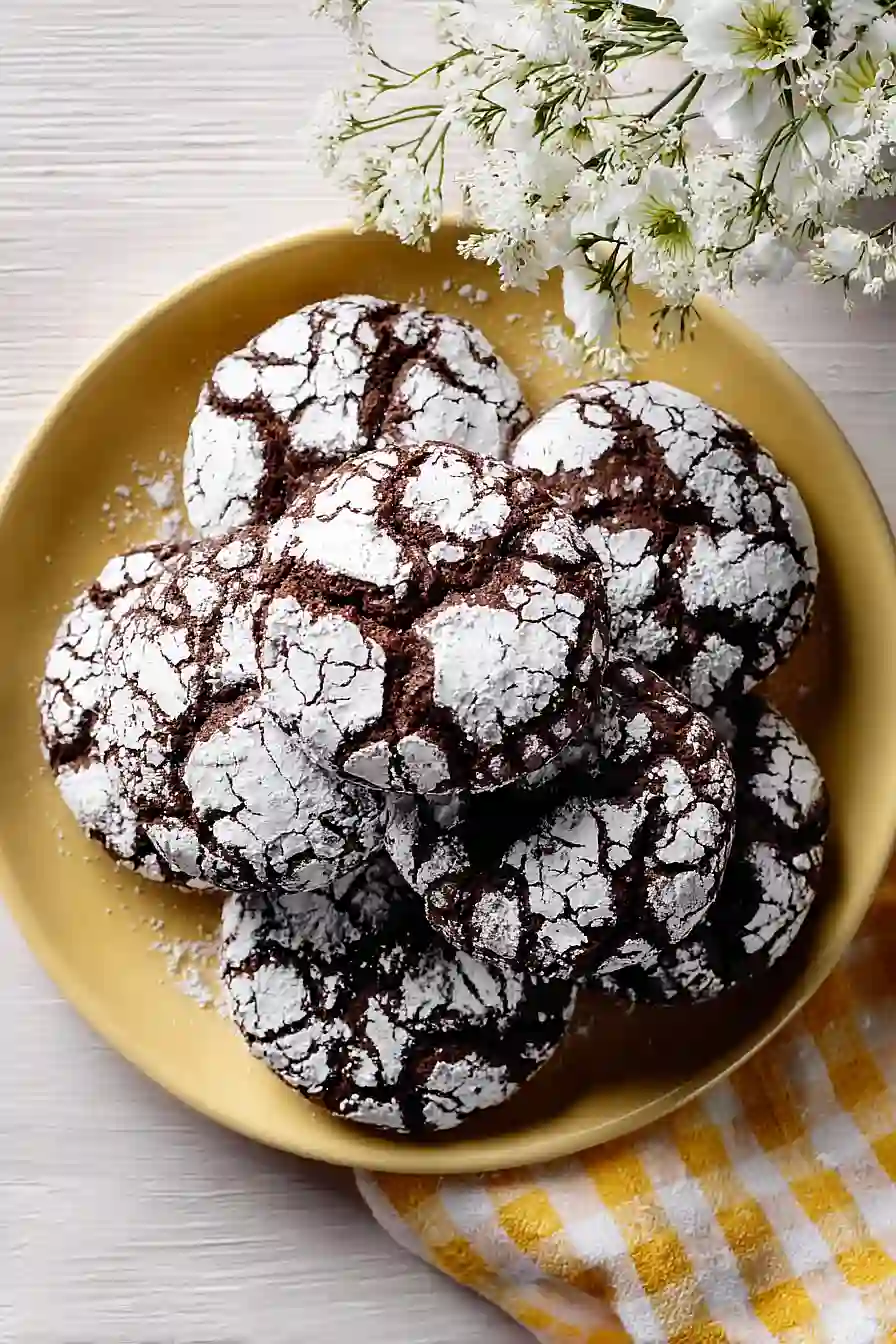
I used to think chocolate crinkle cookies were one of those recipes you could only make in big batches—you know, the kind where you’re stuck with three dozen cookies and flour all over your kitchen. Then I realized you could just cut everything down and make a small batch instead.
These small batch chocolate crinkle cookies give you about 8 cookies, which is perfect for when you want something chocolate and a little fancy-looking without committing to feeding the entire neighborhood. The powdered sugar coating cracks as they bake, which makes them look like you spent way more effort than you actually did. And honestly, they come together pretty quickly with ingredients you probably already have.
Why You’ll Love These Chocolate Crinkle Cookies
- Small batch recipe – This recipe makes just enough cookies for a cozy treat without leaving you with dozens sitting around. Perfect when you’re craving something sweet but don’t want to commit to a huge batch.
- Rich chocolate flavor – With both cocoa powder and chocolate chips, these cookies deliver a deep, fudgy chocolate taste in every bite.
- Simple pantry ingredients – You probably have most of these staples in your kitchen already, making this an easy recipe to whip up on a whim.
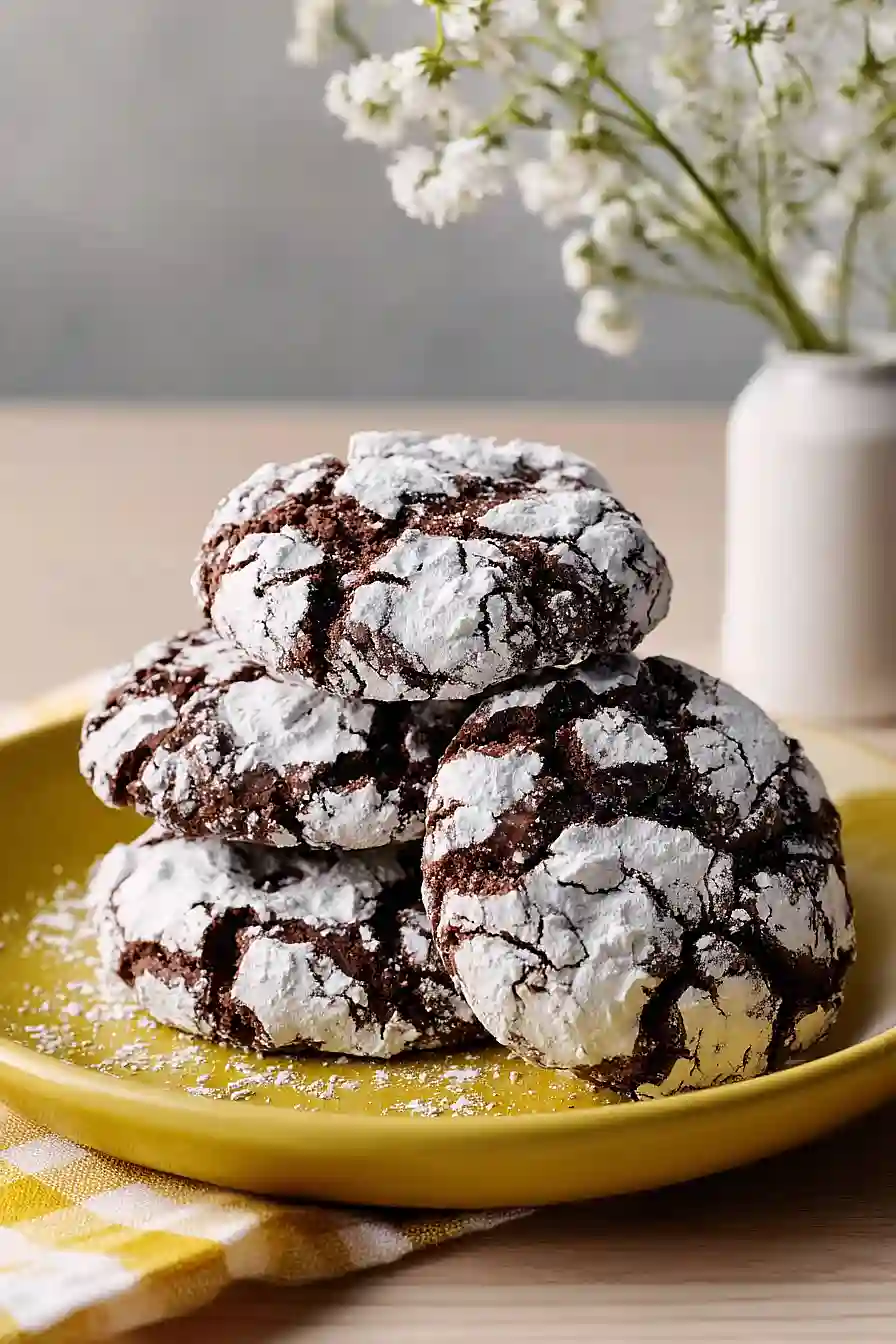
- Beautiful presentation – The crackled powdered sugar coating gives these cookies that classic bakery look that’s sure to impress without any fancy decorating skills needed.
What Kind of Cocoa Powder Should I Use?
For chocolate crinkle cookies, Dutch process cocoa powder is your best bet because it gives you that deep, rich chocolate flavor without any bitterness. Dutch process cocoa has been treated to neutralize its acidity, which results in a smoother, more mellow chocolate taste that really shines in these cookies. If you only have natural cocoa powder on hand, you can still use it, but keep in mind your cookies might have a slightly more acidic, sharper chocolate flavor. Either way, make sure your cocoa powder is fresh and hasn’t been sitting in your pantry for years, as old cocoa can taste flat and won’t give you those beautiful dark cookies you’re looking for.
Options for Substitutions
This small batch recipe is pretty forgiving, so here are some swaps you can make:
- Dutch process cocoa powder: If you only have natural cocoa powder, you can use it instead. The cookies will have a slightly lighter color and tangier chocolate flavor, but they’ll still turn out great.
- Canola oil: Any neutral oil works here – vegetable, grapeseed, or even melted coconut oil. You could also use melted butter for a richer flavor, though the texture might be slightly different.
- Dark brown sugar: Light brown sugar is a fine substitute. You can also make your own by mixing 3 tablespoons of granulated sugar with about 1/2 teaspoon of molasses.
- Semi-sweet chocolate chips: Feel free to use milk chocolate chips, dark chocolate chips, or even chopped chocolate bars. You can also leave them out entirely if you prefer a simpler cookie.
- All-purpose flour: Don’t substitute the flour in this recipe – it’s essential for getting that signature crinkle texture and proper cookie structure.
- Powdered sugar: The powdered sugar coating is what gives these cookies their classic crinkle look, so I wouldn’t skip it. Granulated sugar won’t give you the same effect.
Watch Out for These Mistakes While Baking
The biggest mistake with chocolate crinkle cookies is skipping the chilling step – the dough needs at least 2 hours in the fridge (or 30 minutes in the freezer) so it firms up enough to roll into balls without sticking to your hands.
Another common error is rolling the dough balls in powdered sugar while they’re still cold and smooth, but you’ll get better cracks if you let them sit at room temperature for about 5 minutes first so the surface gets slightly tacky.
Don’t overbake these cookies or you’ll lose that fudgy center – pull them from the oven when the edges are set but the centers still look slightly underdone, as they’ll continue cooking on the baking sheet.
For the most dramatic crinkle effect, make sure to coat each dough ball generously with powdered sugar and avoid touching them too much after rolling, since the oils from your hands can prevent those pretty cracks from forming.

What to Serve With Chocolate Crinkle Cookies?
These cookies are perfect alongside a cold glass of milk – seriously, the classic pairing never gets old, especially with rich chocolate cookies like these. I also love serving them with hot coffee or a mug of hot chocolate for an extra cozy treat, particularly during the colder months. If you’re putting together a dessert spread, chocolate crinkle cookies pair nicely with vanilla ice cream or even a simple fruit salad to balance out the sweetness. They’re also great for cookie swaps or holiday platters mixed in with sugar cookies and gingerbread.
Storage Instructions
Store: Keep your chocolate crinkle cookies in an airtight container at room temperature for up to 5 days. I like to put a piece of parchment paper between layers to keep them from sticking together. They stay soft and chewy this way, which is exactly how I like them!
Freeze: These cookies freeze really well for up to 3 months. You can freeze them already baked in a freezer-safe container, or freeze the dough balls before rolling in powdered sugar. If you freeze the dough, just roll them in powdered sugar when you’re ready to bake.
Enjoy: Frozen cookies can be thawed at room temperature for about 30 minutes, or you can warm them in the microwave for 10-15 seconds if you want that fresh-baked feel. If you froze the dough, bake straight from frozen and add an extra minute or two to the baking time.
| Preparation Time | 90-100 minutes |
| Cooking Time | 10-15 minutes |
| Total Time | 100-120 minutes |
| Level of Difficulty | Medium |
| Servings | 10 cookies |
Estimated Nutrition
Estimated nutrition for the whole recipe (without optional ingredients):
- Calories: 800-900
- Protein: 10-13 g
- Fat: 34-38 g
- Carbohydrates: 120-130 g
Ingredients
For the dough:
- 2 tbsp canola oil (or any neutral oil)
- 1/4 cup unsweetened cocoa powder (I use Hershey’s)
- 1/2 cup all-purpose flour (sifted to remove lumps)
- 1/4 cup semi-sweet chocolate chips
- 1/2 tsp baking powder
- 1/4 cup sugar
- 3 tbsp brown sugar (packed for moisture)
- 1 large egg (room temperature)
- 1/4 tsp salt
- 1/2 tsp vanilla extract
For coating:
- 2 tbsp powdered sugar (for coating, creates crackled exterior)
Step 1: Prepare Mise en Place and Preheat Oven
- 1/2 cup all-purpose flour
- 1/4 cup unsweetened cocoa powder
- 1/2 tsp baking powder
- 1/4 tsp salt
- 2 tbsp powdered sugar
Start by preheating your oven to 350°F and lining a baking sheet with parchment paper.
While the oven heats, sift together the all-purpose flour, unsweetened cocoa powder, baking powder, and salt in a small bowl—sifting removes lumps and aerates the dry ingredients, which helps create a better texture.
Pour the powdered sugar into a separate shallow dish for coating the dough balls later.
Having everything ready before you start mixing ensures a smooth workflow and prevents the dough from over-mixing.
Step 2: Create the Wet Ingredient Base
- 2 tbsp canola oil
- 1/4 cup sugar
- 3 tbsp brown sugar
- 1 large egg
- 1/2 tsp vanilla extract
In a mixing bowl, combine the canola oil, sugar, and packed brown sugar.
Mix until the ingredients are well combined and the mixture looks slightly emulsified—the brown sugar adds moisture and richness to the cookies.
Add the room temperature egg and vanilla extract, and mix until fully incorporated.
I like to use room temperature eggs because they incorporate more smoothly into the mixture, creating a more cohesive dough.
Step 3: Combine Dry and Wet Ingredients
- dry ingredient mixture from Step 1
- 1/4 cup semi-sweet chocolate chips
Gently sift the dry ingredient mixture from Step 1 over the wet ingredients, then stir until just combined—be careful not to overmix, as this can toughen the cookies.
Once the dry ingredients are fully incorporated with no streaks of flour remaining, fold in the semi-sweet chocolate chips.
The dough will be thick and slightly sticky, which is exactly what you want for a chewy crinkle cookie.
Step 4: Chill the Dough
Cover the dough bowl with plastic wrap or a lid and refrigerate for at least 1 hour.
Chilling is crucial for these cookies—it allows the flavors to develop and makes the sticky dough much easier to handle when scooping and rolling.
The cold dough will hold its shape better and create those signature cracks when it bakes.
Step 5: Shape and Coat the Cookies
- chilled dough from Step 4
- powdered sugar for coating from Step 1
Remove the chilled dough from the refrigerator.
Using a small cookie scoop or spoon, form the dough into 1-inch balls.
Roll each ball in the powdered sugar from Step 1, coating it evenly, then roll it a second time in the same dish—this double coating is what creates the beautiful crackled exterior that gives these cookies their signature look.
Place the coated balls on your prepared baking sheet, spacing them about 2 inches apart to allow room for slight spreading.
Step 6: Bake the Cookies
- shaped and coated dough from Step 5
Place the baking sheet in your preheated 350°F oven and bake for 10 to 12 minutes.
The cookies should look set on the edges but still slightly soft in the center when you remove them—I find that 11 minutes usually hits the sweet spot for a chewy interior with slightly crispy edges.
Don’t overbake, as these cookies continue to set as they cool.
Step 7: Cool and Transfer
- baked cookies from Step 6
Let the cookies cool on the baking sheet for about 5 minutes—this allows them to set enough to handle without falling apart.
Then transfer them to a wire rack to cool completely.
This two-stage cooling prevents the cookies from breaking apart while they’re still too soft, and the rack allows air to circulate underneath so they don’t become soggy from steam.

Easy Small Batch Chocolate Crinkle Cookies
Ingredients
For the dough:
- 2 tbsp canola oil (or any neutral oil)
- 1/4 cup unsweetened cocoa powder (I use Hershey's)
- 1/2 cup all-purpose flour (sifted to remove lumps)
- 1/4 cup semi-sweet chocolate chips
- 1/2 tsp baking powder
- 1/4 cup sugar
- 3 tbsp brown sugar (packed for moisture)
- 1 large egg (room temperature)
- 1/4 tsp salt
- 1/2 tsp vanilla extract
For coating:
- 2 tbsp powdered sugar (for coating, creates crackled exterior)
Instructions
- Start by preheating your oven to 350°F and lining a baking sheet with parchment paper. While the oven heats, sift together the all-purpose flour, unsweetened cocoa powder, baking powder, and salt in a small bowl—sifting removes lumps and aerates the dry ingredients, which helps create a better texture. Pour the powdered sugar into a separate shallow dish for coating the dough balls later. Having everything ready before you start mixing ensures a smooth workflow and prevents the dough from over-mixing.
- In a mixing bowl, combine the canola oil, sugar, and packed brown sugar. Mix until the ingredients are well combined and the mixture looks slightly emulsified—the brown sugar adds moisture and richness to the cookies. Add the room temperature egg and vanilla extract, and mix until fully incorporated. I like to use room temperature eggs because they incorporate more smoothly into the mixture, creating a more cohesive dough.
- Gently sift the dry ingredient mixture from Step 1 over the wet ingredients, then stir until just combined—be careful not to overmix, as this can toughen the cookies. Once the dry ingredients are fully incorporated with no streaks of flour remaining, fold in the semi-sweet chocolate chips. The dough will be thick and slightly sticky, which is exactly what you want for a chewy crinkle cookie.
- Cover the dough bowl with plastic wrap or a lid and refrigerate for at least 1 hour. Chilling is crucial for these cookies—it allows the flavors to develop and makes the sticky dough much easier to handle when scooping and rolling. The cold dough will hold its shape better and create those signature cracks when it bakes.
- Remove the chilled dough from the refrigerator. Using a small cookie scoop or spoon, form the dough into 1-inch balls. Roll each ball in the powdered sugar from Step 1, coating it evenly, then roll it a second time in the same dish—this double coating is what creates the beautiful crackled exterior that gives these cookies their signature look. Place the coated balls on your prepared baking sheet, spacing them about 2 inches apart to allow room for slight spreading.
- Place the baking sheet in your preheated 350°F oven and bake for 10 to 12 minutes. The cookies should look set on the edges but still slightly soft in the center when you remove them—I find that 11 minutes usually hits the sweet spot for a chewy interior with slightly crispy edges. Don't overbake, as these cookies continue to set as they cool.
- Let the cookies cool on the baking sheet for about 5 minutes—this allows them to set enough to handle without falling apart. Then transfer them to a wire rack to cool completely. This two-stage cooling prevents the cookies from breaking apart while they're still too soft, and the rack allows air to circulate underneath so they don't become soggy from steam.
