I’ve always had a sweet spot for brownies, but finding ways to make them a bit healthier without losing that chocolate goodness can be tricky. After my kids started asking for afternoon treats more often, I knew I needed to come up with something that wouldn’t send them bouncing off the walls with sugar. Trust me, NO ONE needs that kind of afternoon chaos!
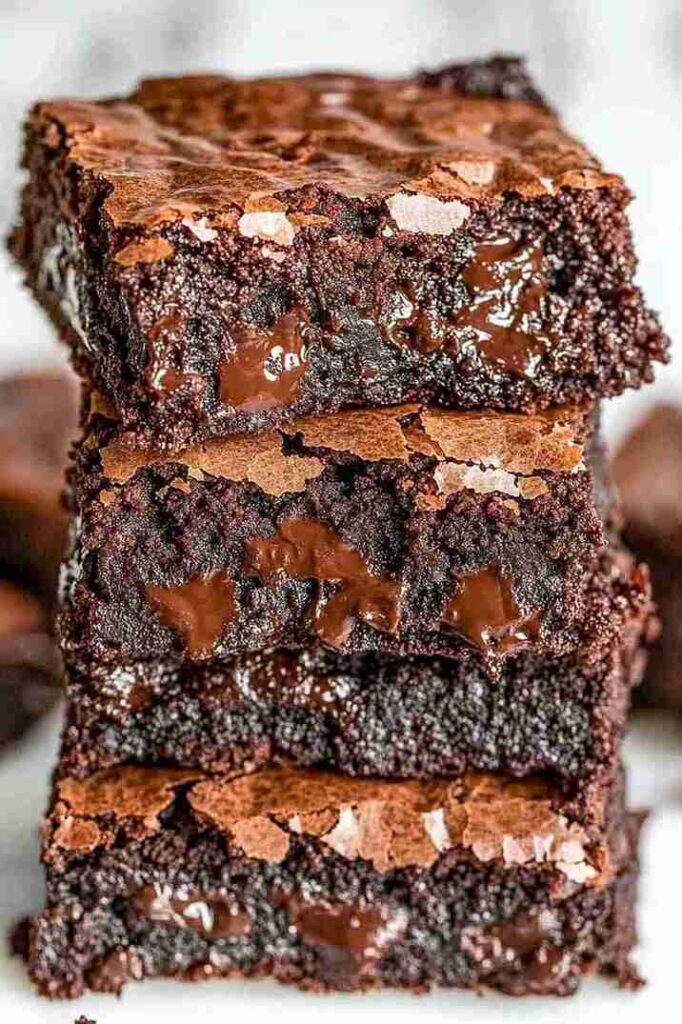
That’s where these zero sugar brownies came into the picture. By using Greek yogurt, we get that perfect fudgy texture while cutting back on the sugar and adding some protein. I often make these on Sunday afternoons when I’m meal prepping for the week. They’re just as good straight from the oven as they are packed in lunch boxes the next day.
Looking for a brownie that won’t throw your healthy eating off track? Or maybe you’re watching your sugar intake? These brownies check ALL those boxes, and the best part is – they still taste like the real deal. No one in my house even notices they’re sugar-free!
Why You’ll Love These Zero Sugar Brownies
- Diet-friendly dessert – These brownies can fit into various eating plans since they’re made with zero sugar and can be adapted for gluten-free diets.
- Protein-packed treat – Thanks to Greek yogurt, these brownies pack more protein than traditional recipes, making them a more filling dessert option.
- Quick preparation – You’ll only need about 35-45 minutes from start to finish, making these perfect for those last-minute dessert cravings.
- Simple ingredients – Most of these ingredients are probably already in your pantry, and you can easily swap them based on your dietary needs.
- Healthier alternative – Using Greek yogurt reduces the fat content while keeping these brownies moist and satisfying.
Which Type of Greek Yogurt Should I Use?
For these brownies, plain Greek yogurt is your best bet – either regular or non-dairy versions will work great.
If you’re using dairy Greek yogurt, stick with whole milk (full-fat) versions rather than non-fat, as the fat content helps keep the brownies moist and gives them a better texture.
When shopping for non-dairy alternatives, look for thick, Greek-style versions made from almond, coconut, or soy – just make sure they’re unsweetened since we’re already adding our own sweetener to the recipe.
A good tip is to give your yogurt a quick stir before measuring, and if it seems extra watery, strain it through a coffee filter or cheesecloth for about 30 minutes to remove excess liquid.
Options for Substitutions
These brownies are super adaptable and work well with several substitutions:
- Greek yogurt: Replace with dairy-free alternatives like coconut yogurt or silken tofu. If using tofu, blend it until smooth first. You could also use mashed ripe banana or unsweetened applesauce, though this will add some natural sweetness.
- Sweetener: Use any sweetener you prefer – monk fruit, stevia, erythritol, or regular sugar. Just check the conversion chart for your specific sweetener as amounts may vary.
- Flour: Replace with whole wheat flour, oat flour, or a 1:1 gluten-free flour blend. Almond flour works too, but reduce the amount to 2/3 cup as it’s more dense.
- Milk: Cow’s milk, soy milk, oat milk, or coconut milk. Just make sure it’s unsweetened if you’re keeping these sugar-free.
- Chocolate chips: These are optional, but you can use sugar-free chips, cacao nibs, or chopped nuts instead. You can also skip them completely for a classic brownie texture.
- Cocoa powder: This is a must-keep ingredient for chocolate flavor, but you can use either natural or Dutch-processed cocoa powder.
Storage Instructions
Keep Fresh: These yummy brownies stay good for up to 5 days when kept in an airtight container at room temperature. If you live somewhere warm or humid, pop them in the fridge where they’ll keep nicely for up to a week.
Freeze: These brownies are perfect for freezing! Cut them into squares, wrap them individually in plastic wrap or parchment paper, and store in a freezer bag. They’ll stay fresh for up to 3 months.
Enjoy Later: When you’re ready to dig in, let frozen brownies thaw at room temperature for about an hour. For an extra treat, warm them up in the microwave for 10-15 seconds – they’ll taste just like they’re fresh from the oven!
Zero Sugar Brownies FAQ
Why is my brownie batter thicker than usual?
Greek yogurt creates a thicker batter compared to traditional brownie recipes that use oil or butter. This is totally normal and actually helps create that dense, fudgy texture we love in brownies.
Do I need to let the brownies cool completely?
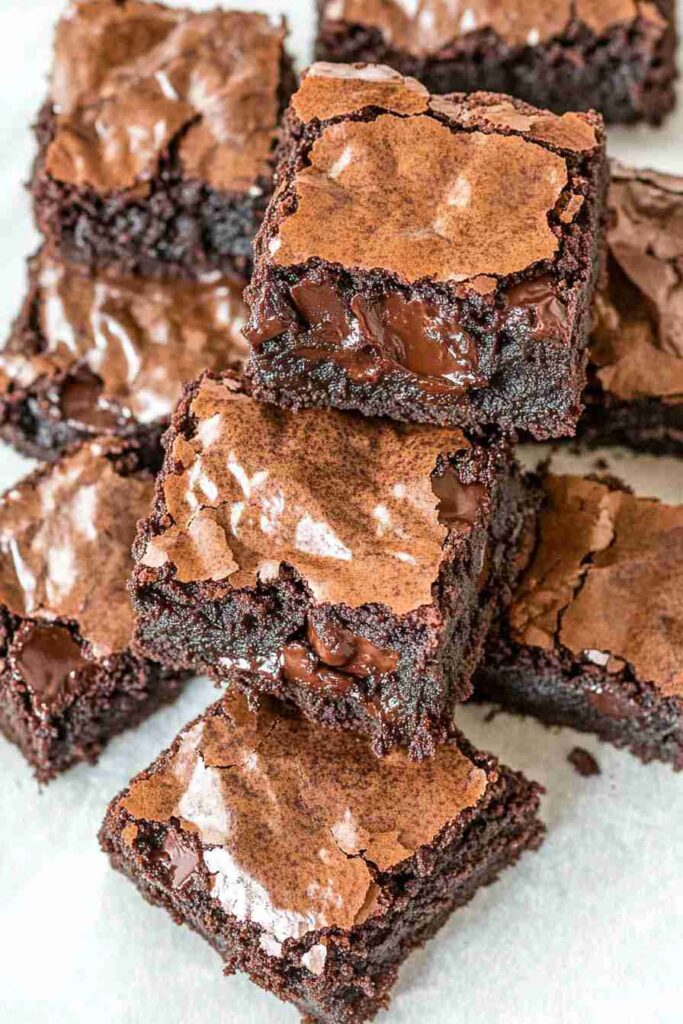
YES, these brownies need more cooling time than traditional recipes because of the Greek yogurt. I recommend letting them cool in the pan for at least 10 minutes, then transferring to a wire rack. They’ll continue to set up as they cool, giving you that perfect brownie texture.
Why did my brownies sink in the middle?
A slight sink in the middle is normal for these brownies due to the Greek yogurt and lower sugar content. The edges typically rise a bit more than the center, but this doesn’t affect the taste at all. In fact, that slightly sunken middle often becomes the fudgiest, most delicious part of the brownie!
| Preparation Time | 10-15 minutes |
| Cooking Time | 25-30 minutes |
| Total Time | 35-45 minutes |
| Level of Difficulty | Medium |
Ingredients
For the wet mixture:
- 1/2 cup sweetener
- 1 cup plain Greek yogurt (full-fat for richness)
- 1/2 cup chopped chocolate (I use Ghirardelli 60% cacao bars, roughly chopped)
For the dry ingredients and additions:
- 1 cup chocolate chips (for texture variation)
- 1/2 tsp baking soda
- 1/2 cup milk
- 1/2 cup cocoa powder (unsweetened, such as Hershey’s)
- 3/4 cup all-purpose flour (King Arthur all-purpose flour works great)
Step 1: Prepare the Baking Pan and Preheat the Oven
Preheat your oven to 180°C (350°F).
Line an 8 x 8-inch baking pan with parchment paper, ensuring the paper extends slightly over the edges for easy removal later.
Set the prepared pan aside.
Step 2: Melt Chocolate and Combine Wet Ingredients
- 1/2 cup chopped chocolate pieces
- 1 cup non-dairy Greek yogurt
- 1/2 cup sweetener of choice (sugar-free, white or brown sugar)
In a microwave-safe bowl, add your chopped chocolate.
Melt the chocolate in the microwave in short bursts, stirring occasionally until smooth.
Let it sit for 1-2 minutes to cool slightly.
Then add yogurt and sugar to the melted chocolate.
Whisk the mixture until it is smooth and well combined.
Transfer this chocolate mixture to a large mixing bowl.
Step 3: Mix Dry Ingredients and Combine with Wet Ingredients
- 3/4 cup regular or gluten-free all-purpose flour
- 1/2 cup cocoa powder
- 1/2 teaspoon baking soda
- 1/2 cup preferred milk (like unsweetened almond milk)
- 1 cup optional chocolate chips
Add the flour, cocoa powder, and baking soda to the chocolate mixture.
Stir until just combined—be careful not to overmix.
Pour in the milk and mix well until the batter is fully incorporated.
If using, fold through chocolate chips gently into the batter, distributing them evenly throughout.
Step 4: Bake the Brownies
Transfer the prepared batter to your lined baking pan.
Smooth the top with a spatula if needed.
Bake the brownies in the preheated oven for 25-30 minutes, or until a skewer or toothpick inserted into the center comes out just clean, indicating they are fully baked.
Step 5: Cool the Brownies
Once baked, remove the pan from the oven and allow the brownies to cool in the pan for about 10 minutes.
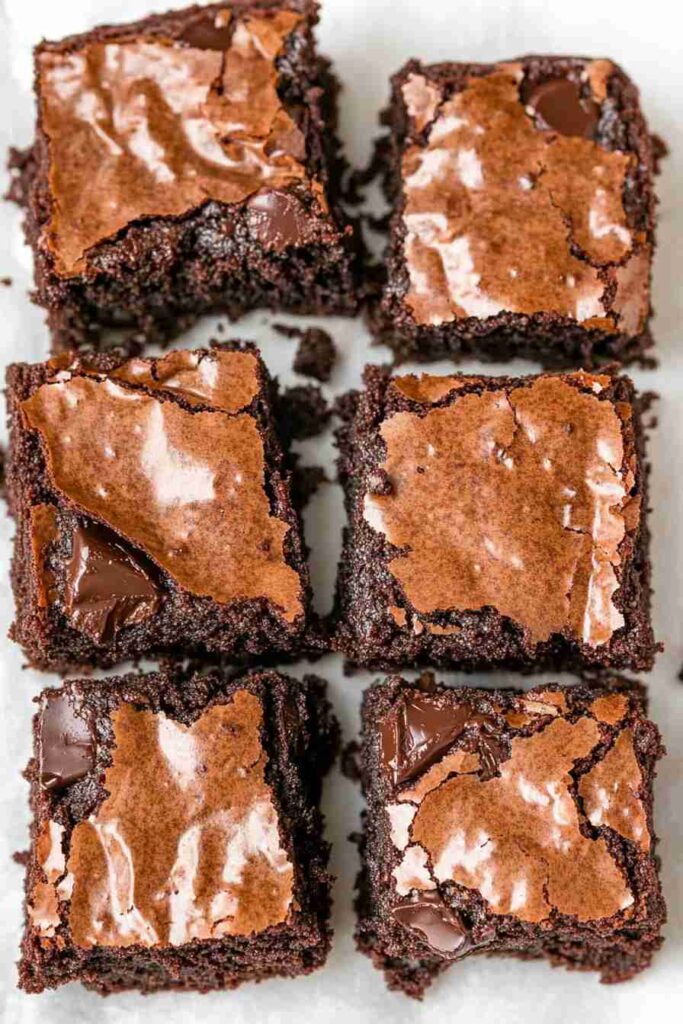
Carefully lift the brownies out of the pan using the parchment paper overhang and transfer them to a wire rack to cool completely before cutting into squares.
Enjoy your delicious homemade brownies!
Easy Zero Sugar Brownies with Greek Yogurt
Ingredients
Wet mixture
- 1/2 cup sweetener
- 1/2 cup chopped chocolate (I use Ghirardelli 60% cacao bars, roughly chopped)
Dry ingredients and additions
- 1 cup chocolate chips (for texture variation)
- 1/2 tsp baking soda
- 1/2 cup milk
- 1/2 cup cocoa powder (unsweetened, such as Hershey’s)
- 3/4 cup all-purpose flour (King Arthur all-purpose flour works great)
Instructions
- Preheat your oven to 180°C (350°F). Line an 8 x 8-inch baking pan with parchment paper, ensuring the paper extends slightly over the edges for easy removal later. Set the prepared pan aside.
- In a microwave-safe bowl, add your chopped chocolate. Melt the chocolate in the microwave in short bursts, stirring occasionally until smooth. Let it sit for 1-2 minutes to cool slightly. Then add yogurt and sugar to the melted chocolate. Whisk the mixture until it is smooth and well combined. Transfer this chocolate mixture to a large mixing bowl.
- Add the flour, cocoa powder, and baking soda to the chocolate mixture. Stir until just combined—be careful not to overmix. Pour in the milk and mix well until the batter is fully incorporated. If using, fold through chocolate chips gently into the batter, distributing them evenly throughout.
- Transfer the prepared batter to your lined baking pan. Smooth the top with a spatula if needed. Bake the brownies in the preheated oven for 25-30 minutes, or until a skewer or toothpick inserted into the center comes out just clean, indicating they are fully baked.
- Once baked, remove the pan from the oven and allow the brownies to cool in the pan for about 10 minutes. Carefully lift the brownies out of the pan using the parchment paper overhang and transfer them to a wire rack to cool completely before cutting into squares. Enjoy your delicious homemade brownies!

What kind of chocolate do you use to chop and melt? Baking chocolate? A dark or milk chocolate? Thank you.