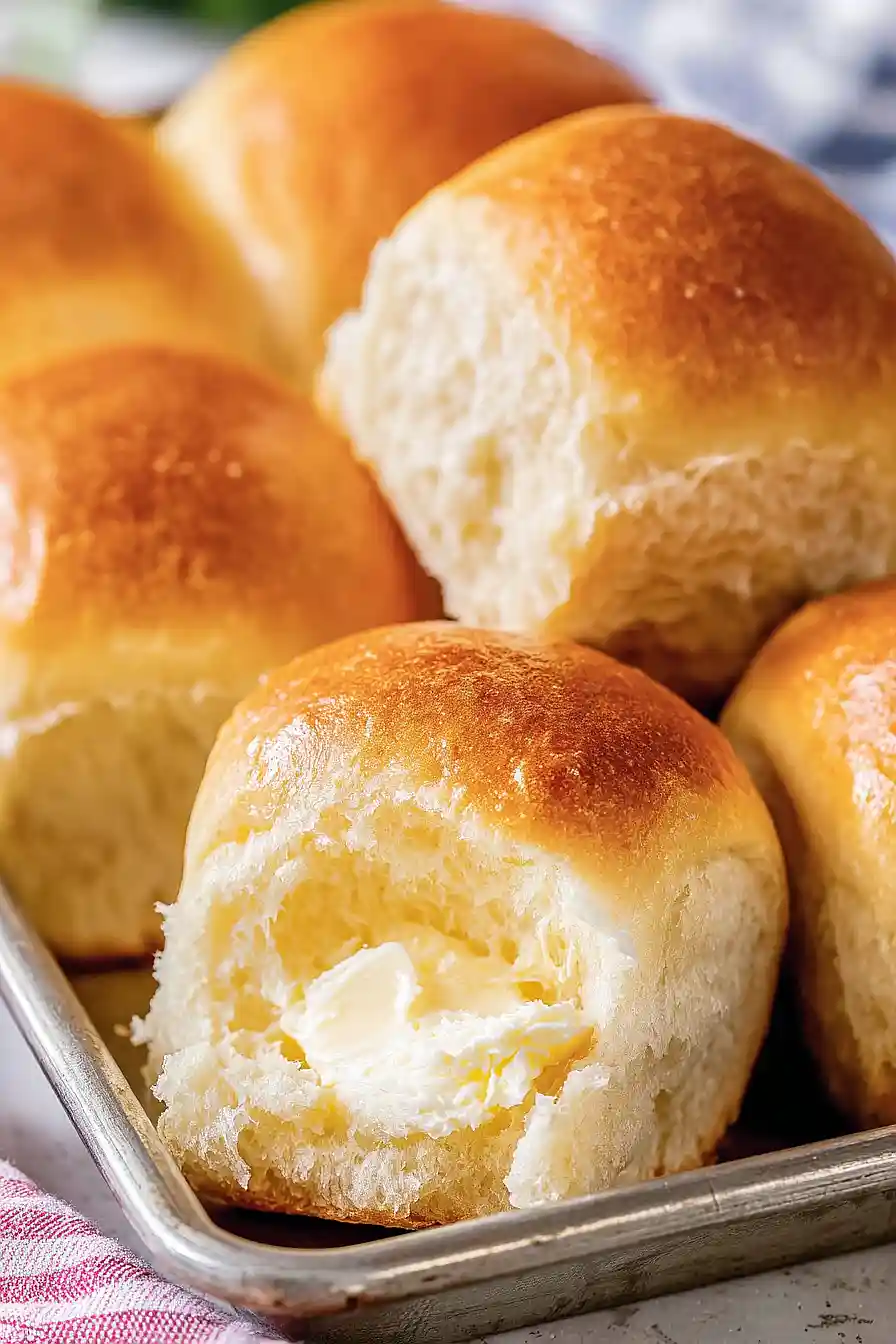
Here is my go-to dinner roll recipe, made with active dry yeast for soft, fluffy rolls that are perfect for any meal, with just the right amount of sweetness and a golden brown top.
These dinner rolls are always a hit at our family dinners. I love making a double batch because they disappear so quickly, and there’s nothing quite like fresh, warm bread straight from the oven.
Why You’ll Love These Dinner Rolls
- Soft, fluffy texture – These homemade dinner rolls come out perfectly tender and light every time, making them irresistible at any meal.
- Simple pantry ingredients – You probably already have everything you need in your kitchen – just basic baking staples like flour, butter, milk, and yeast.
- Perfect for any occasion – Whether it’s a holiday dinner, Sunday meal, or weeknight comfort food, these rolls make every meal feel special.
- Make-ahead friendly – You can prepare the dough earlier in the day and bake them fresh when you’re ready to serve, filling your kitchen with that amazing homemade bread smell.
- Budget-friendly homemade goodness – Skip the store-bought rolls and make these from scratch for a fraction of the cost, plus they taste so much better than anything you can buy.
What Kind of Flour Should I Use?
All-purpose flour is your best bet for these dinner rolls, and it’s what most home bakers already have in their pantry. You don’t need to get fancy with bread flour here – regular all-purpose will give you soft, fluffy rolls with just the right texture. If you’re gluten-free, you can try a 1:1 gluten-free flour substitute, though the texture might be slightly different. Keep in mind that flour can vary by brand and humidity, so you might need to add a bit more than the recipe calls for if your dough feels too sticky. Just add it gradually, a tablespoon at a time, until the dough pulls away from the sides of the bowl.

Options for Substitutions
These dinner rolls are pretty forgiving when it comes to swaps, but there are a few things to keep in mind:
- Active dry yeast: You can use instant yeast instead – just use the same amount and mix it directly into the flour without proofing it first. If you only have fresh yeast, use about 3 times the amount (roughly 2 tablespoons).
- Whole milk: 2% milk works just fine, or you can use buttermilk for a slight tangy flavor. Non-dairy options like oat milk or almond milk will work too, though the rolls might be slightly less rich.
- All-purpose flour: Bread flour will give you chewier rolls with more structure, while cake flour will make them more tender. Stick with all-purpose for the best balance, but either swap works in equal amounts.
- Unsalted butter: You can use salted butter – just reduce the kosher salt to about ½ teaspoon. Vegetable oil or melted coconut oil work as substitutes, though you’ll lose some of that rich buttery flavor.
- Granulated sugar: Brown sugar, honey, or maple syrup will work, but if using liquid sweeteners, reduce the milk by a tablespoon or two to keep the dough consistency right.
Watch Out for These Mistakes While Baking
The biggest mistake when making dinner rolls with active dry yeast is using milk that’s too hot when proofing the yeast, which can kill it completely – aim for milk that feels just warm to the touch, around 100-110°F.
Another common error is not giving the yeast enough time to foam and bubble during proofing, so wait a full 5-10 minutes to see those telltale signs of life before proceeding with your dough.
Over-kneading can make your rolls tough and dense, so knead just until the dough is smooth and elastic, about 6-8 minutes by hand or 4-5 minutes in a stand mixer.
Finally, don’t rush the rising process – your dough should double in size during both rises, which might take longer in cooler kitchens, and always cover the dough with a damp towel to prevent it from drying out and forming a skin.
What to Serve With Dinner Rolls?
These soft, buttery dinner rolls are perfect alongside just about any main dish you can think of! They’re amazing for soaking up gravy at Thanksgiving dinner, or for wiping your plate clean after a hearty stew or pot roast. I love serving them with roasted chicken, beef brisket, or even a simple pasta dinner – they really make any meal feel more special. You can also slice them open and use them for mini sandwiches with leftover turkey or ham, or just enjoy them warm with a pat of butter and some honey.
Storage Instructions
Keep Fresh: These dinner rolls are best enjoyed fresh, but you can store them in an airtight container or wrapped in plastic wrap at room temperature for up to 3 days. I like to place a slice of bread in the container to help keep them soft and prevent them from drying out.
Freeze: Dinner rolls freeze really well for up to 3 months! Wrap them individually in plastic wrap or place them in a freezer bag with parchment paper between each roll. You can freeze them either baked or shaped and ready to bake – just adjust your timing accordingly.
Warm Up: To bring back that fresh-baked taste, wrap the rolls in a damp paper towel and microwave for 15-20 seconds, or warm them in a 350°F oven for about 5 minutes. If they’re frozen, let them thaw at room temperature first, then warm them up using the same method.
| Preparation Time | 30-60 minutes |
| Cooking Time | 20-25 minutes |
| Total Time | 1-2 hours |
| Level of Difficulty | Medium |
Estimated Nutrition
Estimated nutrition for the whole recipe (without optional ingredients):
- Calories: 1950-2150
- Protein: 38-44 g
- Fat: 78-86 g
- Carbohydrates: 270-290 g
Ingredients
For the dough:
- 3 1/2 cups all-purpose flour (I always use King Arthur all-purpose flour), plus extra if needed
- 1/4 cup white sugar
- 2 1/4 tsp active dry yeast (ensure it’s fresh for good rise)
- 1 tsp kosher salt
- 1 large egg, beaten (room temperature for better emulsification)
- 1 1/4 cups whole milk, divided
- 1/4 cup unsalted butter (I like Kerrygold for this)
For assembly and finishing:
- 1 tsp vegetable oil
- 1/4 cup unsalted butter, melted (for brushing)
Step 1: Combine Butter, Sugar, Salt, and Warm Milk
- 1/4 cup unsalted butter, thinly sliced
- 1/4 cup white sugar
- 1 tsp kosher salt
- 1 1/4 cups whole milk, divided (use 1 cup here)
Slice the 1/4 cup unsalted butter as thinly as possible and add it to the bottom of a stand mixer.
Add the 1/4 cup white sugar and 1 teaspoon kosher salt to the mixer as well.
Warm 1 1/4 cups whole milk in the microwave in 15–30 second intervals until it reaches between 105–110°F.
Pour 1 cup of the warm milk over the butter, sugar, and salt in the mixer.
Let it sit without stirring to allow the butter to begin melting.
Step 2: Activate the Yeast and Combine Wet Ingredients
- 1/4 cup whole milk (reserved from Step 1)
- 2 1/4 tsp active dry yeast (1 packet)
- 1 large egg, beaten
In a small bowl, add the remaining 1/4 cup of warm milk and sprinkle over the active dry yeast.
Stir to combine and let the mixture sit for about 5 minutes until it becomes foamy, indicating the yeast is active.
Pour this activated yeast mixture into the stand mixer with the butter and milk.
Add the beaten egg, and stir everything together until well combined.
Step 3: Form and Knead the Dough
- 3 1/2 cups all-purpose flour, plus extra if needed
Attach the dough hook to your stand mixer.
Gradually add 3 1/2 cups all-purpose flour to the wet mixture, one cup at a time, making sure to scrape down the sides as needed.
Allow the dough to come together; once it resembles a sticky dough, increase the mixer speed to medium-high and knead.
If the dough doesn’t cleanly pull away from the sides, add a bit more flour (up to 1/2 cup more) until it does.
Continue kneading for 3 minutes to develop gluten.
I always watch the dough closely—it should be soft but not overly sticky at this stage.
Step 4: First Dough Rise
- 1 tsp vegetable oil
- kneaded dough from Step 3
Lightly oil a large bowl with 1 teaspoon vegetable oil.
Remove the kneaded dough from the mixer and transfer it to the oiled bowl, turning the dough so that all sides are coated.
Cover the bowl with plastic wrap and let the dough rise in a warm place for 1–2 hours, or until doubled in size.
Step 5: Shape and Second Rise
- 1/4 cup unsalted butter, melted (for brushing)
- risen dough from Step 4
Melt 1/4 cup unsalted butter.
Use a small amount to brush the bottom and sides of a 9″x13″ baking dish, ensuring it’s lightly coated.
Once the dough has risen, punch it down to release air.
Divide the dough into 15 equal pieces.
Shape each piece into a smooth ball by stretching and tucking the ends underneath, pinching the seams, and gently rolling between your hands.
Arrange the balls seam-side down in the prepared baking dish in 5 rows of 3.
Cover with plastic wrap and let rise again until doubled, about 1 hour.
Step 6: Bake the Rolls
Preheat your oven to 350°F.
Once the rolls have completed their second rise, remove the plastic wrap and bake for 20–25 minutes until the tops are golden brown and the rolls sound hollow when tapped.
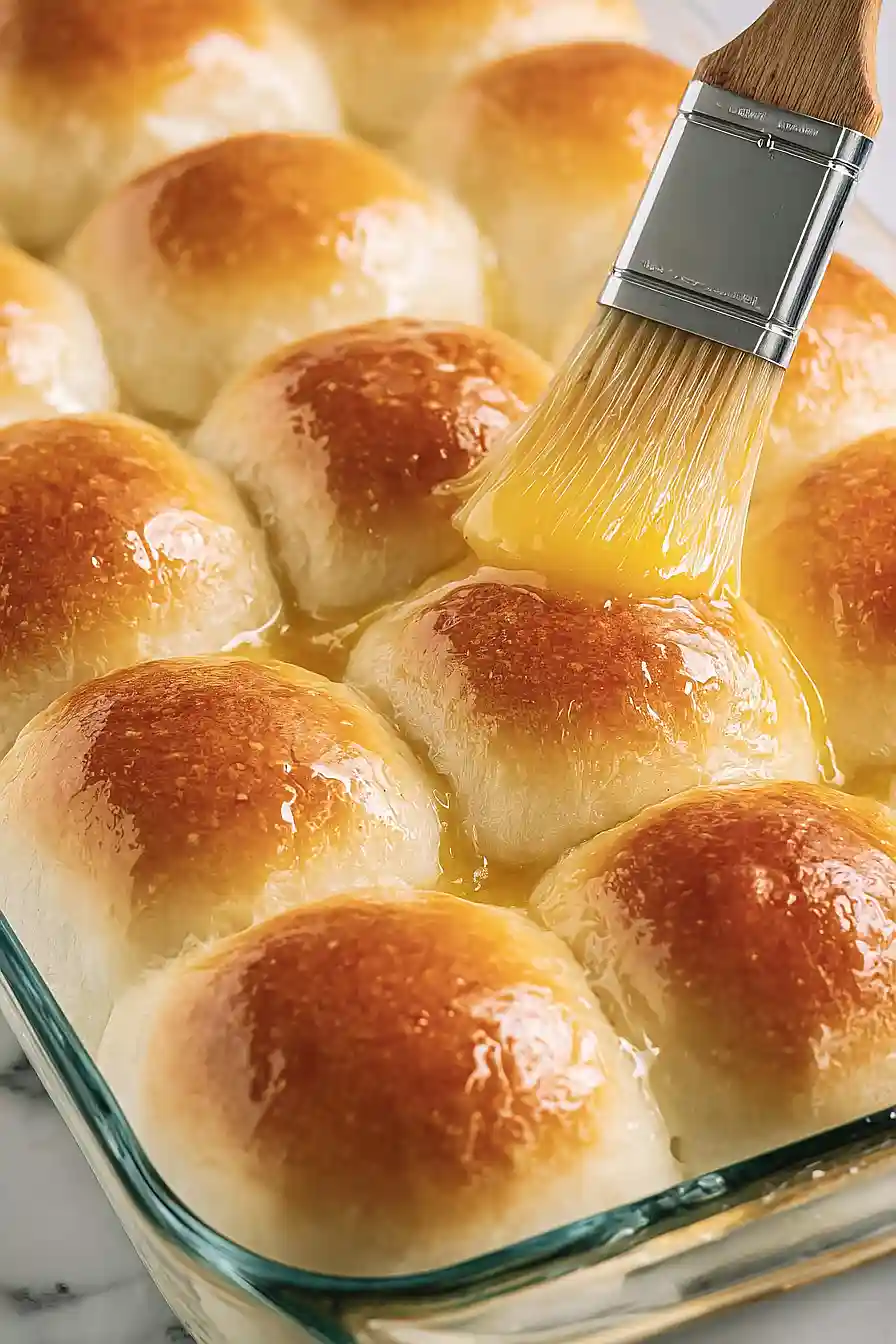
Step 7: Brush with Butter and Serve
- remaining melted butter from Step 5
As soon as the rolls come out of the oven, generously brush the tops with the remaining melted butter.
Serve the rolls warm.
For an extra boost of flavor, I love to sprinkle a touch of flaky sea salt on the warm rolls right after buttering them.
