Halloween party planning can be a real headache, especially when you’re trying to come up with treats that are both spooky and tasty. Between coordinating costumes, hanging decorations, and managing sugar-excited kids, the last thing you need is a complicated recipe that takes hours to perfect.
That’s where these zombie chocolate covered strawberries come in handy: they’re fun and creepy-looking, easy enough to make with kids, and way more interesting than the usual bowl of candy corn. Plus, they only need a few basic ingredients you can grab at any grocery store.

Why You’ll Love These Zombie Strawberries
- Quick and easy – These spooky treats come together in just 15-25 minutes, making them perfect for last-minute Halloween party prep.
- Kid-friendly activity – Children love helping decorate these silly zombies – it’s like an edible craft project that creates fun memories in the kitchen.
- Simple ingredients – With just a handful of basic items from the baking aisle and fresh strawberries, you can create these creepy-cute treats.
- Party-perfect dessert – These zombie strawberries are guaranteed to be the talk of any Halloween gathering – they’re both spooky and sweet, and everyone will want to take pictures.
What Kind of Strawberries Should I Use?
For chocolate-covered strawberries, you’ll want to pick fresh, firm strawberries that are bright red and free from any soft spots or blemishes. Medium-sized berries typically work better than jumbo ones since they’re easier to handle and eat in one or two bites. When shopping, look for strawberries with their green caps still attached – this gives you something to hold onto while dipping and adds to the finished look. Just make sure to wash your berries thoroughly and pat them completely dry before dipping, as any moisture will prevent the candy coating from sticking properly.
Options for Substitutions
Making these spooky treats? Here are some helpful substitution tips:
- Wilton’s dark green candy melts: If you can’t find green candy melts, use white candy melts or white chocolate and add green food coloring. Just be careful – only use oil-based or candy coloring, as regular food coloring can make the chocolate seize up!
- Candy eyes: No candy eyes? You can make your own using white candy melts for the base and a tiny dot of black icing for the pupil. Or try using mini M&Ms with a dot of black icing!
- Black food coloring: Black gel food coloring works best, but you can mix equal parts blue, red, and green food coloring to create black. In a pinch, you could also use black icing or melted dark chocolate for the details.
- Fresh strawberries: Fresh strawberries are a must for this recipe – frozen ones won’t work as they get too wet when thawed. Try to pick medium-sized berries with a nice shape for the best results.
- Food-safe paintbrush: If you don’t have a food-safe paintbrush, you can use a clean, new small craft paintbrush, or even the back of a spoon for larger areas. For fine details, try using a toothpick.
- Wax paper: Parchment paper or silicone baking mats work just as well. Even aluminum foil can do the job – just be sure to grease it lightly first.
Watch Out for These Mistakes While Making
The biggest challenge when making zombie chocolate covered strawberries is working with chocolate that’s too hot, which can cause the candy melts to become lumpy or seize up – always melt your candy melts in 30-second intervals, stirring between each round.
Getting the right consistency is crucial, so if your melted chocolate seems too thick, add a teaspoon of vegetable shortening (not water!) to thin it out, as water will cause the chocolate to seize and become grainy.
When attaching the candy eyes, make sure your base coating is still slightly wet but not completely fluid, and avoid pressing too hard or they’ll slide right off – waiting about 2-3 minutes after dipping gives you the perfect tacky surface.
For those spooky zombie details, let each layer of chocolate fully set before adding the next one, and keep your strawberries at room temperature before dipping, as cold strawberries can cause the chocolate to crack or not adhere properly.
What to Serve With Zombie Strawberries?
These spooky chocolate-covered strawberries make a perfect addition to any Halloween party spread! They pair really well with other fun Halloween treats like ghost cookies, monster cupcakes, or witch finger pretzels to create an awesome dessert table. Since these are sweet and chocolatey, I like serving them alongside some salty snacks like popcorn or mixed nuts to balance out the flavors. You can also put them on a platter with regular chocolate-covered strawberries and other fresh fruit for a mix of scary and sweet options that both kids and adults will love.
Storage Instructions
Keep Fresh: These spooky strawberries are best enjoyed the same day they’re made, but you can keep them for up to 24 hours. Place them in a single layer in an airtight container lined with paper towels and store them in the fridge. The paper towels help absorb any excess moisture that could make the candy coating soft.
Prepare Ahead: If you’re planning a Halloween party, you can prep these zombie treats a few hours before your guests arrive. Just make sure to take them out of the fridge about 15-20 minutes before serving so the chocolate coating isn’t too cold and hard – this lets the strawberry flavors really come through!
Important Note: Keep in mind that strawberries can get quite juicy over time, which might cause the candy eyes to slide off. That’s why these cute zombies are best made and enjoyed within 24 hours. Plus, the strawberries taste freshest this way!
| Preparation Time | 10-15 minutes |
| Cooking Time | 5-10 minutes |
| Total Time | 15-25 minutes |
| Level of Difficulty | Easy |
Estimated Nutrition
Estimated nutrition for the whole recipe (without optional ingredients):
- Calories: 100-150
- Protein: 1-2 g
- Fat: 4-6 g
- Carbohydrates: 15-20 g
Ingredients
- dark green candy melts
- 3-5 fresh strawberries
- wax paper
- small candy eyes (Wilton’s brand is great for this)
- black food coloring (gel or liquid)
- food-safe paintbrush
Step 1: Melt the Candy Melts
Start by filling a glass to the brim with Wilton’s Dark Green Candy Melts.
Place the glass in the microwave and heat on high for 1 minute.
After heating, stir the candy melts until smooth.
If you find the chocolate is still clumpy, continue heating in 30-second intervals, stirring in between, until the melts are completely smooth.
Step 2: Dip and Decorate the Strawberries
Prepare a piece of wax paper to set your strawberries on.
Dip each strawberry into the melted candy until fully covered, letting any excess drip off.
Carefully place the dipped strawberries onto the wax paper.
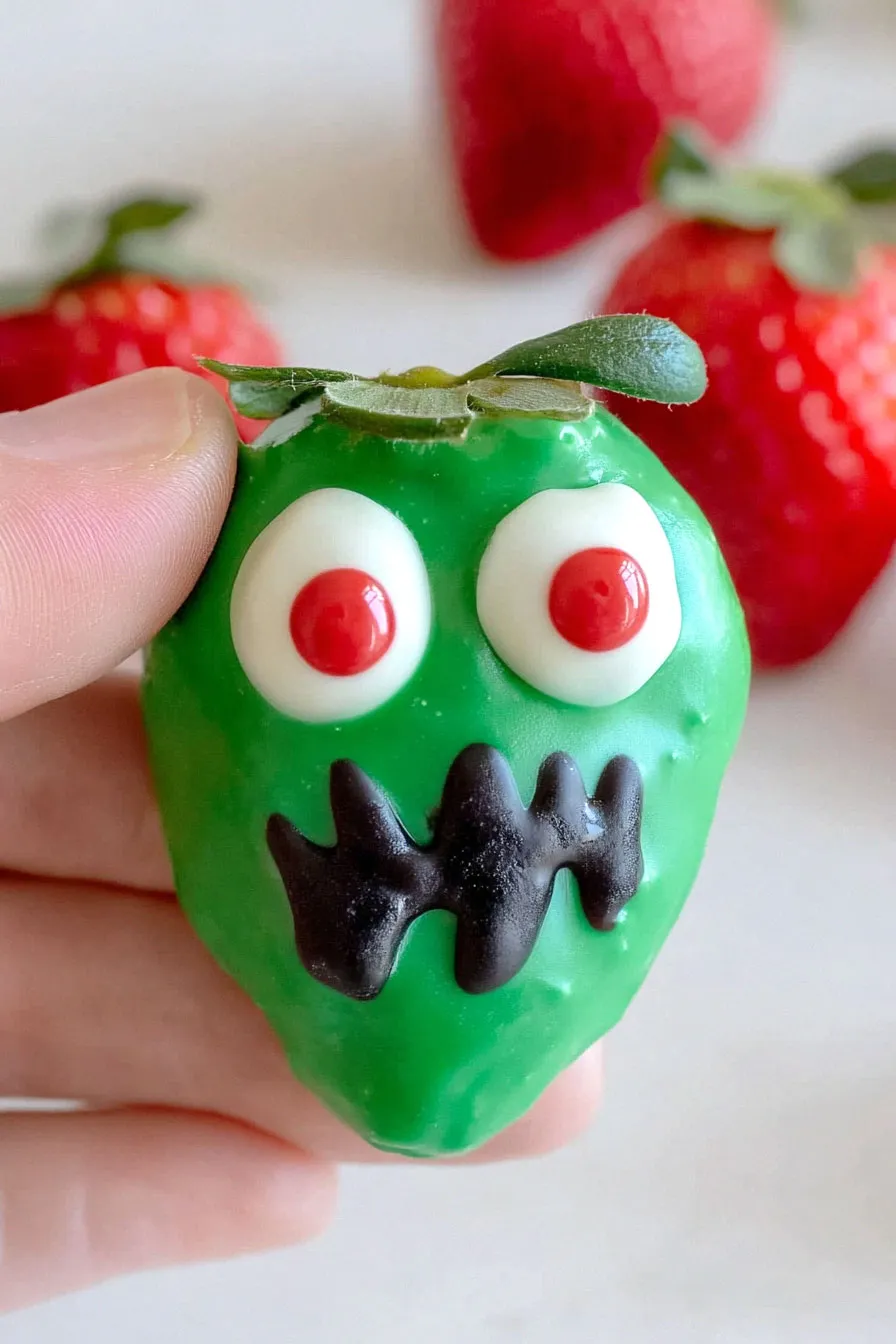
While the coating is still wet, press a pair of candy eyes onto each strawberry to create the zombie face.
Step 3: Allow Coating to Set
Let the strawberries sit at room temperature until the candy coating has firmed completely.
This might take a few minutes, depending on the ambient temperature.
Step 4: Add Zombie Details
Once the candy coating is firm, use a fine paintbrush and black food dye to draw a zombie mouth onto each strawberry.
Be creative with the expressions for added fun!
Step 5: Serve and Enjoy
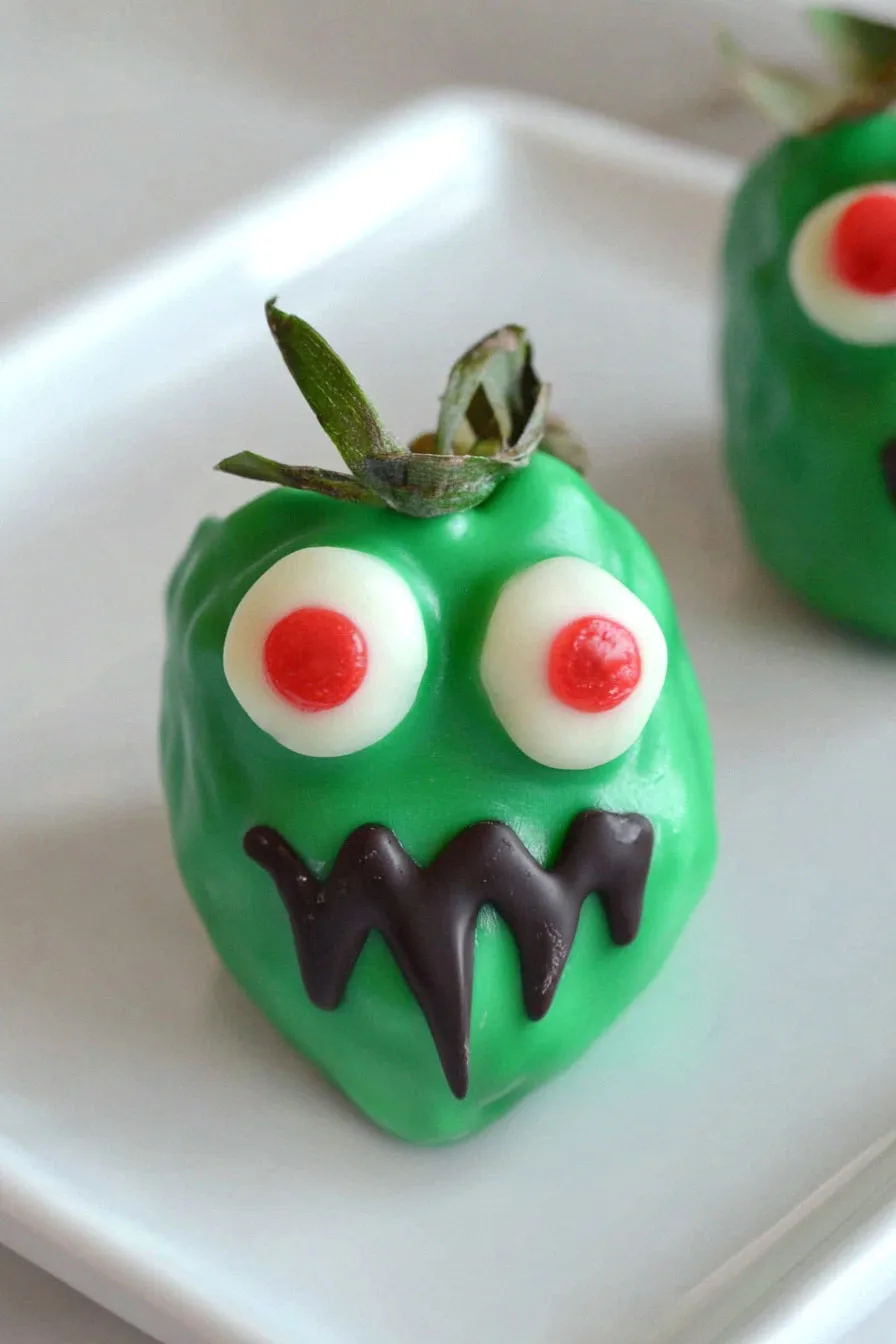
After the decoration is complete and the dye has dried, your zombie strawberries are ready to serve.
Enjoy these spooky treats with friends and family!
