Snacking on keto can feel pretty limited sometimes. I mean, how many times can you eat the same nuts or cheese cubes before you start craving something with actual crunch? I’ve been there, staring into my pantry wishing I could just grab a sleeve of crackers like I used to.
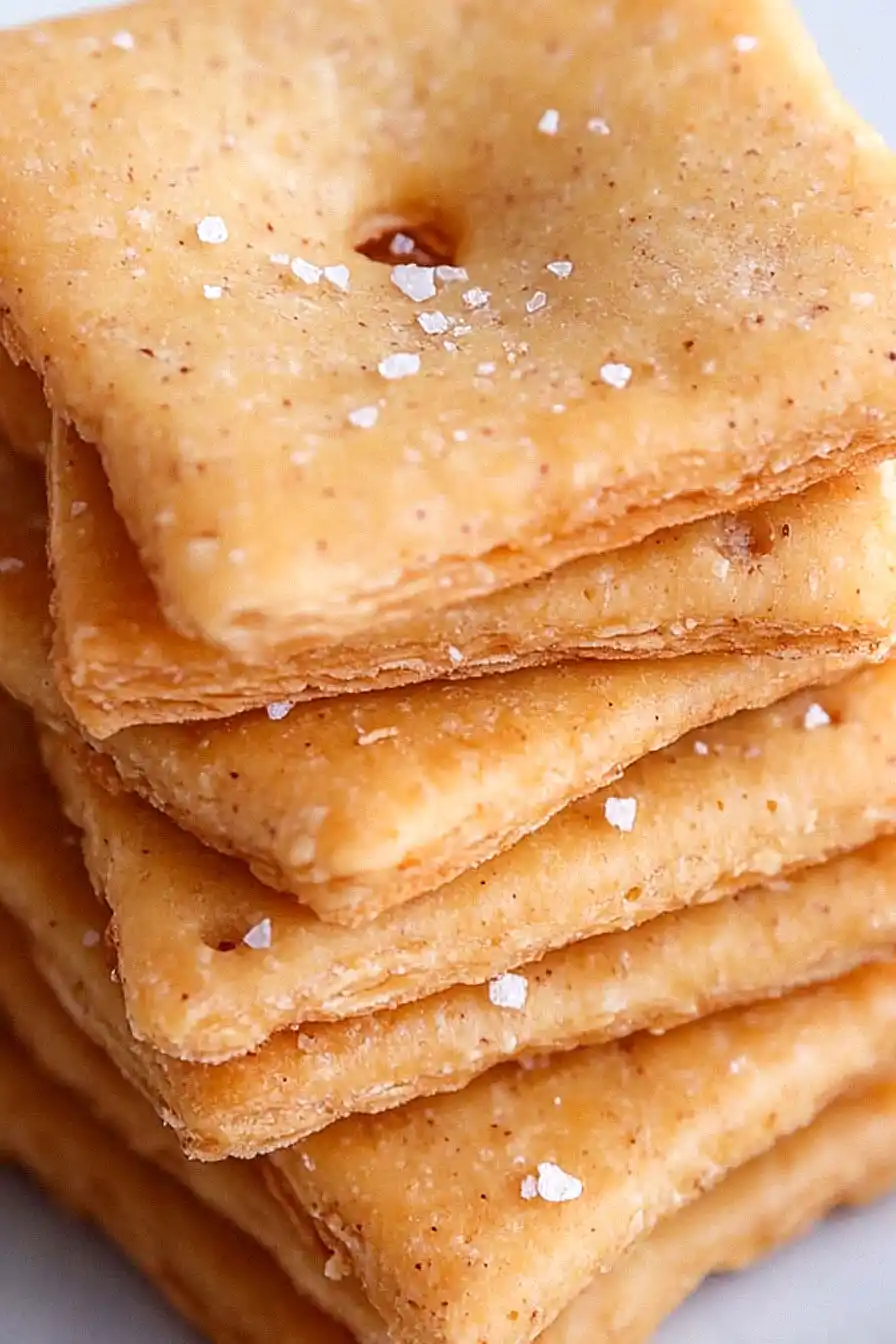
That’s when I started making my own keto cheese crackers. They’re crispy, cheesy, and satisfy that need for something to munch on without knocking me out of ketosis. Plus, they’re way easier to make than you’d think. I can whip up a batch while dinner is in the oven.
The best part? My kids actually like them too. They have no idea they’re eating something “healthy” – they just know they taste good. I keep a container on the counter for when we need a quick snack or want something to dip in guacamole.
Why You’ll Love These Keto Cheese Crackers
- Keto-friendly snacking – These crackers are made with almond flour and cheese, keeping your carb count low while satisfying your crunch cravings.
- Simple ingredients – You probably already have most of these pantry staples on hand, making this an easy recipe to whip up anytime.
- Quick preparation – Ready in just 30-45 minutes from start to finish, these crackers are perfect when you need a fast snack or appetizer.
- Cheesy, crunchy satisfaction – The combination of melted cheese and almond flour creates that perfect crispy texture you’ve been missing on your low-carb diet.
- Customizable flavor – Switch up the cheese varieties or add your favorite spices to make these crackers exactly how you like them.
What Kind of Cheese Should I Use?
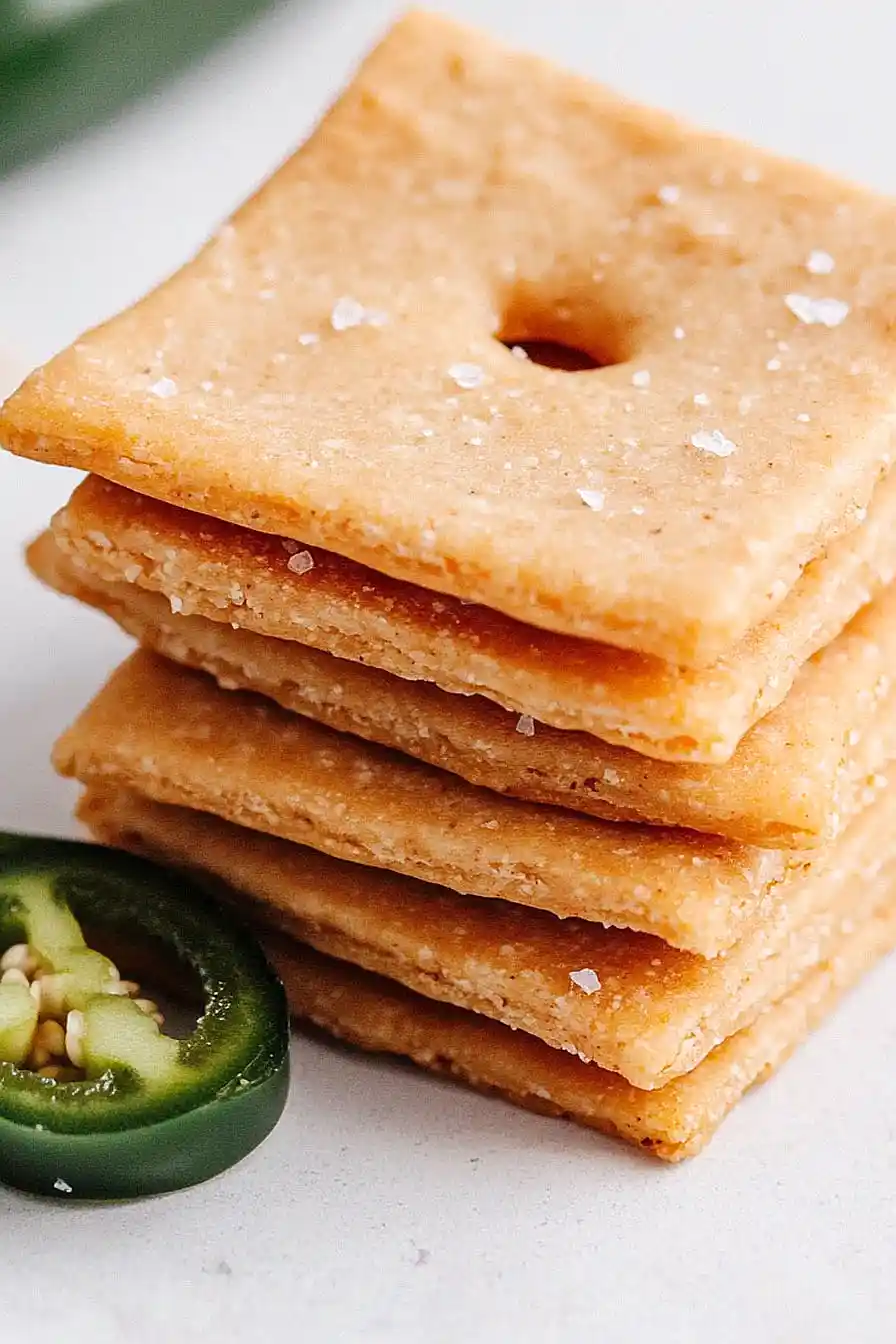
For these keto crackers, you’ll want to stick with good melting cheeses that have bold flavor since the cheese is really the star of the show. Sharp cheddar works great because it gives you that classic cheesy cracker taste, while pepper jack adds a nice kick if you’re looking for some heat. You can also try other hard cheeses like aged gouda or even a Mexican blend if that’s what you have on hand. Just make sure to use pre-shredded cheese or shred it yourself – avoid the fancy cheese counter varieties that might have coatings, as they won’t melt and bind as well in this recipe.
Options for Substitutions
This keto cracker recipe is pretty forgiving when it comes to swaps:
- Shredded cheese: While cheddar and pepper jack work great, you can try sharp white cheddar, gouda, or even parmesan for a nuttier flavor. Just make sure to use a cheese that melts well and has good flavor.
- Almond flour: This is pretty essential for the keto aspect, but if you’re not following keto strictly, you could use a mix of almond flour and a small amount of regular flour. Coconut flour won’t work as a direct swap since it absorbs liquid differently.
- Red pepper flakes: Skip these if you don’t like heat, or try paprika, onion powder, or dried herbs like rosemary or thyme for different flavor profiles.
- Butter: You can substitute with olive oil or melted coconut oil if needed. The texture might be slightly different, but they’ll still turn out tasty.
- Coarse salt: Regular table salt works fine, or try everything bagel seasoning, sesame seeds, or poppy seeds for a fun twist on top.
Watch Out for These Mistakes While Baking
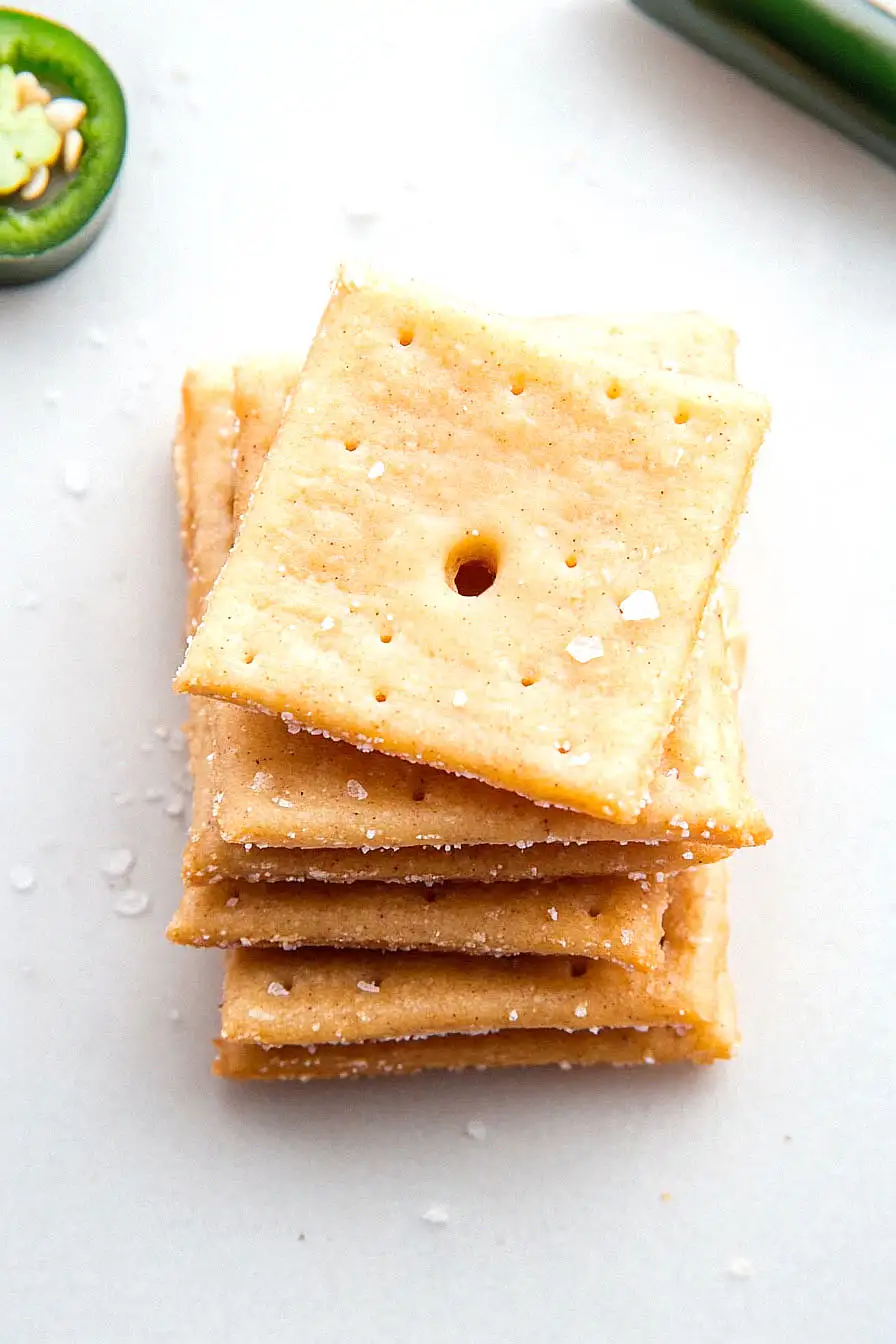
The biggest mistake when making keto cheese crackers is rolling the dough too thick, which results in chewy, bread-like crackers instead of crispy ones – aim for about 1/8 inch thickness or even thinner for that perfect crunch.
Another common error is not chilling the dough before rolling, as warm dough becomes sticky and difficult to work with, so pop it in the fridge for 30 minutes to make your life easier.
Watch your oven carefully during the last few minutes of baking since these crackers can go from golden to burnt quickly, and don’t skip the parchment paper or they’ll stick to your baking sheet.
For extra crispy results, let the crackers cool completely on the baking sheet before removing them, as they’ll continue to firm up as they cool down.
What to Serve With Keto Cheese Crackers?
These crispy cheese crackers are perfect for snacking on their own, but they really shine when paired with a good cheese board or charcuterie spread. I love serving them alongside cream cheese dips, guacamole, or even a simple spinach artichoke dip for parties. They also make a great crunchy addition to a bowl of soup instead of regular crackers, especially tomato or broccoli cheddar soup. For a quick snack, try them with sliced salami, pepperoni, or a dollop of sour cream mixed with fresh herbs.
Storage Instructions
Keep Fresh: These keto cheese crackers stay crispy when stored in an airtight container at room temperature for up to a week. I like to toss in a small piece of parchment paper to help absorb any moisture that might sneak in and make them lose their crunch.
Freeze: You can absolutely freeze these crackers for longer storage! Just pop them in a freezer-safe container or bag and they’ll keep for up to 3 months. They thaw quickly at room temperature and taste just as good as fresh.
Refresh: If your crackers lose some of their crispiness after a few days, just spread them on a baking sheet and pop them in a 300°F oven for about 5 minutes. This brings back that perfect crunch and makes them taste freshly baked again!
| Preparation Time | 10-15 minutes |
| Cooking Time | 20-30 minutes |
| Total Time | 30-45 minutes |
| Level of Difficulty | Easy |
Estimated Nutrition
Estimated nutrition for the whole recipe (without optional ingredients):
- Calories: 800-900
- Protein: 35-40 g
- Fat: 60-70 g
- Carbohydrates: 20-25 g
Ingredients
For the crackers:
- 1 large egg
- 1/2 tsp garlic powder
- 6 oz shredded cheddar or pepper jack cheese
- 1.5 cups almond flour (blanched fine almond flour gives the best texture)
- 1/2 tsp salt
- 1/4 tsp crushed red pepper flakes (adds a mild kick)
For topping and dusting:
- 1 tbsp melted butter (I like using Kerrygold unsalted butter for this)
- coarse salt
- extra almond flour
Step 1: Prepare Baking Surface and Preheat Oven
- almond flour, plus extra for dusting
Preheat your oven to 300ºF.
Place a large silicone baking mat on your work surface and dust it lightly with some almond flour to prevent sticking.
This step ensures you’ll have a smooth workspace when rolling out the dough.
Step 2: Melt the Cheese
- 6 oz shredded Cheddar or Pepper Jack cheese
In a large microwave-safe bowl, add the shredded Cheddar or Pepper Jack cheese.
Microwave on high in 30-second increments, stirring each time, until the cheese is well melted and smooth.
This provides the base for your dough.
Step 3: Combine Ingredients and Make Dough
- 1 1/2 cups almond flour
- 1/2 tsp salt
- 1/2 tsp garlic powder
- 1/4 tsp crushed red pepper flakes (optional)
- 1 large egg
- melted cheese from Step 2
- extra almond flour, if needed
Add the almond flour, salt, garlic powder, crushed red pepper flakes (if using), and the egg to the melted cheese (from Step 2).
Stir thoroughly, and then use a rubber spatula to knead the mixture against the sides of the bowl until a uniform dough forms.
If the dough feels too sticky, incorporate a few more tablespoons of almond flour.
I always add a touch more almond flour if the dough isn’t easy to handle.
Step 4: Roll Out and Shape the Dough
- dough from Step 3
- almond flour-dusted mat from Step 1
Turn the kneaded dough (from Step 3) out onto the prepared mat from Step 1.
Place a piece of parchment or waxed paper on top and roll it out as thinly as possible, aiming for no more than 1/8 inch thick.
Cut into desired cracker shapes (about 1 inch across for snack-size) using a pizza wheel or sharp knife.
For a classic look, use a straw to poke a hole in the center of each cracker or prick with a fork.
Step 5: Butter and Salt the Crackers
- 1 tbsp melted butter
- coarse salt, for topping
- shaped crackers from Step 4
Gently brush the surface of the shaped crackers (from Step 4) with the melted butter, then sprinkle them with coarse salt, pressing lightly so it sticks to the surface.
This step gives your crackers that irresistible crunch and flavor.
I like to use coarse salt for a satisfying finish, but you can adjust to taste.
Step 6: Bake and Crisp the Crackers
Carefully transfer the silicone mat with the prepared crackers to a large baking sheet.
Bake in the preheated oven for 20 to 30 minutes, until they are golden brown and the edges begin to crisp.
Once baked, turn off the oven and leave the crackers inside to allow them to crisp up.
Keep a close eye to avoid overbaking; letting them finish in the residual heat helps achieve that perfect crunch.
