I thought I knew how to make apple pie until I tried my neighbor’s recipe last fall. Mine always turned out with a soggy bottom crust, while hers was perfectly crisp every time. Turns out, I was making the classic mistake of not pre-baking the crust.
The secret is giving that bottom crust a head start before you add the filling. It sounds like extra work, but it’s actually pretty simple. Once you try this method, you’ll never go back to throwing everything together and hoping for the best.

Why You’ll Love This Apple Pie
- Classic homemade taste – Nothing beats the smell and flavor of a fresh apple pie made from scratch with tender Granny Smith apples and warm spices.
- Simple ingredients – You probably have most of these basic baking staples in your pantry already, making this an easy dessert to whip up anytime.
- Perfect for any occasion – Whether it’s a holiday gathering, Sunday dinner, or just because you’re craving something sweet, this apple pie always hits the spot.
- Impressive presentation – The golden, flaky crust and beautiful apple filling make this pie look like it came straight from a bakery, but it’s totally doable at home.
- Great for sharing – One pie serves plenty of people, and leftovers taste amazing the next day with a scoop of vanilla ice cream or your morning coffee.
The Best Apple Variety for Apple Pie
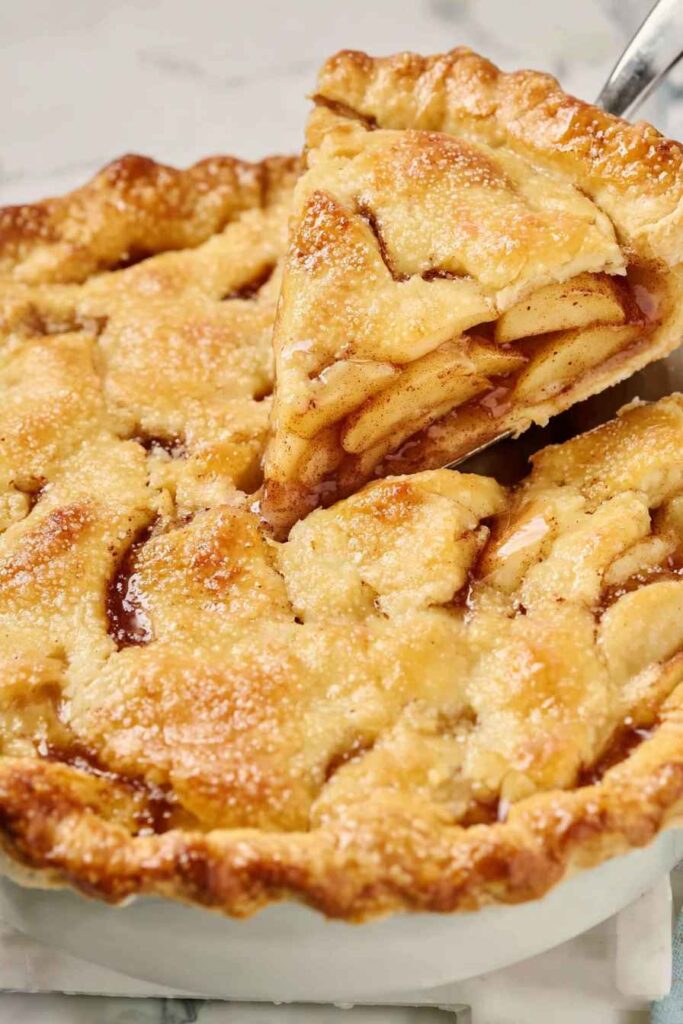
Granny Smith apples are the go-to choice for apple pie because they hold their shape well during baking and have that perfect tart flavor that balances out all the sugar. If you can’t find Granny Smiths, other good baking apples include Honeycrisp, Braeburn, or Jonathan varieties.
You can even mix different types of apples for a more complex flavor – try combining tart Granny Smiths with sweeter Gala or Fuji apples. Just avoid really soft apples like Red Delicious, as they’ll turn to mush in the oven and won’t give you those nice apple slices you want in your pie.
Options for Substitutions
This classic apple pie recipe is pretty forgiving when it comes to swaps:
- Granny Smith apples: While Granny Smith apples are perfect for their tartness and ability to hold their shape, you can mix things up with Honeycrisp, Braeburn, or Jonathan apples. For best results, use a mix of tart and sweet varieties.
- Pie crusts: Store-bought crusts work great, but if you’re making homemade and don’t have enough time, you can make a single-crust pie with a crumb topping instead of a full top crust.
- Light brown sugar: You can substitute with dark brown sugar for a deeper molasses flavor, or use all granulated sugar if that’s what you have on hand.
- All-purpose flour: Cornstarch works as a thickener too – just use 1 tablespoon instead of 2 tablespoons of flour. Tapioca starch is another good option at the same 1 tablespoon amount.
- Ground nutmeg: If you don’t have nutmeg, you can skip it entirely or add a pinch of allspice or cardamom for a different warm spice note.
- Sanding sugar: Regular granulated sugar works fine for sprinkling on top, or you can skip the sugar topping altogether if you prefer.
Granny Smith Apple Pie FAQ
How thinly should I slice the apples – does thickness affect cooking time?
The ½-inch thickness is crucial. Thinner (¼-inch) turns mushy, thicker (¾-inch+) stays crunchy and creates gaps. Consistency matters most—uneven slices cook unevenly. This thickness gives tender apples that hold shape and release proper juice for cohesive filling.
Do I need a deep dish pie plate specifically, or will a regular 9-inch work?
You need a deep dish (1.5-2 inches deep). Standard plates (1-1.25 inches) can’t hold 7 apples—filling will overflow. If you only have standard, use 5 apples and reduce other ingredients proportionally, or make two pies.
The 3-hour cooling time seems long – what happens if I cut it sooner?
Cutting too early results in soupy, runny filling. The juices need time to thicken as pectin gels during cooling. At 1 hour it’s liquid inside. At 2 hours still loose. Wait minimum 2 hours for warm pie, but 3-4 hours gives clean slices that don’t fall apart.
Storage Instructions
Keep Fresh: Your apple pie will stay delicious at room temperature for up to 2 days if you cover it loosely with foil or plastic wrap. If you want to keep it longer, pop it in the fridge where it’ll stay good for up to 5 days. I actually think apple pie tastes even better the next day after all those flavors have had time to meld together!
Freeze: Apple pie freezes really well, either before or after baking. If you’re freezing a baked pie, let it cool completely first, then wrap it tightly in plastic wrap and foil. It’ll keep for up to 4 months in the freezer, which is perfect for making ahead for holidays.
Warm Up: To bring your pie back to life, warm it in a 350°F oven for about 15-20 minutes if it’s from the fridge, or 30-40 minutes if it’s frozen. This helps crisp up the crust again and makes the filling nice and bubbly. You can also microwave individual slices for about 30 seconds if you’re in a hurry.
| Preparation Time | 65-75 minutes |
| Cooking Time | 55-60 minutes |
| Total Time | 120-135 minutes |
| Level of Difficulty | Medium |
Estimated Nutrition
Estimated nutrition for the whole recipe (without optional ingredients):
- Calories: 2000-2200
- Protein: 15-18 g
- Fat: 60-70 g
- Carbohydrates: 370-390 g
Ingredients
For the pastry crust:
- 2 (9-inch) pie shells (store-bought for convenience)
For the apple filling:
- 1 tbsp lemon juice
- 1/2 cup brown sugar (lightly packed)
- 1/2 cup white sugar
- Zest from 1/2 lemon
- 1 tsp ground cinnamon (freshly ground for best flavor)
- 7 large Granny Smith apples (peeled, cored, and sliced 1/2-inch thick)
- 1/8 tsp ground nutmeg
- 2 tbsp all-purpose flour
For assembling and topping:
- 2 tbsp sanding sugar (optional, adds a sparkly finish)
- 1 large egg, beaten (for egg wash)
Step 1: Prepare the Pie Crusts
- 2 (9-inch) pie shells
If making homemade pie crust, prepare the dough for two 9-inch pie shells according to your favorite recipe, ensuring it has time to chill for at least 1 hour before use.
Alternatively, use store-bought pie shells and follow package instructions.
Place the oven rack in the center position and preheat the oven to 400°F (204°C).
I find that chilling the dough really helps achieve a wonderfully flaky crust.
Step 2: Make the Apple Filling
- 7 large Granny Smith apples, peeled, cored, cut in 1/2-inch slices
- 1/2 cup white sugar
- 1/2 cup lightly packed brown sugar
- 2 tbsp all-purpose flour
- 1 tsp ground cinnamon
- 1/8 tsp ground nutmeg
- 1 tbsp lemon juice
- zest from 1/2 a lemon
In a large bowl, combine the sliced Granny Smith apples, white sugar, brown sugar, flour, ground cinnamon, ground nutmeg, lemon juice, and lemon zest.
Toss everything together until the apples are thoroughly coated in the sugar and spice mixture.
Let the filling sit while you prepare the crusts—this helps draw out excess juice from the apples.
Step 3: Roll Out and Assemble the Pie Shells
- pie dough (from Step 1)
- apple filling (from Step 2)
Remove the chilled pie crust dough from the fridge and let it rest at room temperature for 5–10 minutes to become more pliable.
On a lightly floured surface, roll one disc of dough into a 12-inch circle about 1/8-inch thick.
Carefully line the bottom of a deep dish pie plate with the rolled dough.
Spoon the apple filling (from Step 2) evenly over the bottom crust, discarding any accumulated juices to avoid a soggy base.
Roll out the second disc of dough to a similar thickness and place it over the apple filling.
Step 4: Seal, Vent, and Prepare the Pie for Baking
Trim the excess dough along the edge of the pie plate with a sharp knife.
Carefully pinch together the edges of the bottom and top crusts, folding them under themselves for a tidy seal.
Rotate the pie plate as you work for best results.
Use a sharp knife to cut 4 slits in the top crust to allow steam to escape during baking.
Set the prepared pie on a baking sheet to catch any bubbling juices.
Step 5: Add Finishing Touches and Bake
- 1 large egg, beaten (for egg wash)
- 2 tbsp sanding sugar, if desired
Brush the surface of the pie with the beaten egg to help develop a golden, shiny crust.
Sprinkle sanding sugar evenly over the top for a sparkly, crunchy finish if desired.
To prevent the edges from over-browning, cover them with a pie shield or strips of foil for the initial baking period.
Bake at 400°F (204°C) for 25 minutes, then carefully remove the pie shield and reduce the oven temperature to 375°F (190°C).
Continue baking for 30–35 minutes, or until the top crust is golden brown and the filling is bubbling.
I like to use sanding sugar for an extra festive appearance, but it’s totally optional!
Step 6: Cool the Pie
Allow the baked pie to cool on a wire rack at room temperature for at least 3 hours.
This patience ensures the juices settle, making the pie easier to slice and helping the flavors develop.
Granny Smith Apple Pie Recipe
Ingredients
Apple filling
- 1 tbsp lemon juice
- 1/2 cup brown sugar (lightly packed)
- 1/2 cup white sugar
- Zest from 1/2 lemon
- 1 tsp ground cinnamon (freshly ground for best flavor)
- 7 large Granny Smith apples (peeled, cored, and sliced 1/2-inch thick)
- 1/8 tsp ground nutmeg
- 2 tbsp all-purpose flour
For assembling and topping
- 2 tbsp sanding sugar (optional, adds a sparkly finish)
- 1 large egg, beaten (for egg wash)
Instructions
- If making homemade pie crust, prepare the dough for two 9-inch pie shells according to your favorite recipe, ensuring it has time to chill for at least 1 hour before use. Alternatively, use store-bought pie shells and follow package instructions. Place the oven rack in the center position and preheat the oven to 400°F (204°C). I find that chilling the dough really helps achieve a wonderfully flaky crust.
- In a large bowl, combine the sliced Granny Smith apples, white sugar, brown sugar, flour, ground cinnamon, ground nutmeg, lemon juice, and lemon zest. Toss everything together until the apples are thoroughly coated in the sugar and spice mixture. Let the filling sit while you prepare the crusts—this helps draw out excess juice from the apples.
- Remove the chilled pie crust dough from the fridge and let it rest at room temperature for 5–10 minutes to become more pliable. On a lightly floured surface, roll one disc of dough into a 12-inch circle about 1/8-inch thick. Carefully line the bottom of a deep dish pie plate with the rolled dough. Spoon the apple filling (from Step 2) evenly over the bottom crust, discarding any accumulated juices to avoid a soggy base. Roll out the second disc of dough to a similar thickness and place it over the apple filling.
- Trim the excess dough along the edge of the pie plate with a sharp knife. Carefully pinch together the edges of the bottom and top crusts, folding them under themselves for a tidy seal. Rotate the pie plate as you work for best results. Use a sharp knife to cut 4 slits in the top crust to allow steam to escape during baking. Set the prepared pie on a baking sheet to catch any bubbling juices.
- Brush the surface of the pie with the beaten egg to help develop a golden, shiny crust. Sprinkle sanding sugar evenly over the top for a sparkly, crunchy finish if desired. To prevent the edges from over-browning, cover them with a pie shield or strips of foil for the initial baking period. Bake at 400°F (204°C) for 25 minutes, then carefully remove the pie shield and reduce the oven temperature to 375°F (190°C). Continue baking for 30–35 minutes, or until the top crust is golden brown and the filling is bubbling. I like to use sanding sugar for an extra festive appearance, but it’s totally optional!
- Allow the baked pie to cool on a wire rack at room temperature for at least 3 hours. This patience ensures the juices settle, making the pie easier to slice and helping the flavors develop.


Bonjour,
Je ne suis pour l’instant jamais satisfaite de mes tartes aux pommes (apple pie). Je vais donc essayer votre recette mais j’ai un problème avec les proportions en tasse ou 1/2 tasse. Comment convertir en grammes ?
Avez vous une recette de croûte ?
Merci et bon week-end.