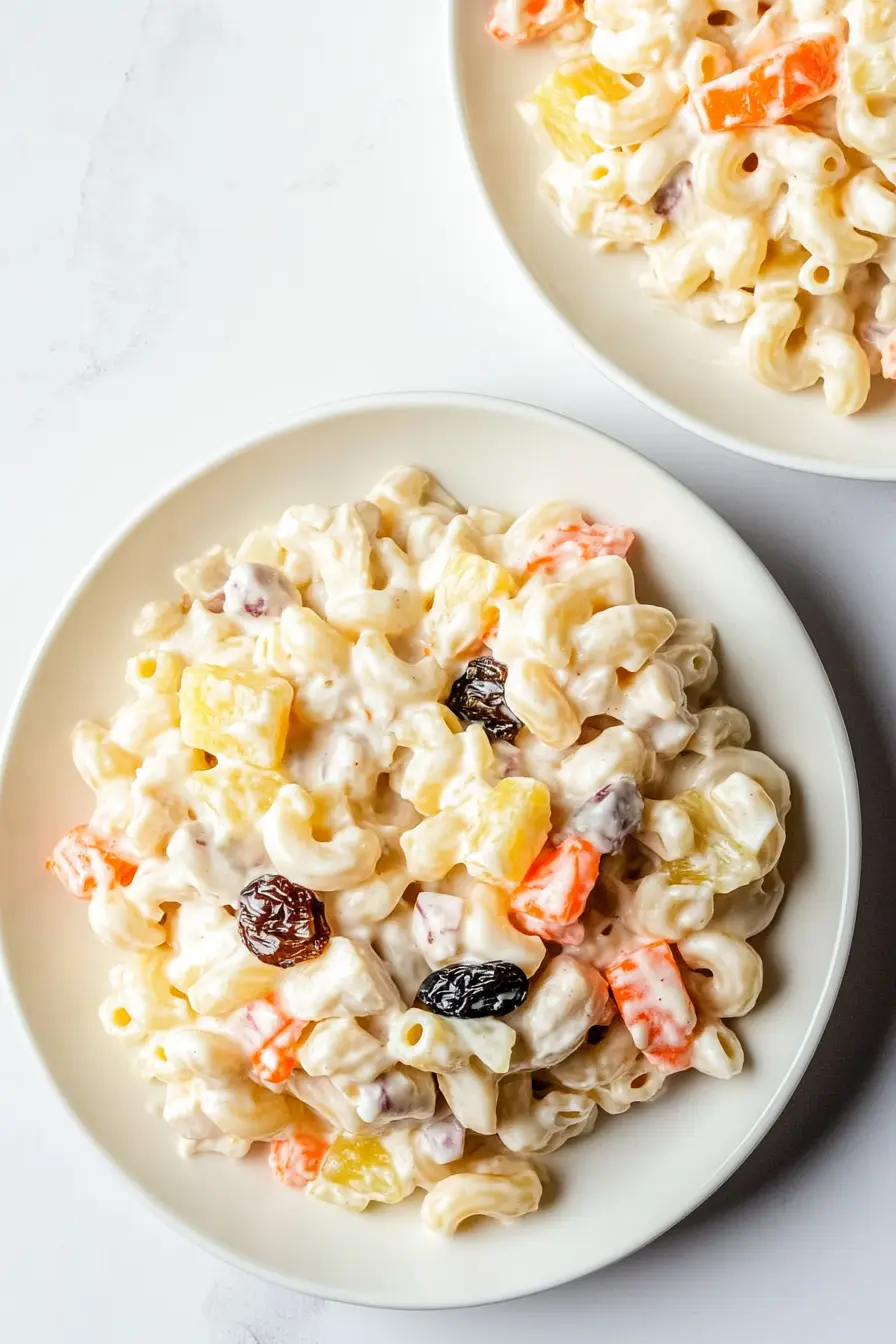
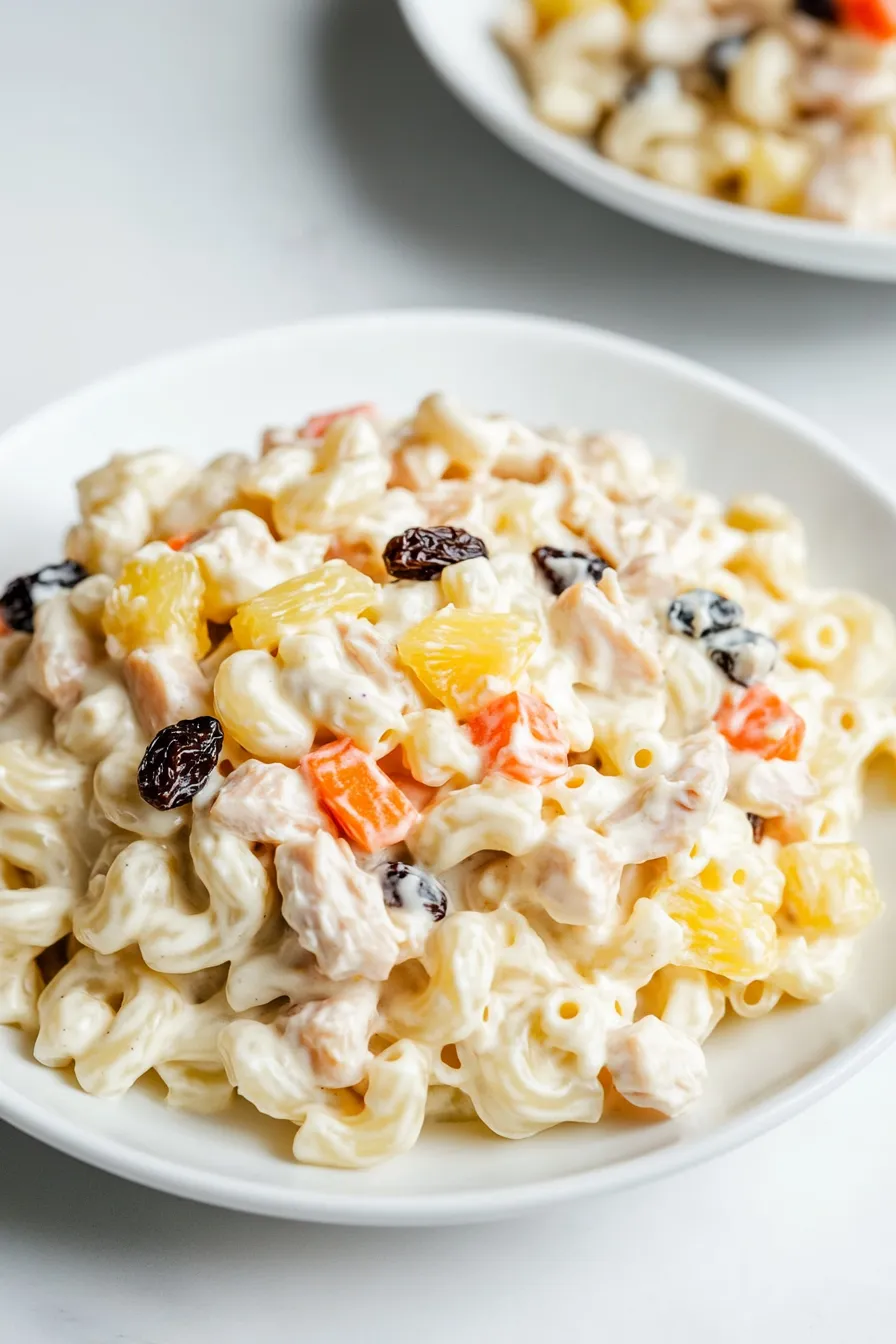
Growing up in an American household, Filipino macaroni salad wasn’t something I knew about until my neighbor brought it to our block party last summer. It was different from the usual macaroni salad I was used to – a little sweeter, packed with more ingredients, and somehow even more comforting. Since then, I’ve made it countless times for my family gatherings, and it’s become our go-to pasta salad.
What I love most about this Filipino-style version is how it brings together simple ingredients in a way that feels both familiar and new. The creamy sauce has just the right touch of sweetness, and there’s something about the combination of macaroni, carrots, and chicken that makes everyone come back for seconds. It’s the kind of recipe that proves good food doesn’t need to be complicated.
This is perfect for potlucks, family dinners, or when you’re craving something creamy and satisfying. Plus, you can make it ahead of time, which is always a bonus in my book. The flavors actually get better after hanging out in the fridge for a bit.
Why You’ll Love This Macaroni Salad
- Make-ahead friendly – You can prepare this Filipino-style macaroni salad the day before your gathering, and it actually tastes even better after the flavors have time to meld together in the fridge.
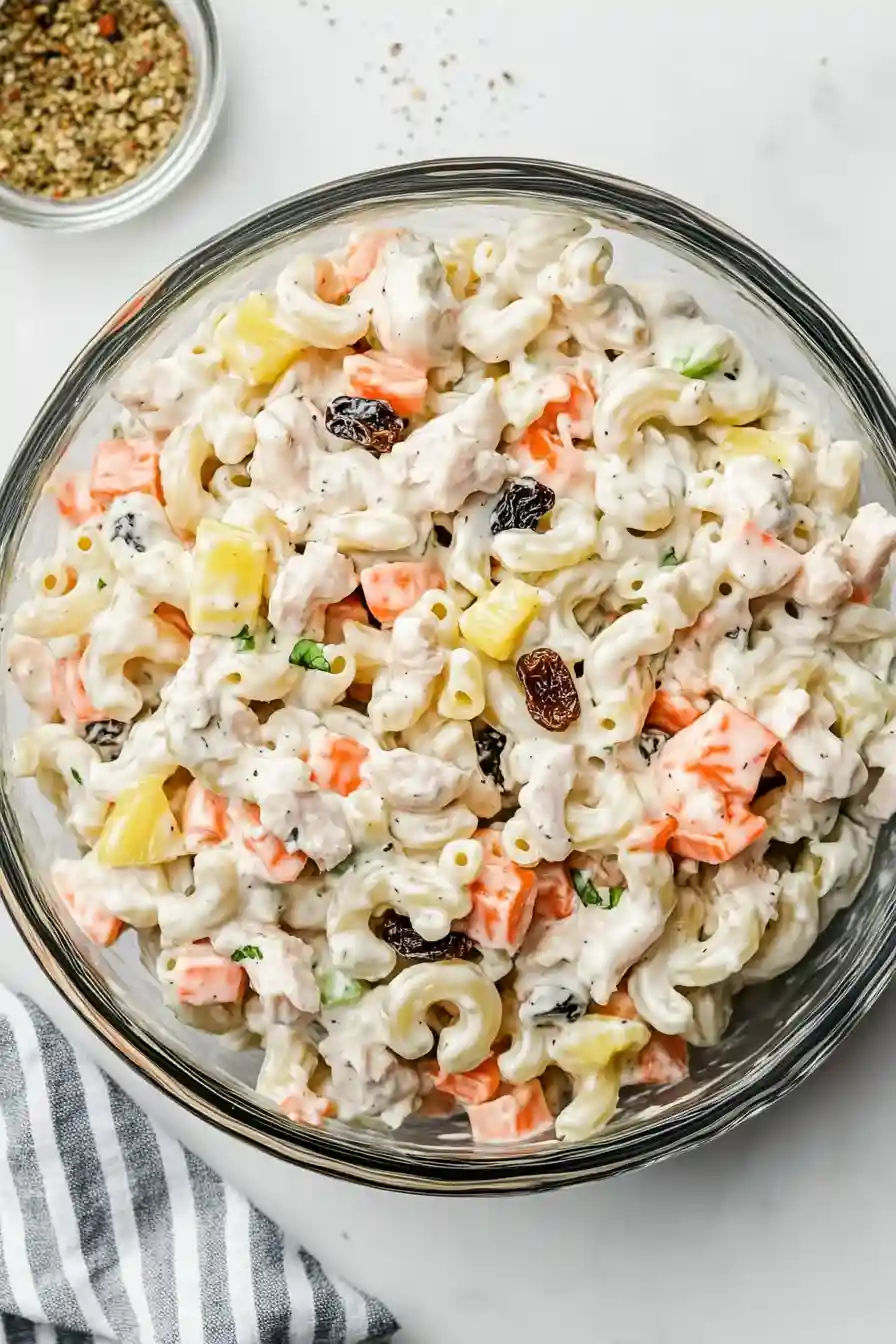
- Sweet and savory combo – The unique mix of chicken, pineapple, and raisins creates that perfect balance of sweet and savory that Filipino cuisine is known for.
- Great for parties – This recipe makes a big batch that’s perfect for potlucks, family gatherings, or holiday celebrations – and it’s always a hit with both kids and adults.
- Complete meal in one bowl – With protein from the chicken, carbs from the pasta, and plenty of vegetables and fruit mixed in, you’ve got a satisfying complete meal in every serving.
What Kind of Macaroni Should I Use?
Traditional elbow macaroni is the go-to pasta shape for this Filipino-style salad, though you could use other small pasta shapes in a pinch. The key is picking a pasta that has nooks and crannies to hold onto the creamy dressing – shells or small penne would work as alternatives. When cooking your pasta, make sure to follow the package directions but aim for al dente (still slightly firm when bitten), as overcooked pasta can become mushy once it’s mixed with the mayo dressing. For the best results, rinse your cooked pasta under cold water to stop the cooking process and prevent it from sticking together while you prep the other ingredients.
Options for Substitutions
This Filipino-style macaroni salad is pretty adaptable – here are some swaps you can try:
- Elbow macaroni: While elbow macaroni is classic, you can use other short pasta shapes like shells, rotini, or penne. Just cook them according to package instructions until they’re tender.
- Mayo: For a lighter version, try using half mayo and half Greek yogurt. You could also use Miracle Whip if that’s what you have, but keep in mind it will add a sweeter taste to your salad.
- Chicken: Canned tuna or ham work great as alternatives to chicken. You could even use diced turkey if you have some leftover from holiday meals.
- Pineapple: Fresh, canned, or frozen pineapple all work well – just make sure to drain canned pineapple really well. In a pinch, you could use mandarin oranges, though this will change the flavor profile.
- Cheddar cheese: Feel free to swap the cheddar with monterey jack or even mild gouda. Just avoid soft cheeses as they won’t hold their shape in the salad.
- Raisins: Not a fan of raisins? Try dried cranberries or chopped dates instead. You can also skip them altogether if dried fruit isn’t your thing.
Watch Out for These Mistakes While Cooking
The biggest mistake when making Filipino-style macaroni salad is overcooking the pasta – aim for al dente (about 7-8 minutes) since the noodles will continue to soften as they absorb the mayo dressing, and no one wants mushy macaroni.
Temperature control is crucial – make sure your chicken and pasta are completely cooled before mixing with mayo to prevent the dressing from breaking down, and always chill the salad for at least 2 hours before serving to let the flavors meld together.
To keep your salad from becoming watery, drain your pineapple pieces thoroughly and pat them dry with paper towels, and when dicing your carrots and onions, keep them small and uniform so they distribute evenly throughout the salad.
For the best texture and taste, avoid making this salad more than 24 hours in advance, as the pasta will continue to absorb the dressing and can become too soft – if needed, you can refresh it with a little extra mayo just before serving.
What to Serve With Filipino Macaroni Salad?
This creamy, sweet-savory macaroni salad is a staple at Filipino gatherings and pairs wonderfully with grilled or barbecued meats like chicken skewers or pork belly. Since it’s already pretty filling with the chicken and pasta, you might want to balance it out with some simple grilled vegetables or a fresh green salad on the side. At parties, I love serving this alongside other Filipino favorites like lumpia (spring rolls) or pancit (noodles) – it’s just how we do it back home! If you’re having this for a casual lunch, some crusty bread and fresh sliced tomatoes are all you really need to round out the meal.
Storage Instructions
Keep Cool: This Filipino style macaroni salad needs to be kept in the fridge in an airtight container. It’ll stay fresh and yummy for up to 3 days. Since it contains mayo and chicken, make sure not to leave it sitting out at room temperature for more than 2 hours to keep it food-safe.
Make Ahead: You can prep this salad a day before your gathering – in fact, it often tastes even better the next day when all the flavors have had time to mingle! Just give it a good stir before serving, and if it seems a bit dry, you can mix in a little extra mayo to freshen it up.
Pack for Picnics: If you’re taking this to a potluck or picnic, pack it in a cooler with ice packs to keep it chilled. I like to put the container in a bowl of ice to keep it cool throughout the event – nobody likes warm macaroni salad!
| Preparation Time | 10-15 minutes |
| Cooking Time | 5-7 minutes |
| Total Time | 75-90 minutes |
| Level of Difficulty | Easy |
Estimated Nutrition
Estimated nutrition for the whole recipe (without optional ingredients):
- Calories: 1800-2000
- Protein: 90-100 g
- Fat: 120-130 g
- Carbohydrates: 150-160 g
Ingredients
- 1/2 cup cubed cheddar cheese
- 2 cups elbow pasta
- 1/4 cup minced onion
- 1 1/2 cups pineapple chunks (drained well, 1/2-inch pieces)
- 1/3 cup raisins
- 1 cup mayonnaise (I use Hellmann’s Light Mayonnaise)
- 1 lb shredded cooked chicken breast
- 1/3 cup sweet pickle relish (for a touch of tang and sweetness)
- 1/4 tsp black pepper
- 1/4 tsp salt
- 1 large carrot (finely diced)
Step 1: Cook the Macaroni
In a saucepan over medium heat, bring enough water to a boil with a sprinkle of salt.
Add the macaroni and cook according to the package directions, typically about 5-7 minutes or until al dente.
After cooking, drain the macaroni and rinse it with cold water to prevent sticking.
Allow the pasta to cool completely before proceeding to the next step.
Step 2: Combine Ingredients
In a large mixing bowl, place the cooled macaroni and combine it with the other ingredients for your dish.
Mix thoroughly until the mayonnaise and seasonings are well incorporated throughout the pasta.
This step is crucial for achieving a uniform flavor throughout the dish.
Step 3: Adjust Seasoning
Taste the mixture to ensure the seasoning is to your liking.
Adjust with additional salt and black pepper if needed to enhance the flavors.
Step 4: Chill and Serve
Cover the mixing bowl and refrigerate the prepared dish for at least an hour or longer.
This chilling process allows the flavors to meld together nicely.
Once the dish is well-chilled, serve and enjoy!
