I never knew quinoa could be anything other than that grain my health-conscious sister would bring to family potlucks. Growing up, we were strictly a rice and pasta family, and quinoa seemed like one of those trendy foods I’d never understand.
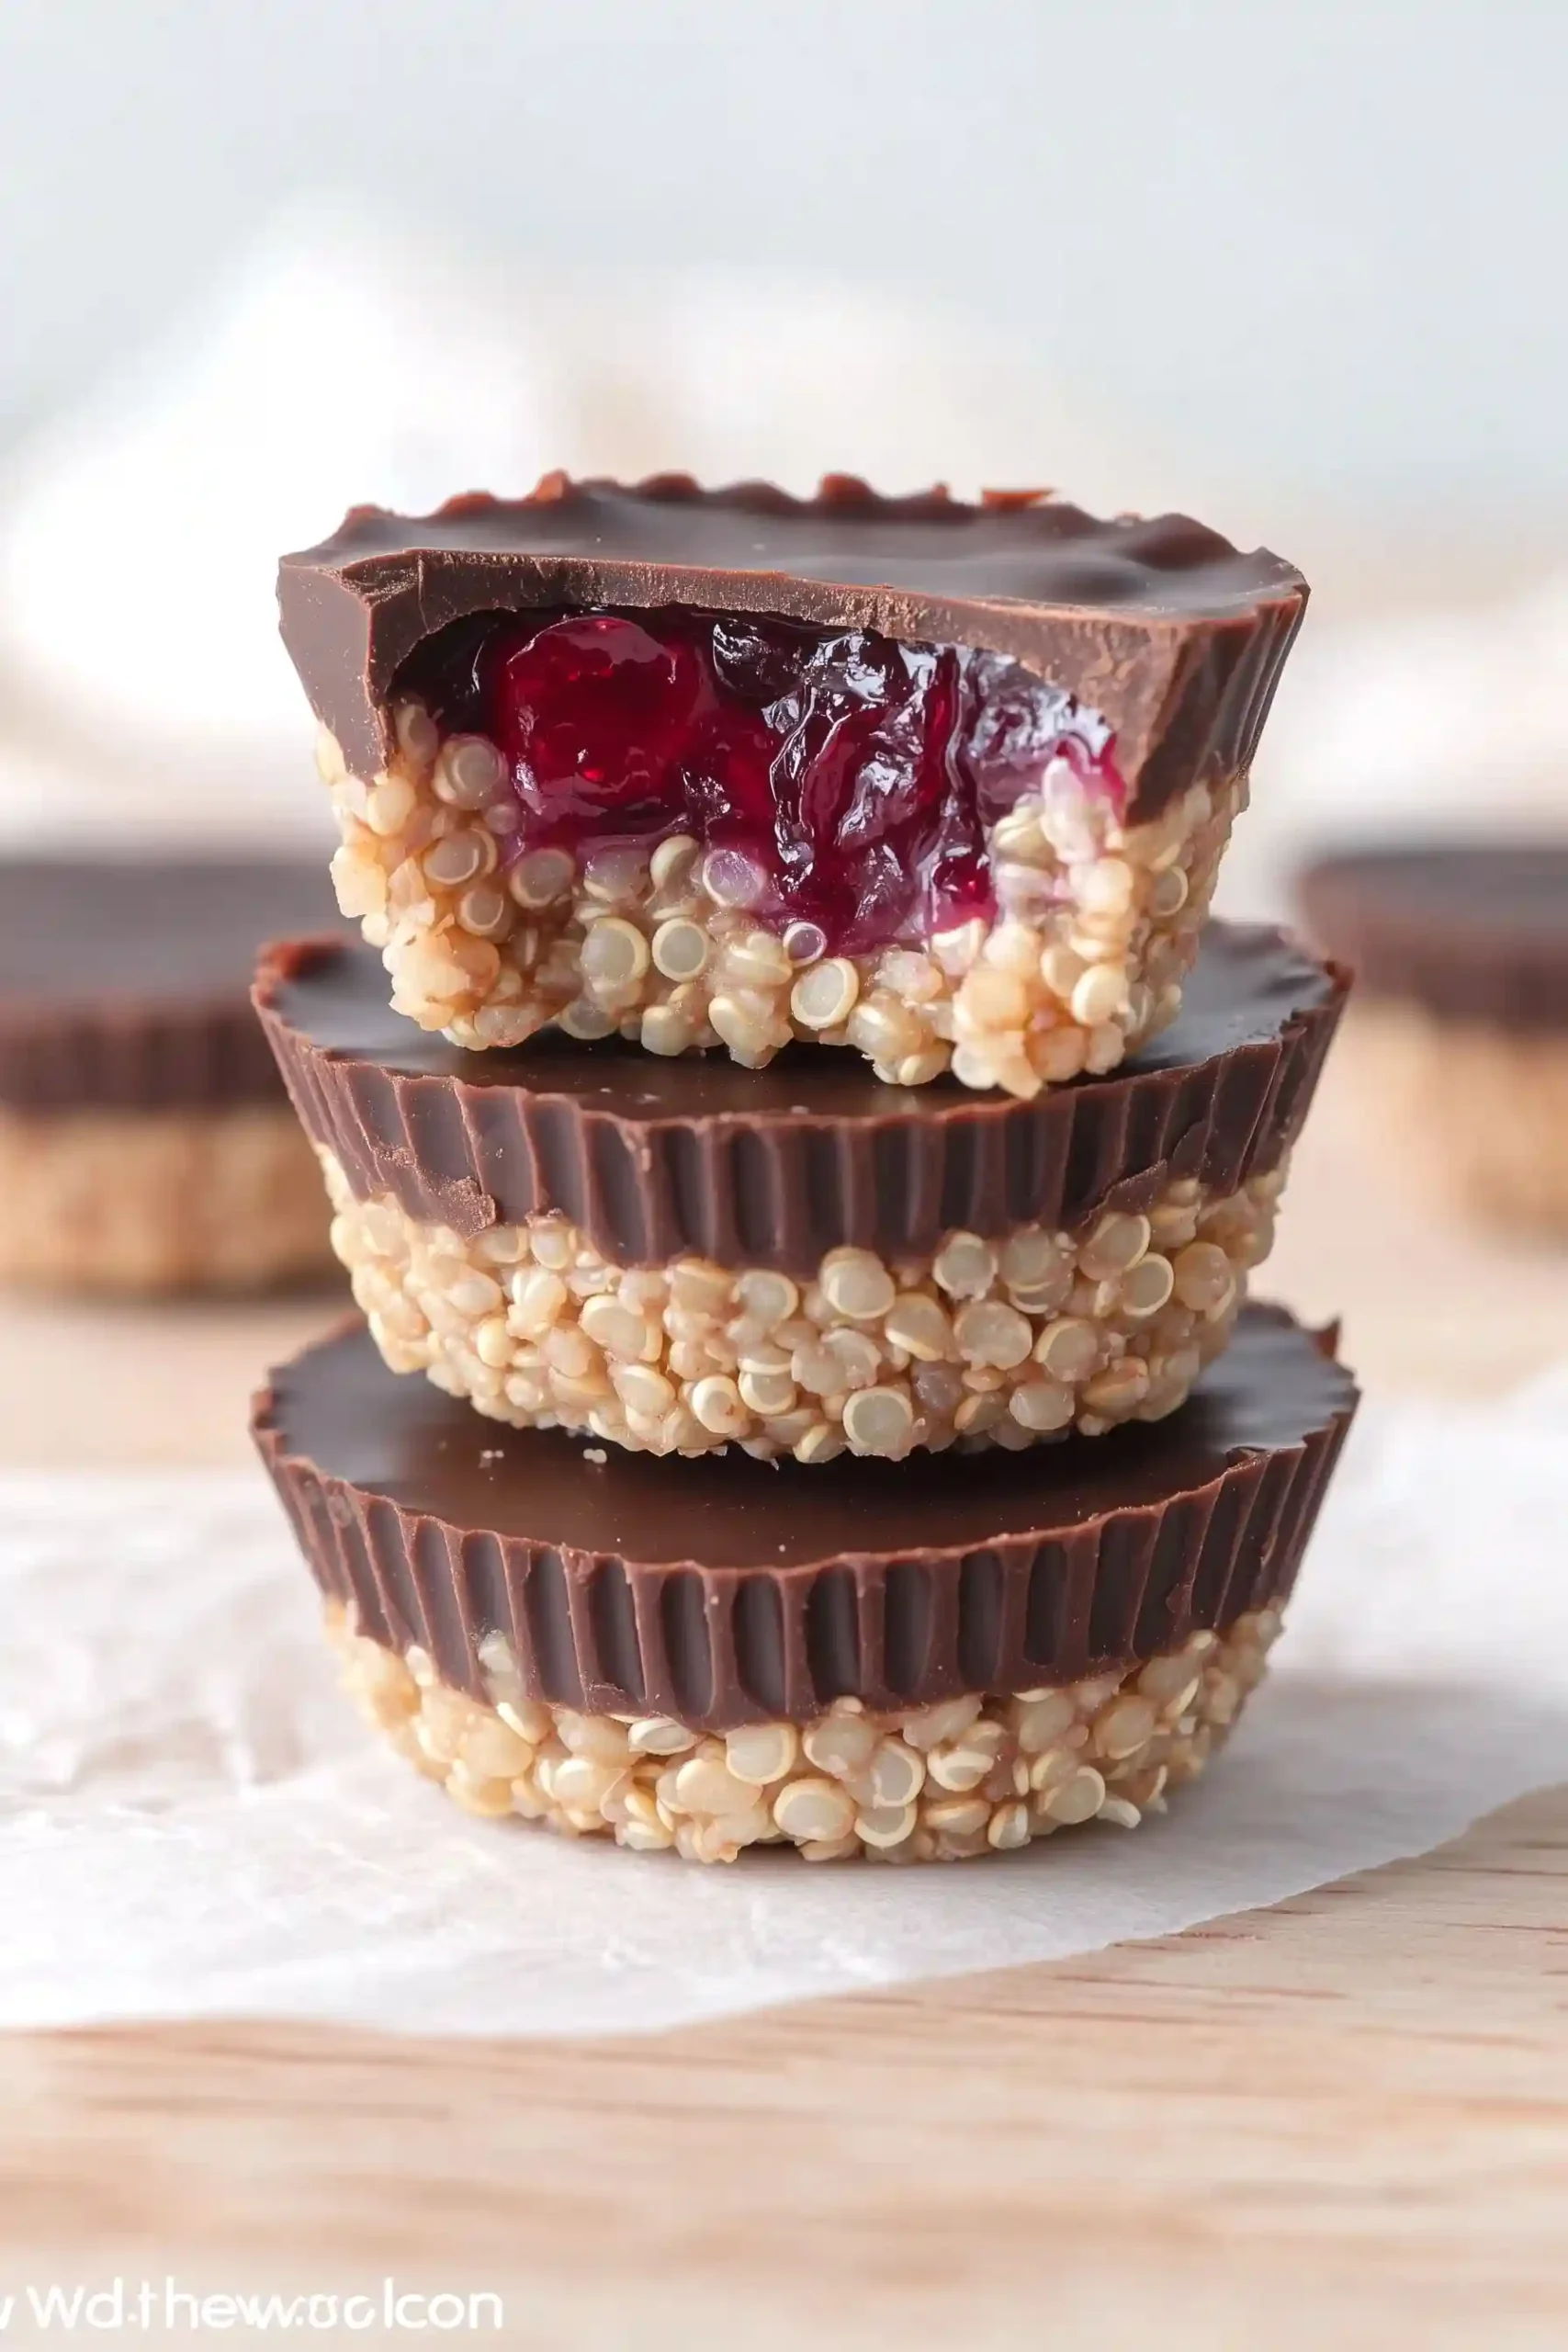
That was until I discovered you could puff it like popcorn and turn it into something magical with chocolate and peanut butter. These puffed quinoa cups aren’t just another healthy substitute – they’re actually really good, with a nice crunch that reminds me of those classic chocolate treats we all loved as kids.
Why You’ll Love These Peanut Butter Cups
- Healthier twist on a classic – These treats swap traditional graham crackers for protein-rich quinoa puffs and hemp seeds, making them a more nutritious choice than store-bought candy.
- No-bake recipe – You don’t need to turn on your oven – just mix, layer, and chill these treats for a fuss-free dessert.
- Allergy-friendly options – The recipe is naturally gluten-free and can easily be made vegan by using maple syrup instead of honey.
- Perfect make-ahead treat – These cups store well in the fridge or freezer, so you can make a batch and enjoy them throughout the week.
What Kind of Peanut Butter Should I Use?
Natural peanut butter is the way to go for these peanut butter cups, but you’ll want to make sure it’s well-stirred before measuring. The drippy kind that contains just peanuts (and maybe salt) works best here since it mixes more easily with the other ingredients. While chunky peanut butter can work, smooth varieties will give you the best texture and help your cups hold together better. Just avoid peanut butters with added oils or sugar – they can affect how well the cups set up and might make them too sweet. If your natural peanut butter is stored in the fridge, let it come to room temperature before using it so it blends more easily with the honey and other ingredients.
Options for Substitutions
This recipe is pretty flexible and you can make several swaps based on what you have in your pantry:
- Quinoa puffs: If you can’t find quinoa puffs, try using puffed rice, crispy rice cereal, or even crushed graham crackers. The texture might be slightly different, but they’ll all work well as a crunchy base.
- Hemp seeds: You can swap hemp seeds with chia seeds, flax seeds, or even chopped nuts. Or simply skip them if you don’t have any on hand.
- Peanut butter: Any nut or seed butter works great here – try almond butter, cashew butter, or sunflower seed butter for a nut-free version.
- Honey/maple syrup: These are interchangeable with agave nectar or brown rice syrup. Each will give a slightly different sweetness level, so adjust to taste.
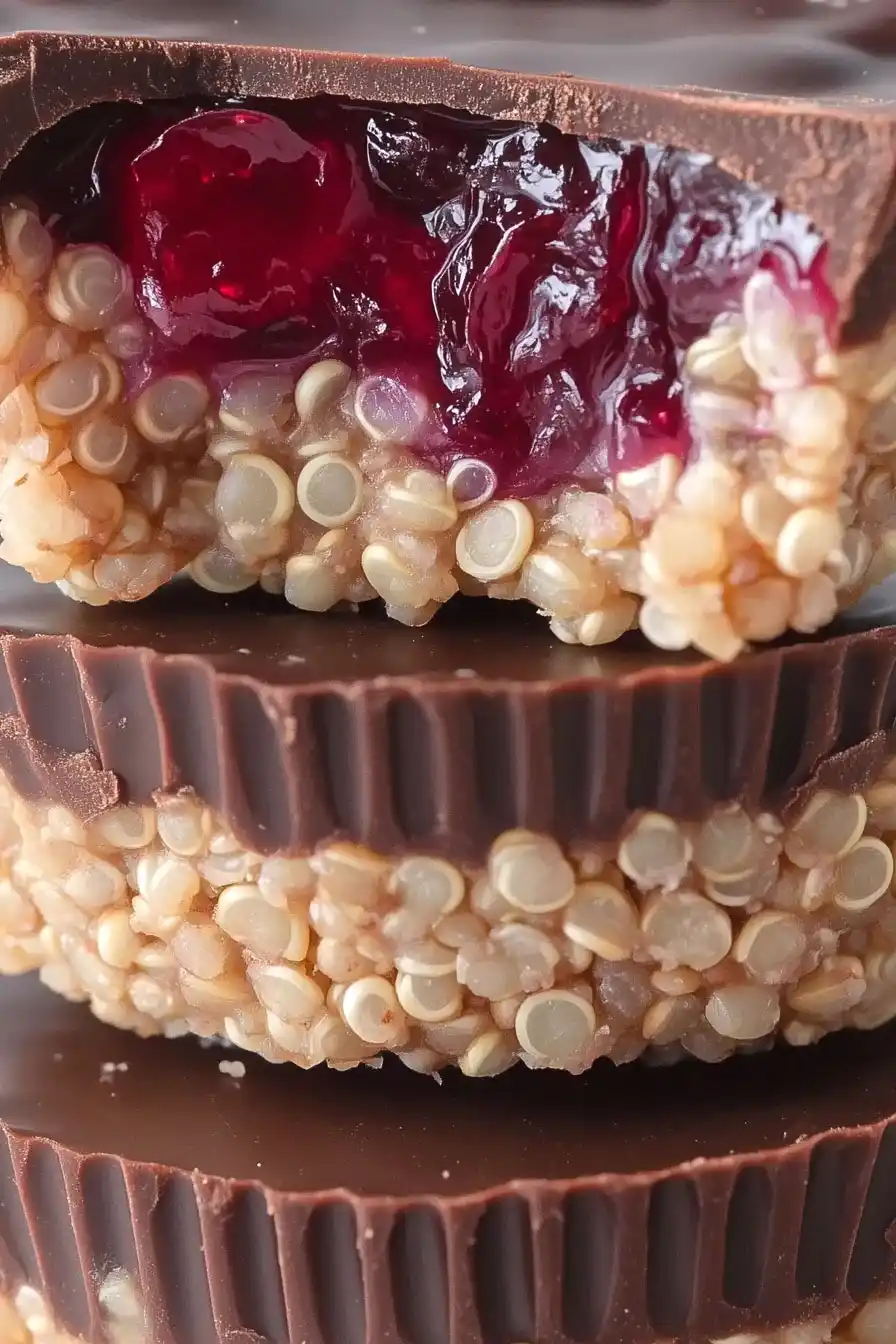
- Berry jam: Feel free to use any flavor of jam you like – strawberry, raspberry, or even apricot would work nicely. You could also skip it for a simpler treat.
- Semi-sweet chocolate chips: Dark chocolate, milk chocolate, or even white chocolate chips all work well. Just remember to keep the coconut oil ratio the same for proper melting.
- Coconut oil: You can substitute coconut oil with butter or shortening – just use the same amount to help the chocolate melt smoothly.
Watch Out for These Mistakes While Making
The biggest challenge when making puffed quinoa peanut butter cups is getting the right consistency for the peanut butter mixture – if it’s too runny, your cups won’t hold their shape, so make sure to stir the peanut butter well and avoid overheating it when mixing with honey. Another common mistake is rushing the freezing process between layers – each layer needs at least 15 minutes to set properly in the freezer, or you’ll end up with a messy mixture instead of distinct layers. When melting the chocolate, be careful not to overheat it or it will become grainy and lose its shine – use short bursts in the microwave or a double boiler method, stirring frequently until just melted. For the best results, store these treats in the freezer and let them sit at room temperature for 5 minutes before eating to achieve the perfect texture.
What to Serve With Peanut Butter Quinoa Cups?
These healthy-ish treats are perfect for serving alongside your afternoon coffee or tea break! Since they’re already packed with protein from the peanut butter and quinoa, they make a great post-workout snack on their own or paired with a cold glass of almond milk. If you’re hosting friends, try setting these out on a dessert board with some fresh berries and banana slices to complement the chocolate and peanut butter flavors. For a fun movie night spread, serve them alongside other bite-sized treats like popcorn or mixed nuts – just be warned, they might steal the show!
Storage Instructions
Keep Cool: These peanut butter cups need to stay chilled to maintain their shape. Place them in an airtight container and keep them in the fridge for up to 2 weeks. I like to separate layers with parchment paper to prevent them from sticking together.
Freeze: Want to save them for later? These treats freeze really well! Pop them in a freezer-safe container and they’ll stay good for up to 3 months. They’re actually pretty tasty straight from the freezer – like a cold, crunchy candy bar!
Serve: If you’re grabbing them from the freezer, let them sit at room temperature for about 5-10 minutes before eating. From the fridge, they’re ready to enjoy right away. Just keep in mind they’ll get soft if left out too long at room temperature, so it’s best to serve them straight from the fridge.
| Preparation Time | 15-20 minutes |
| Cooking Time | 10-15 minutes |
| Total Time | 55-75 minutes |
| Level of Difficulty | Easy |
Estimated Nutrition
Estimated nutrition for the whole recipe (without optional ingredients):
- Calories: 1000-1100
- Protein: 20-25 g
- Fat: 55-65 g
- Carbohydrates: 110-120 g
Ingredients
For the base:
- 2 tbsp honey (or maple syrup)
- 1 cup puffed quinoa
- 1 tsp vanilla extract (I use Simply Organic vanilla)
- pinch of salt (enhances flavor)
- 1/2 cup natural peanut butter (creamy, no added sugar)
- 2 tbsp hemp seeds
For the filling:
- 3 tbsp berry jam
For the topping:
- 1/2 cup semi-sweet chocolate chips (I like Ghirardelli)
- 2 tsp coconut oil
Step 1: Combine Dry Ingredients
Begin by combining puffed quinoa, hemp hearts, and a pinch of salt in a small mixing bowl.
Stir these dry ingredients together until they are evenly mixed.
Step 2: Mix in Wet Ingredients
Add natural peanut butter, honey, and pure vanilla extract to the mixture in the bowl.
Mix everything thoroughly with a spoon or spatula until well combined, forming a cohesive mixture.
Step 3: Prepare Muffin Tin
Line a mini muffin tin with mini muffin liners.
Spoon the quinoa mixture into each liner, pressing it down firmly.
Use the back of a 1/4 teaspoon measure to create a small indentation in the center of each filled liner for the jam.
Step 4: Add Jam Filling
Fill each indentation with 1/4 to 1/2 teaspoon of mixed berry jam, depending on your preference for sweetness and flavor intensity.
Ensure that the jam sits neatly in the center.
Step 5: Melt Chocolate
Using a double boiler, melt the semi-sweet chocolate chips along with the coconut oil.
Stir until the chocolate is completely smooth and silky, ensuring there are no lumps.
Step 6: Top with Chocolate and Chill
Pour the melted chocolate over each quinoa bite in the muffin tin.
Use the back of a spoon to gently spread and smooth out the chocolate layer over the top.
Place the muffin tin in the refrigerator to allow the bites to set and firm up, chilling for at least 30 minutes.
Step 7: Serve and Enjoy
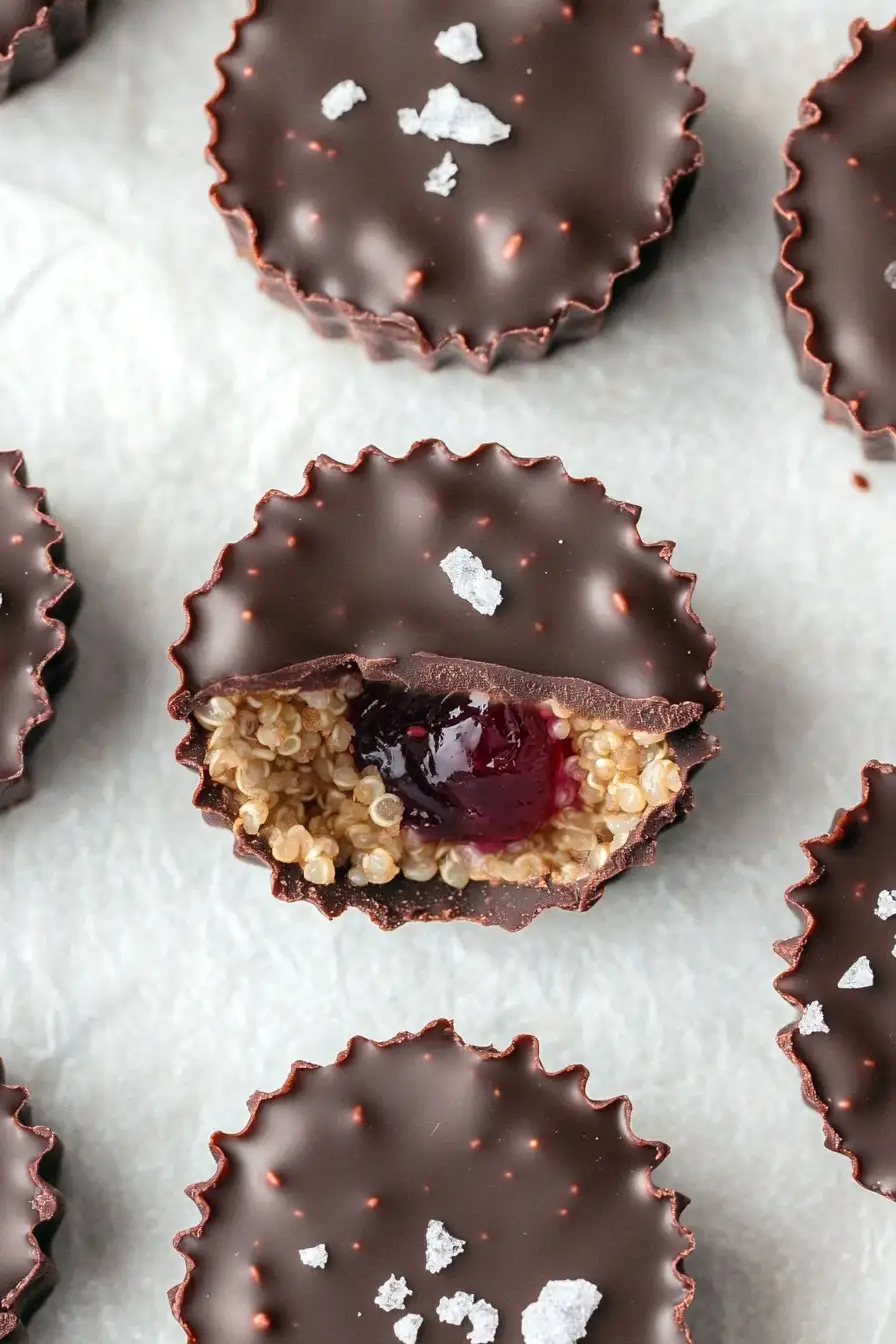
Once the chocolate has set, optionally sprinkle the bites with flaky salt for added flavor.
Serve these delicious bites straight from the fridge for a crisp texture.
Enjoy your homemade quinoa bites!
