Let’s be honest – putting together a veggie and hummus platter is one of the easiest ways to feed a crowd. I’ve lost count of how many times this simple appetizer has saved me when hosting last-minute gatherings or when my kids have friends over after school. There’s something so satisfying about arranging fresh vegetables around a bowl of creamy hummus.
What I love most about making these platters is that there’s no real cooking involved – just some washing, cutting, and arranging. I usually prep the veggies while I’m already in the kitchen making dinner the night before, storing them in containers until I need them. That way, when guests arrive, I can pull everything out and arrange it in just a few minutes.
Whether you’re hosting book club, having family over for game night, or just want something healthy to snack on during the week, this platter has you covered. And the best part? You can use whatever vegetables you have on hand – no stress about following an exact recipe.
Why You’ll Love This Veggie and Hummus Platter
- Quick and easy – This platter comes together in just 15 minutes, making it perfect for last-minute entertaining or a quick healthy snack.
- Fresh and healthy – Packed with protein-rich hummus and colorful vegetables, this platter is both nutritious and satisfying while being naturally vegan-friendly.
- Customizable – You can easily swap in your favorite vegetables or add different dippers like pita chips or cucumber slices to make it your own.
- Perfect for sharing – Whether it’s a casual get-together or a formal party, this platter is ideal for serving groups and always gets people gathering around the table.
What Kind of Chickpeas Should I Use?
For homemade hummus, canned chickpeas are totally fine and will save you tons of time compared to cooking dried ones. Any brand of canned chickpeas will work well, but look for ones packed in just water and salt rather than those with added preservatives. Taking an extra few minutes to remove the skins will give you the smoothest, creamiest hummus possible – just gently pinch each chickpea and the skin will slip right off. If you’re really short on time, you can skip the peeling step and still end up with perfectly good hummus, though it won’t be quite as silky smooth.
Options for Substitutions
This platter is super adaptable and you’ve got plenty of options for switching things up:
- Chickpeas and white beans: You can make this hummus with just chickpeas if you prefer – just double the amount. Or swap white beans for cannellini, navy, or great northern beans. They all work great!
- Tahini: While tahini is pretty important for authentic hummus flavor, you can use unsweetened sunflower seed butter in a pinch. The taste will be different, but still good!
- Za’atar: If you can’t find za’atar, mix some dried thyme with sesame seeds and a pinch of sumac. Or simply top with dried oregano and a sprinkle of sesame seeds.
- Naan: Any flatbread works here – try pita, lavash, or even toasted baguette slices. For a gluten-free option, use rice crackers or veggie chips.
- Veggies: The beauty of a veggie platter is that you can use whatever’s in season! Try bell peppers, cucumber slices, cherry tomatoes, or celery sticks. In winter, roasted veggies are great too.
- Aquafaba: If you’re not saving the chickpea liquid, just use plain water. Start with 3 tablespoons and add more if needed for the right consistency.
Watch Out for These Mistakes While Making
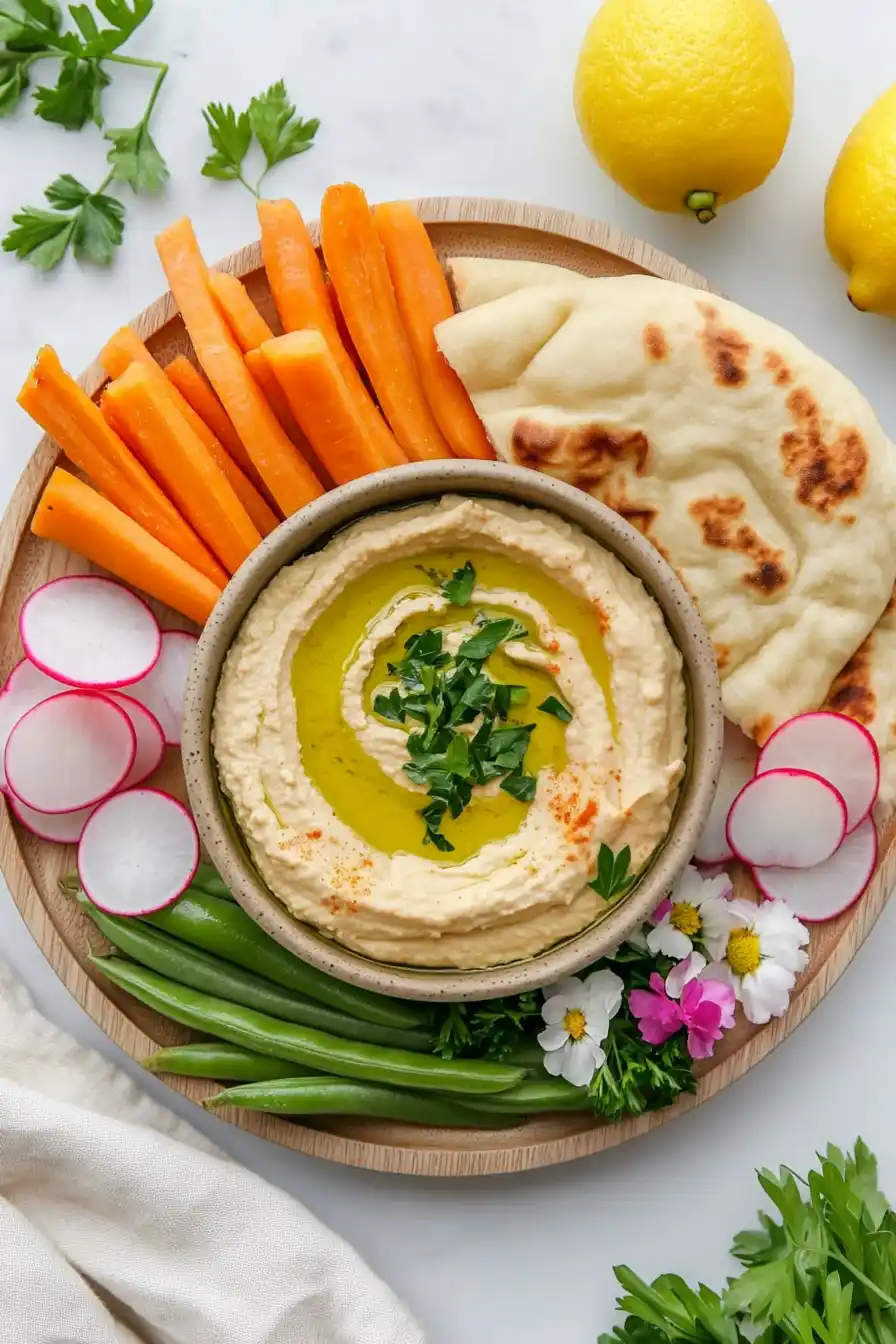
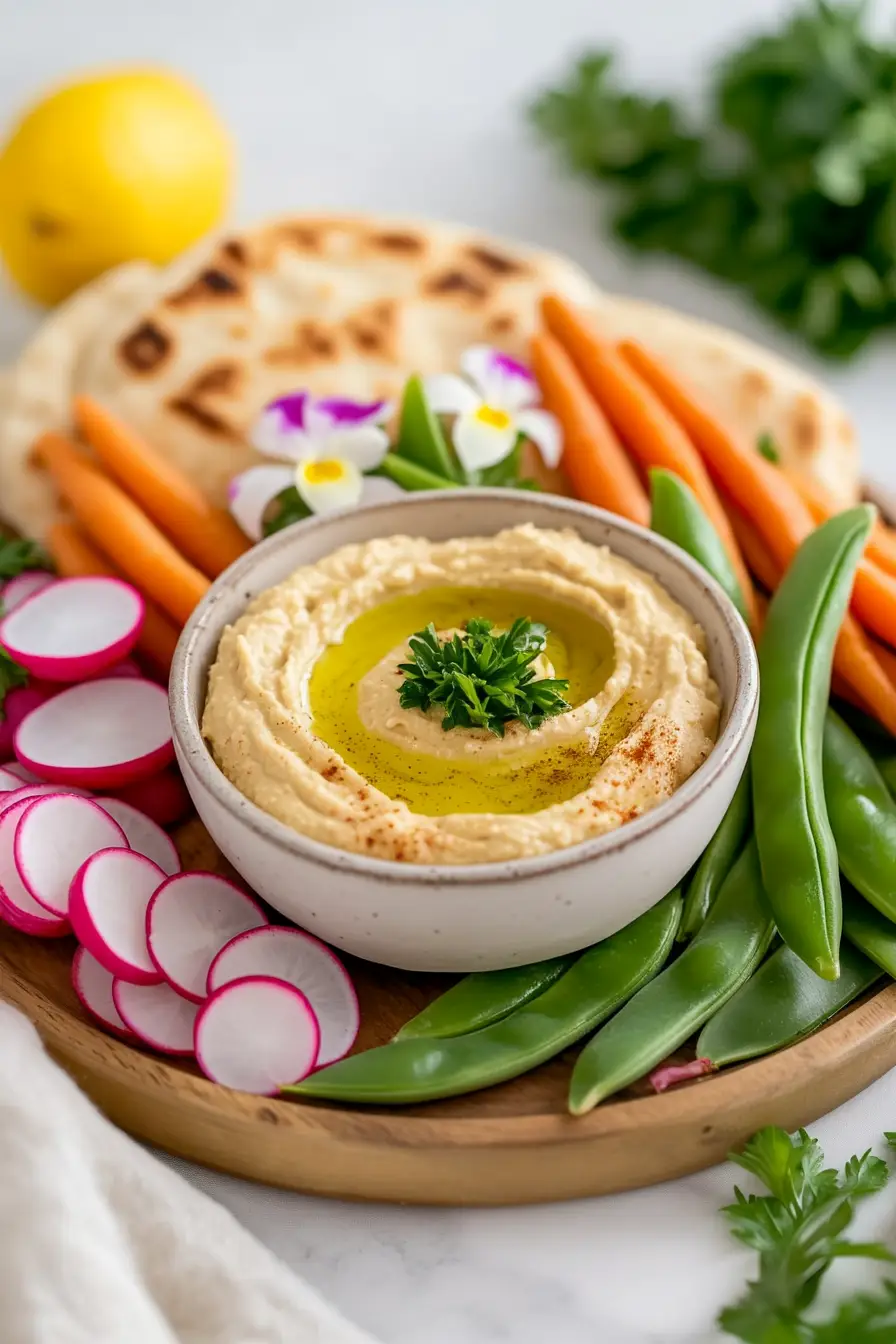
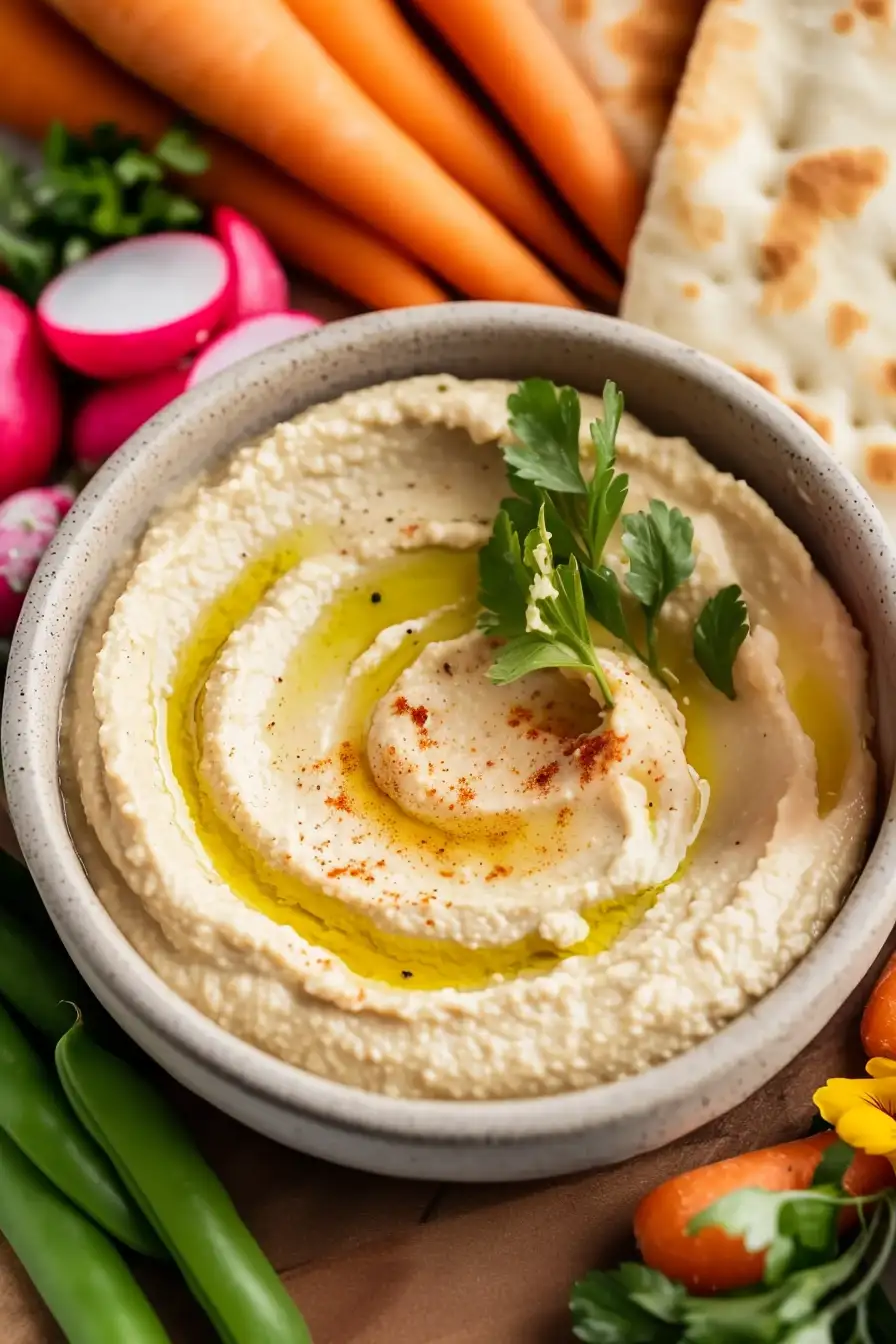
The biggest mistake when making hummus is skipping the step of removing chickpea skins, which prevents you from achieving that smooth, creamy texture – take those extra 10 minutes to pop off the skins, and you’ll notice a remarkable difference in the final product. A common error is adding all the liquid at once, which can make your hummus too runny – instead, start with half the recommended amount of aquafaba and gradually add more until you reach your desired consistency. When it comes to the garlic, avoid throwing whole cloves directly into your food processor, as this can result in harsh, uneven garlic flavor – instead, mince the garlic first or better yet, let it sit in the lemon juice for 5-10 minutes to mellow out its raw bite. For the perfect presentation, don’t just dump the vegetables on the platter – arrange them thoughtfully in groups, creating height and visual interest by varying the lengths of your vegetable cuts and leaving some space between different items.
What to Serve With a Veggie and Hummus Platter?
A veggie and hummus platter is already a fantastic appetizer spread, but you can make it even better with some tasty additions! Warm pita triangles or fluffy flatbread make perfect dipping companions alongside the naan that’s already included. For extra crunch and variety, try adding some salty pretzels, crispy pita chips, or seasoned crackers to the mix. If you want to make it more of a meal, serve it as part of a Mediterranean spread with falafel, Greek salad, or grilled chicken skewers – this way, everyone can mix and match their favorites while sharing and snacking.
Storage Instructions
Keep Fresh: The homemade hummus will stay fresh in an airtight container in the fridge for up to 5 days. Pro tip: drizzle a thin layer of olive oil on top before storing to keep it from drying out. For the best texture, give it a quick stir before serving.
Prep Ahead: You can prep all your veggies up to 2 days in advance – just keep them in separate containers with a slightly damp paper towel to maintain their crunch. The carrots and snap peas do especially well when stored in water in the fridge, while the radishes are best kept dry.
Assemble: For the freshest presentation, arrange your platter just before serving. If you have leftover cut vegetables, store them separately from the hummus – this way they’ll stay crisp and ready for your next snack session. The toasted naan is best prepared right before serving, but if needed, you can store it in a paper bag at room temperature for a day.
| Preparation Time | 10-15 minutes |
| Cooking Time | 0 minutes |
| Total Time | 10-15 minutes |
| Level of Difficulty | Easy |
Estimated Nutrition
Estimated nutrition for the whole recipe (without optional ingredients):
- Calories: 900-1000
- Protein: 30-40 g
- Fat: 50-60 g
- Carbohydrates: 80-90 g
Ingredients
For the hummus:
- 1 can white beans
- 3 to 4 tbsp fresh lemon juice
- 1 can chickpeas (safely drained, reserving 5 tbsp liquid)
- 3 to 4 garlic cloves (peeled and smashed for easier blending)
- 5 tbsp chickpea liquid
- 5 tbsp olive oil
- 3/4 tsp ground cumin
- 1/2 cup tahini (I use Soom Foods tahini for its smooth consistency)
- 3/4 to 1 tsp salt
For the garnish:
- fresh lemon juice
- 1 tsp za’atar
- olive oil (a good quality extra virgin for drizzling)
- 1 tbsp fresh parsley (finely chopped)
For serving:
- 3 rainbow carrots (scrubbed and sliced into sticks)
- 4 to 5 radishes (thinly sliced using a mandoline if possible)
- 1 cup sugar snap peas
- 1 piece naan (toasted until golden, then torn into pieces)
Step 1: Blend the Ingredients
In a food processor, combine the chickpeas, white beans, tahini, 1/4 cup of olive oil, 1/4 cup of aquafaba, lemon juice, garlic cloves, 3/4 teaspoon of salt, and cumin.
Blend the mixture until it reaches a smooth and creamy consistency.
If the hummus appears too thick, gradually add an extra tablespoon each of olive oil and aquafaba to achieve the desired texture.
Step 2: Adjust the Seasoning
Taste the blended hummus and adjust the seasoning if necessary.
You may want to add the extra 1/4 teaspoon of salt if you prefer a more pronounced flavor.
Blend again briefly to incorporate any additional seasoning.
Step 3: Transfer and Garnish
Transfer the hummus to a serving bowl.
For a lovely presentation and additional flavor, drizzle some olive oil and lemon juice on top of the hummus.
Garnish with fresh parsley for a pop of color and freshness.
This batch makes enough for 2 serving bowls, so you can save half for later if desired.
Step 4: Serve and Enjoy
Place the hummus bowl on a platter and serve it with naan and fresh vegetables such as sliced cucumbers, carrots, or bell peppers for dipping.
Enjoy your homemade hummus with a delicious and nutritious meal or snack.
