Growing up, I thought donuts were something you could only get at the local bakery. My mom never made them at home – she said they were too complicated and messy. But one lazy Sunday morning, I discovered you could make pretty good donuts with just Bisquick and a few pantry staples.
Turns out, these Bisquick donuts are about as simple as it gets. No fancy equipment or deep fryers needed – just a mixing bowl and some basic ingredients. For anyone who’s nervous about making donuts from scratch, this recipe is perfect for building your confidence in the kitchen.
Why You’ll Love These Bisquick Donuts
- Quick preparation – These donuts come together in just 20 minutes – perfect for those morning sweet cravings when you don’t want to wait for yeast dough to rise.
- Simple pantry ingredients – If you’ve got a box of Bisquick in your pantry, you’re already halfway there! Most other ingredients are basic kitchen staples you likely have on hand.
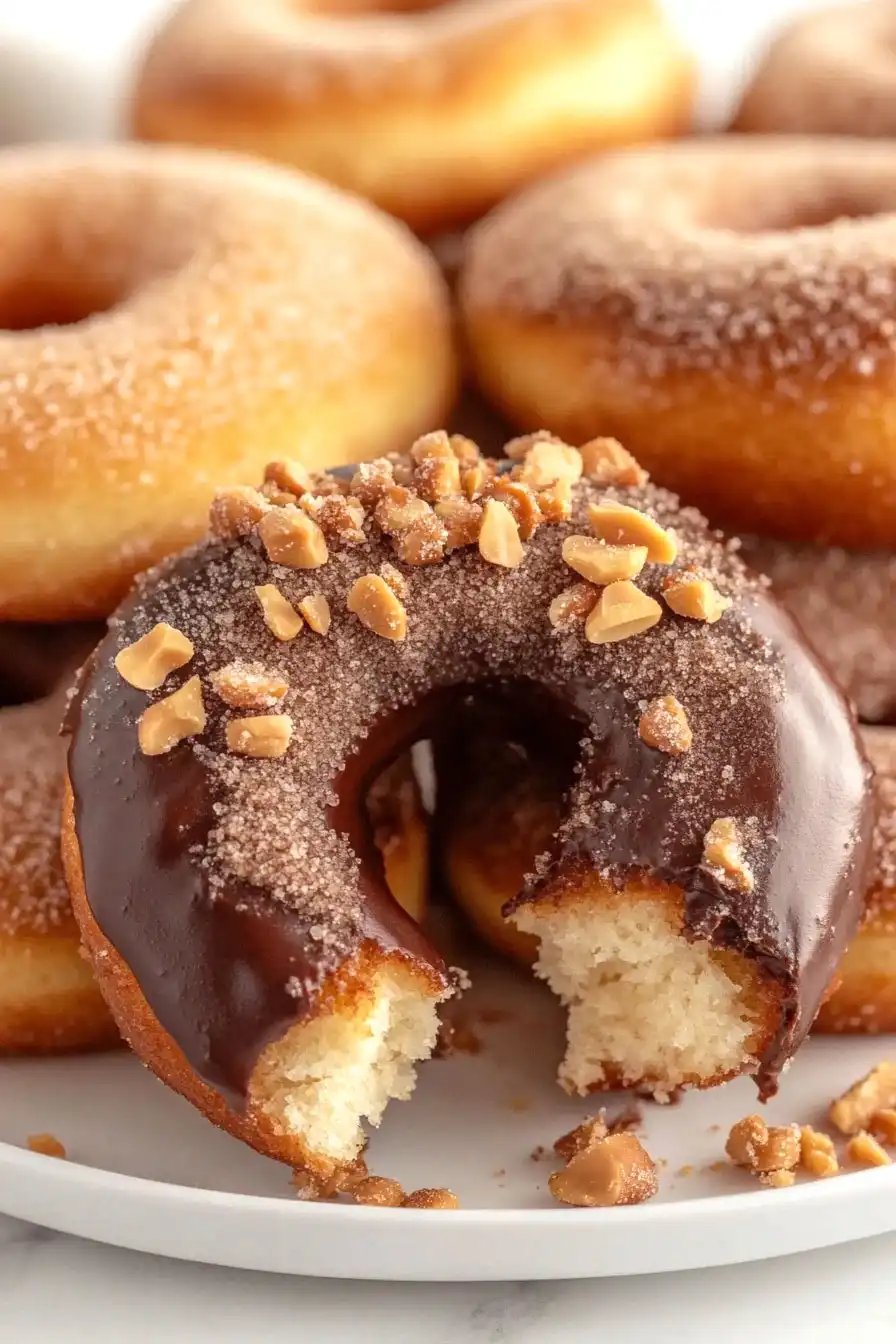
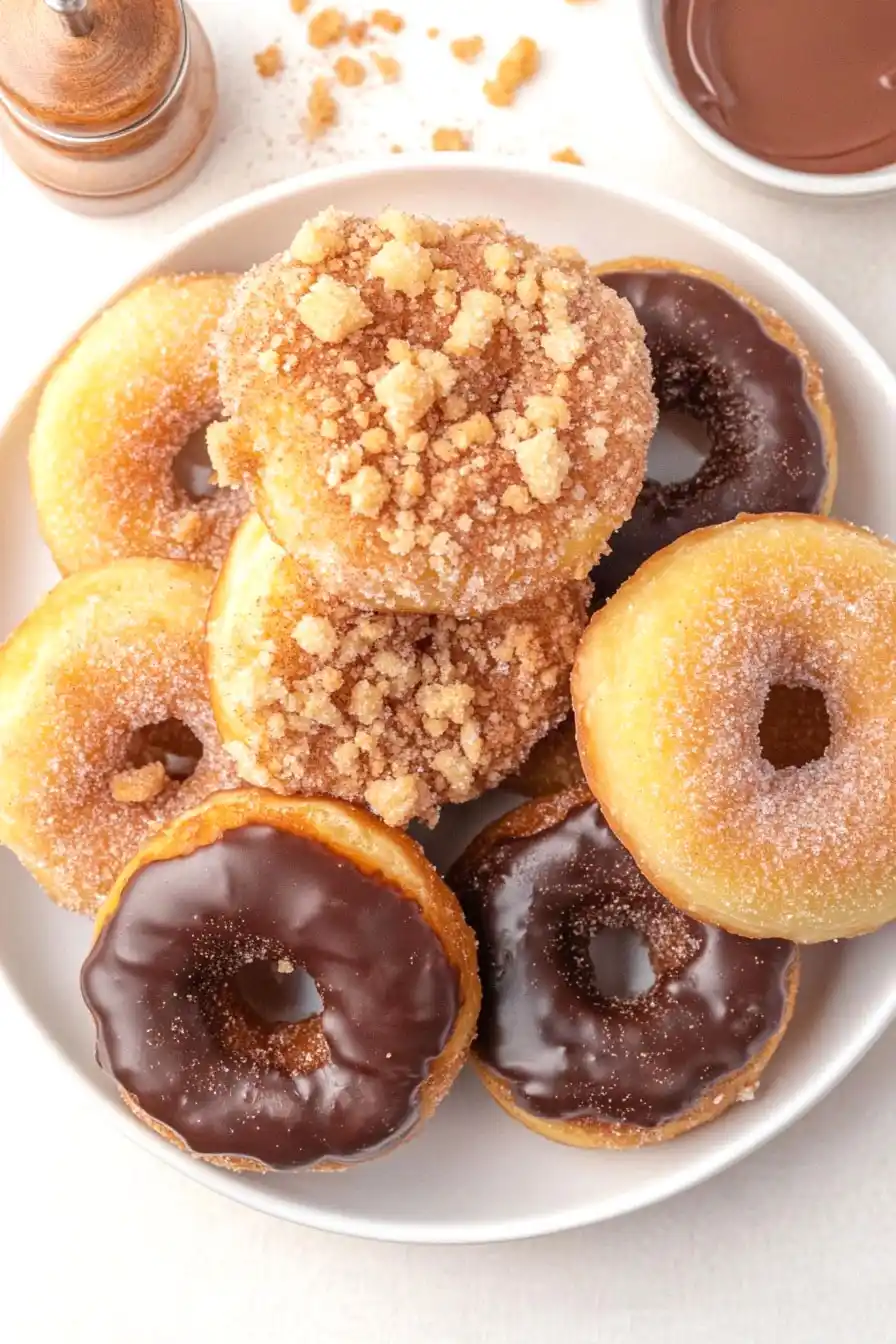
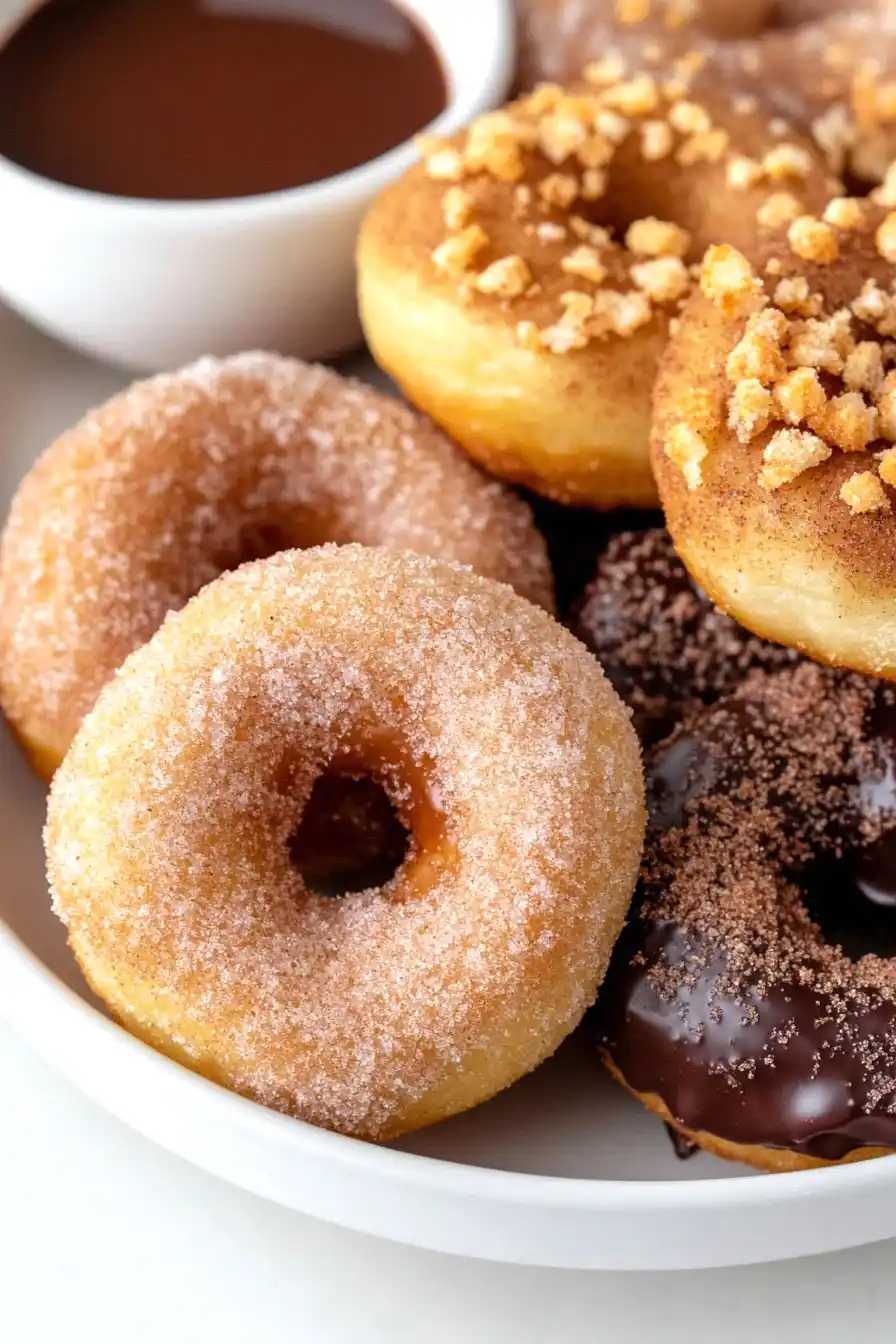
- Customizable options – You can make these gluten-free by using the alternative mix, and they’re easy to dress up with different toppings like cinnamon sugar, glazes, or chocolate.
- No special equipment needed – Unlike traditional donuts that require a deep fryer, these can be made with just basic baking tools you already have in your kitchen.
- Kid-friendly baking project – The simple mixing and measuring make this a perfect recipe to make with kids – they’ll love helping to create their own breakfast treats.
What Kind of Bisquick Should I Use?
Regular Bisquick and Gluten-Free Bisquick will both work great for these donuts, so you can choose based on your dietary needs. The original Bisquick mix tends to create a slightly fluffier texture, while the gluten-free version still produces good results but might be a touch more dense. When measuring your Bisquick, remember to spoon it into the measuring cup and level it off with a knife rather than scooping directly from the box – this prevents using too much mix which could make your donuts heavy. If you’re storing your Bisquick for a while, keep it in an airtight container to prevent it from absorbing moisture, which can affect how your donuts turn out.
Options for Substitutions
Making these donuts but missing some ingredients? Here are some handy swaps you can try:
- Bisquick baking mix: If you’re out of Bisquick, you can use any all-purpose baking mix, or make your own by mixing 1½ cups all-purpose flour with 2 teaspoons baking powder, ½ teaspoon salt, and 2 tablespoons cold butter cut into the flour mixture.
- Plain yogurt: You can substitute plain yogurt with sour cream, Greek yogurt, or buttermilk. If using Greek yogurt, thin it slightly with a bit of milk to match regular yogurt’s consistency.
- Vanilla essence: Out of vanilla? Try using almond extract (use half the amount), maple syrup, or even a touch of cinnamon for flavor.
- Frozen butter: Regular cold butter works fine too – just make sure it’s very cold. You can also use coconut oil, but it should be solid and cold.
- Gluten-free baking mix: You can use regular all-purpose flour if you don’t need the recipe to be gluten-free. Just remember that the texture might be slightly different.
- Milk: Feel free to use any type of milk – whole, 2%, almond, or soy milk all work well. Just note that non-dairy alternatives might make the donuts slightly less rich.
Watch Out for These Mistakes While Baking
The biggest challenge when making Bisquick donuts is overmixing the batter – stir just until the ingredients are combined, as excessive mixing will result in tough, dense donuts instead of light and fluffy ones.
Temperature control is crucial – if your oil isn’t hot enough (around 350°F), the donuts will absorb too much oil and become greasy, but if it’s too hot, they’ll brown too quickly on the outside while remaining raw inside.
Keep an eye on portion size when dropping the batter into the oil – using too much will give you donuts that are crispy on the outside but doughy in the middle, so aim for about 2 tablespoons of batter per donut.
For the best texture, make sure your egg and milk are at room temperature before mixing, and don’t skip the resting time – letting the batter sit for 5-10 minutes allows the Bisquick to properly hydrate and results in more tender donuts.
What to Serve With Bisquick Donuts?
These homemade Bisquick donuts are perfect for breakfast or brunch, and they pair wonderfully with your morning coffee or tea. A cold glass of milk is always a classic choice, especially for kids who’ll love dunking these sweet treats. For a complete breakfast spread, serve these donuts alongside some fresh fruit like strawberries or sliced bananas to balance out the sweetness. If you’re hosting a brunch, consider setting up a hot chocolate station or offering fresh-squeezed orange juice to give your guests different beverage options to enjoy with their donuts.
Storage Instructions
Keep Fresh: These homemade Bisquick donuts are best enjoyed the same day, but you can keep them in an airtight container at room temperature for up to 2 days. Place a paper towel in the container to absorb any excess moisture and keep them from getting soggy.
Refrigerate: If you’ve added any cream-based toppings or fillings, store your donuts in the fridge for up to 3 days. Just remember to bring them to room temperature before eating – they’ll taste much better!
Make Ahead: You can prepare the donut batter the night before and keep it covered in the fridge. When you’re ready to make them, just give the batter a quick stir before cooking. This is perfect for fresh, warm donuts in the morning without all the prep work!
| Preparation Time | 10-15 minutes |
| Cooking Time | 6-8 minutes |
| Total Time | 16-23 minutes |
| Level of Difficulty | Easy |
Estimated Nutrition
Estimated nutrition for the whole recipe (without optional ingredients):
- Calories: 1500-1700
- Protein: 40-50 g
- Fat: 50-60 g
- Carbohydrates: 220-240 g
Ingredients
- 3/4 cup milk
- 1.5 cups Bisquick baking mix (I like Betty Crocker original)
- 1 large egg (room temperature, about 70°F, for better emulsion)
- 1 tbsp frozen butter (grated for easier incorporation)
- 1 tsp vanilla extract
- 1 tbsp granulated sugar
- 1/8 tsp cinnamon
Step 1: Prepare Butter and Preheat Oven
Start by placing a stick of butter in your freezer if you haven’t already.
You can also cut off 1 tablespoon and place it in a freezer-safe bowl to freeze.
Preheat your oven to 400°F (200°C).
While waiting for the oven to heat, use your favorite non-stick cooking spray to lightly coat your donut pan.
Step 2: Mix Dry Ingredients
In a large mixing bowl, combine the Bisquick, white granulated sugar, and ground cinnamon.
Use a whisk to thoroughly blend these dry ingredients together, ensuring an even distribution of ingredients.
Set this bowl aside for now.
Step 3: Incorporate Wet Ingredients
In a small bowl, whip an egg using a fork or a small whisk until it is well beaten.
Pour the whipped egg into the bowl of dry ingredients.
Add the vanilla extract and milk into the large bowl as well.
Using a wooden spoon, gently stir the mixture until it becomes smooth.
If the batter appears too dry, add more milk, one tablespoon at a time, until you achieve the desired consistency.
Step 4: Add Frozen Butter
Remove the frozen butter from the freezer and grate it directly over the batter.
Gently fold the grated butter into the batter to incorporate it evenly.
This step will add richness and flakiness to the donuts.
Step 5: Fill and Bake the Donuts
Carefully fill each mold in the prepped donut pan to about 2/3 full with the batter.
Place the pan in the preheated oven and bake for 6 to 8 minutes, or until the donuts start to brown slightly on the sides.
Step 6: Cool, Dip, and Serve
After baking, let the donuts cool in the pan for a few minutes before transferring them to a wire rack.
Once cooled, dip the donuts in a cinnamon-sugar mixture or your favorite chocolate glaze for an extra layer of flavor.
Serve and enjoy your homemade Bisquick donuts!
