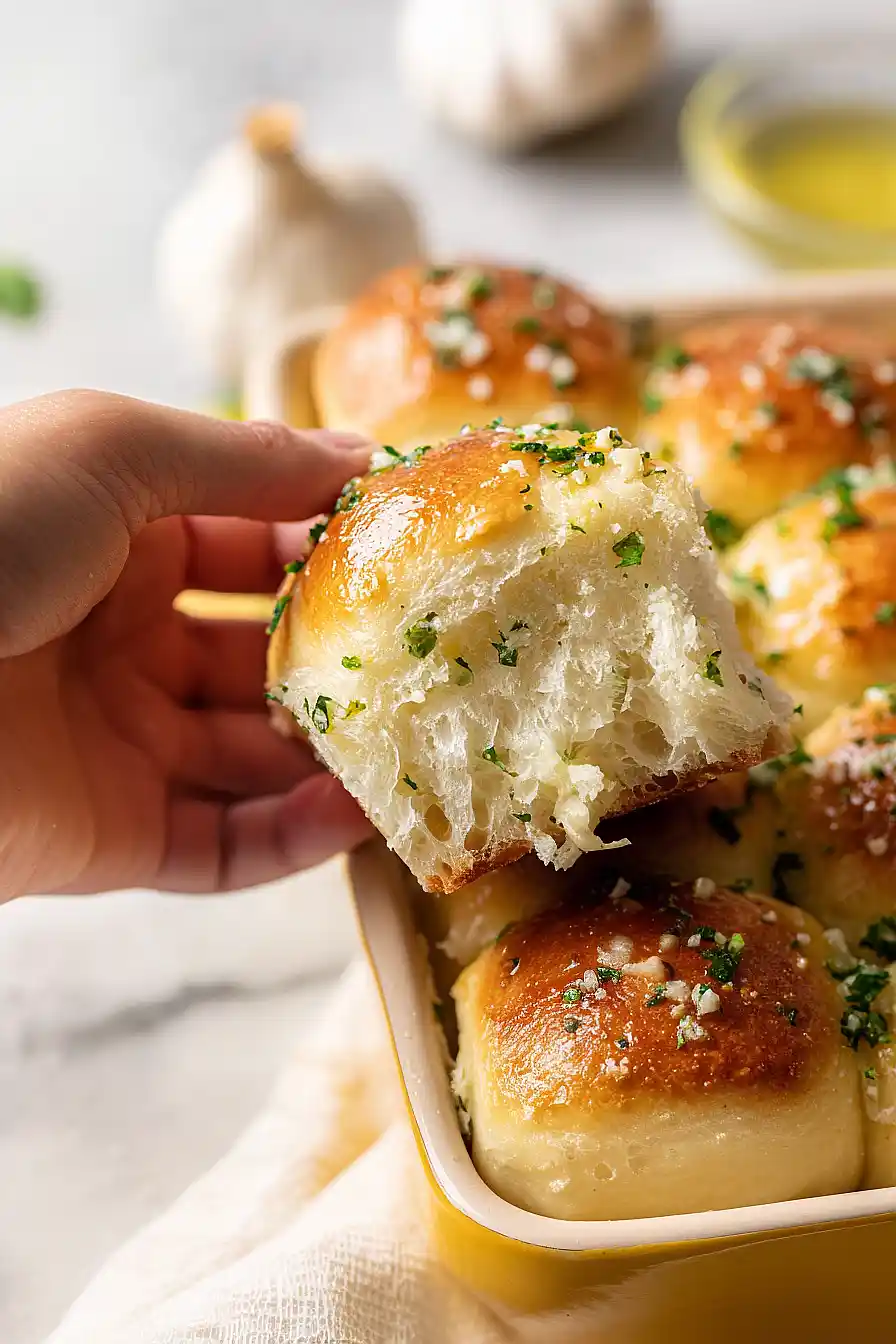
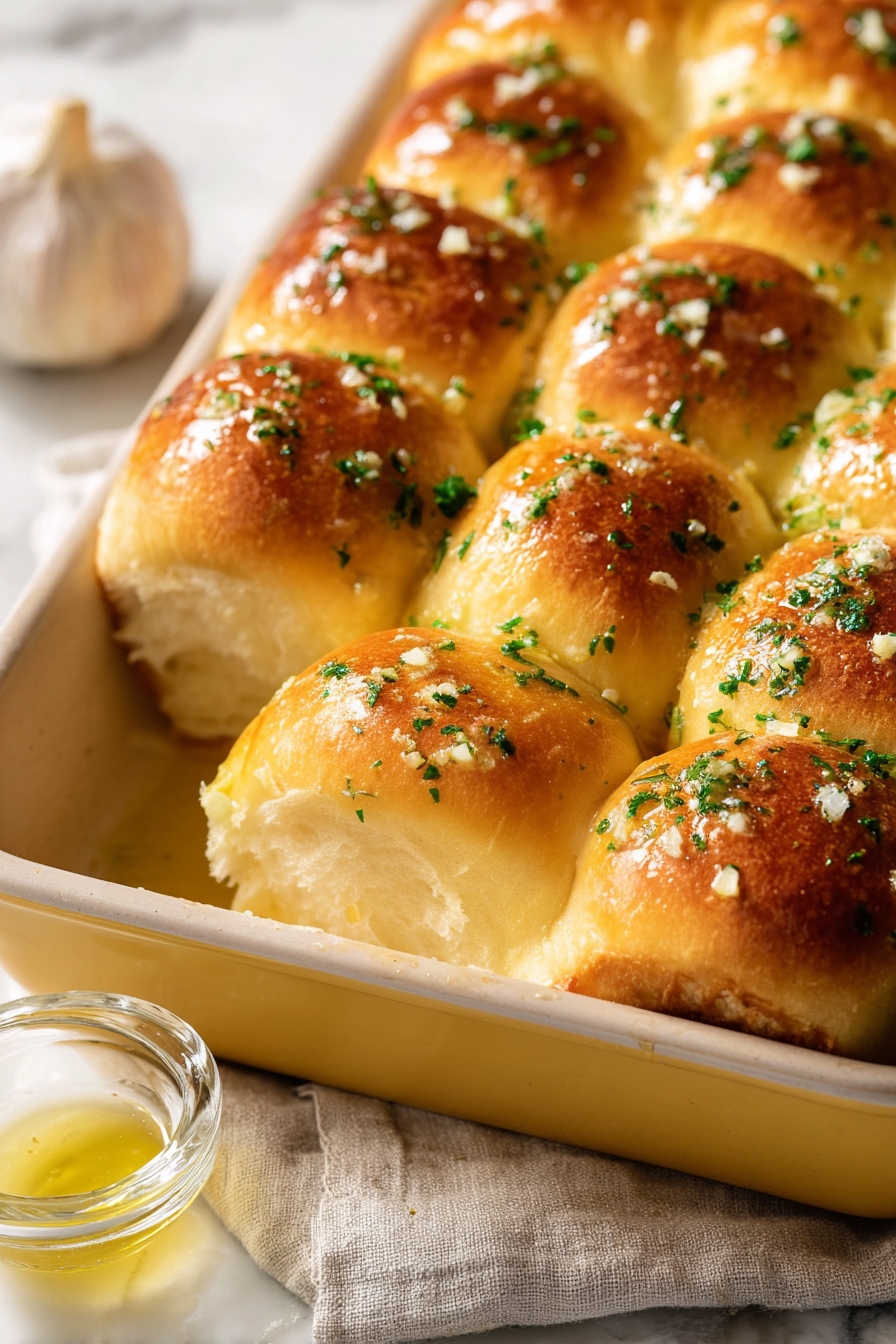
Here are my homemade garlic bread rolls, with a soft, fluffy dough made from scratch, brushed with plenty of melted butter, fresh garlic, parsley, and parmesan cheese.
These garlic bread rolls are always the first thing to disappear at our dinner table. I’ve started making a double batch because my kids will eat them with just about anything. They’re perfect alongside pasta, soups, or honestly, just on their own as a snack.
Why You’ll Love These Garlic Bread Rolls
- Fresh, homemade goodness – There’s nothing quite like pulling warm, fluffy rolls straight from your oven. The smell alone will have everyone gathering in the kitchen.
- Packed with garlic flavor – These rolls get garlic in both the dough and brushed on top, so every bite is loaded with that irresistible garlicky taste we all crave.
- Perfect for any meal – Whether you’re serving them alongside pasta, soup, or at a holiday dinner, these rolls are always a hit and disappear fast.
- Simple ingredients – You probably have most of these pantry staples on hand already, making this an easy recipe to whip up whenever the craving strikes.
What Kind of Flour Should I Use?
All-purpose flour is your best bet for these garlic bread rolls, and it’s probably what you already have in your pantry. You can use either bleached or unbleached all-purpose flour – both will give you soft, fluffy rolls with a nice structure. If you’re measuring by volume rather than weight, make sure to spoon the flour into your measuring cup and level it off with a knife instead of scooping directly from the bag, which can pack in too much flour and make your rolls dense. Bread flour can work in a pinch if that’s all you have, though your rolls might turn out slightly chewier rather than soft and pillowy.
Options for Substitutions
These garlic bread rolls are pretty forgiving when it comes to swaps:
- Fresh parsley: If you don’t have fresh parsley, dried parsley works fine – just use about 1 tablespoon instead of 3 tablespoons fresh. You could also try fresh basil or chives for a different flavor twist.
- Whole or 2% milk: Any milk will work here, including skim or even non-dairy options like oat or almond milk. Just make sure to warm it to 110°F so the yeast activates properly.
- Instant yeast: You can use active dry yeast instead – just use the same amount and let it proof in the warm milk with a pinch of sugar for about 5 minutes before adding to the flour.
- All-purpose flour: Stick with all-purpose flour for this recipe – bread flour will make the rolls too chewy, and other flours won’t give you the right texture.
- Fresh garlic: In a pinch, you can use garlic powder (about 1 teaspoon per tablespoon of minced garlic), but fresh garlic really makes these rolls shine, so try to use it if possible.
Watch Out for These Mistakes While Baking
The biggest mistake people make with garlic bread rolls is burning the garlic when making the butter mixture – garlic burns quickly and turns bitter, so keep the heat on medium-low and remove it from the stove as soon as it becomes fragrant, usually within 1-2 minutes.
Another common error is not warming your milk to the right temperature; if it’s too hot (above 120°F), it will kill the yeast and your rolls won’t rise, but if it’s too cool, the dough will take forever to proof.
Don’t skip the kneading time either – a full 10-12 minutes develops the gluten structure that gives these rolls their soft, pillowy texture, and you’ll know the dough is ready when it’s smooth and springs back when you poke it.
Finally, resist the urge to overbake them; pull the rolls out when they’re just golden brown on top, as they’ll continue cooking slightly from residual heat and you want to keep that soft, tender crumb inside.

What to Serve With Garlic Bread Rolls?
These garlic bread rolls are perfect alongside just about any pasta dish, whether it’s a simple marinara, creamy alfredo, or hearty bolognese. They’re also great for soaking up the broth from soups and stews – think minestrone, Italian wedding soup, or even a simple chicken noodle. I love serving them with a big Caesar salad for a lighter meal, or you can use them to make mini sandwiches with sliced deli meats and cheese. They also work really well as a side for grilled chicken or fish when you want something more filling than regular dinner rolls.
Storage Instructions
Store: These garlic bread rolls are best enjoyed fresh, but they’ll keep at room temperature in an airtight container or bag for up to 2 days. After that, they start to lose their soft, fluffy texture and can get a bit stale.
Freeze: You can freeze these rolls for up to 3 months in a freezer-safe bag or container. I like to freeze them after baking and cooling completely, so they’re ready whenever I need them for a quick dinner side.
Reheat: To bring back that fresh-baked warmth, wrap the rolls in foil and heat them in a 350°F oven for about 10 minutes. If they’re frozen, let them thaw at room temperature first, then warm them up. You can also microwave individual rolls for about 15-20 seconds, but the oven method gives you that nice crispy outside again.
| Preparation Time | 30-40 minutes |
| Cooking Time | 20-30 minutes |
| Total Time | 90-150 minutes |
| Level of Difficulty | Medium |
| Servings | 12 rolls |
Estimated Nutrition
Estimated nutrition for the whole recipe (without optional ingredients):
- Calories: 2100-2400
- Protein: 50-55 g
- Fat: 85-95 g
- Carbohydrates: 295-325 g
Ingredients
For the dough:
- 3 3/4 cups all-purpose flour
- 1 cup whole milk (lukewarm, about 110°F)
- 1 large egg
- 2 1/4 tsp active dry yeast
- 1 1/2 tbsp granulated sugar
- 1 1/4 tsp salt
- 4 tbsp unsalted butter (melted and cooled slightly)
- 1 1/2 tbsp garlic, minced
- 2 tbsp fresh parsley, finely chopped
For the egg wash and topping:
- 1 egg (beaten with 1 tsp water)
- 4 tbsp unsalted butter
- 2 tbsp garlic, freshly minced
- 2 tbsp fresh parsley, finely chopped
- 2 tbsp grated parmesan cheese
- 1/2 tsp onion powder
- 1/2 tsp flaky sea salt
Step 1: Prepare the Dough Base with Infused Butter
- 4 tbsp unsalted butter
- 1 1/2 tbsp garlic, minced
- 3 3/4 cups all-purpose flour
- 2 1/4 tsp active dry yeast
- 1 1/2 tbsp granulated sugar
- 1 1/4 tsp salt
- 2 tbsp fresh parsley, finely chopped
- 1 cup whole milk
- 1 large egg
In a small saucepan, melt 4 tablespoons of butter over low heat, then add 1 1/2 tablespoons of minced garlic and cook for 1-2 minutes until fragrant but not browned.
Remove from heat and let cool slightly until it reaches about room temperature—this preserves the garlic flavor without cooking it further.
In a large mixing bowl, combine 3 3/4 cups flour, 2 1/4 teaspoons active dry yeast, 1 1/2 tablespoons sugar, 1 1/4 teaspoons salt, 2 tablespoons fresh parsley, and the cooled garlic butter.
Add 1 cup lukewarm milk and 1 large egg, then mix until all ingredients are incorporated and a shaggy dough forms.
Step 2: Knead the Dough to Develop Structure
- dough from Step 1
Turn the dough out onto a lightly floured surface and knead for 10-12 minutes until the dough becomes smooth, elastic, and slightly tacky.
I like to knead by hand for this recipe because you can feel when the dough transitions from shaggy to silky—this texture tells you the gluten is properly developed and your rolls will have a tender, pillowy crumb.
If the dough feels too sticky, add a tablespoon of flour at a time; if too dry, wet your hands slightly and continue kneading.
Step 3: First Rise and Shape into Rolls
- 4 tbsp unsalted butter
- dough from Step 2
Lightly butter a 9×13-inch baking dish (or similar size to fit 12 rolls comfortably).
Form the kneaded dough into 12 equal-sized balls by rolling each piece between your palms, then arrange them seam-side down in the prepared pan, spacing them slightly apart.
Cover the pan loosely with a kitchen towel or plastic wrap and let the rolls rise at room temperature for 1-2 hours until they’ve doubled in size and are touching each other—they should look puffy and spring back slowly when gently poked.
Step 4: Proof and Prepare for Baking
- 1 egg
About 20 minutes before baking, preheat your oven to 350°F.
While the oven heats, prepare an egg wash by whisking 1 beaten egg with 1 teaspoon of water until combined.
Once the rolls have finished rising, gently brush the top of each roll with the egg wash using a pastry brush, being careful not to deflate them too much.
Step 5: Bake the Rolls Until Golden
- rolls from Step 3
Place the pan in the preheated 350°F oven and bake for 20-30 minutes until the rolls are deep golden brown on top.
The rolls should sound slightly hollow when tapped on the bottom if you carefully lift one—this is a good sign they’re cooked through.
Remove from the oven and let cool for just 2-3 minutes while you prepare the garlic butter topping.
Step 6: Make the Garlic Butter Topping
- 4 tbsp unsalted butter
- 2 tbsp garlic, freshly minced
- 2 tbsp fresh parsley, finely chopped
- 2 tbsp grated parmesan cheese
- 1/2 tsp onion powder
- 1/2 tsp flaky sea salt
In a small saucepan, melt 4 tablespoons of butter over low heat, then add 2 tablespoons of freshly minced garlic and cook for 1-2 minutes until just fragrant—don’t let it brown or it will taste bitter.
Remove from heat and stir in 2 tablespoons of fresh parsley, 2 tablespoons of grated Parmesan cheese, 1/2 teaspoon of onion powder, and 1/2 teaspoon of flaky sea salt.
I like to use fresh garlic in the topping instead of pre-minced because it adds a bright, sharp flavor that contrasts beautifully with the soft, yeasty rolls.
Step 7: Finish and Serve
- warm rolls from Step 5
- garlic butter topping from Step 6
While the rolls are still warm, generously brush or drizzle the garlic butter mixture over the tops of each roll, allowing it to soak into the warm bread.
Serve immediately while the rolls are still warm and the garlic butter is fragrant—they’re best enjoyed fresh from the oven.
Homemade Garlic Bread Rolls
Ingredients
For the dough
- 3 3/4 cups all-purpose flour
- 1 cup whole milk (lukewarm, about 110°F)
- 1 large egg
- 2 1/4 tsp active dry yeast
- 1 1/2 tbsp granulated sugar
- 1 1/4 tsp salt
- 4 tbsp unsalted butter (melted and cooled slightly)
- 1 1/2 tbsp garlic, minced
- 2 tbsp fresh parsley, finely chopped
For the egg wash and topping
- 1 egg (beaten with 1 tsp water)
- 4 tbsp unsalted butter
- 2 tbsp garlic, freshly minced
- 2 tbsp fresh parsley, finely chopped
- 2 tbsp grated parmesan cheese
- 1/2 tsp onion powder
- 1/2 tsp flaky sea salt
Instructions
- In a small saucepan, melt 4 tablespoons of butter over low heat, then add 1 1/2 tablespoons of minced garlic and cook for 1-2 minutes until fragrant but not browned. Remove from heat and let cool slightly until it reaches about room temperature—this preserves the garlic flavor without cooking it further. In a large mixing bowl, combine 3 3/4 cups flour, 2 1/4 teaspoons active dry yeast, 1 1/2 tablespoons sugar, 1 1/4 teaspoons salt, 2 tablespoons fresh parsley, and the cooled garlic butter. Add 1 cup lukewarm milk and 1 large egg, then mix until all ingredients are incorporated and a shaggy dough forms.
- Turn the dough out onto a lightly floured surface and knead for 10-12 minutes until the dough becomes smooth, elastic, and slightly tacky. I like to knead by hand for this recipe because you can feel when the dough transitions from shaggy to silky—this texture tells you the gluten is properly developed and your rolls will have a tender, pillowy crumb. If the dough feels too sticky, add a tablespoon of flour at a time; if too dry, wet your hands slightly and continue kneading.
- Lightly butter a 9x13-inch baking dish (or similar size to fit 12 rolls comfortably). Form the kneaded dough into 12 equal-sized balls by rolling each piece between your palms, then arrange them seam-side down in the prepared pan, spacing them slightly apart. Cover the pan loosely with a kitchen towel or plastic wrap and let the rolls rise at room temperature for 1-2 hours until they've doubled in size and are touching each other—they should look puffy and spring back slowly when gently poked.
- About 20 minutes before baking, preheat your oven to 350°F. While the oven heats, prepare an egg wash by whisking 1 beaten egg with 1 teaspoon of water until combined. Once the rolls have finished rising, gently brush the top of each roll with the egg wash using a pastry brush, being careful not to deflate them too much.
- Place the pan in the preheated 350°F oven and bake for 20-30 minutes until the rolls are deep golden brown on top. The rolls should sound slightly hollow when tapped on the bottom if you carefully lift one—this is a good sign they're cooked through. Remove from the oven and let cool for just 2-3 minutes while you prepare the garlic butter topping.
- In a small saucepan, melt 4 tablespoons of butter over low heat, then add 2 tablespoons of freshly minced garlic and cook for 1-2 minutes until just fragrant—don't let it brown or it will taste bitter. Remove from heat and stir in 2 tablespoons of fresh parsley, 2 tablespoons of grated Parmesan cheese, 1/2 teaspoon of onion powder, and 1/2 teaspoon of flaky sea salt. I like to use fresh garlic in the topping instead of pre-minced because it adds a bright, sharp flavor that contrasts beautifully with the soft, yeasty rolls.
- While the rolls are still warm, generously brush or drizzle the garlic butter mixture over the tops of each roll, allowing it to soak into the warm bread. Serve immediately while the rolls are still warm and the garlic butter is fragrant—they're best enjoyed fresh from the oven.
